Hello!
![]() Topaz Photo Official Release
Topaz Photo Official Release
Today we’re thrilled to announce a brand-new Topaz Photo release that brings some of our most exciting features to date. We know many of you are adjusting to the new subscription model, and our goal with this update is to make Topaz Photo more valuable and accessible than ever.
Here is the first release of Topaz Photo with a impressive set of new AI models and new features:
- New Standard MAX Upscaling model - local and cloud render
- New Wonder model - local and cloud render
- Unlimited + free cloud render
- Healing brush as a standalone enhancement
- Opacity control for Sharpen and Super Focus
- Accordion style controls for all enhancements
- Upscale anywhere in the enhancement stack
- Updated header and footer
- New selection workspace with updated selector for brush type
- Flatten layers function to replace locking edits
- Windows ARM (Snapdragon) support
- Lightroom Cloud plugin support
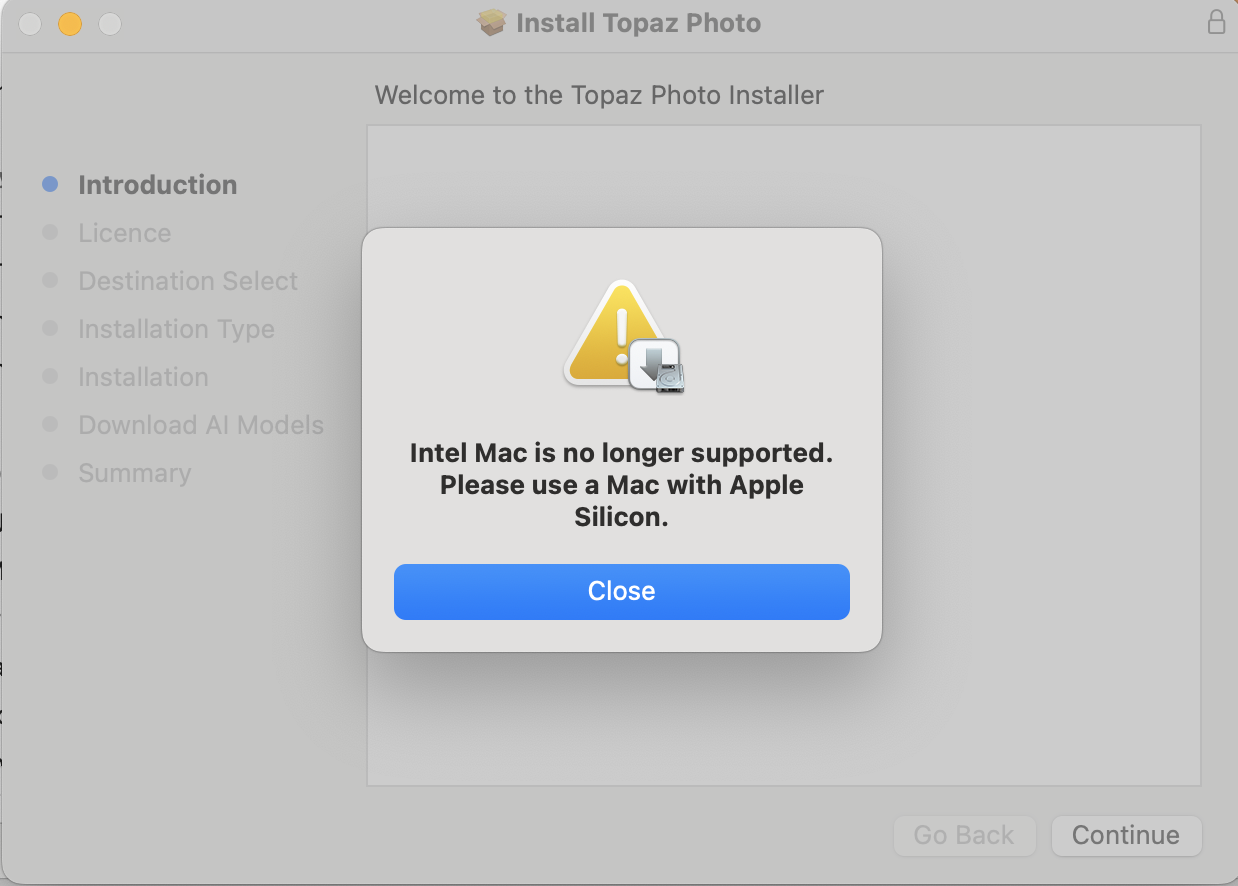
We will no longer sell perpetual licensed products moving forward, but we will continue to update them to maintain compatibility with major OS updates for as long as possible. Here are the installers, a quick FAQ to address any confusions you may have, followed by the longest release thread I have seen on these forums.
Topaz Photo v1.0.0
Released September 17th, 2025
Installers:
Windows: Download
Mac: Download
Snapdragon: Download
What is Topaz Studio?
Topaz Studio is our collection of desktop apps (Topaz Video, Topaz Gigapixel, Topaz Photo) as well as our web applications (Bloom, Astra, Express), mobile iOS app, and more! In short - it’s everything that Topaz has to offer to enhance your images and videos.
How does Topaz Photo fit into Studio?
Topaz Photo is available as a part of our new Studio Launch. With this launch, Topaz Photo will only be available under a subscription license. Topaz Photo will install into a new directory so you can try it out, and of course you’ll still have access to Photo AI forever under the legacy perpetual license. Note that new features and new AI models will be coming only to Topaz Photo, along with the other products in the Studio suite.
What if I already own Photo AI or other Topaz products?
Purchased a Topaz product within the last year? Then you get to try Studio for free for the length of your remaining license. You’ll also get some extra benefits.
If you are a Topaz customer with an active license and you maintain your new studio subscription, you’ll be considered a Topaz Founding Customer which will give you access to some of our more powerful Pro models such as Starlight and other Pro features at no extra cost as well with your Individual license of Topaz video.
Can I buy the individual products or a perpetual license?
Topaz Studio is an incredible value - all for one low monthly price. You can still purchase subscriptions to the individual products as you wish, but you’ll get the best value with the Studio or Desktop collection bundles.
We will no longer sell perpetual licensed products moving forward, but we will continue to update them to maintain compatibility with major OS updates for as long as possible.
When will I get my free studio upgrade and access?
Please note that the transition plan is underway and may take a few days - but if you’ve already purchased and hold an active license for Photo AI, or if you own more than 2 Topaz Products on an active license, you’ll have automatic access to Topaz Photo at no extra cost once the transition is complete. We’ll keep you updated via email, and you can check the status of your account on the My Account page.
If you have questions about the transition to Studio, please visit this forum thread:
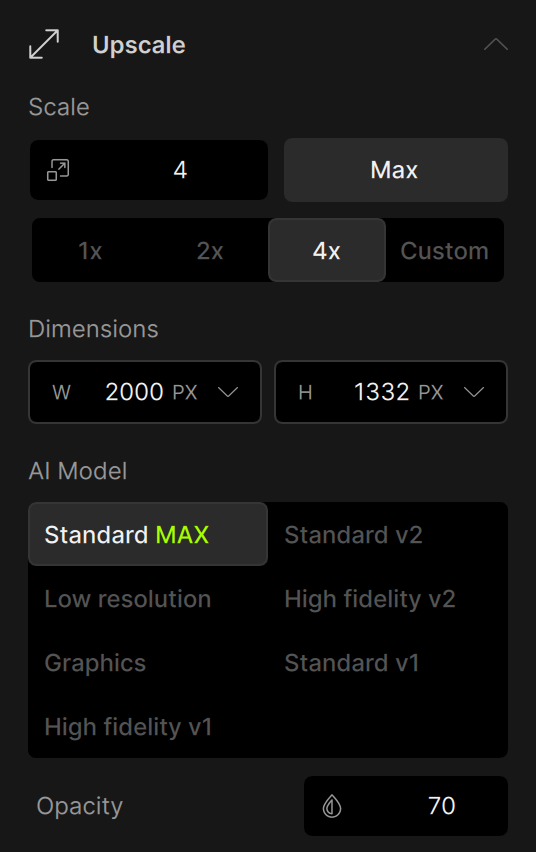
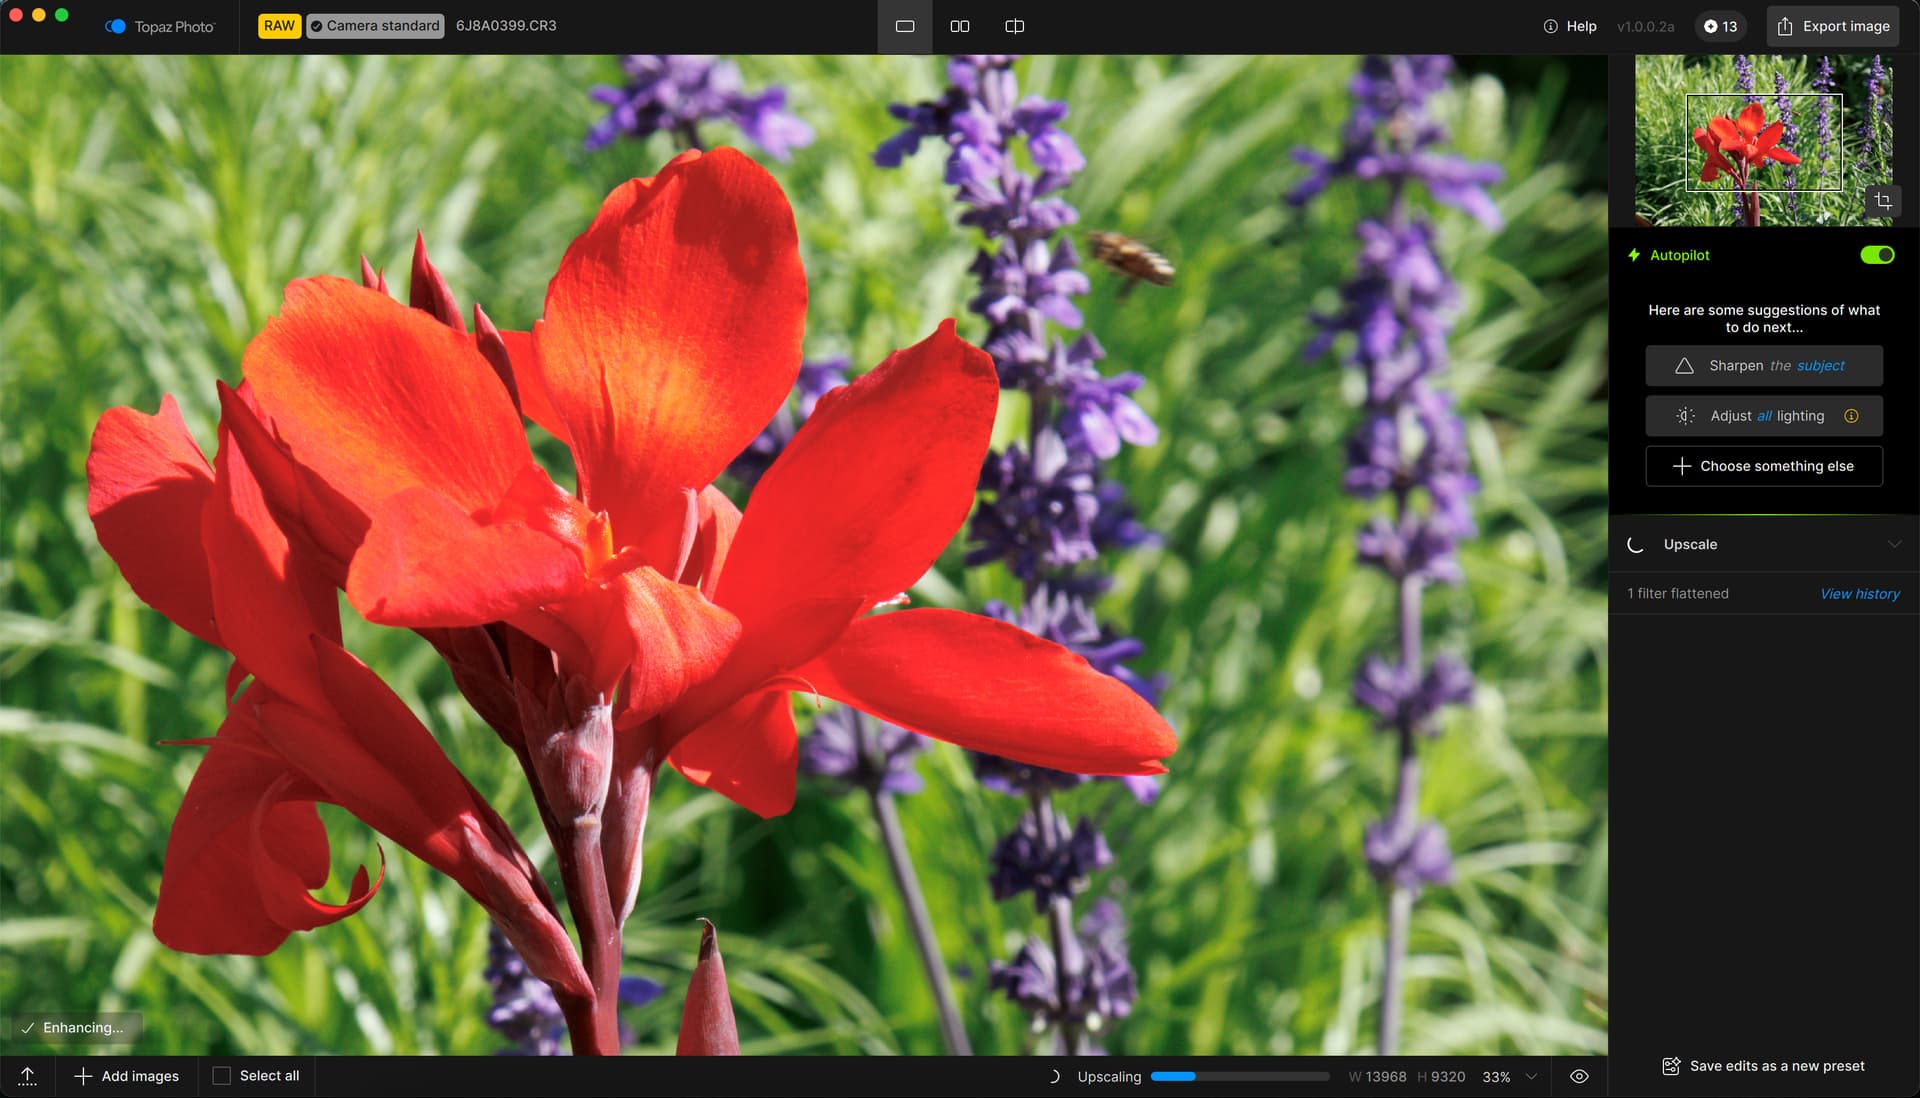
New Standard MAX Upscaling model
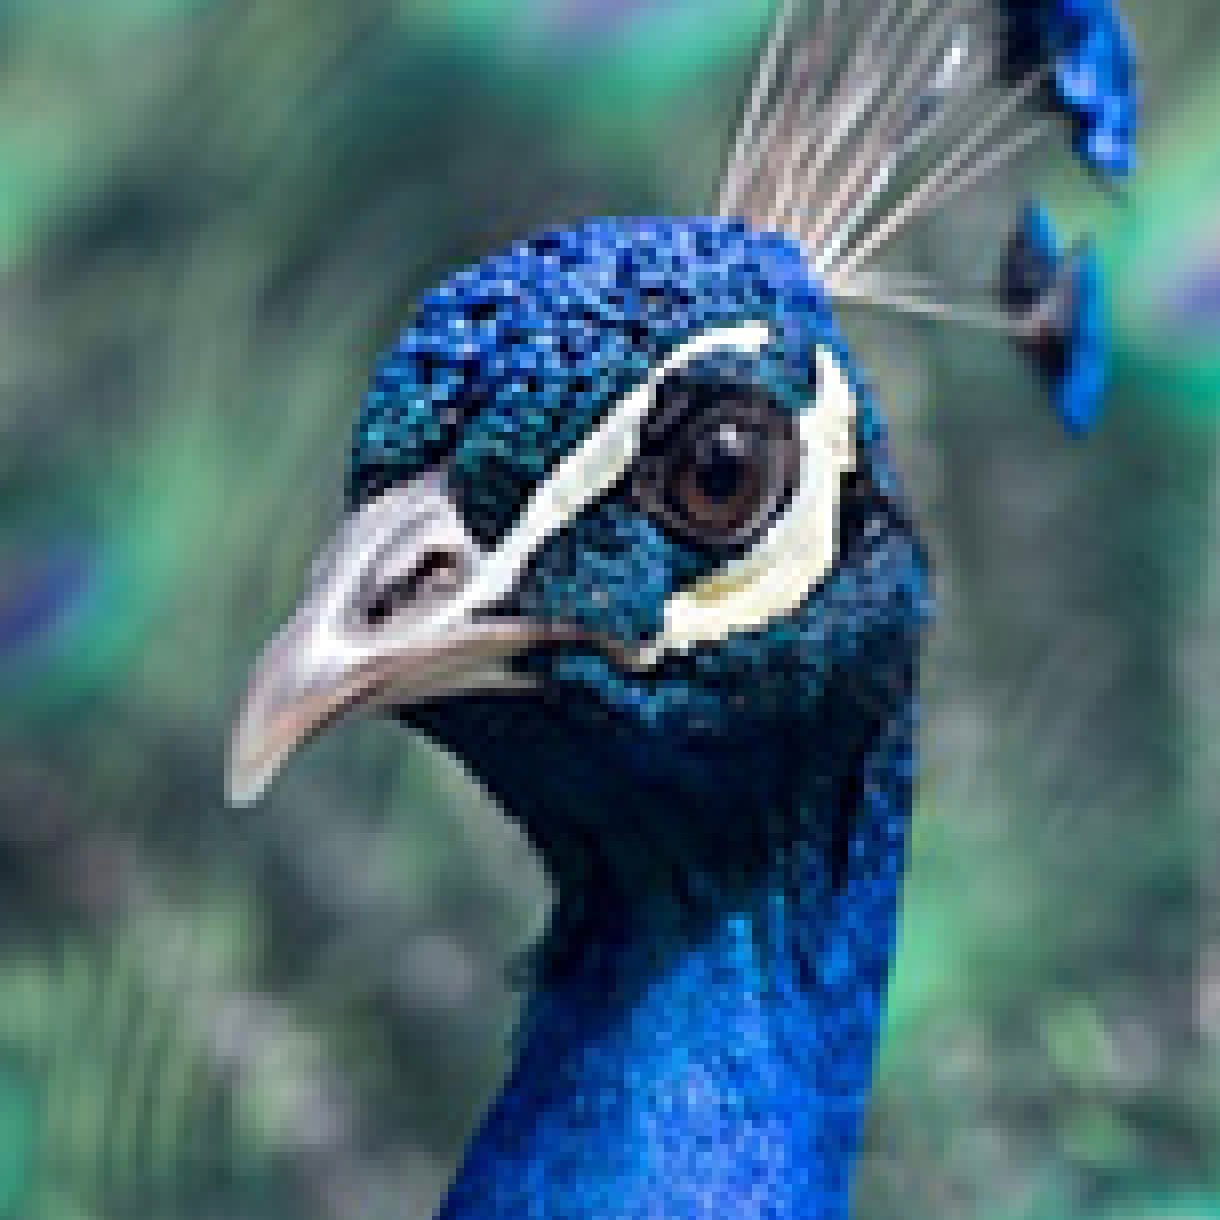
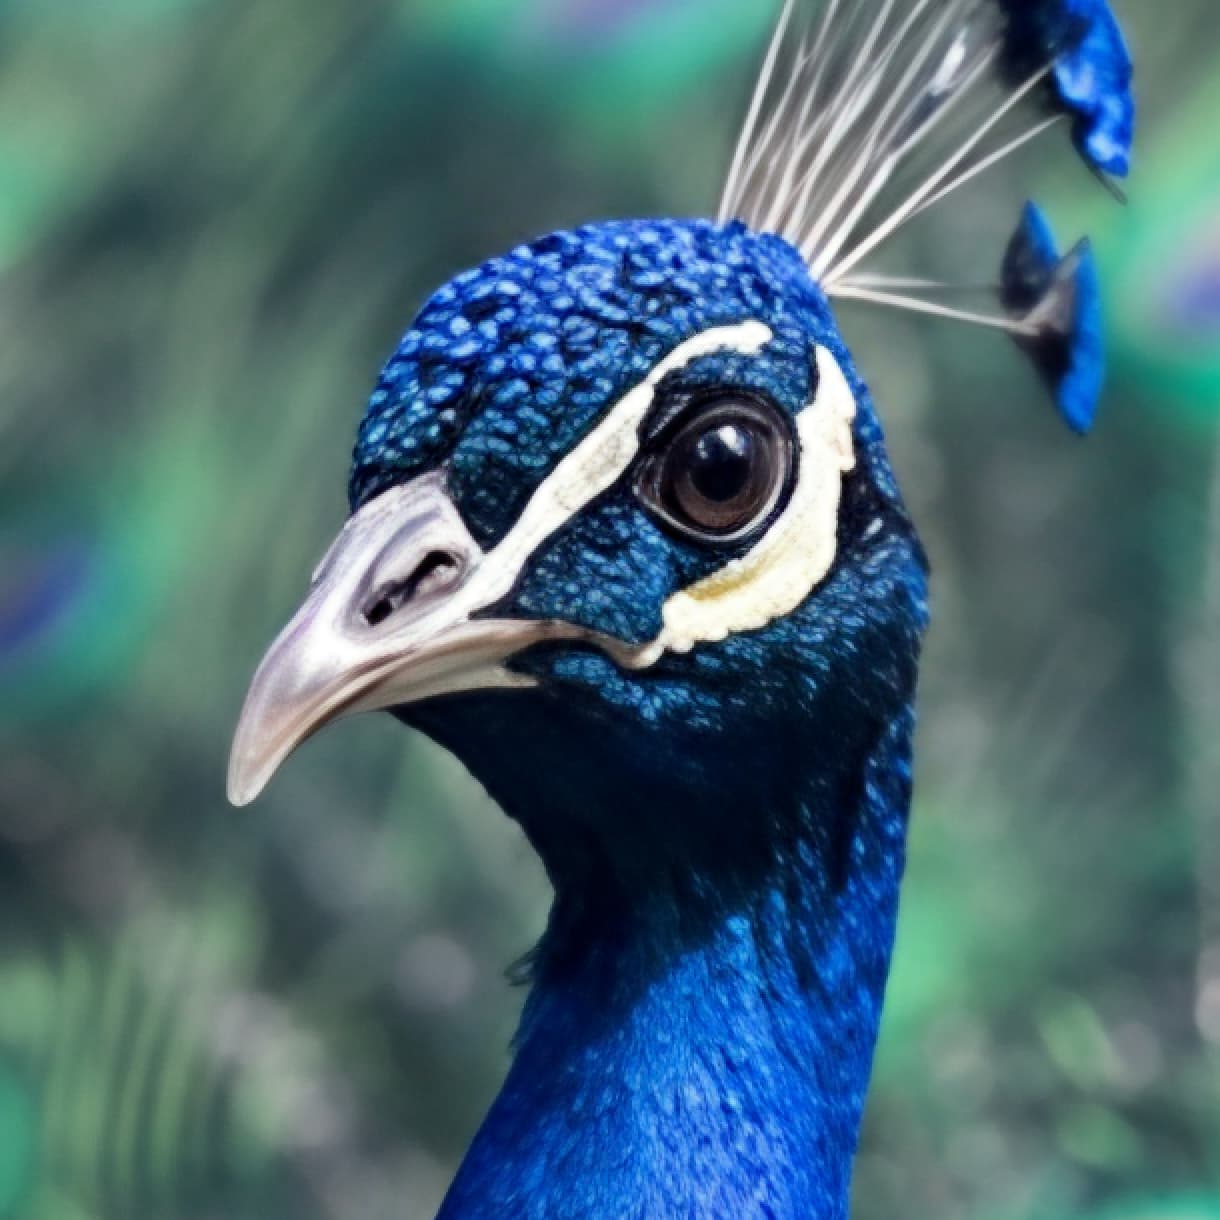
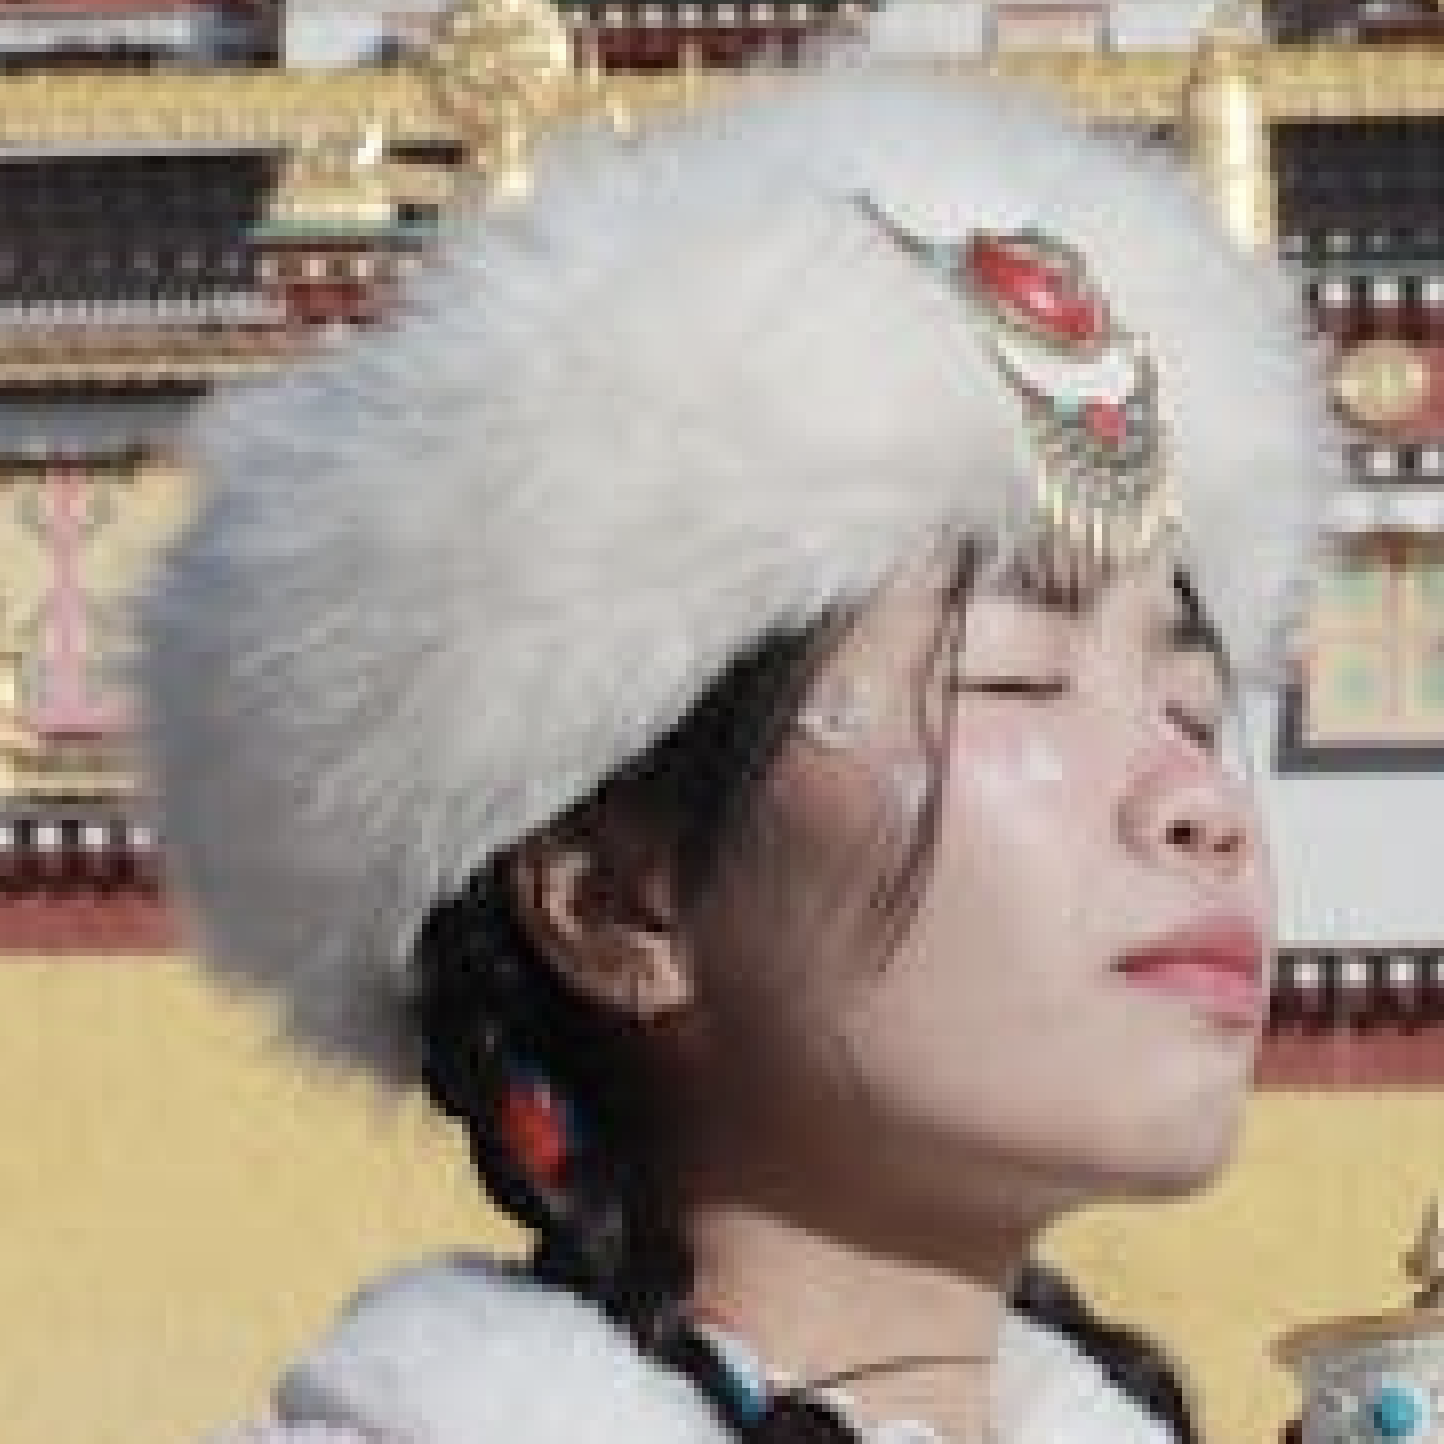
The Standard MAX model is a powerful new upscaling tool in Topaz Photo. This model is built on new architecture, producing very high-quality outputs similar to generative upscaling models in Gigapixel AI while significantly lowering the hardware requirements and high processing time. Standard MAX can run on a wide range of devices — making advanced restoration more accessible than ever.
Standard MAX delivers outstanding results across all types of input images, but it truly shines on low-resolution photos where it generates incredible photorealistic detail that surpasses anything currently available in Topaz Photo. The results are clean and natural, with refined textures that are hard to achieve in other AI upscaling models. While we highly recommend trying it on low-res images for truly jaw-dropping outputs, Standard Max also performs exceptionally well on medium and high-quality images, making it a versatile and powerful choice for a wide range of upscaling needs.
Before and after on a low resolution image
Try it for yourself! Here are test images you can use with Standard Max, including the examples above.
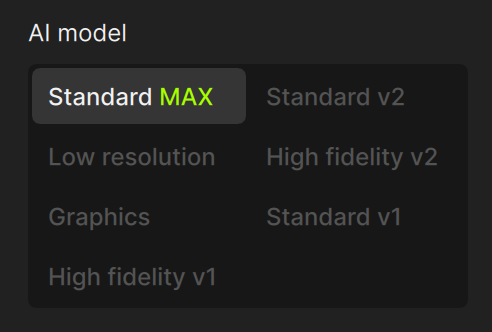
To use Standard Max, add Upscale to your image and pick it from the AI model grid select.
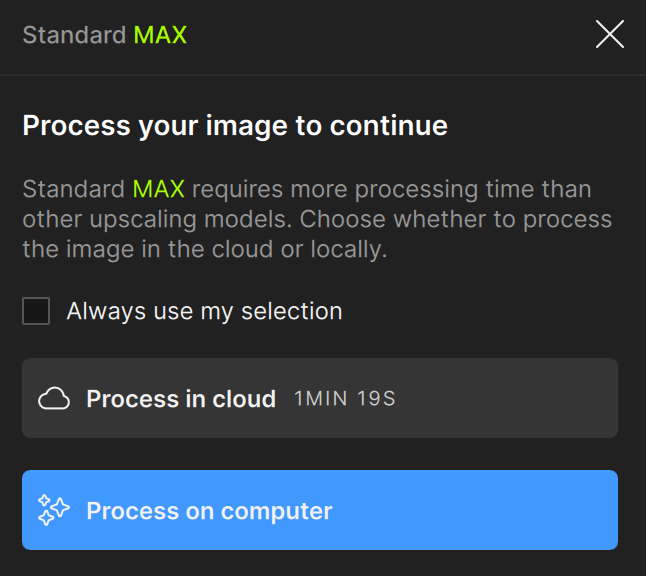
Select a scale and whether you want to process locally or on the cloud. After processing completes, adjust Opacity to dial in the exact look you want—from subtle improvements to full recovery.
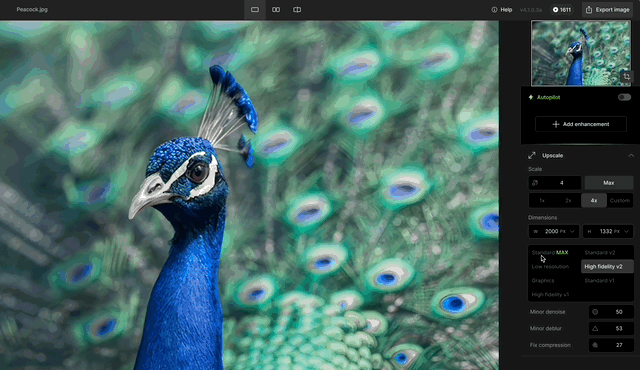
Cloud render is also available for this model, allowing anyone to run it no matter your hardware.
NOTE: cloud render for Standard MAX has a 256 megapixel output limit.
Wonder Model for Local and Cloud Processing
We’re introducing Wonder, a new enhancement designed for professionals who want a simple, reliable way to improve image quality without stacking multiple tools. Traditional workflows can over-process or introduce artifacts when several enhancements are combined. Wonder is an automatic image repair tool to deliver very high-quality, artifact-free results—especially on medium and low-quality images.
NOTE: Local rendering for the Wonder model is available for Pro and Founder users. Consumer licenses can only use cloud rendering.
Before and after with a low resolution image.

It’s able to generate clean outputs, especially with fine details that other models may struggle with.
To use the Wonder model, open the enhancements menu and select the new Wonder enhancement. Wonder is able to scale your image up or down. For larger files, use the cloud option to speed up processing.

This model is best for images that are soft, noisy, compressed, or low-resolution where you want clean, realistic detail without artifacts.
Try Wonder on a variety of medium and low-quality images and tell us what you think. Your input will help us tune defaults and scaling behavior before full release.
Unlimited! and Free! Cloud Renders
Cloud processing is now Unlimited and Free. That means any image you process through the cloud will cost 0 credits, no matter how many files you process. Run our most powerful models in the cloud with one click for faster results, and importantly without worrying about costs.
Note: there is still a maximum output limitation, but any image below that size will process for free.
This feature will be available for the following models:
- Super Focus
- Dust & Scratch
- Standard MAX
- Wonder
We hope that removing the barriers for cloud render increase your usage for this feature, and significantly improve the processing experience for the new models we have released. For users with less capable graphics cards, this should make the generative models accessible and fast as you can offload your processing to the cloud.
Let us know what you think about this feature, especially how we can improve it in the application to make it more useful.
Spot Healing now available as a standalone enhancement
The Spot healing brush is now available in the enhancements menu. If you’ve used the Dust & scratch model, then you already recognize this tool as it was included as the second step to help remove larger damage that the AI model did not clean up. By turning it into a stand alone tool, we are giving you a fast, lightweight way to clean up small sections of your image without needing to run the full Dust & Scratch workflow.
This tool is ideal for removing minor artifacts, blemishes, or imperfections with precision. Just use the brush to select a small area, and as soon as you release, processing begins instantly — no need to adjust settings or switch tools. It’s a quicker and more targeted alternative to the Remove tool, designed to keep your workflow smooth and responsive.
Try it out on photos with minor flaws or cleanup needs, and let us know how it feels to use. We’d love to hear your feedback on the results and whether it helps improve your editing process.
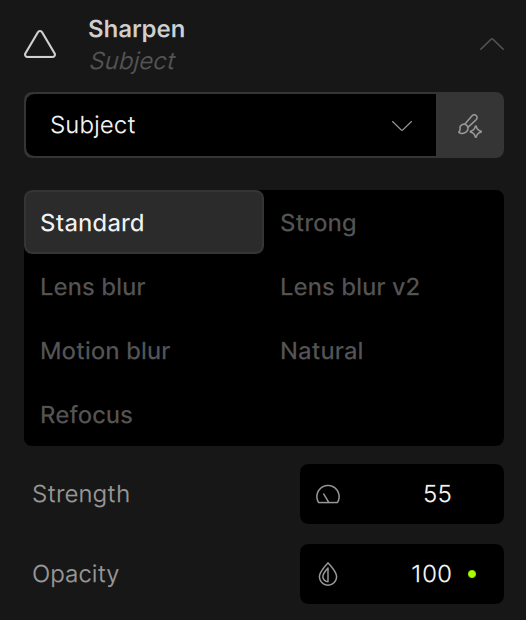
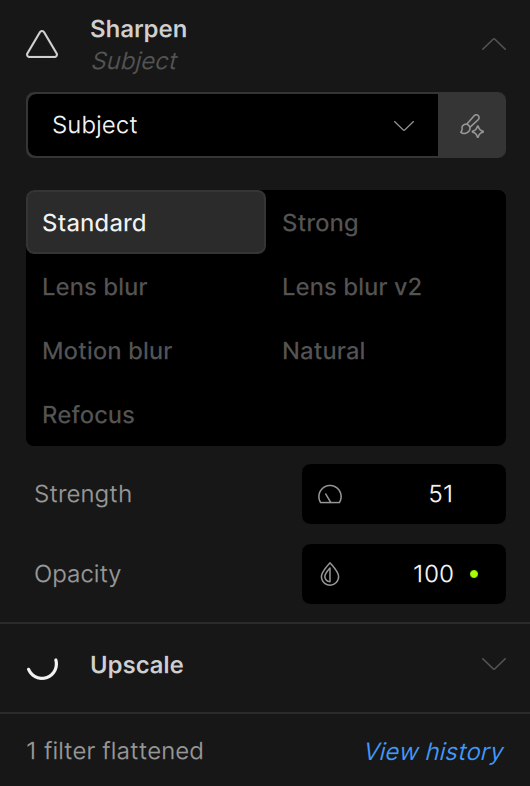
Opacity control for Sharpen and Super Focus
We’re introducing a new opacity control for the Sharpen and Super Focus enhancements, giving you more flexibility to fine-tune the final look of your image. While our sharpening models are powerful, some users have noted that the results can sometimes look unnatural or plasticky—especially on portraits or finely textured areas.
New sharpen controls including the new opacity parameter:
New super focus controls including the new opacity parameter:
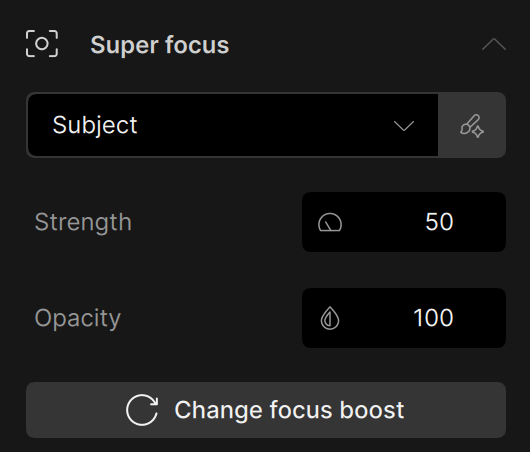
Previously, adjusting the strength slider was the only way to control intensity, but it didn’t always offer enough subtlety. With the new opacity slider, you can now blend the sharpened output with the original image, making it easier to strike the right balance between clarity and realism.
Upscaled with Super Focus @ 100% opacity - a little over-sharp:
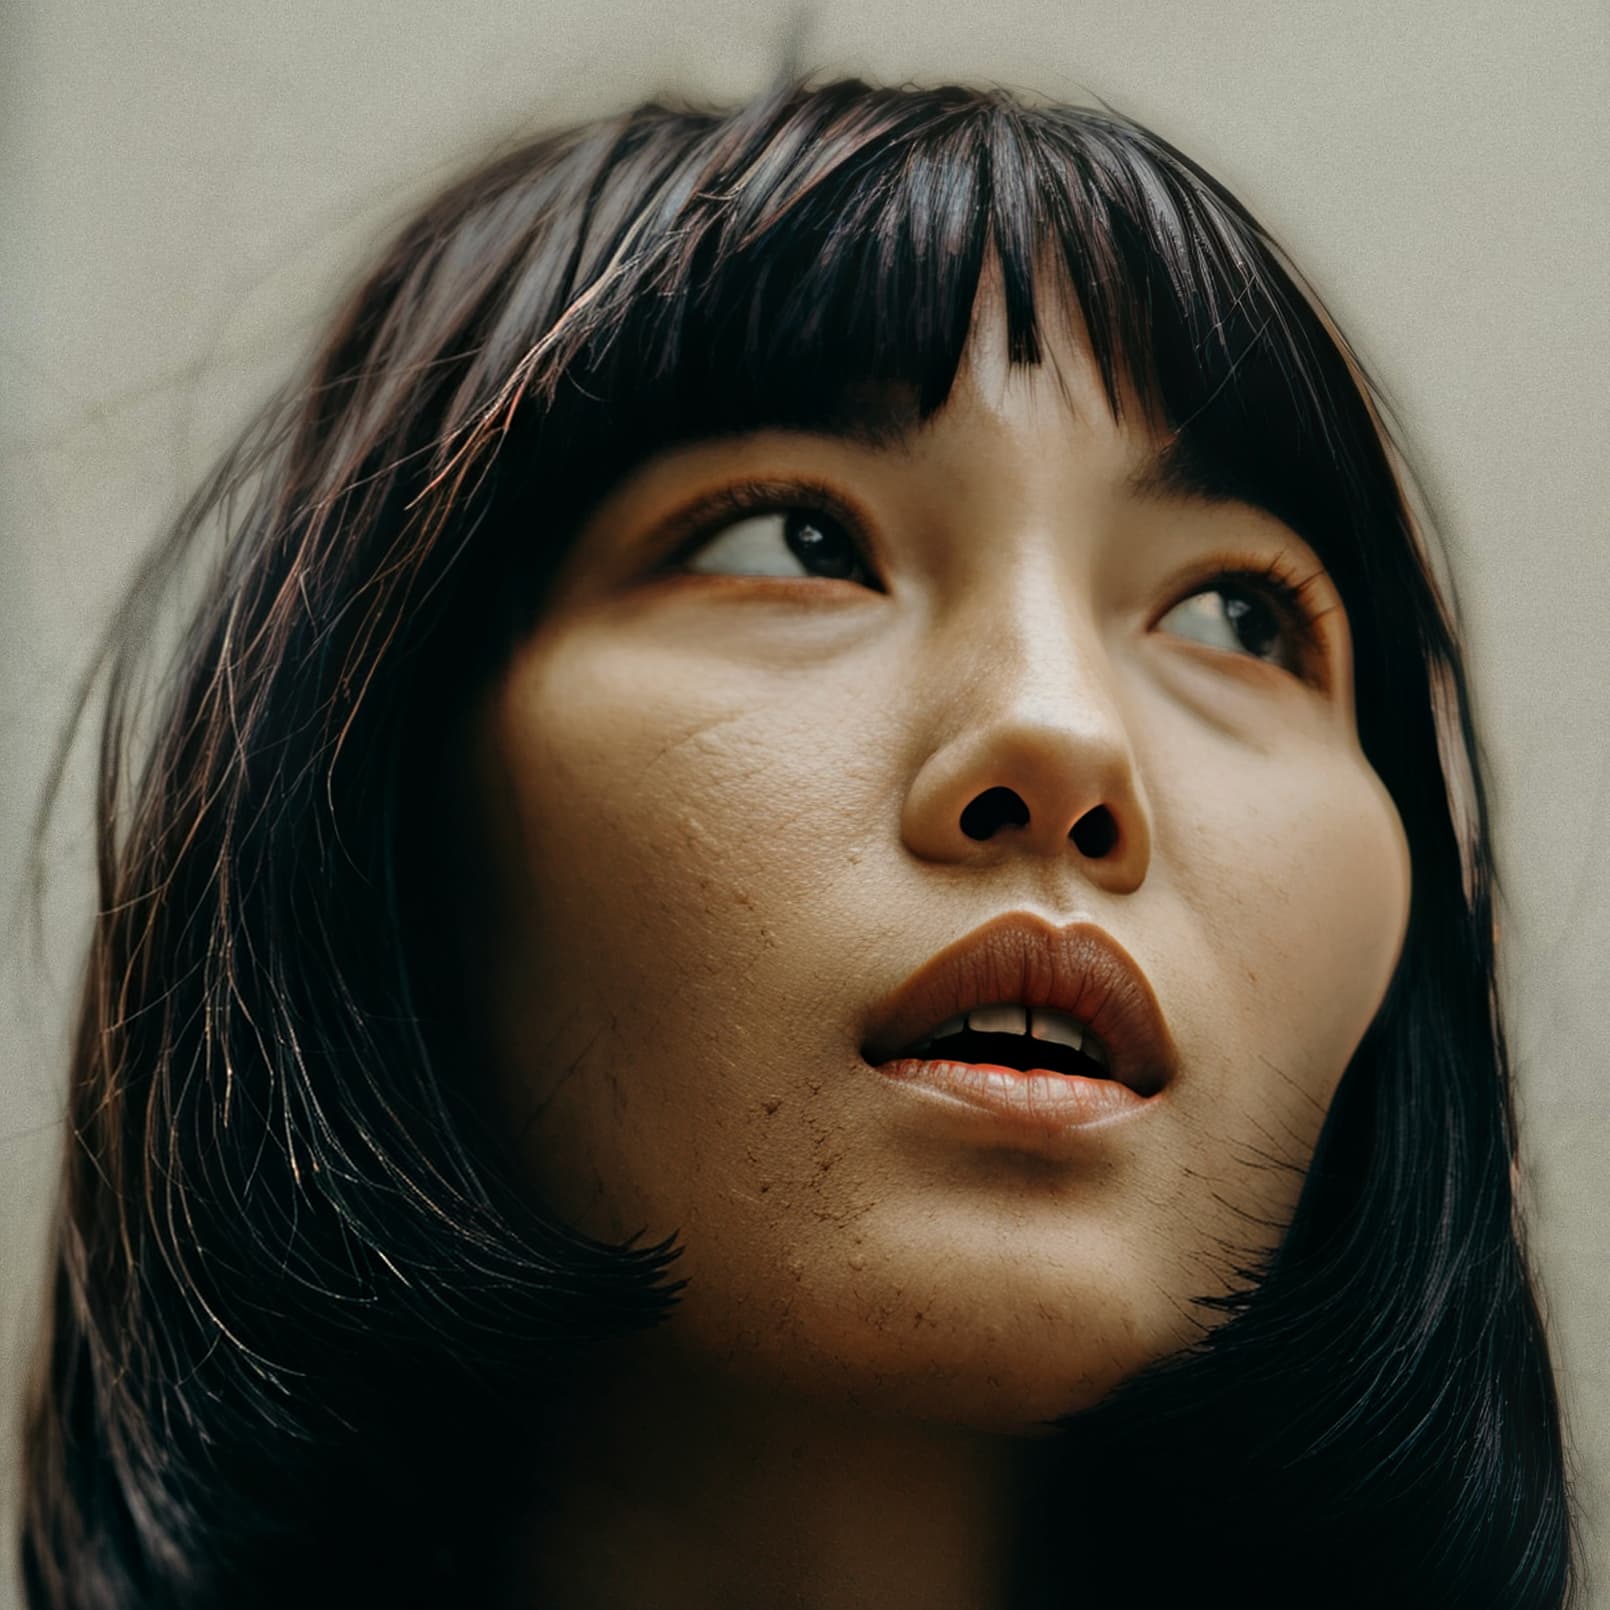
Reduced to 50% opacity - much better

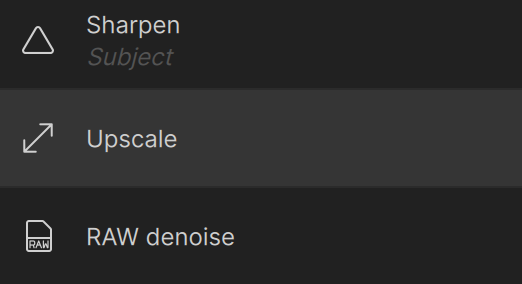
Accordion-Style Controls
We’re excited to introduce a much-requested update: accordion-style controls for enhancements in the right-hand panel. This change is designed to show more of the image preview area while still having quick access to our powerful AI tools.
With this new layout, enhancements listed on the right panel are expanded on click to show all your controls. This keeps the interface cleaner and your attention where it matters most—on the image.
This update also aligns with our goal of reducing clutter in the workspace, giving you better visibility of your image and simplifying the process of fine-tuning adjustments.
Let us know what you think about the updated design!
Upscale Anywhere in the Enhancement Stack
One of our most requested features is finally here—you can now add Upscale anywhere in the processing stack. Previously, Upscale was locked to the end of the workflow, which limited your ability to improve low-resolution images that needed enhancement before upscaling.
With this update, you can now place Upscale before or after tools like Denoise, Sharpen, or Super Focus**, giving you more control over how and when detail is introduced into your image. This helps preserve and amplify fine details before using other enhancements to refine them further. We recommend applying Upscale to increase resolution early, especially on low and medium resolution images where other enhancements may over-process the image or remove too much detail so that Upscale was no longer as effective for improving quality.
On the top is an image processed with Sharpen, then Upscale. The bottom image is processed with Upscale, then Sharpen. Same exact enhancements, models, and settings. However the top image looks over-processed and the bottom image looks more natural especially in fine details.

Try out Upscale Anywhere and let us know how it works with your images. We’re eager to hear how it impacts your results and helps streamline your enhancement process.
Updated Header and Footer – cleaner layout, smarter controls
The latest update introduces a more thoughtful layout with a redesigned header and bottom bar, giving users better access to important controls while reducing visual clutter. Previously, core UI elements like zoom, export, and preview toggles were scattered or obstructed the preview area, making the experience feel cramped—especially for new users.
With this update:
- the Export button has been moved to the header for better visibility
- the zoom control has been refined
- the Show Original button has been relocated to improve usability during side-by-side or full-screen previews
- the image dimensions are moved to footer
- the progress bar is improved and located in the footer
- we’ve removed less-used features like screen capture to reduce distractions
- and applied updated colors and styling for a cleaner, more modern feel.
The bottom bar now displays processing status and incorporates an improved progress indicator that reflects the total amount of processing needed to render the preview. This resolves previous issues where inaccurate preview states caused confusion or made the app feel unresponsive.
![]()
Together, these changes improve clarity, accessibility, and trust in the editing experience—helping you stay focused, informed, and in control as you work.
Flatten Layers
We’re introducing an important update to the editing workflow: Flattening—a concept many of you are already familiar with from working with generative enhancements. This feature is designed to bring more clarity and control when combining multiple enhancements, especially those that are dependent on the state of previous edits.

Previously, generative enhancements would automatically flatten your existing edits to ensure stable results and avoid reprocessing demanding enhancements. However, this behavior wasn’t clearly communicated, often leading to confusion about why some layers couldn’t be modified after applying a generative enhancement.
With this update, we’re adding a cleaner visual design to indicate when layers are being flattened. Flattening will be automatically triggered by Remove, Spot Healing, Super Focus, Dust & Scratch, and Upscale.
Selection Improvements
We’ve made a series of updates to the selection experience in Topaz Photo based on your feedback and feature requests.
Now, when you edit a selection from the enhancement controls, you’ll enter a dedicated selection mode where you can adjust the mask. In this mode we updated the design to improve accessibility for different selection brushes, such as the object selection brush or the superpixel brush. You might notice we also have undo/redo controls in selection now to assist with your custom selections.
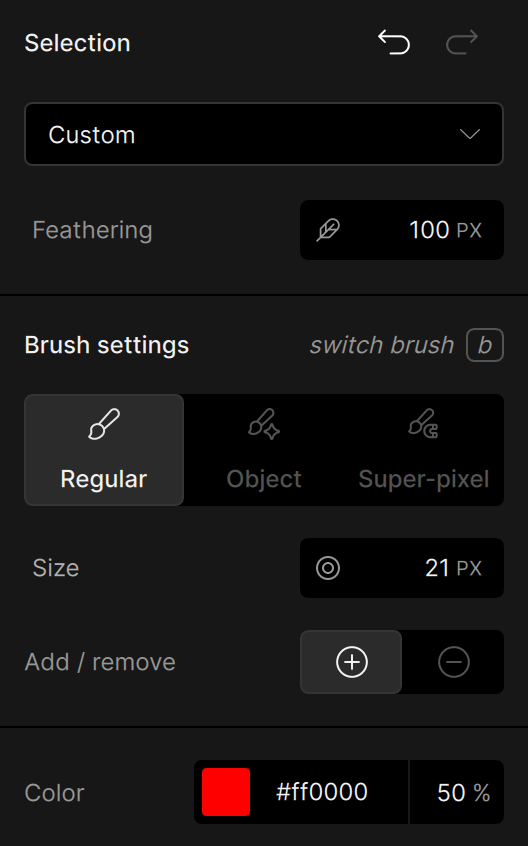
Whether you’re isolating a subject, applying targeted enhancements, or fine-tuning a mask, these updates are designed to make selection more powerful, intuitive, and easier to use.
Windows ARM (Qualcomm Snapdragon) support
It’s here—Topaz Photo now runs natively on Windows ARM, delivering a smooth, fast experience on laptops powered by Qualcomm Snapdragon processors. Execute the ARM installer linked in this thread and the application will run locally on your device.
We’ve been working closely with Qualcomm to make sure our AI models run smoothly and efficiently on this new hardware. That means faster startup, smoother editing, and full access to all your favorite tools like Upscale, Denoise, Sharpen, Face Recovery, and more.
We’d love to hear how the application performs on your ARM device. Share your feedback about speed, stability, and usability. This has been one of our most requested features, and we’re thrilled to finally welcome ARM users into the fold.
Lightroom Cloud plugin support
Great news for Lightroom Cloud users—Topaz Photo AI now supports editing directly from Lightroom Cloud via plugin! Adobe recently opened up support for third-party plugins in Lightroom Cloud, and we’ve built a dedicated integration to make your workflow faster, smoother, and less frustrating.
Previously, using the application with Lightroom Cloud involved multi-step workarounds that slowed down editing. Now, with this release, you can round trip your image directly from Lightroom Cloud to Topaz Photo and back, all from within the Lightroom Cloud environment.
If you rely on Lightroom Cloud for your mobile or cloud-based workflow, this is a big step toward making high-quality editing more accessible and connected.
For first time usage, follow the written or video steps here.
- Open Lightroom Cloud.
- Right click on an image > Edit in > Browse.
- On Mac, navigate to the Applications > Topaz Photo app.
On Windows, navigate to C:/Program Files/Topaz Labs LLC/Topaz Photo/Topaz Photo.exe. - A popup will appear, click Open Topaz Photo.
- Process your image and export.
- Click Save on the dialog in Lightroom Cloud.
- Your processed image returns to Lightroom Cloud and is stacked with the original image.
After the plugin is used once, you can right click on an image and use Edit in > Topaz Photo directly instead of Browse and navigating to the application.
Known issues
- Windows ARM Standard MAX is disabled due to bad output
- Lightroom Classic may require full disk access on Mac for plugin to access model files
- Lightroom Cloud plugin opens in standalone on Mac
- Using Wonder and making changes cause the preview to unload and reload
Changelog
- Topaz Photo launch
- New Standard Max Upscaling model - local and cloud render
- New Wonder model - local and cloud render
- Unlimited + free cloud render
- Accordion style controls for all enhancements
- Upscale anywhere in the enhancement stack
- Updated header and footer
- Healing brush as a standalone enhancement
- Flatten layers function to replace locking edits
- New selection workspace with updated selector for brush type
- Windows ARM (Snapdragon) support
- Lightroom Cloud plugin support on Mac
- Support login for Legacy Photo AI Personal and Pro licenses
Lingyu Kong
Technical Product Manager
Image AI