Will AI Denoise and Sharpen help with my Halftone Problem?

Hi Eleanore, thank you for the informative post, it sounds like PSP doesn’t like Sattva? You are correct my project is ambitious, but it has to be done one way or another. Research which has taken me almost 16 years to complete is now held up further by this problem.
Thanks once again for all your help, if you have any further ideas please let me know,

regards,

Pete.

Pete, here is your original halftone with just frequency separation applied. The second one is with a curves adjustment added to increase brightness and contrast. Both were done in Affinity Photo. You should skip Photoshop as it is a Pro type editor and you don’t need all its functions. It is subscription as well so you don’t own it.

Halftone with curves:
Halftone%20with%20low%20freq%20and%20curves%20adj

1 Like

My take on it. I used Denoise AI, Sharpen AI, Photoshop and Luminar 4

50_G_AI

1 Like

Hello Artisan,
Thanks for the advice and of course the two versions of the picture, as always it is appreciated.

To be honest mate, I don’t know what to do now. When I looked at these pictures all those years ago, I honestly thought to myself that when the time came to use them there would be some great new software that would turn halftone in to photograph quality (well almost) pictures.

We put a man on the moon over fifty years ago and we have Chroma Keying and all those effects, but it remains very difficult to render halftone into a photograph. Maybe I am asking too much.
If you were in my position Artisan, what would you settle for with regards to the results achieved in this thread?

Regards,

Pete.

Hello Johnny, thanks for taking the time, it’s appreciated and also interesting to see what the combined software can achieve.

Here’s an “in between” effect with less smoothing. The problem with your halftone is how little information there actually is to work with.

Edit: This was done with Photoshop and Neat Image to reduce noise.

1 Like

If I gave you a photo with just two dots, could you reconstruct the whole picture? Halftone pictures have limited information so the areas between the dots are interpolated. The questions you must answer is how much time are you willing to put into each picture and what software are you will to buy?

You show only one picture but I might assume that many pictures will have closer spaced dots making them higher resolution such as the kitchen photo. If you want speed with good results then Affinity Photo (very inexpensive) is a good choice and you can make a macro (see below) that applies several filters in one click. Affinity does not call a plugin from a macro so the last step using Denoise AI is done manually. In all cases I would recommend using Topaz Denoise AI as the final step to clean up the picture. Of course you can apply curves if needed after that.

Johnnystar’s results are very good as well and I find that apply Denoise AI as a final step cleans it up even more. However, it seems to be fairly complex and requires much more software so you may not want to go that route.

Affinity Photo macro list:
Affinity%20Halftone%20remove%20macro%20steps

The Delete step is deleting the high frequency layer (appears gray).

1 Like

Hello Artisan,
thanks for the quick reply, and you are correct with regards to the limited information and I think I have been expecting too much. You are also correct when you assume some of the pictures will be slightly higher resolution, unfortunately, though there are several which are probably worse.

I agree that Johnny’s results are good, but that route would need a lot of software and experience which would be too expensive and beyond my capabilities especially when you take into account the fact that this software would most likely be redundant once my project has been completed.

With regards to software, Photo Affinity is, like you say more affordable. I have in the past taken a free trial with Affinity and PSP 2020 and I found the latter easier or more intuitive than Affinity. Is Affinity better than PSP2020?

I think I am going to have to settle for something in between, something similar to what Johnny has achieved above, the “in-between effect” and then as you suggest apply Denoise AI as a final step.
Is it possible to get this “in-between” effect using Affinity Artisan?

Any help or advice appreciated as always,

Regards,

Pete.

Nice work Johnny, but as I have explained in my reply to Artisan’s post (above), this would be expensive with regards to purchasing the software and way beyond my capabilities, unfortunately.

I do appreciate the effort though,

Regards,

Pete.

I haven’t used Paintshop Pro for several years so I can’t compare it to Affinity. I think either would work about the same and they both allow plugins.

Below I did a step by step application using Affinity Photo only. You could do the same in PSP. The results are somewhat similar to Johnny’s simplified version.

Step 1 Curves:

Merge visible (also known as stamp) Ctrl + Alt +Shift + E

Step 2 Frequency separation:

Delete the High Frequency layer.

Step 3 Denoise:

Step 4 De-saturate:

All steps:
All%20steps

Pete, I going to bow out so I wish you good luck. Ron

1 Like

Plenty of food for thought there Ron, thanks for all your help, its appreciated,

Pete.

Affinity capabilities bear more resemblance to Photoshop but I think the learning curve is steeper than PSP, although right now its cheaper…both apps are now on sale.
Personally…an Editor would be my first choice.

1 Like

Hello,

Your problem is quite interesting from a mathematical point of view. There are different solutions, but you always have to deal with compromises in quality.

I can see that you’re delving into the subject and it’s good. However, you probably expect too much from the algorithms. Such things can be seen in some science-fiction movies, or in fake police movies, where the number plate increases from a few pixels to HQ image :slight_smile:

But even today (and not in a few decades) you can design a neural network that will first remove the raster and then beautifully “draw” non-existent details. For this, it is enough to train the network on a thousand faces with augmentation (adding random noise, scale, rotation and shift) and you will get a beautiful effect.

The only question is: why do such experiments?

After all, the end result will be nice, but this face will not resemble the original, because it will be based on “hallucinated” and dispersed details and fragments remembered and stored holographically in millions of neurons of such a network in the form of weights.

As a developer, I dealt with such things, but for academic purposes, because I was also curious.

But at this time it’s rather better way to simply… retouch a photo manually. Or you can even create (paint) a portrait (traditional or digital) in a naturalistic spirit (in a photo-realistic way).

But notice that both ways (by using the best, powerful AI or hand painting) will always change the face, because it is no longer filtering the image, but creation, art.


And finally: to solve this problem well, you should first read the scientific literature to learn absolutely everything. Or as much as you can. I did it and I don’t regret it.

I learned to draw with a pencil and paints. But I’ve also learned to program neural networks and other algorithms related to Digital Signal Processing, including sound, FFT, voice processing and video. All this knowledge is now synergistic.

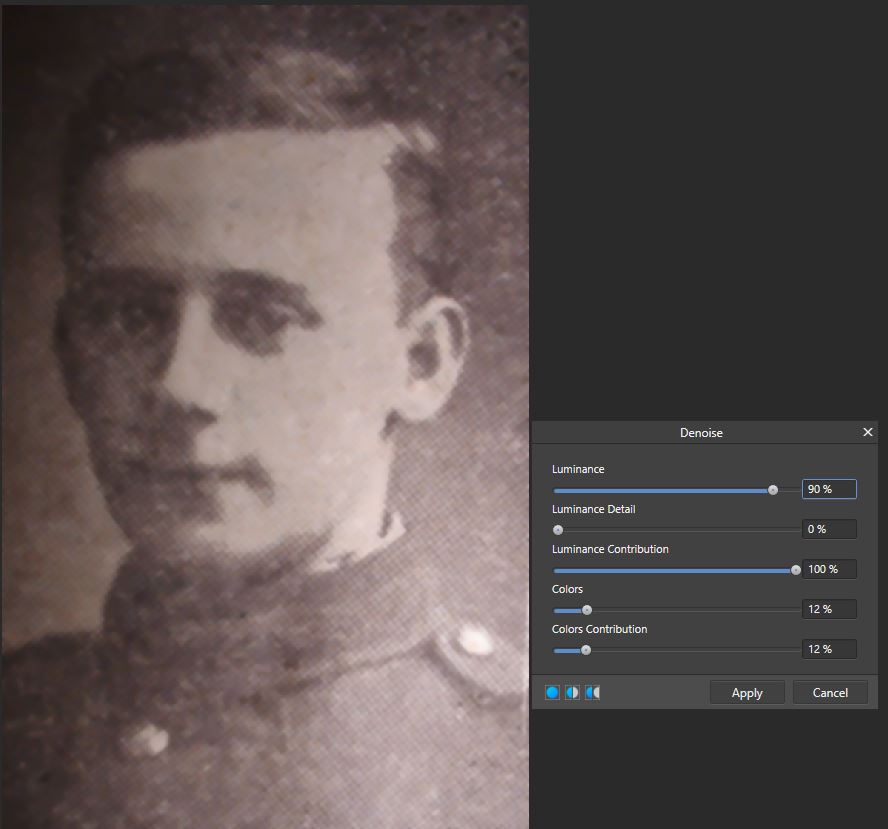
When you acquire such knowledge, you will not be limited. And even if you do not create programs yourself, instead of moving blindly, you will be able to better use someone’s applications such as Gigapixel or Denoise AI, because you will simply know what you are doing. And in this way you will get the desired results faster in these programs.

That is why I encourage you (and anyone who likes knowledge and science) to extend your knowledge to graphic, algorithmic, drawing techniques, professional photography and other skills. The more the better.

Best regards,
Lech Balcerzak

.
PS
And if you don’t like Photoshop and the Adobe’s paid subscription model, I recommend the GIMP graphics program, which is just great. And free.

There you can perform wonderful experiments, because GIMP is equipped with a traditional pseudo-code script interpreter and Python interpreter. You can program almost anything. Only the sky is the limit.

And finally, the sweets:

GIMP has a meta-plug-in that allows almost all plug-ins that are suitable for Photoshop to work. I use this method myself and I can call Topaz Labs programs e.g. Topaz Simplify or Studio from GIMP:

PhotoshopPlugIn

All Topaz plugins work great in GIMP without any errors (except betas, but it’s normal :slight_smile: )

You just have to remember to copy the Topaz 32-bit plug-in versions into the GIMP folder (even if you have Windows 64-bit). There is no problem with it, because Topaz Labs provides both versions of plugins: 32- and 64-bit.

1 Like

Thanks Lech, that was really informative.


HI there all. i have got an old important family pic with a terrible half-tone. i’ve been trying for months but not being able to get rid of it. i used Fourier filter. gaussian blur etc but no satisfactory results. can anyone pl help. i/ll appreciate v much

I took it down to 512 x 349 using Bicubic Smoother in Photoshop.

I then upsized it again by 4x to 2048 x 1396 using Gigapixel Standard with Auto settings and Face Recovery.

p.s. Photo AI was a complete failure in trying to do this. Long Live Gigapixel AI!