Well, I set the slider between 10 and 20 so as not to add too much to the original grain. At zero, it’s a little too smooth, but not too much. A value of 10 - 15 or 20, depending on the photo, gives a very good compromise. The photo should be zoomed in fully to observe any residual original grain. ![]()
And thanks ![]()
1 Like
Ah yes perfect so you are already using it, just wanted to make sure. Good that it can fix smoothness at this 10-15 level!
So I did a comparative test with Adobe Lightroom classic’s Denoise AI. I found that it was still superior.
On the left is the Lightroom version with Photo AI, and on the right the version with Lightroom Classic.
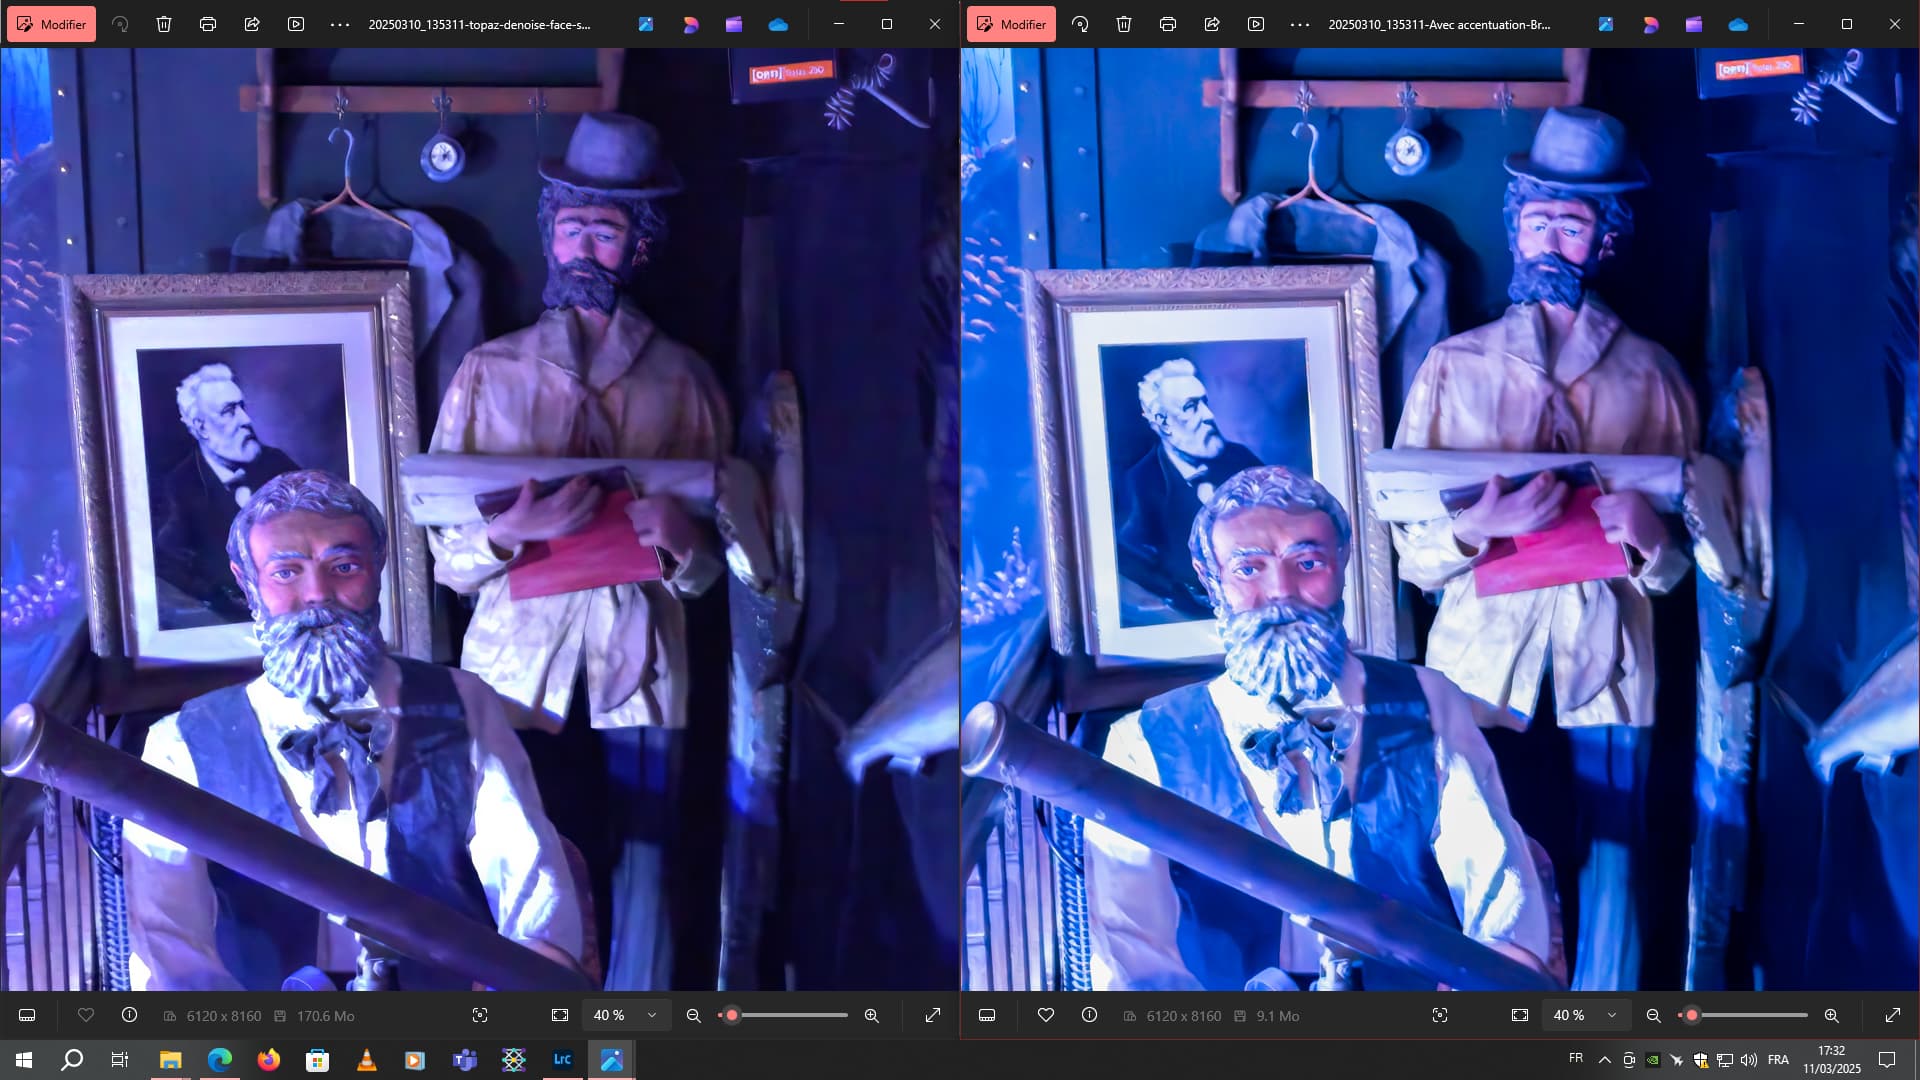
On the right, it better preserves the original hue, as it was in the blues like this at the time of shooting.
On the left, RGB spots can be seen in the darkest areas of the photo.

It looks like very diffuse, spread-out RGB blocks.
I can send you the raw file to see if there’s a way of correcting this little problem in Photo AI futures.
The link is only available for a maximum of 7 days.
1 Like
Photo AI can only apply the color profile set in camera, if there is different hues, it may be that you are comparing the LrC version that has a Adobe color profile set to it. Make sure to compare using the exact in camera color profile if comparing to Photo AI’s results!
Yeah, by default it was on the “Adobe color” profile. By setting it to the “Embedded” profile, the photo is just a little darker with settings very similar to the previous one.

A zoom into the image

Overall, if I copy and paste my settings from the one with the “Adobe color” profile and the one with the “embedded” profile, well, I end up with a shade similar to Photo AI. Without the stains previously shown hahaha.
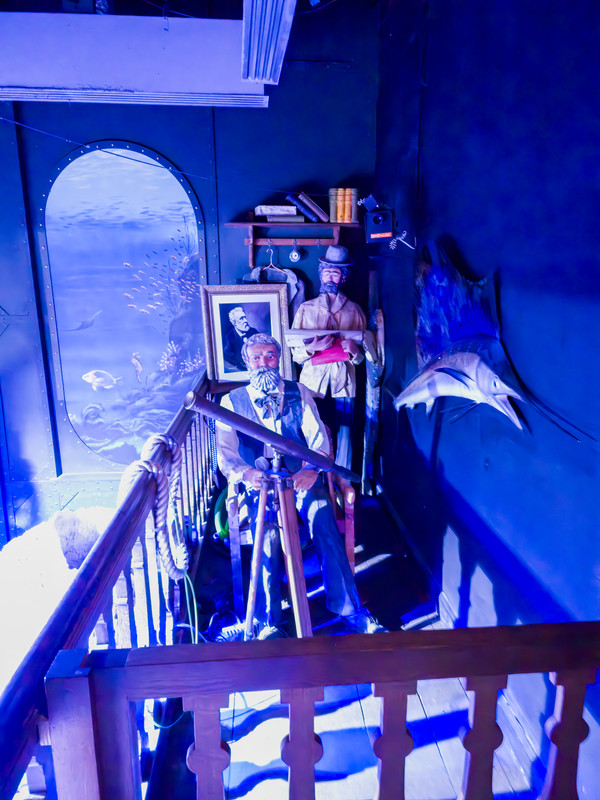
Final result. So denoise via Adobe Lightroom Classic with built-in profile, + a quick run through Photo Ai for the models’ faces + sharpen filter to remove motion blur. ![]()
Comparing the 2 results, there are good and not-so-good areas in both photos. But I can improve even more by combining the best parts of the 2 photos
1 Like
As I like to go the extra mile, on this one I combined the denoised version with Photo AI and then retouched in Adobe Camera RAW with the denoised version and retouched in Adobe Lightroom Classic. I took the best parts of the Photo AI version. In this case, it was the part on the left and the faces of the models and part of their clothing (upper part) as well as the black and white portrait in the background of the photo. The rest of the photo was retouched and debruised by Adobe Lightroom.-
I find the final photo even more detailed ![]() .
.
2 Likes
Unpleasant artifacts: My cat Rašo, who (unlike me) is very photogenic, wanted to be photographed again. The original didn’t turn out very well (I forgot to change the lens), so I tried to make a (not too small) crop without unnecessary edges with a piece of window, etc. I also tried Gigapixel. The best result was given by Topaz Photo AI with Super Focus Beta with automatic values of Sharpen low and Boost none, followed by a 4x magnification. We both liked the cat in the photo, but the pieces of curtain (although unimportant) on the window didn’t turn out too well. In addition, some colors appeared on the left, and there were a lot of blue spots on the right.
I was also quite surprised that the file size increased significantly, from less than 3 MB to almost 43 MB. That seems like a lot even for a 4x magnification. A full photo without cropping usually takes up less than 10 MB, and typically after enhancing it with something from Topaz, the size is even smaller than the original (without reducing it by cropping).

You killed me with your phrase
Citation
who (unlike me) is very photogenic
![]()
4 Likes
Also, if you have photographed in jpeg, in photo Ai you can always adjust the compression slider to reduce the image weight. I often use 90 or 95% quality. But you can test at 80 or 85%. Don’t go any lower, or you’ll start to see compression artifacts.
1 Like
Yes, jpg. I tried 90% and the size reduction was significant: from 42,522,311 to 11,202,381 Bytes. I didn’t notice any artifacts. (I usually leave it at 100%, I don’t mind a size of about 10 MB, I don’t have hundreds of thousands of photos, but the 42 MB surprised me.)
I solved this case by choosing the “subject” enhancement for Super Focus Beta (automatically selected cat with manual addition of the container with grass and blades of grass). I left the uninteresting parts of the curtain unenhanced, which is fine (well, the curtain is of course interesting to the cat, but fortunately the picture doesn’t show the places where the cat tore it with its tiger claws). Now the Super Focus didn’t put those blue spots there. The cat is already quite happy with the result. (Me too. ![]() )
)

1 Like
Cute cat and glad that the community and your tests by masking Super Fcous helped you get good results and optimized file size!
2 Likes
Thanks! Rašo sends his regards! And I forgot to mention, in case anyone is interested, that Super Focus on the aforementioned photo took 4 minutes to process (a laptop with Windows 11, Nvidia Geforce RTX 4070 Laptop GPU, 8 GB).
2 Likes
Photoshop can also sometimes produce large files if the quality is set to 100%. A 50-megapixel photo, at 100% quality (factor 12), can sometimes be as large as 43 MB. In such cases, I lower the factor to “11” or “10”, which remains in the high quality range. It’s the same with Topaz ![]()
Maybe I’m blind, but is there no way of default-ing to “fit” (zoom level) photos when you load a batch of them for viewing/processing?
I’m afraid there isn’t one. (But maybe I’m blind too?) It keeps forcing 100%, and the fastest way to set “fit” is probably just Ctrl+0 individually (it can’t be done for the whole batch). As I recall, this has been discussed here many, many versions ago, but 100% is bulletproof. I don’t understand why 100%, maybe it’s a magic round number. And if I set “fit” for some image X in the batch, then move on and then back to X, this X is 100% again. (But maybe, in addition to being blind, I can’t do that either.)
1 Like
No there is not. I and others have being asking for this for a while, it is a real pain having to change each image to “fit” before you can assess the image. In the Ideas section Zoom Improvement | Set Preference To Always View At Fit Size Rather Than 100%
2 Likes
Thanks for pointing me in the direction of that thread. Voted and commented.
1 Like
We have been working on this feature and it will be released shortly! @unrelent @ra.ny @Left_The_Building
There will be a setting in the Preferences > General menu for default zoom behavior.
6 Likes
Thanks for the message, that’s good to know.
2 Likes