You didn’t post here I moved your post to here from another thread “Topaz Photo AI: Autopilot for Image Quality”.
Sent images as instructed. Thank you.
1 Like
Ok thanks ![]()
Hi, I can send you the pictures.
The camera I took the picture with is a 1DX III.
I used tiff files for denoising, sharpen etc, no RAWs.
I made the tiles visible with Photoshop.
With Sharpen is meant Sharpen A.I., not Sharpen of Photo A.I…
1 Like
1 Like
Just tried the AI and have to say that as an " auto " one button process I like the results . Did notice feeding it a Canon CR2 and asking to maintain image format , that the data for lens corrections in Adobe Camera Raw , where not readable on the AI processed file. ( CS6 used ) Then when I brightened the RAW in PS Raw converter as I opened post AI , I noticed hatching in the black areas. Will play more and update . When the masking arrives would it be possible to decide what the mask protects and what it passes. For example in a shot with oof background , please do not sharpen anything masked , but use noise reduction over the entire image.
1 Like
Oh meant to say that I tried the Auto and the RAW noise reduction and sharpening , and for me the Auto was far nicer . The sharpening in the individual auto was a little fierce for me.
1 Like
Images uploaded, including some you can maybe play around with.
All images starting with “_F9I”, exept one, its named “DN_25”.
1 Like
There was an issue with the links on the Products page but it’s been fixed. You can download the app from that page or using the links on the top of this thread ![]()
Yes, that’s the file. Thank you! Do you remember by chance if the processing just hang up or it said on the right of each file “Skipped: no edits applied”? “Use these Settings for All” doesn’t currently apply to all images and will be fixed in this week’s update so I’m wondering if you used it and some of the files didn’t have any edits so the processing just skipped them.
What I would find really useful is to be able to adjust levels for RAW images. An auto adjustment would be ideal but manual would be OK. Maybe also be able to adjust mid tones. With tiffs I’ve done all that as part of creating the tiff. Then I’m a bit closer to seeing how the final image will look. (If I shoot to protect the highlights the shadows can be rather dark. Denoise seems to work better if I lighten the shadows.)
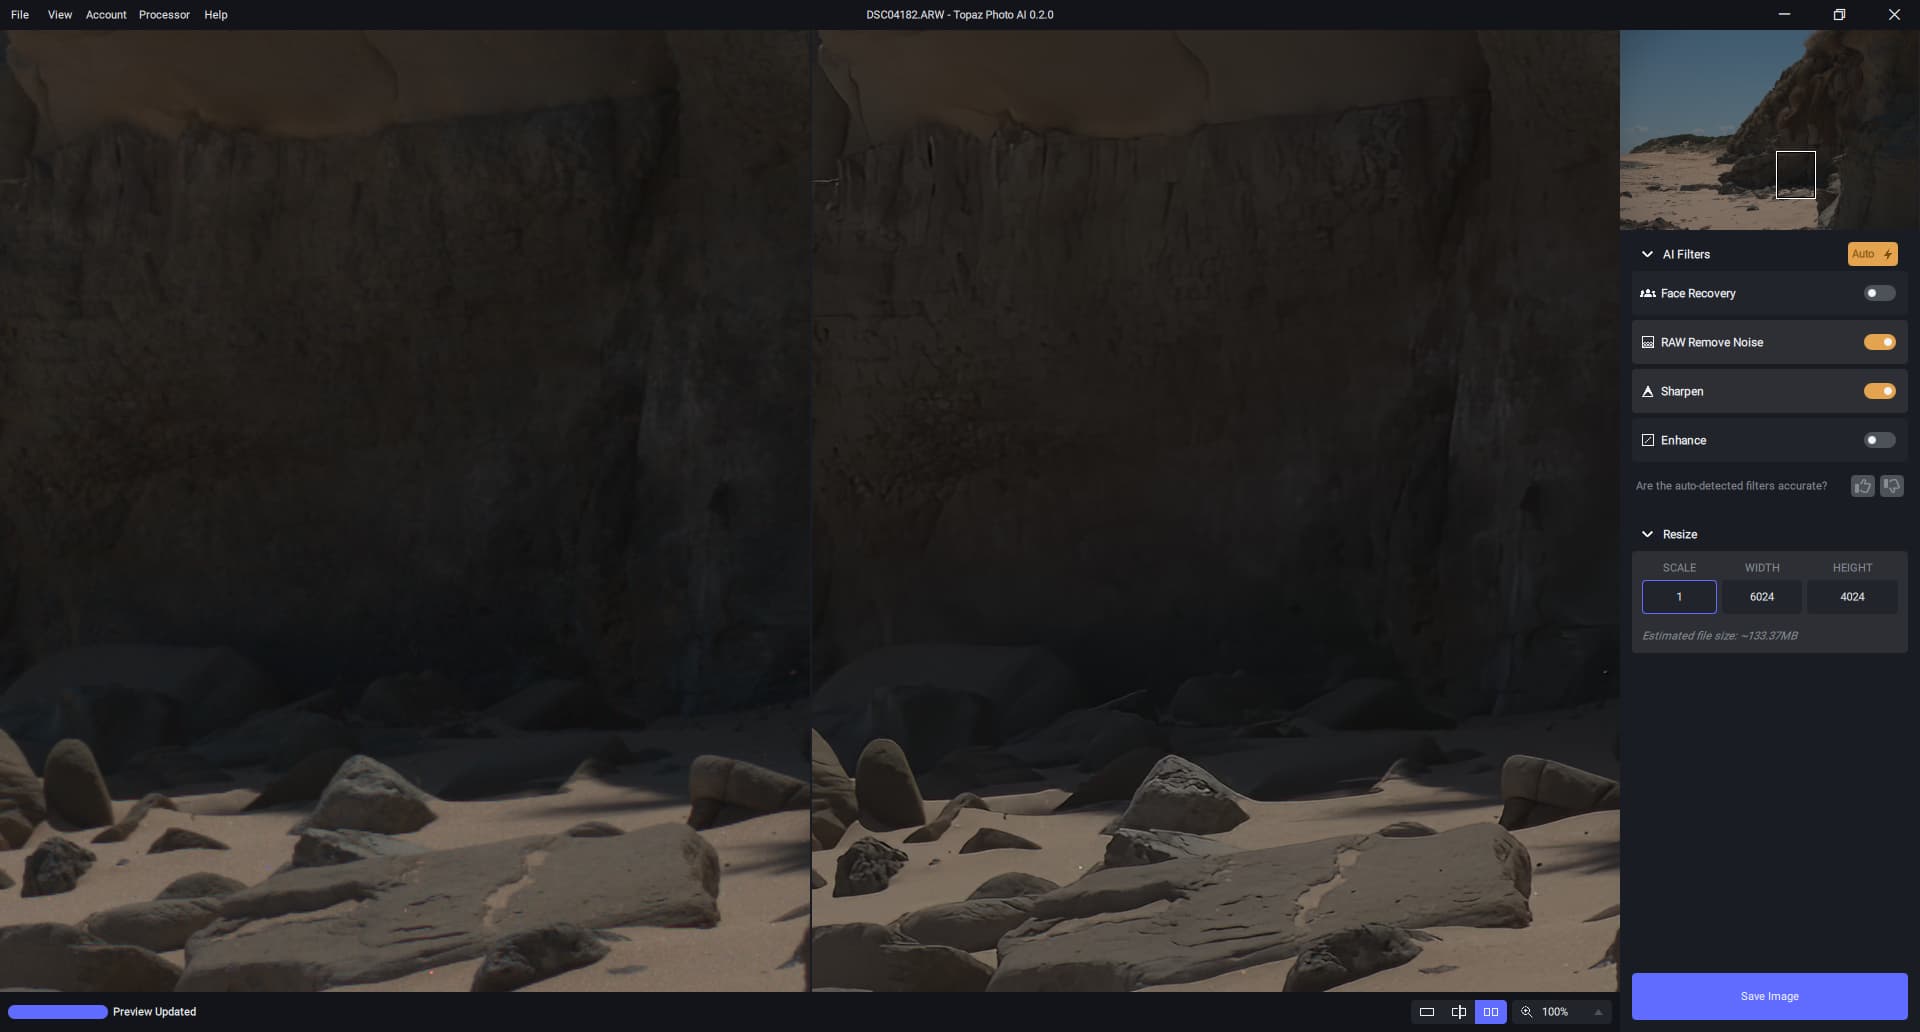
The RAW
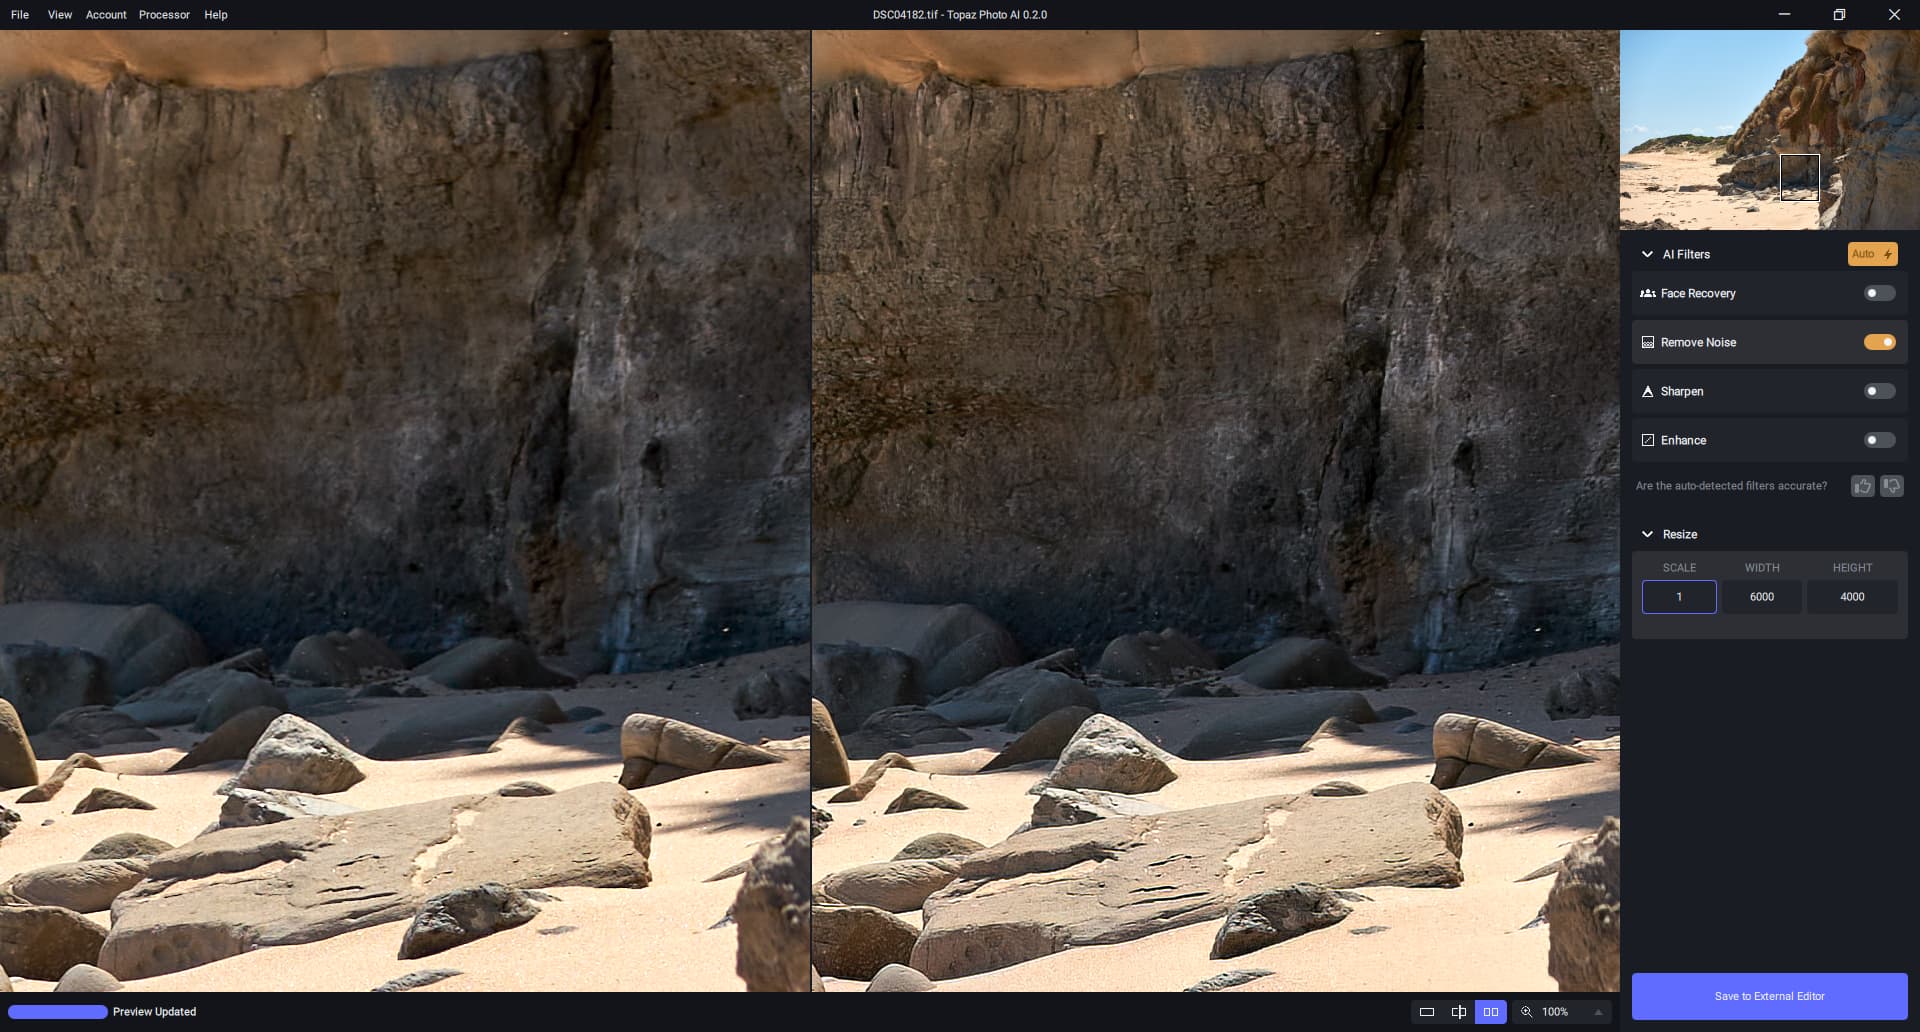
The tiff
2 Likes
Yes, there was the “skipped …” label right of the other files. Thank you for fixing.
1 Like
Hi, sorry for my late answer. I submitted to Canon Cr.3 files starting with UP_ .
As mentioned before, the images are underexposed by more than 2 exposure levels.
That’s why I like richard_m_h’s suggestion to include an exposure compensation option. I also wish in the separate program Denoise AI, especially if you want to use the RAW mode.
1 Like
The RAW images being displayed darker is simply a design flaw / coding issue that has to be fixed.
Standard formats are in 8 bit (256 number of tones).
Let’s say your RAW format is in 12 bit (4096 number of tones).
Most monitors are 8 bit (professional ones are 10 bit, which is still much lower than a RAW image).
Now, when the software reads the RAW file, it has to convert it to 8 bit data so it can fit the monitor bit depth.
Normally, it would transpose the full RAW range (12 bit) to 8 bit values, for example, if a pixel has a value of 1500, it would divide it by 16 and the result would be 94 (rounded).
So, 94/256 is roughly the same color as 1500/4096.
But, Photo AI is doing it wrong here.
Instead, it only seems to keep a much smaller range of the RAW values (1 to 256, or maybe higher I don’t know), which results in a much darker and washed out image ! All the values above that are simply ignored, while it must transpose the whole range instead, as I have explained above.
I suspect that Photo AI is not yet compatible with all RAW formats and bit-depth.
For comparison, PhotoLab displays RAW files properly, since it transposes the full range.
Hello Thomas,
I don’t want to advertise tools from other vendors here. However, my tip: The best tool for culling RAW files is FastRawViewer. Fast, many ways to evaluate the images, easy manual exposure correction, warning indicators for underexposure and overexposure and much more!
1 Like
When using my Cr3 files from my Canon EOS R5 I have the following problems:
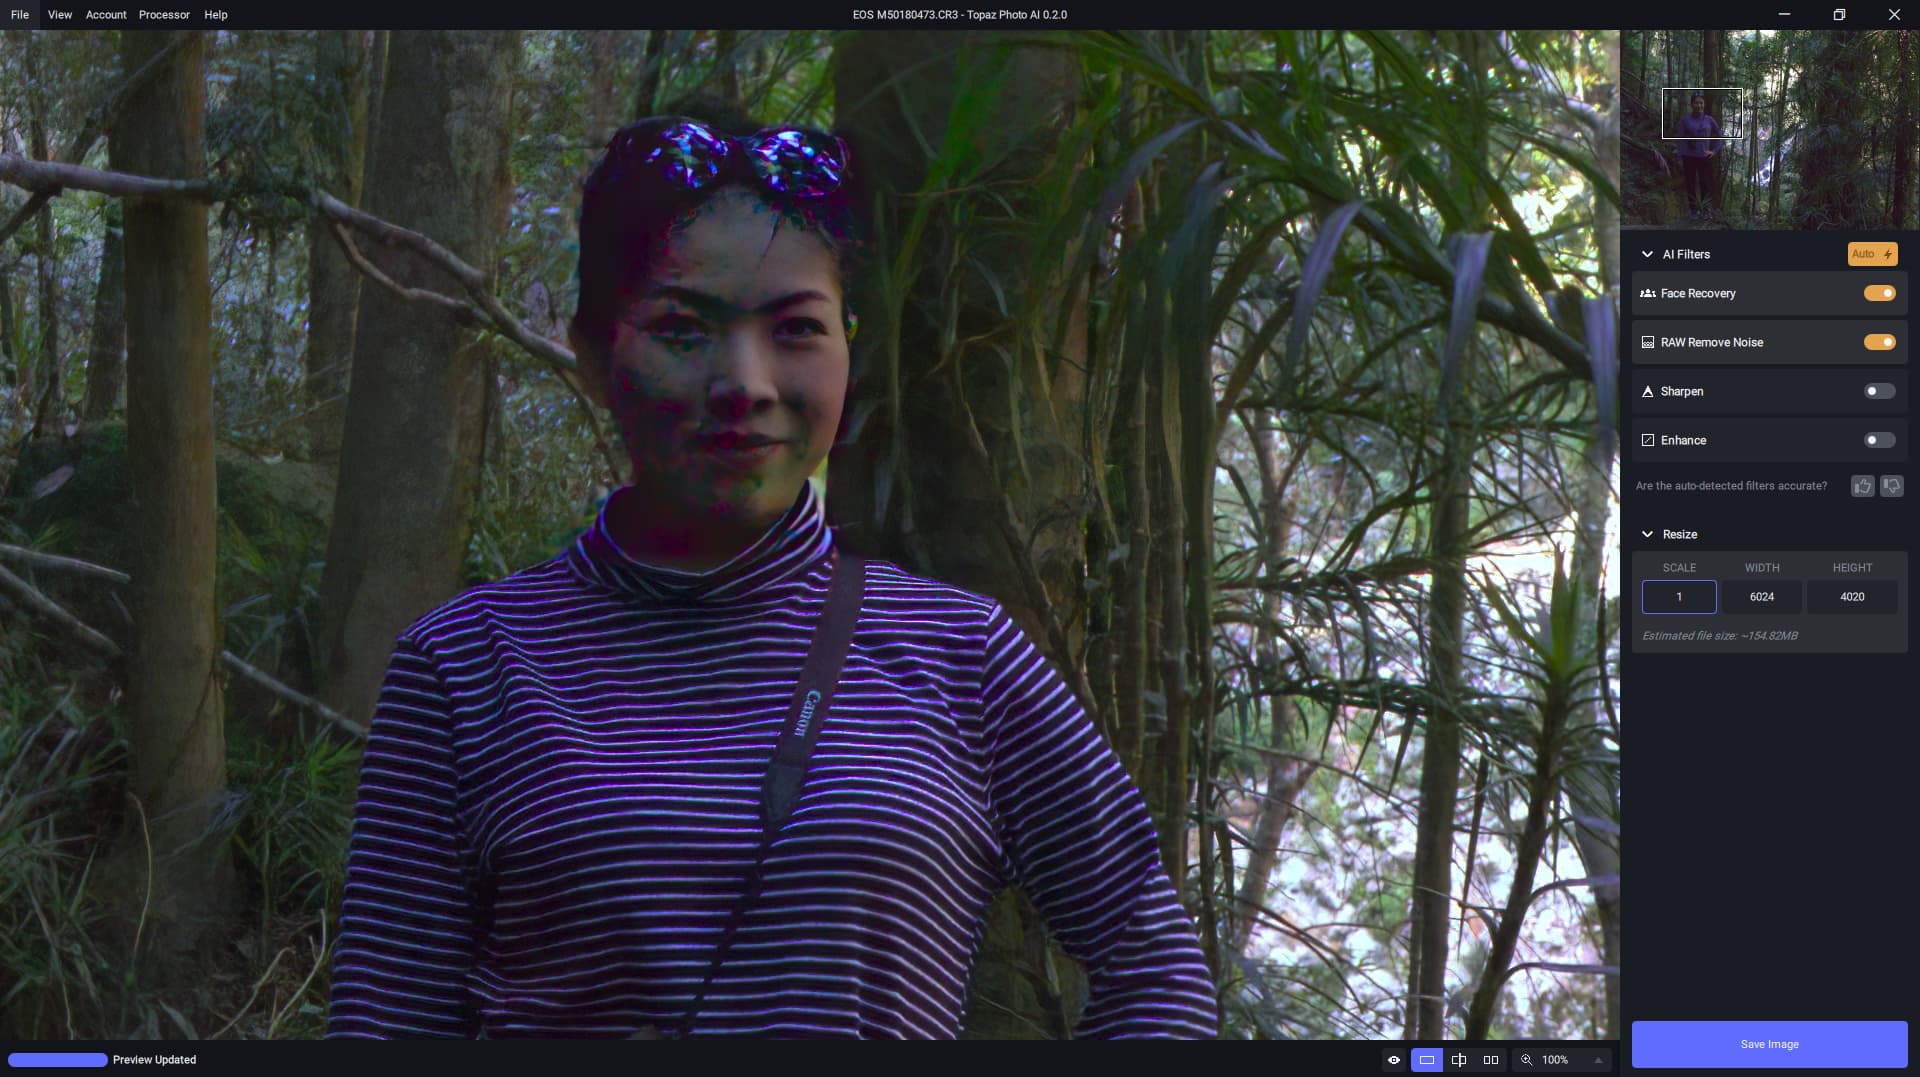
In some images the color reproduction is not correct. And portrait photos are displayed horizontally. This photo is normally quite colorful and not solid purple.See screenshot 1:

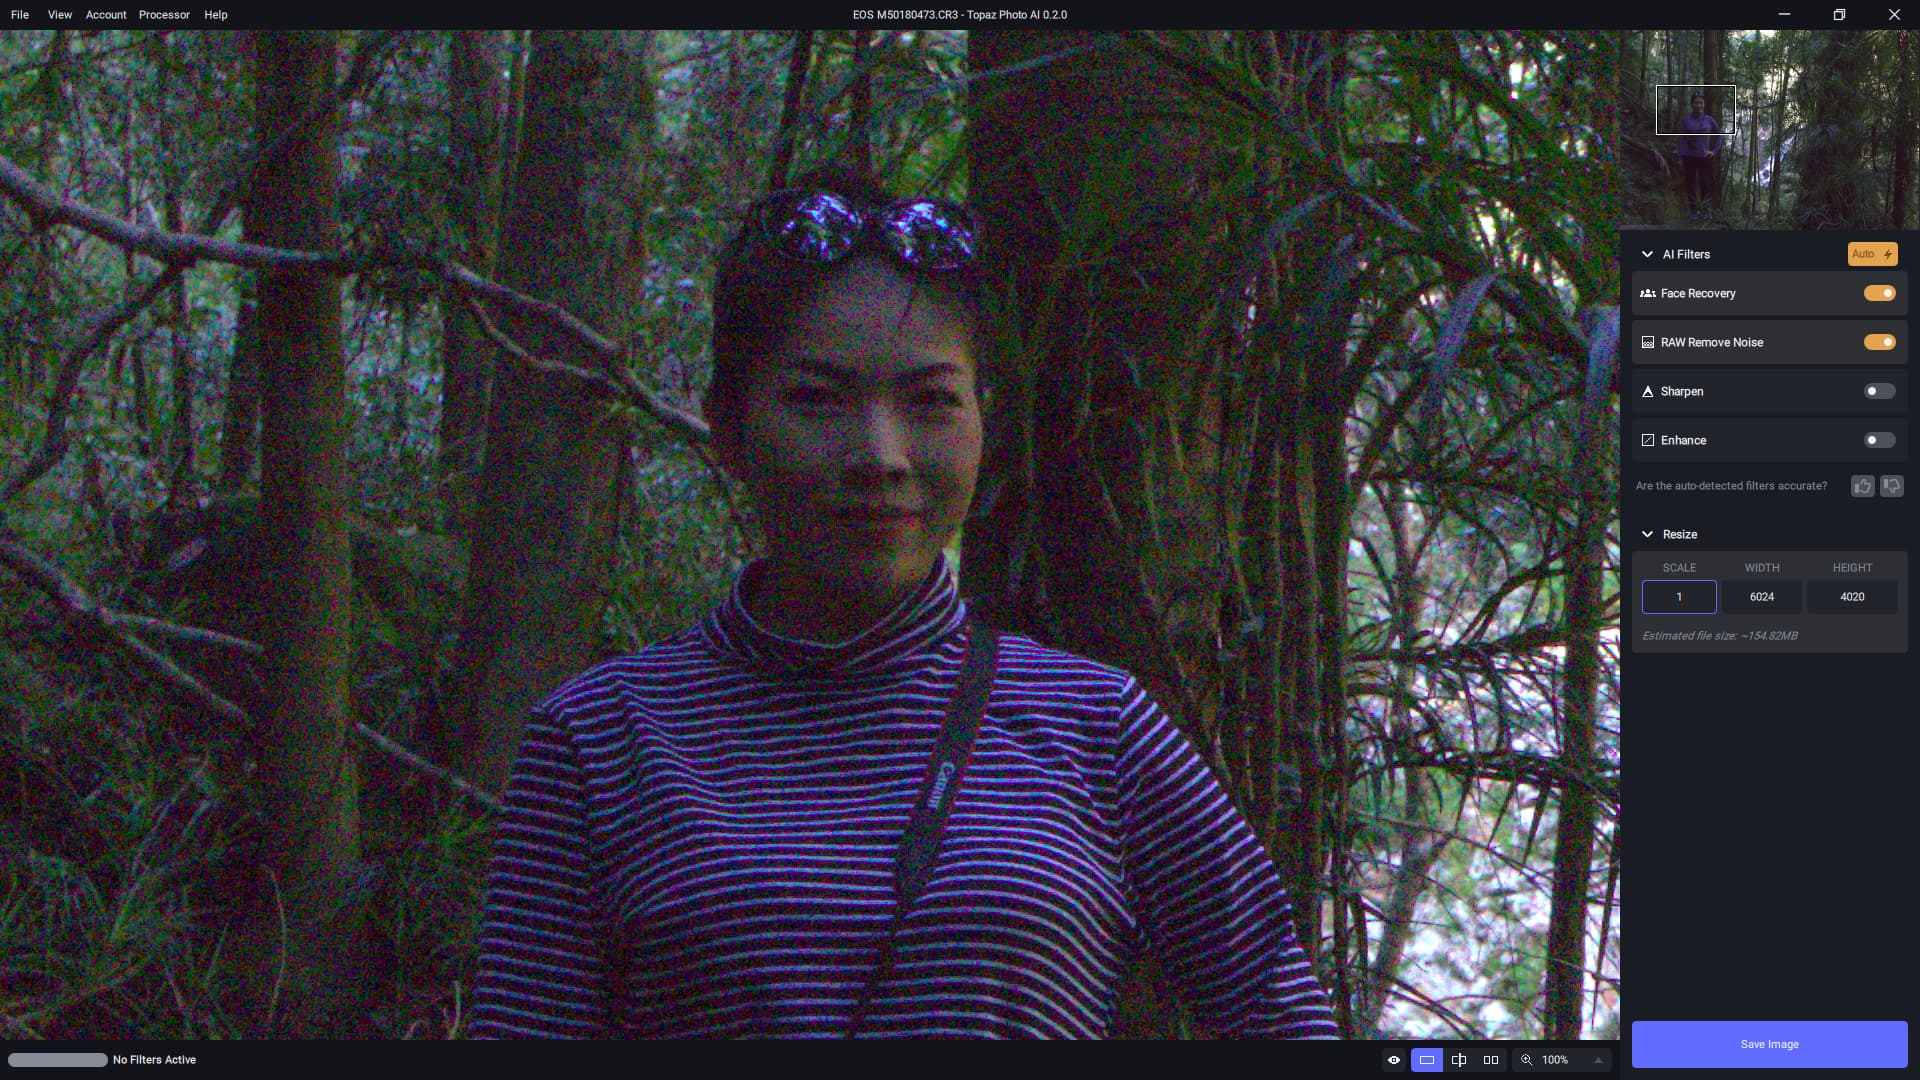
As soon as I turn on “RAW Remove Noise”, whether with automatic setting or manually at 0, 100 and any other arbitrary value, whether other functions are turned on or not, everything is completely white both in the preview and in the saved photo. (In the split screen, of course, only in the preview area. When moving the splitscreen slider, the white area moves with it). See screenshot 2:

For comparison I loaded the same RAW in Denoise AI 3.7.0. See screenshot 3:

By the way, that problem with the white preview image exists also with my .cr2 files from my EOS 5D IV !
I submiited the Logfile and the cr3 to Dropbox as well. Cr3 starts with UP_
(Windows 10 Version 21H1 (Build 19043.1826), Intel I9-9900K, Asus RTX 2060 with the latest NVIDIA Studio-Driver 516.59)
Addendum
The problem with the white preview image only occures using the NVIDIA GPU! Using CPU the preview works fine, while still having the problem with the wrong colors and image orientation!
There is an interesting line in the logfile which referes to a user ADAM @ my PC which doesn´t exit on my machine:
[2022-07-21 16:44:46.301, 962.37 ms] [34a8] Info | AI engine exception: OpenCV(4.5.3) C:\Users\Adam.conan\data\opencv\4.5.
And an other one:
[2022-07-21 16:44:53.178, 4.07 ms] [34a8] Info | Applying camera profile: “Canon” “Canon EOS R5” “C:/ProgramData\Adobe/CameraRaw/CameraProfiles/Adobe Standard/\Canon EOS R5 Adobe Standard.dcp”
I´m not a programmer but it looks strange to me having / and \ in the same Link! Could this be right?
8 bit has 256 tones, not 128.
Hi Ulrich,
I also use FastRawViewer for first level culling. But here I want to select those pictures which are worth to edit with the Topaz AI tools (DeNoise, Sharpen and Gigapixel). For this I want to use batch processing with the default AUTO adjustments and then select those ones for manual adjustment.
Greetings
Thomas
