Next update test connecting to a mobile hotspot prior to updating, if faster, it would confirm the blocker is the router/internet speed!
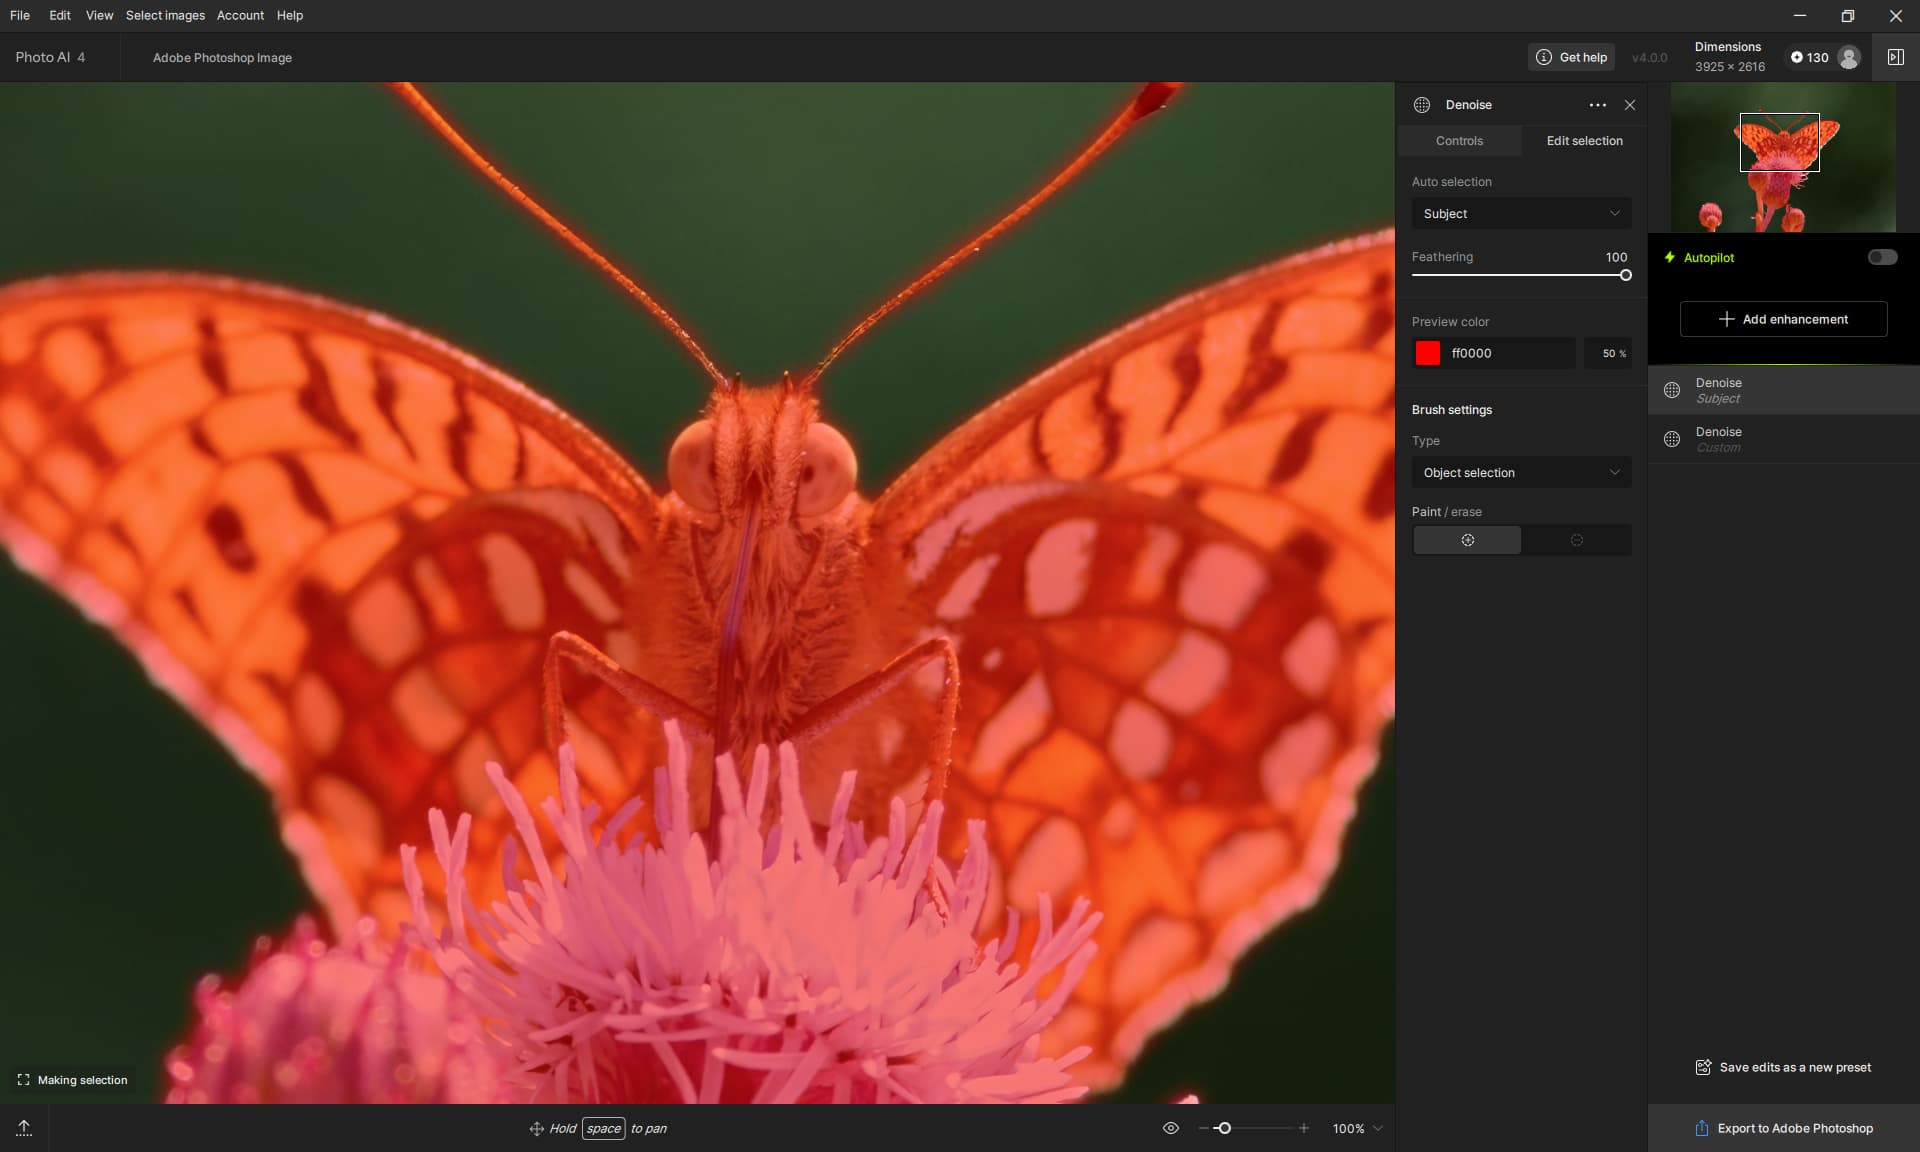
Nice pic! I’ve run into problems when I feed a .dng or .arw from C1 to TPAI in that highlights often get blown out when returned to C1. Are you seeing that here with the white area of the flower or can you resolve highlights after it gets back from TPAI?
1 Like
@david.horita added your contact information on a development team ticket for loss of information when working with clipped highlights. The only workaround right now when you have these types of all white areas in your files, will be to use PS layers to keep the Photo AI parts and layer your LrC recovery of the clipped highlight, from original that LrC/PS/C1 recovers! We can tag you here if a fix is found and released. @TPX let me know if you experience this as well and I can add your information too!
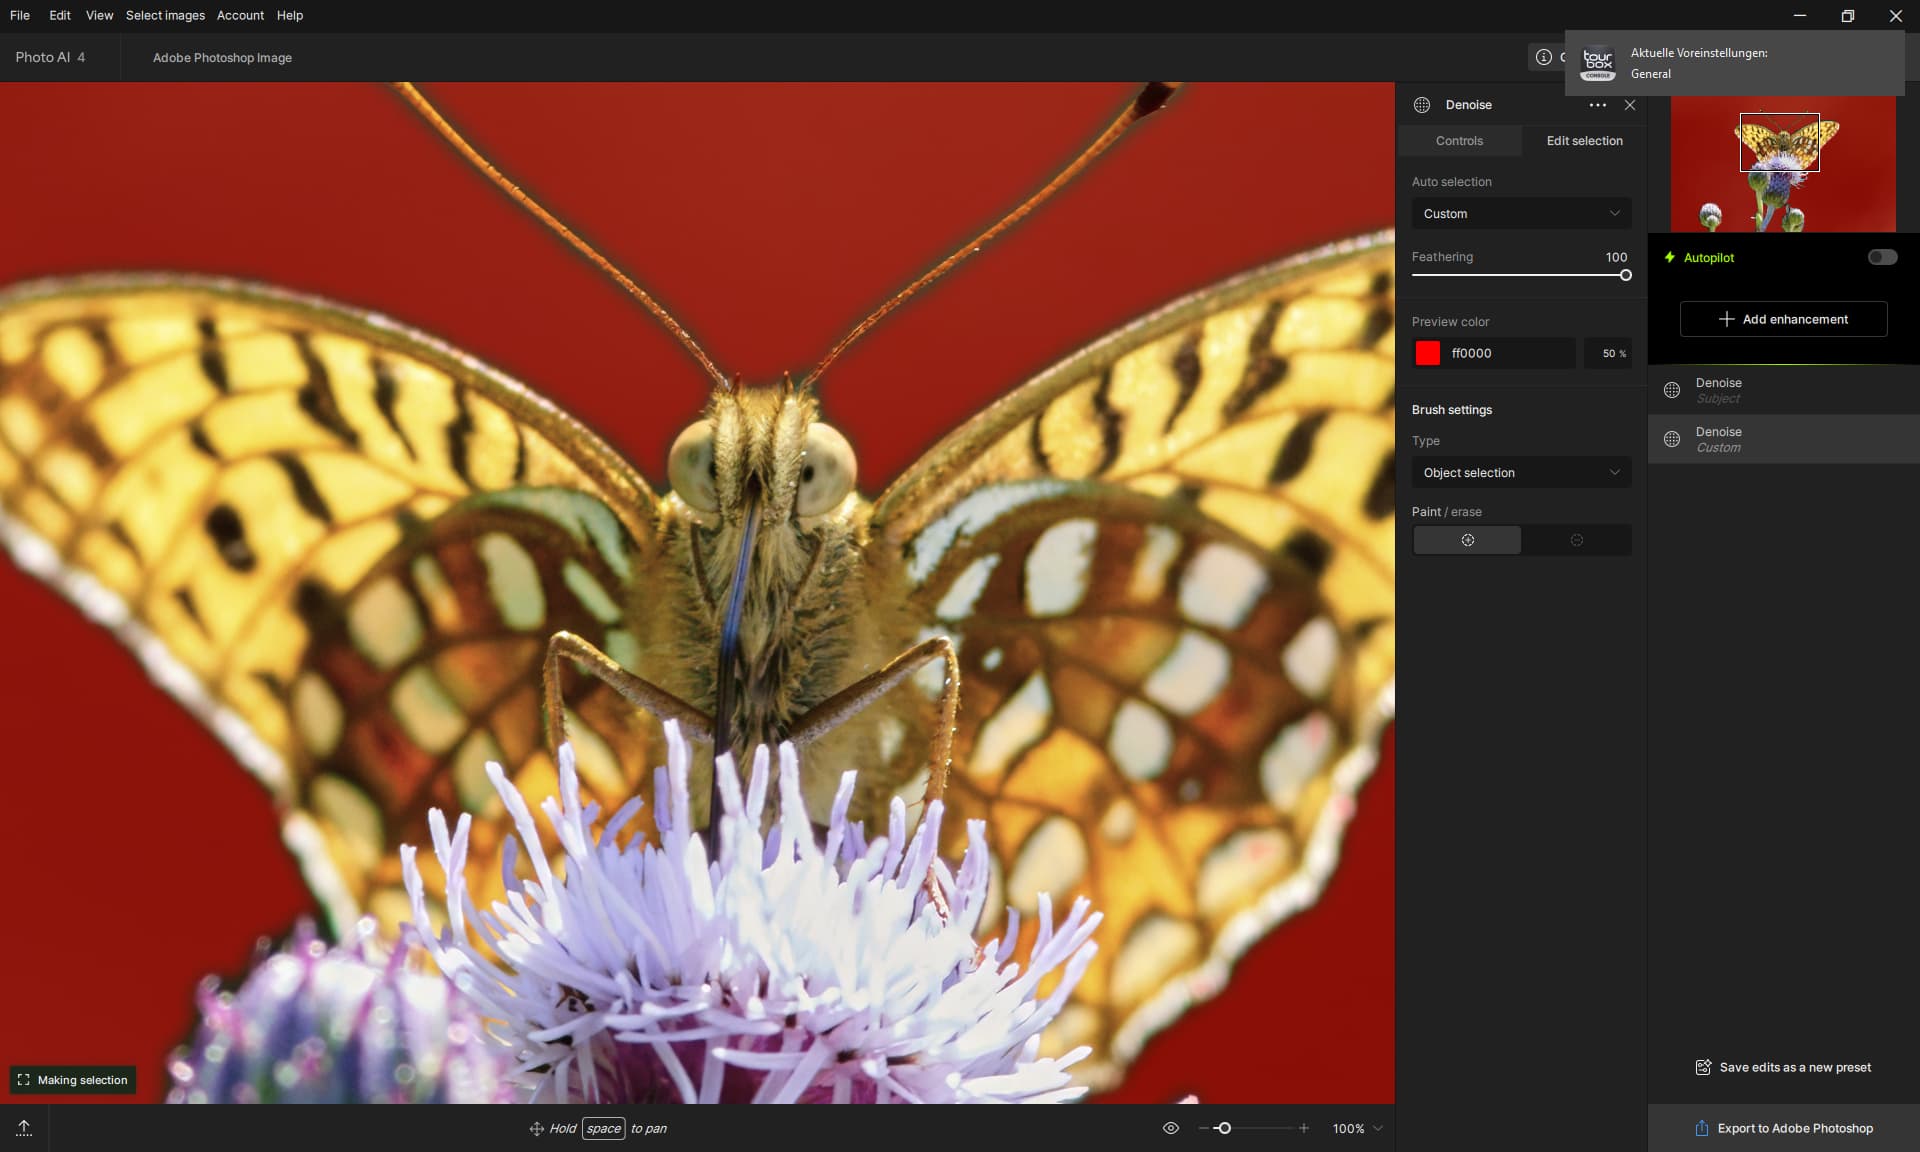
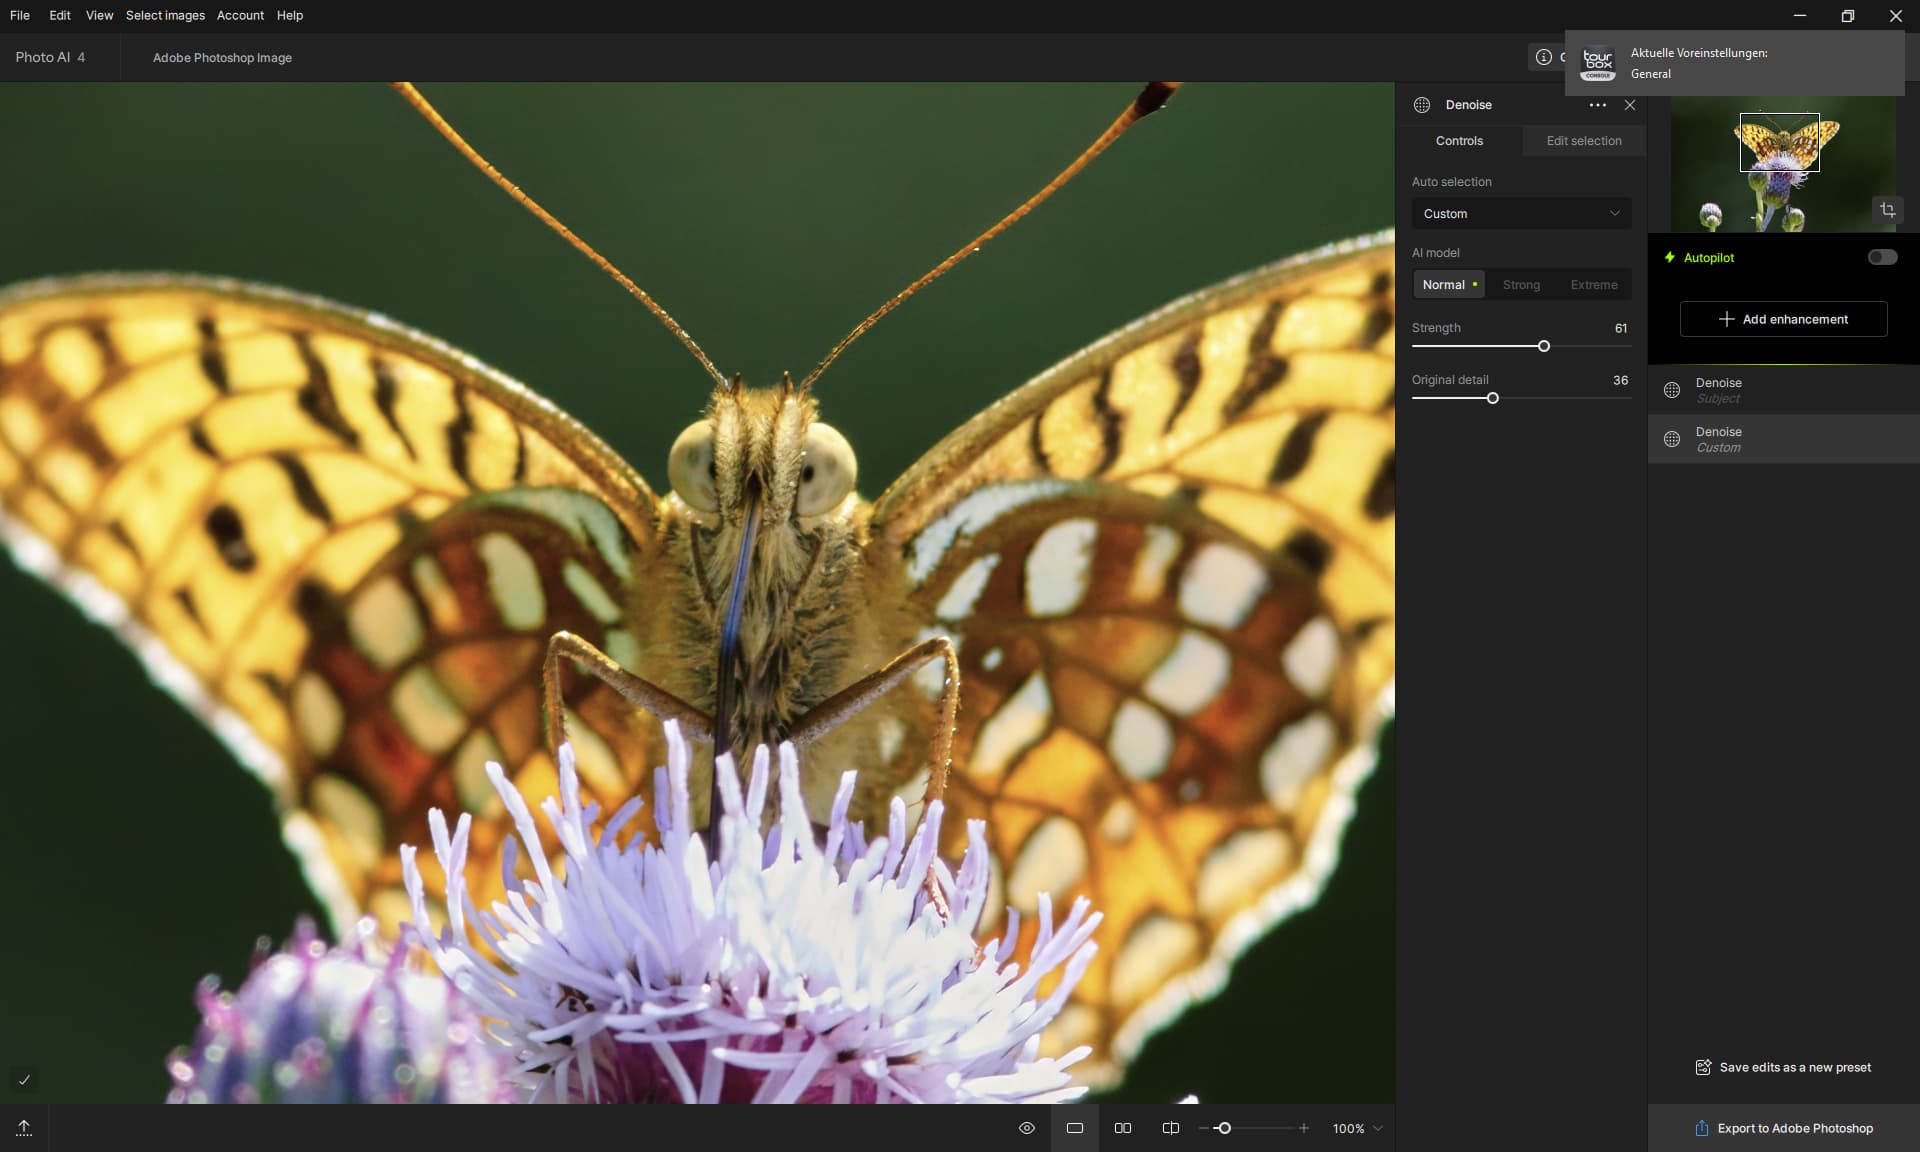
This is a known problem, LIB RAW does not work in the same way as Capture One or DxO PureRAW.
You can work around it by using Capture One first and then PhotoAI, but not with the raw file.
I have attached a comparison image with which I get a similar result like with Pure RAW or Photo AI when denoising the RAW first.
I did Edit the image in Capture One, export as tiff and then denoise it in PhotoAI, in Photoshop with the plugin of PhotoAI.


Three years ago i did denoise the images a little with Capture One and then refine them with Denoise AI or PhotoAI.
Capture One has a very good Denoise algorithm.
This way you can avoid the problem with the clip.

1 Like
Hey! So yeah, that dialog totally pops up if you hold Alt/Opt when you add a curves adjustment layer, and also if you go Image > Adjustments > Curves. That way, you can also save an action if you wanna use it for batch processing a bunch of images.
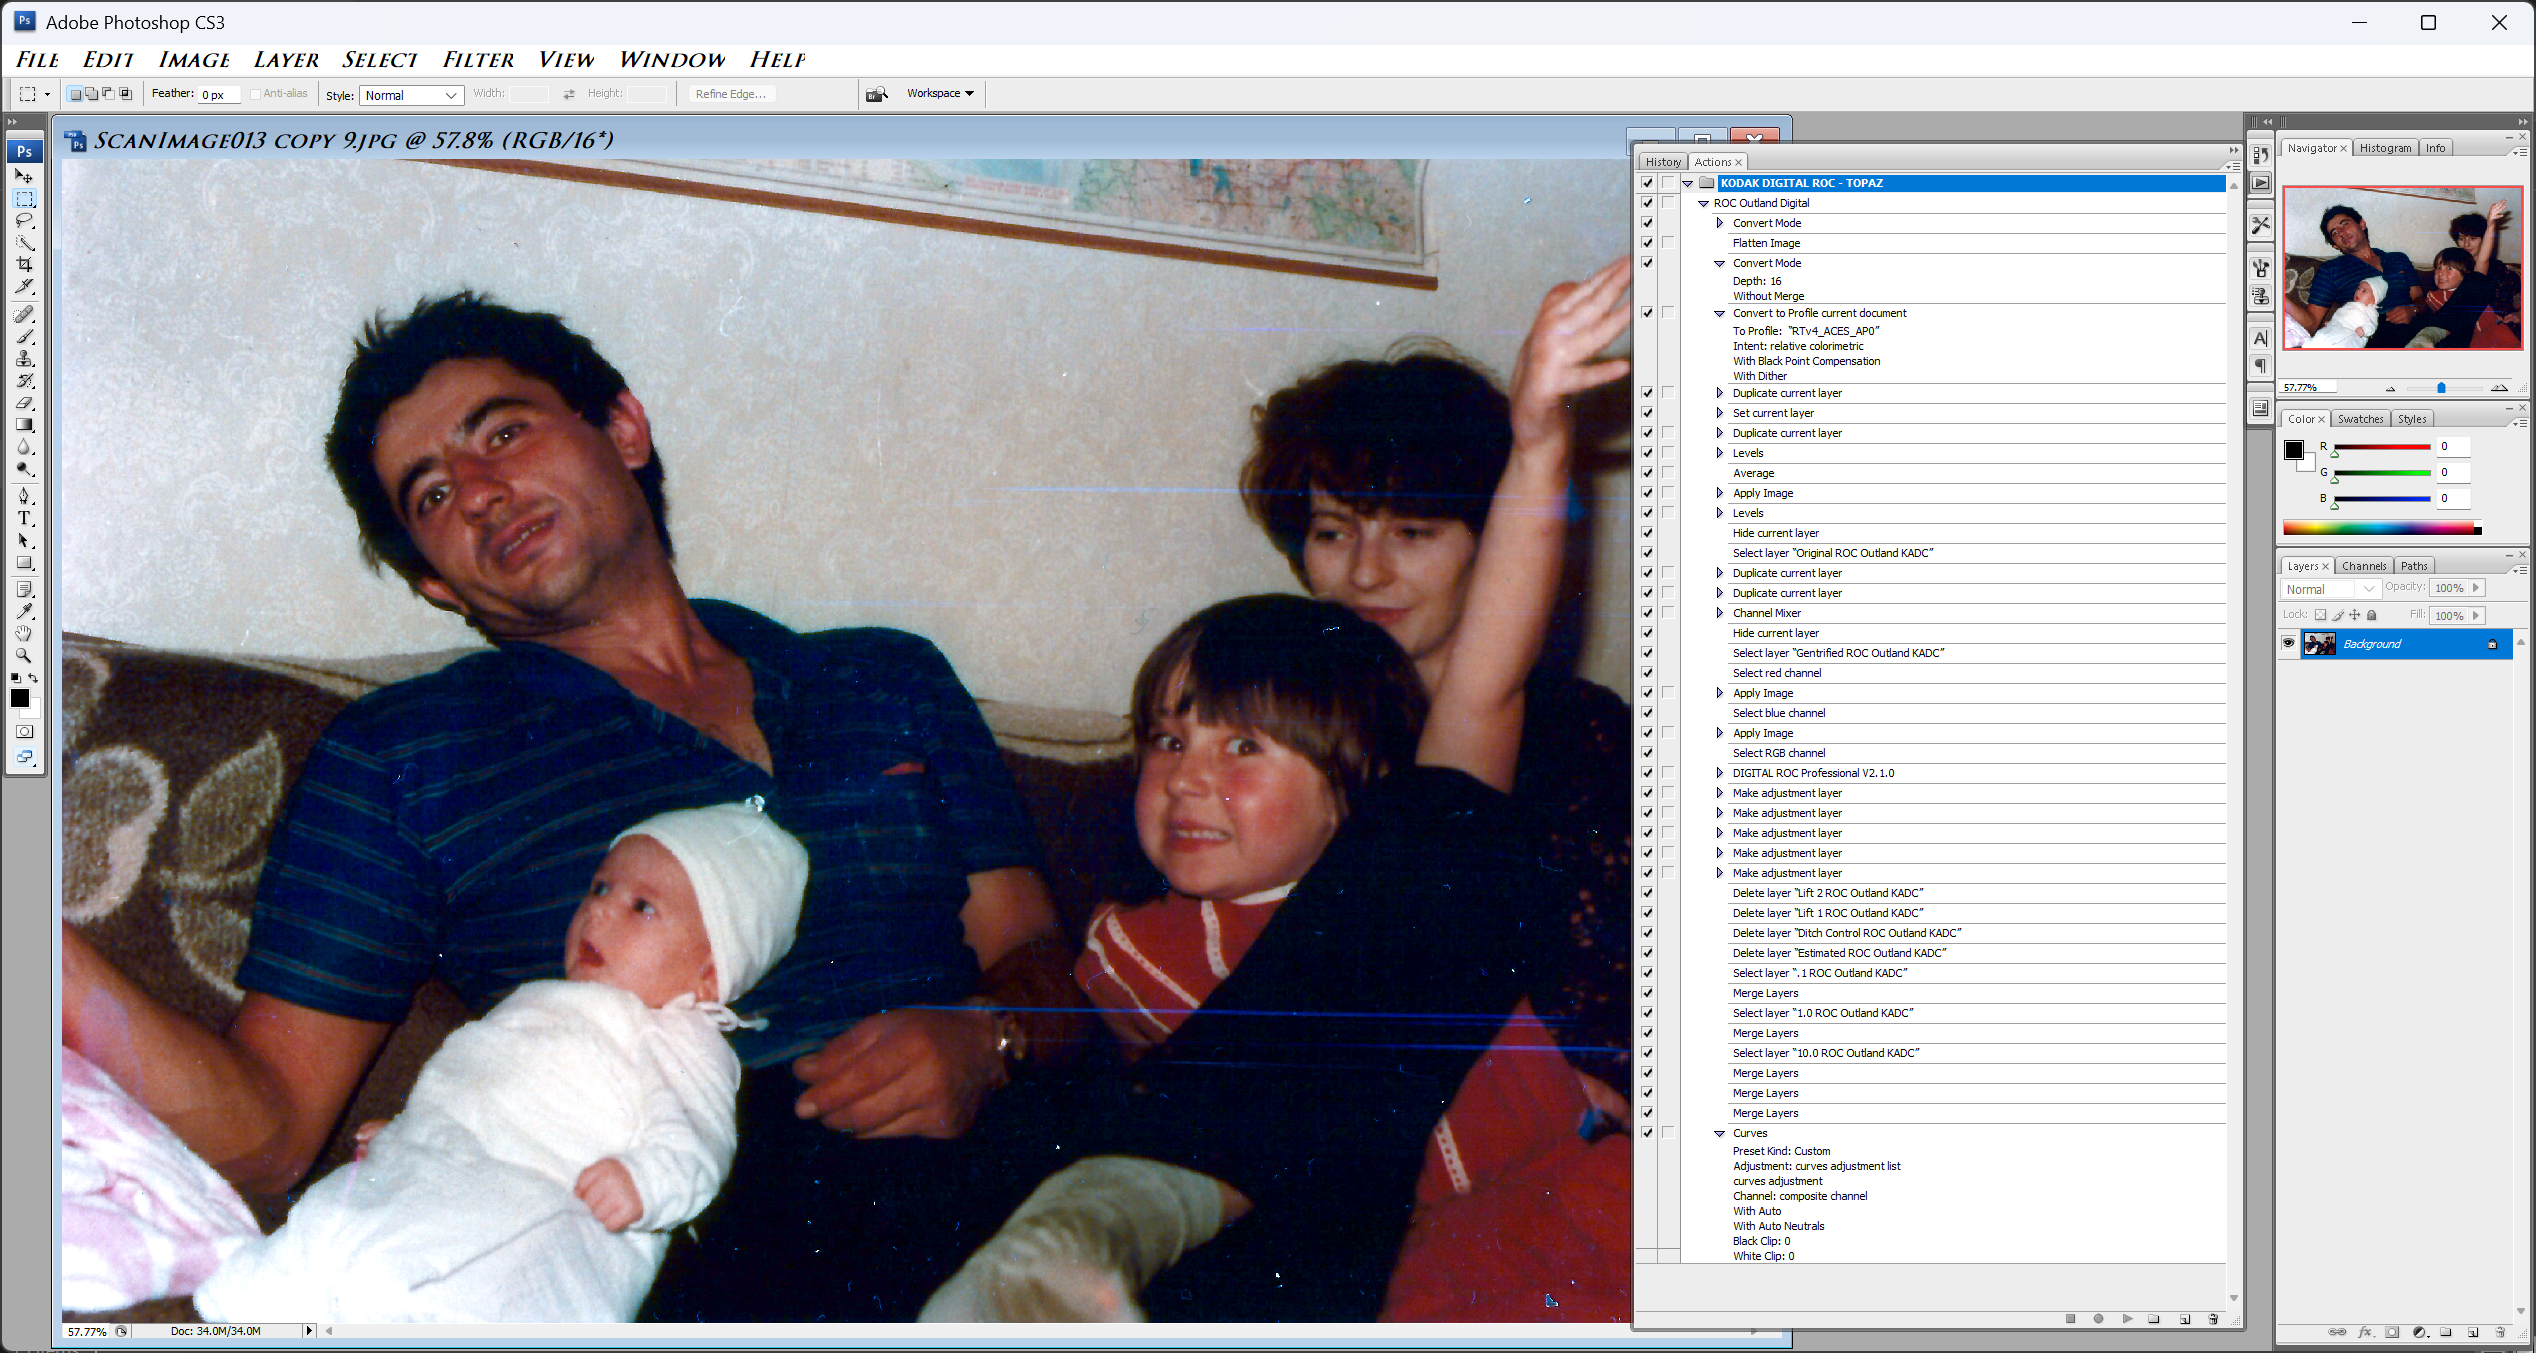
Something I’ve noticed with certain photos that have a really strong color cast (especially old scanned ones) is that it helps to first bump up the bit depth (from 8-bit to 16-bit color), and then change the color space to ProPhoto or Aces AP0 (that one’s derived from RawTherapee). When there’s a gnarly color cast, Photoshop handles auto curves way better like this.
Once you’re done with the color correction, you just switch the photo back to whatever color space you need for web or other stuff (usually sRGB).
Also, for the Kodak Digital ROC plugin I use a lot (which, bummer, only works in older 32-bit PS versions), changing the color space to Aces AP0 massively improves its internal algorithm. So, for example, from an input photo like this,
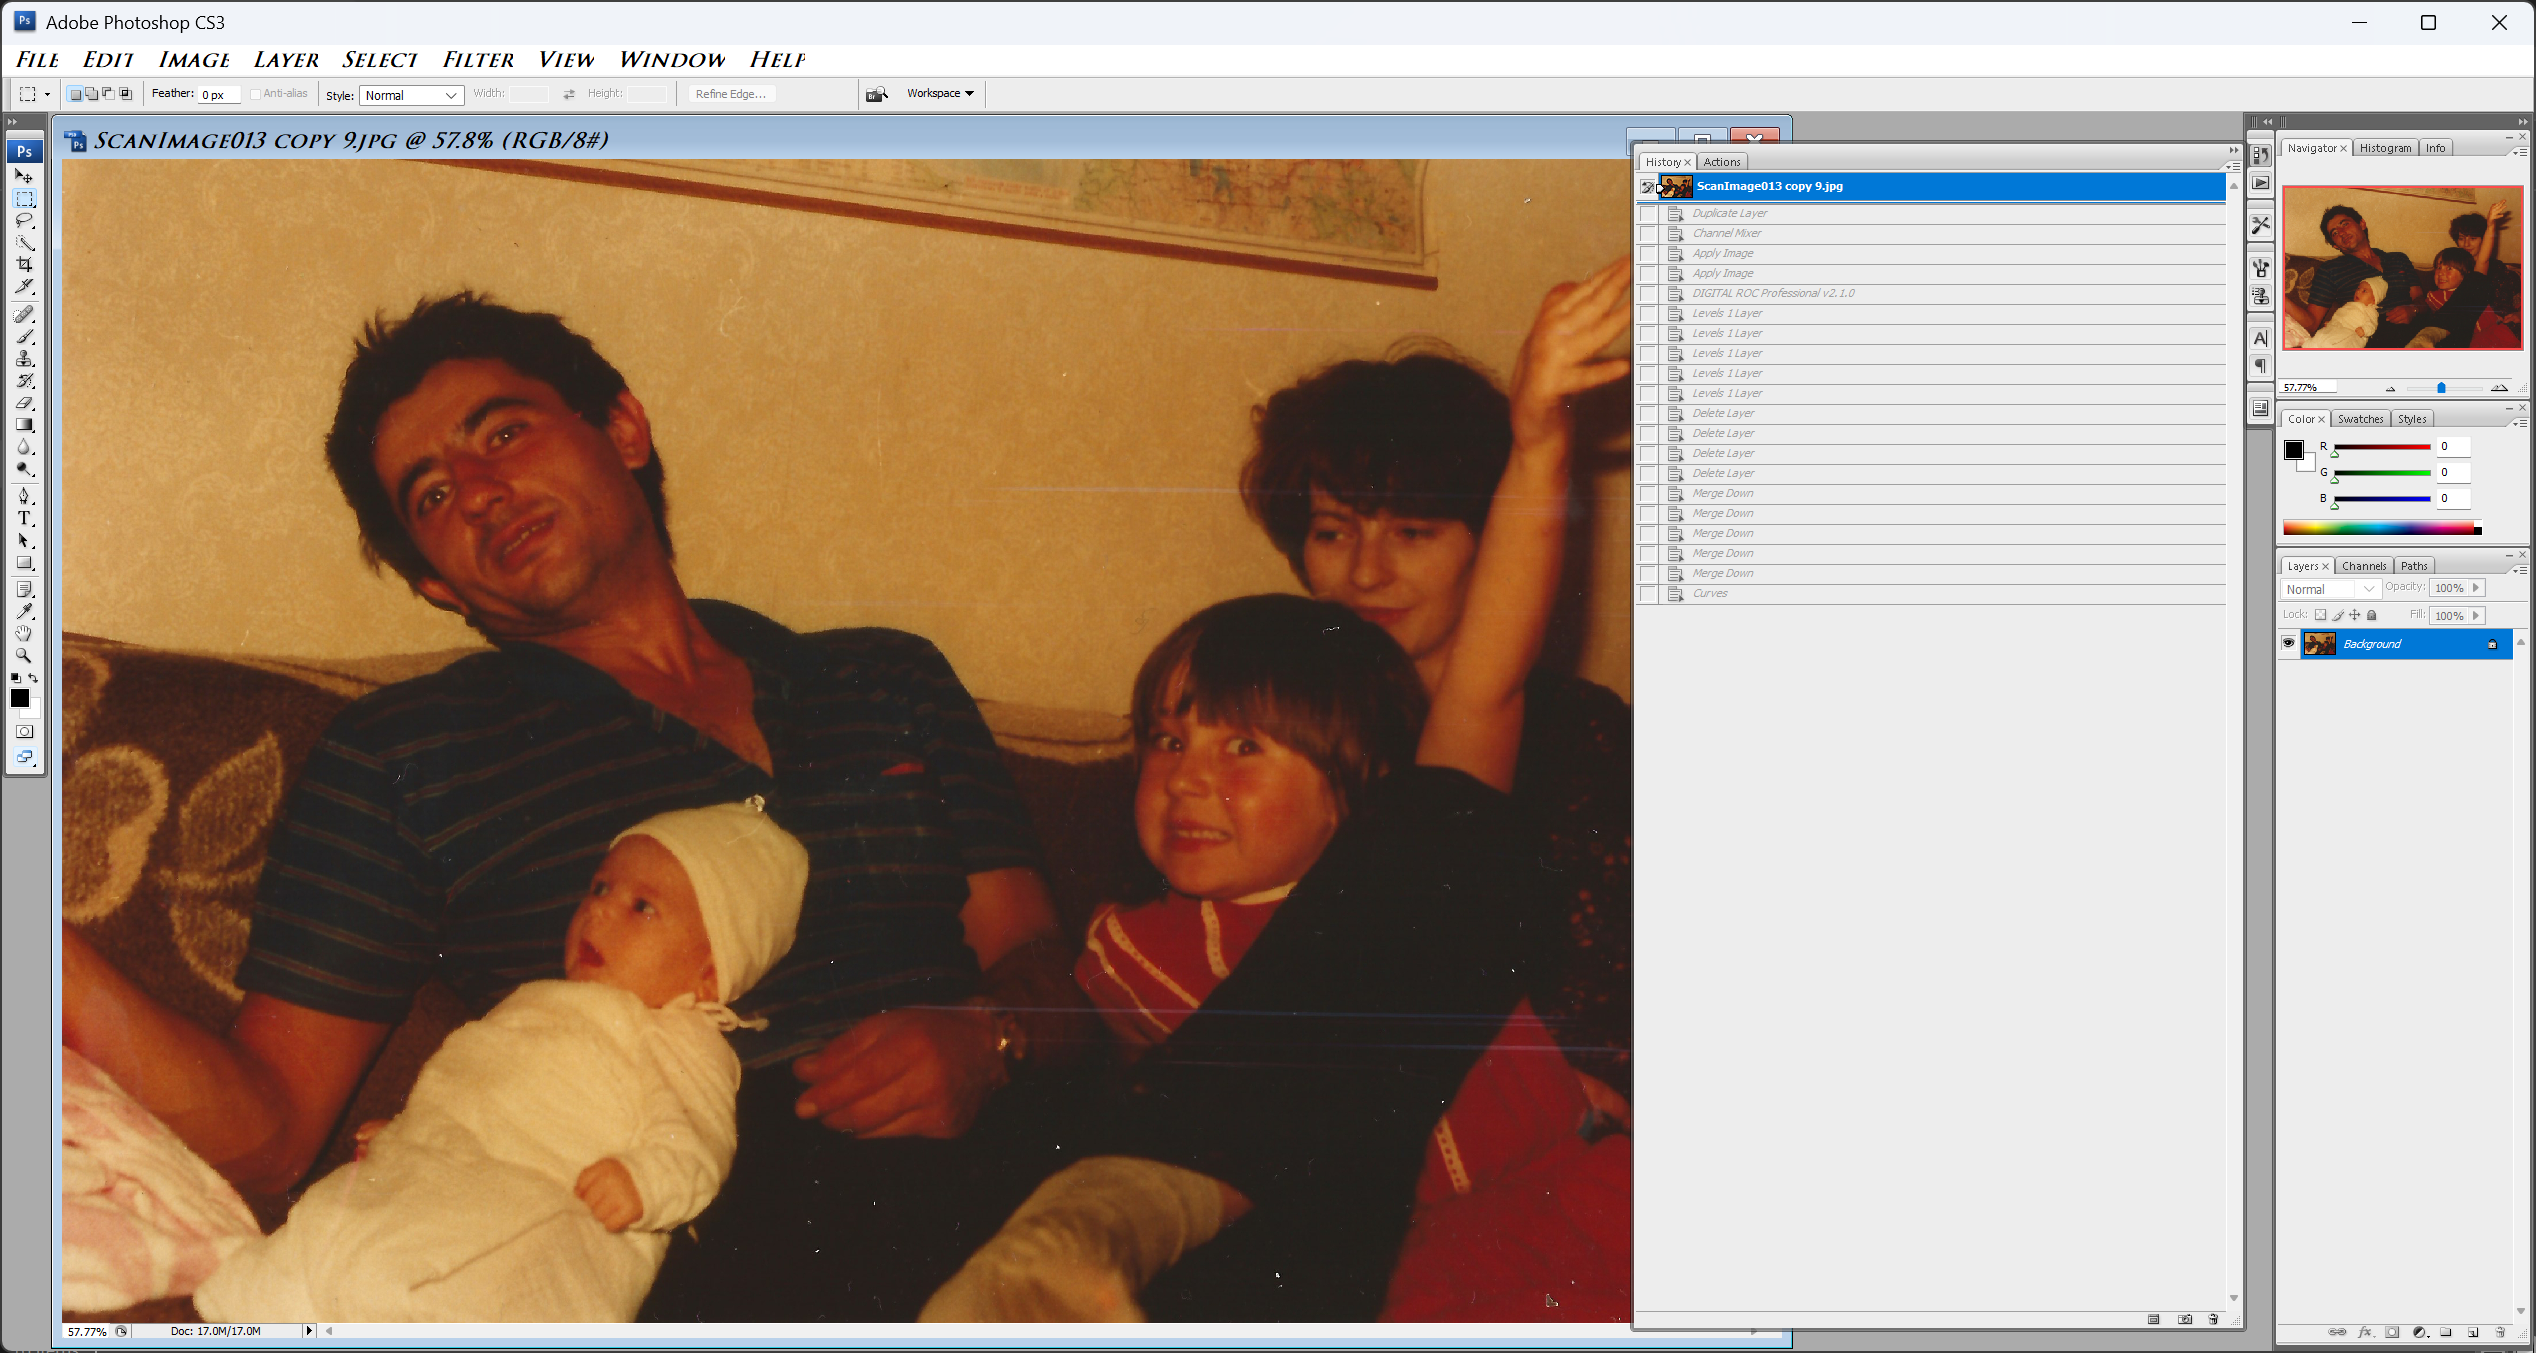
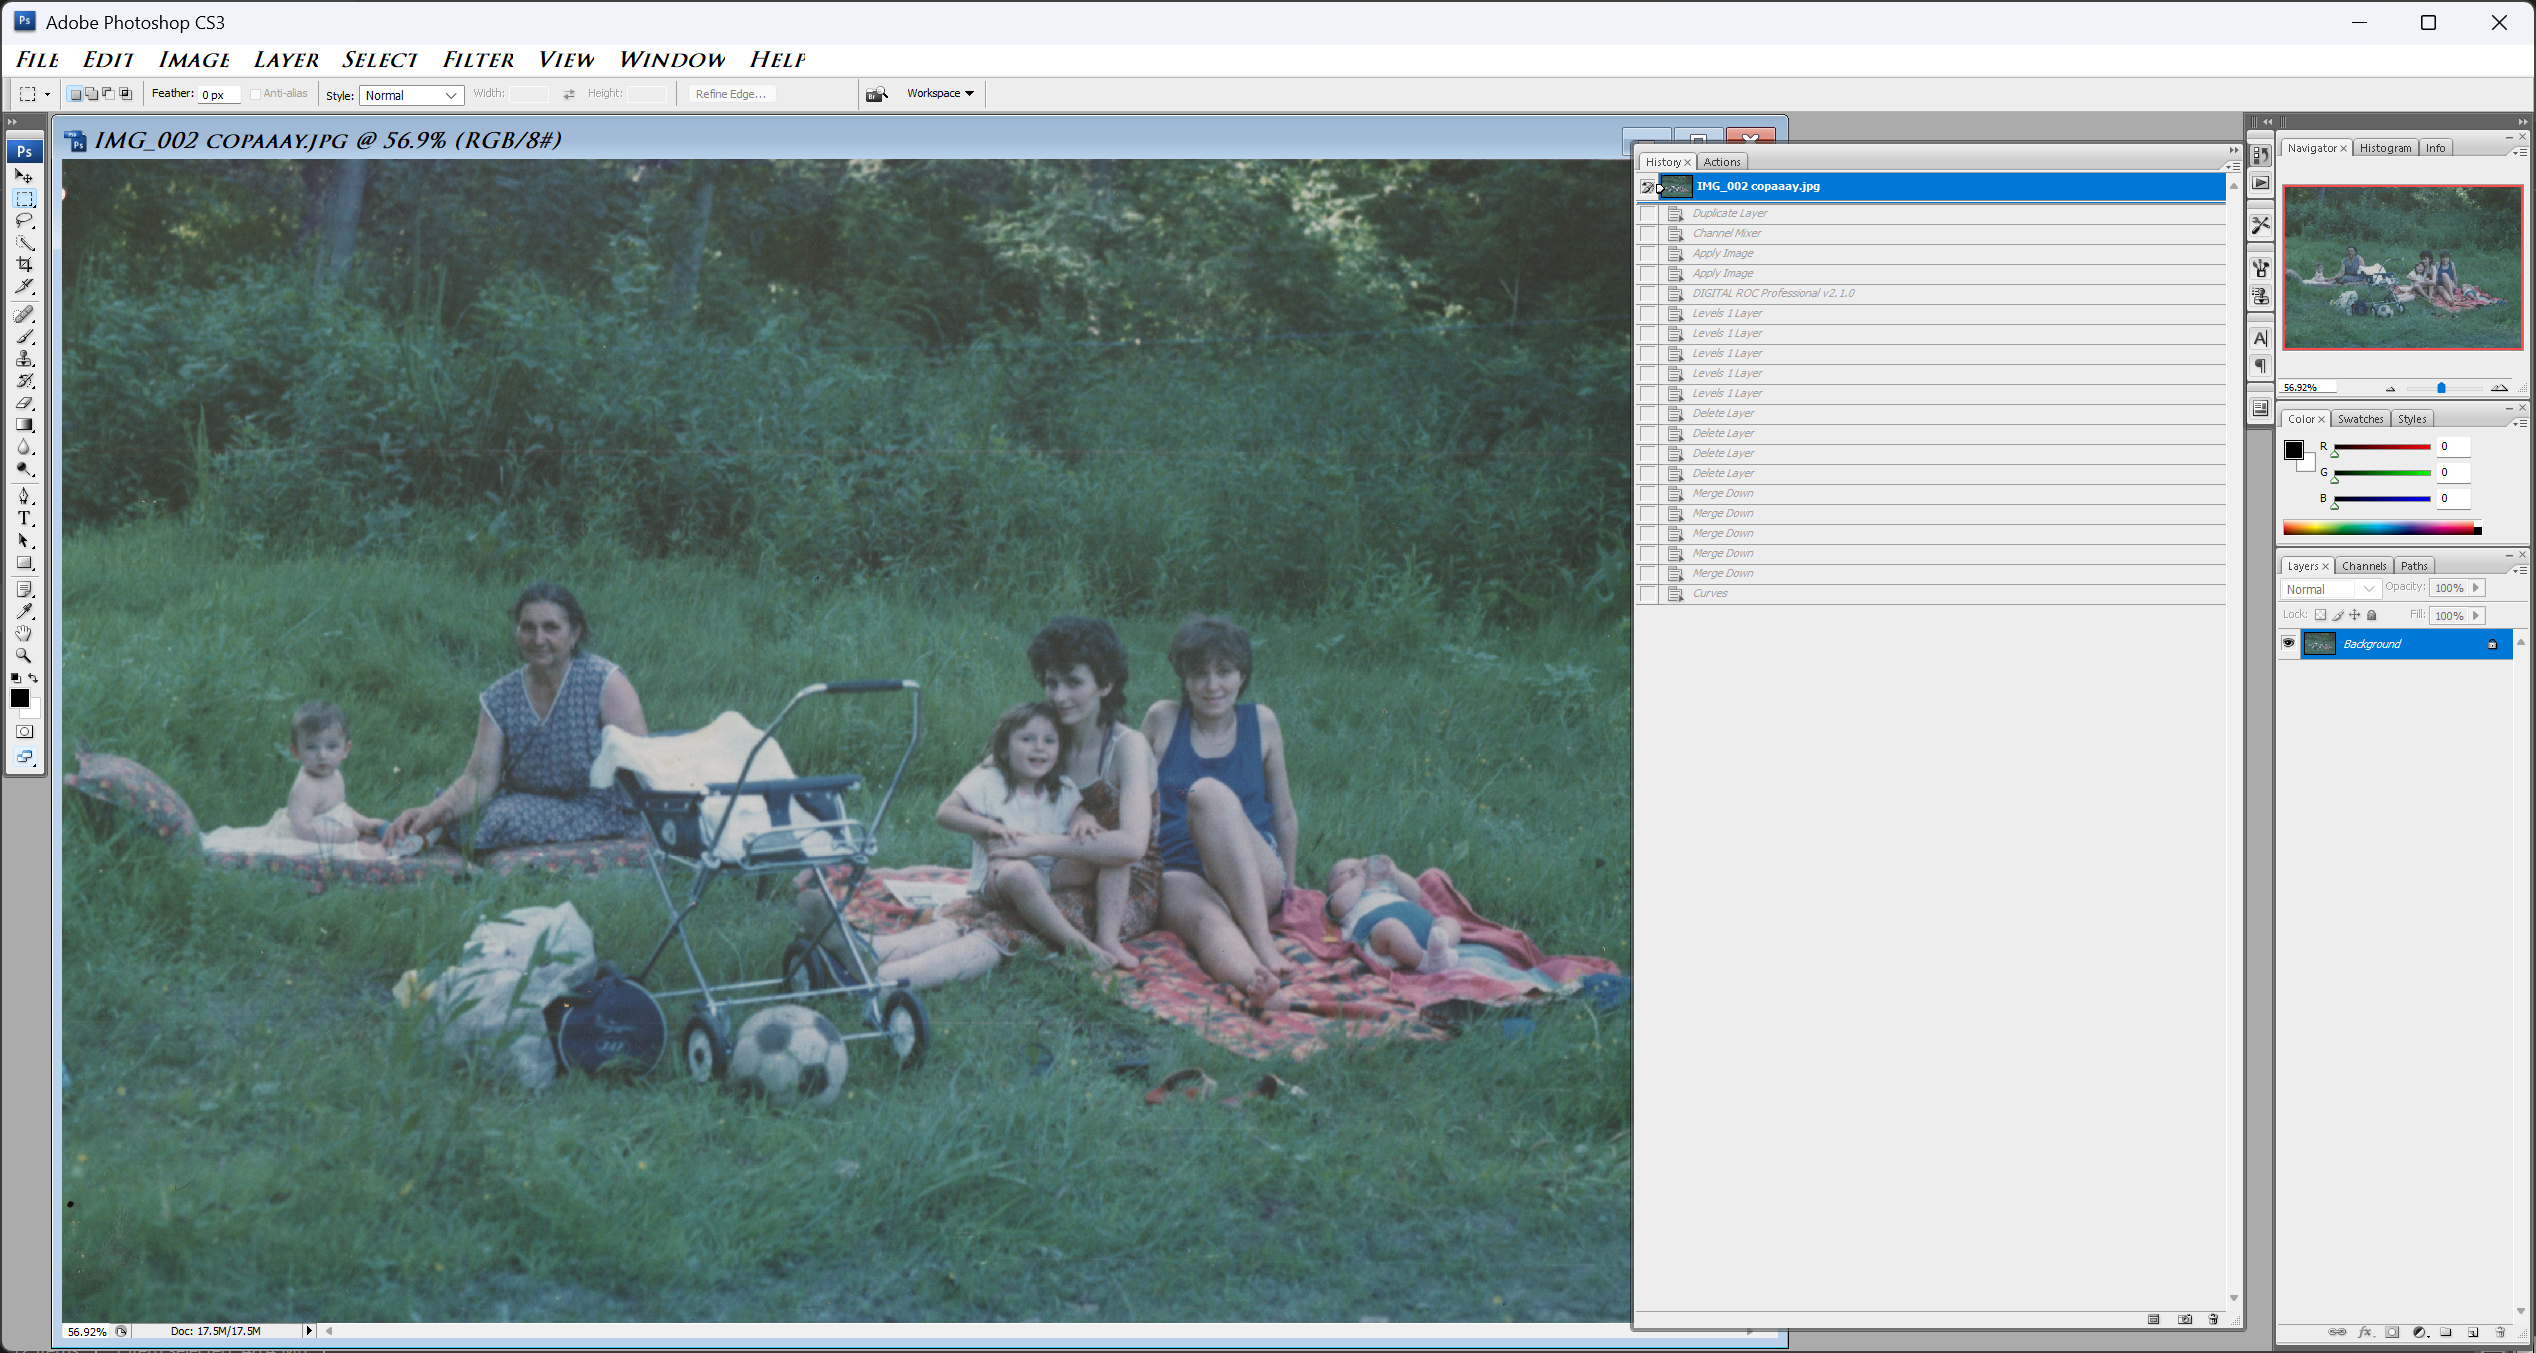
a simple action can get you… [well, much better results!].
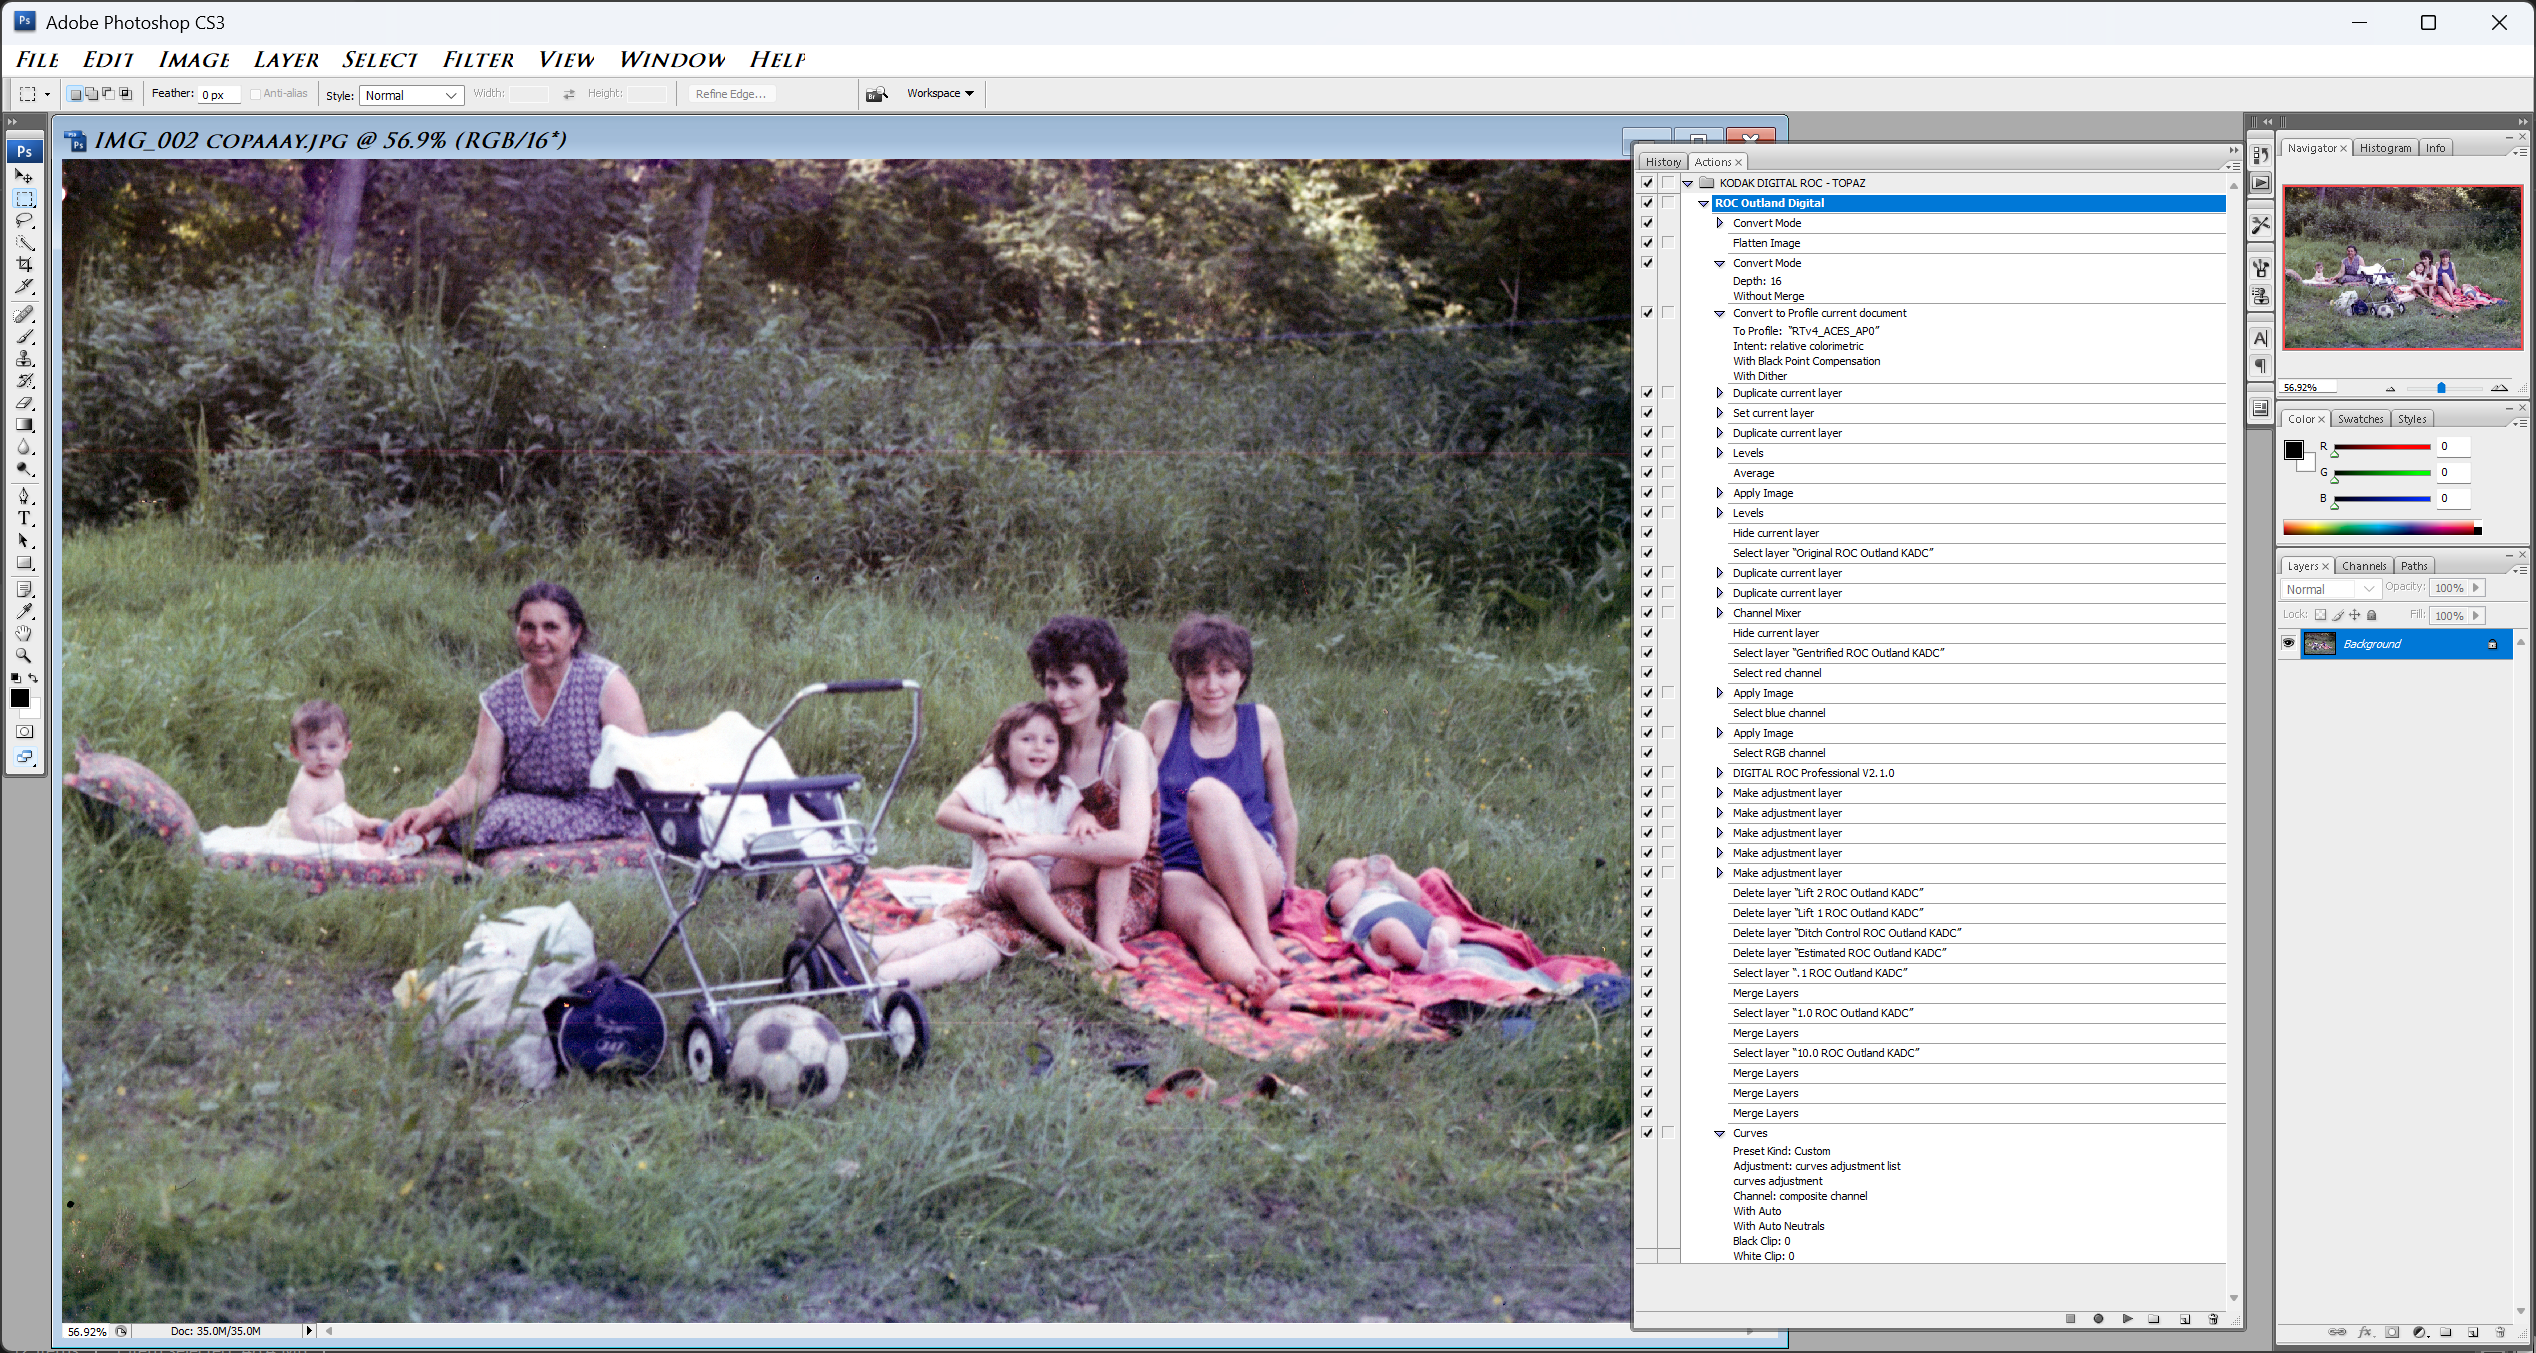
I’ll attach the Aces AP0 color profile so you can give it a shot. I’m also throwing in the Kodak ROC action, but for that one, you’ll need a 32-bit PS and the Kodak Digital ROC plugin. (For those of you who wanna try it – it’s a killer plugin, seriously).
2 Likes
That (C1->tiff first) is what I’ve settled on as well, and it works. Annoying part is that I don’t get to use raw denoise in tpai and need workflows dependent on how close to white visually important parts of the image are.
Thanks! will add your contact info on the development team ticket and we can tag you once a fix for this is done.
Good to know! Thx for your steps.
I’m not familiar with Aces. I’ll have to check that out.
My internet service (ATT Fiber) has had an outage for a week!!! Over 2000 households affected. It came back online last night. So we can finally do Web work and/or Web based post processing again. So much for the old days of their 99.999% reliability & network redundancy…
BTW, did I read it right that you’re working with Ps CS3? I think my 1st Ps was CS4. I’m not a multi-decades user.
@david.123 - in what enhancement?
I figured it out, they show on the individual enhancement options now.
Thanks
1 Like
Well I deleted the latest version then reloaded it. The first time I didn’t get pink images but now I do again. My NVIDIA is up to date. I love Topaz AI and have been using it constantly with no problems up until now. Just converted a photo to DNG first and still got the pink. Thanks for the link will revert to previous version and hope that helps.
@jwmarko - Make sure to send your logs to support@topazlabs.com (help > Open Logs folder from the app) and also send the original file you are editing and we can test it in v4. We haven’t had any reports of pink behavior in v4 and being able to see the logs and your sxact file will help us sort this out!
Hi everyone! The new Dust & Scratch Repair feature is simply amazing!
There is an exposure transition band (change in brightness), which is not detected as a defect. But it can be removed in Photoshop.
Maybe in the future Topaz Photo will fix such defects, in any case, you are cool!
Original:
Process:
Result:

5 Likes
How did you do that?
I just downloaded your ORIG, ran it through PAI 4.0 as a Ps 2025 Plugin (only Dust & Scratch model) on my Win 11 PC and this is what it looked like. Nothing like yours…
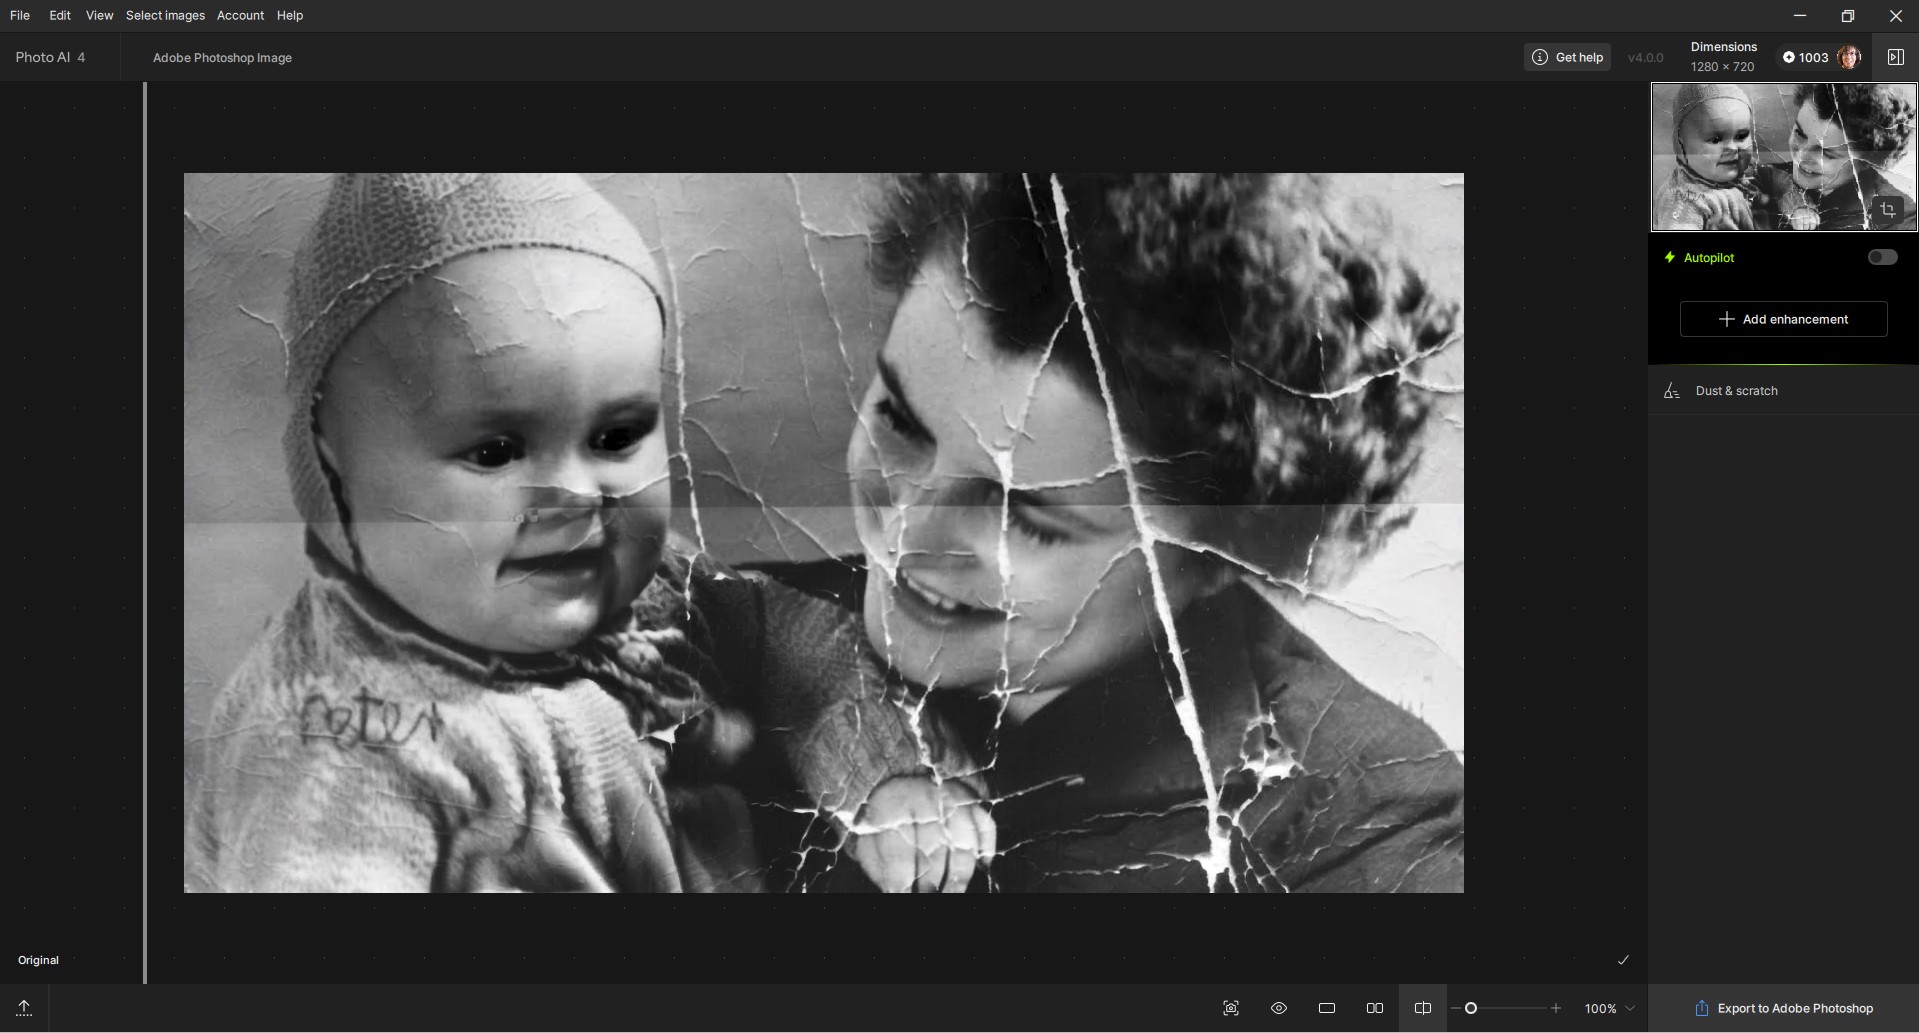
This result I’ve posted is consistent with what I was experiencing with the images I’ve run. i.e., PAI 4.0 Dust & Scratch (singular…) not really making much of a dent on scratches and dust issues within the images I’ve run.
But, whatever other tools you used to clean up the original, you did a very nice retouching job.
----- p.s.
I just tried PAI 4.0 Standalone in case my results were a quirk of the Ps Plugin. Got the same output Standalone from the Dust & Scratch model as shown from the Plugin.
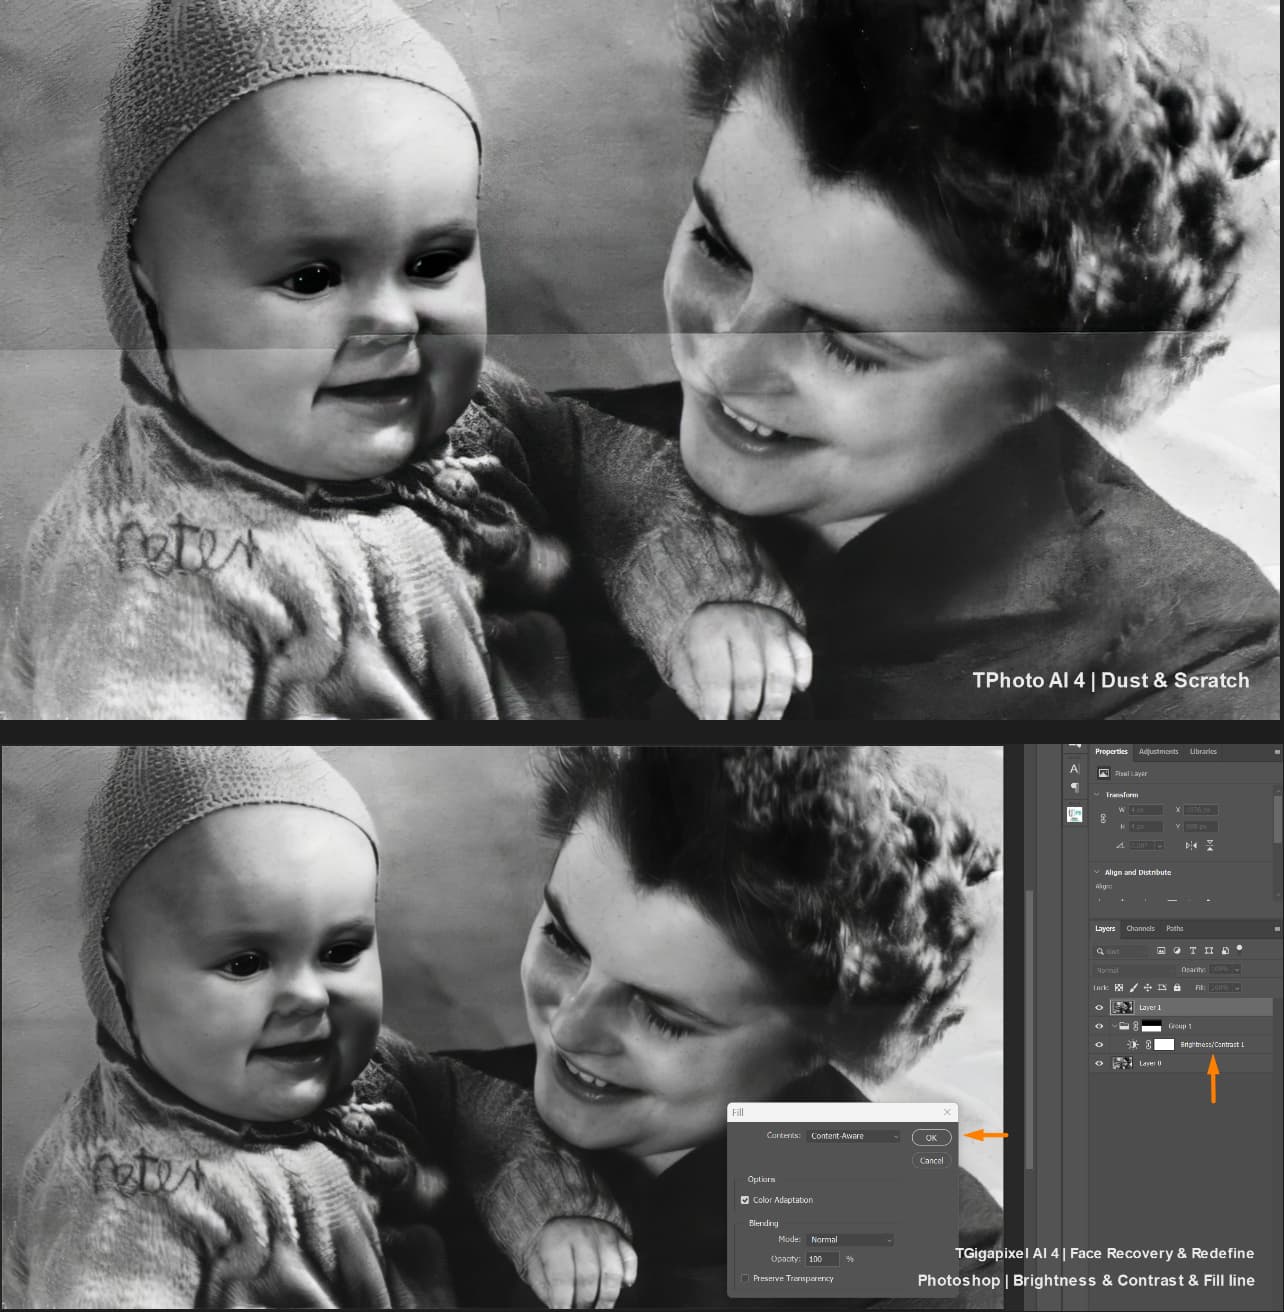
Hi, I used only Topaz Photo 4, Gigapixel 8 BETA and Photoshop just to fix the brightness transition.
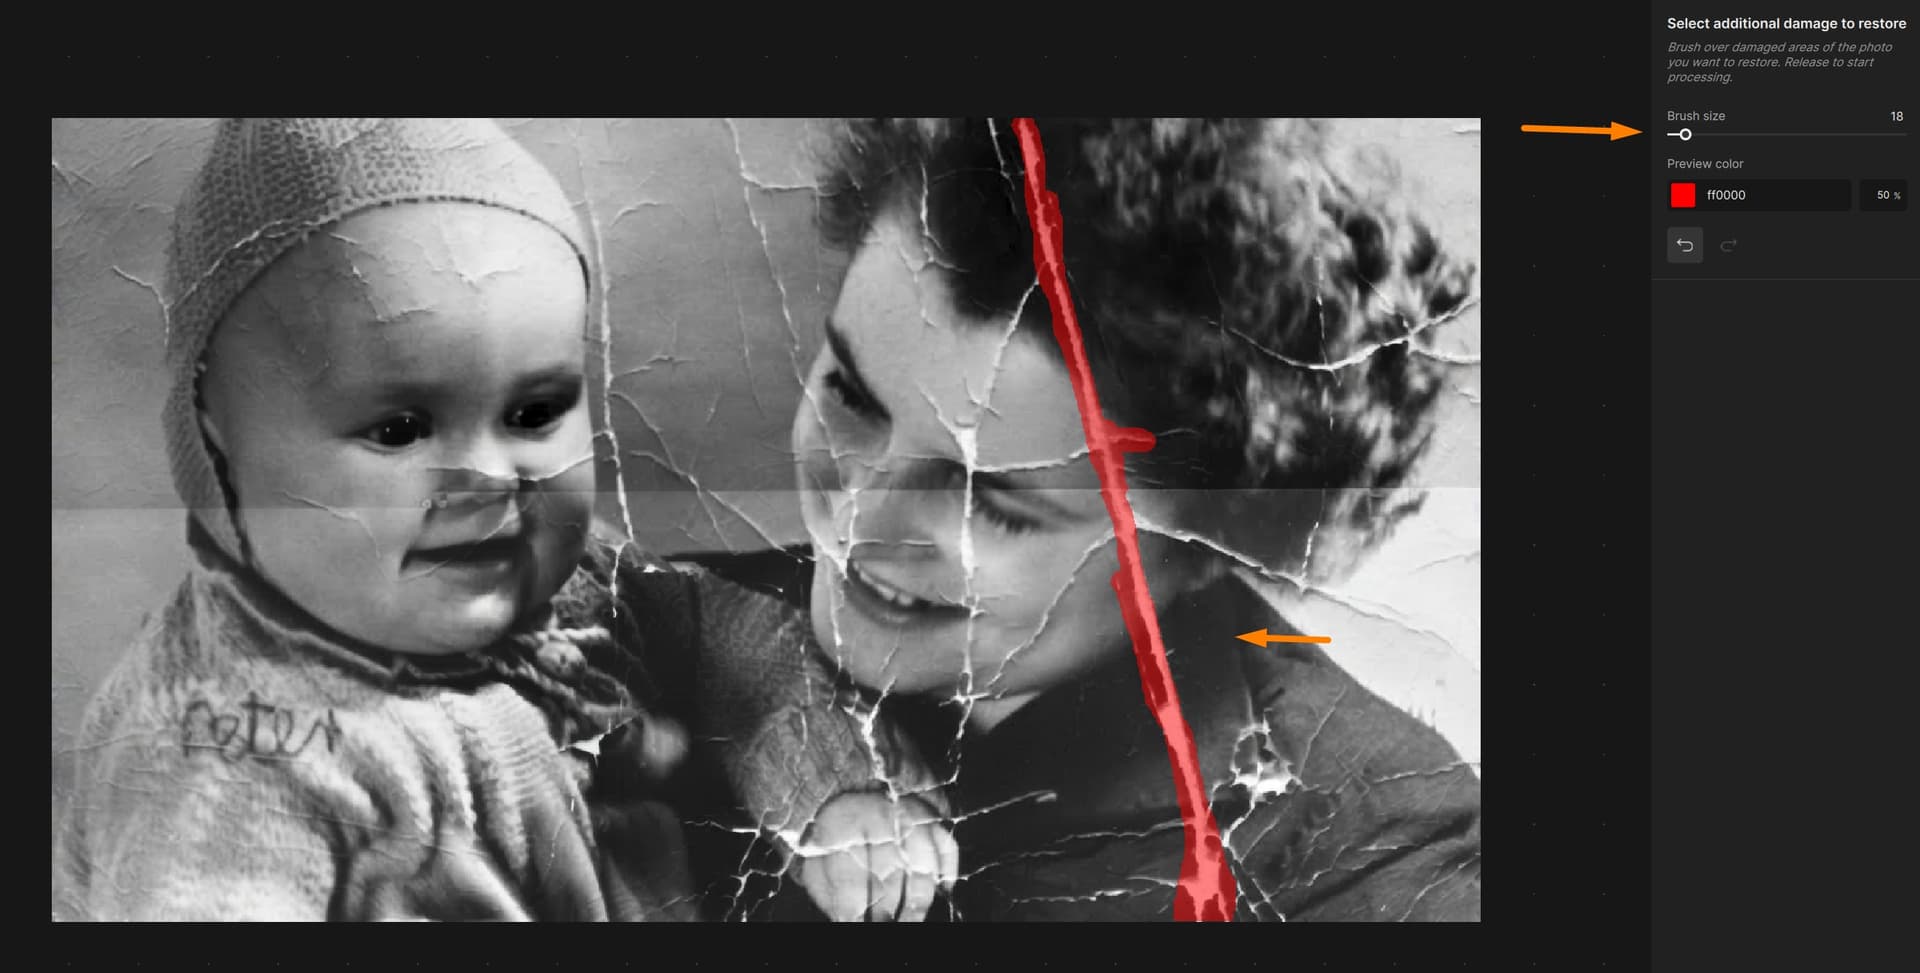
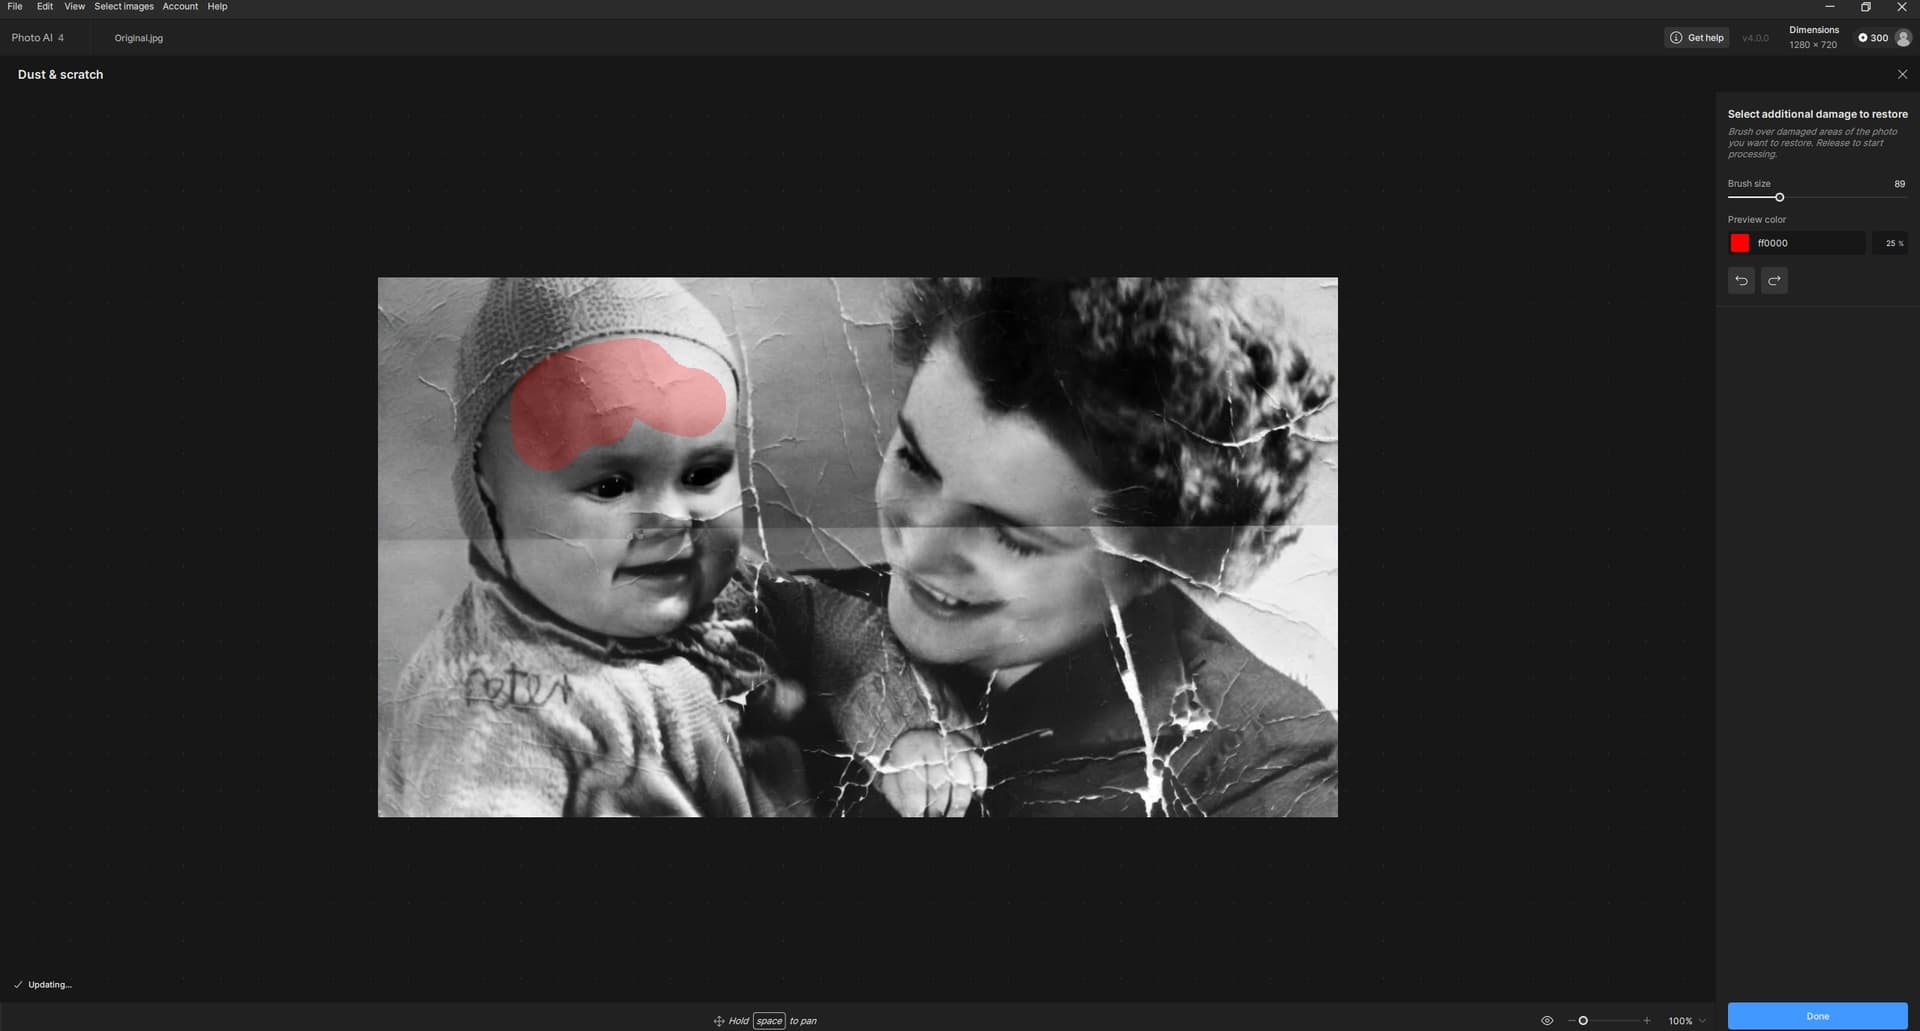
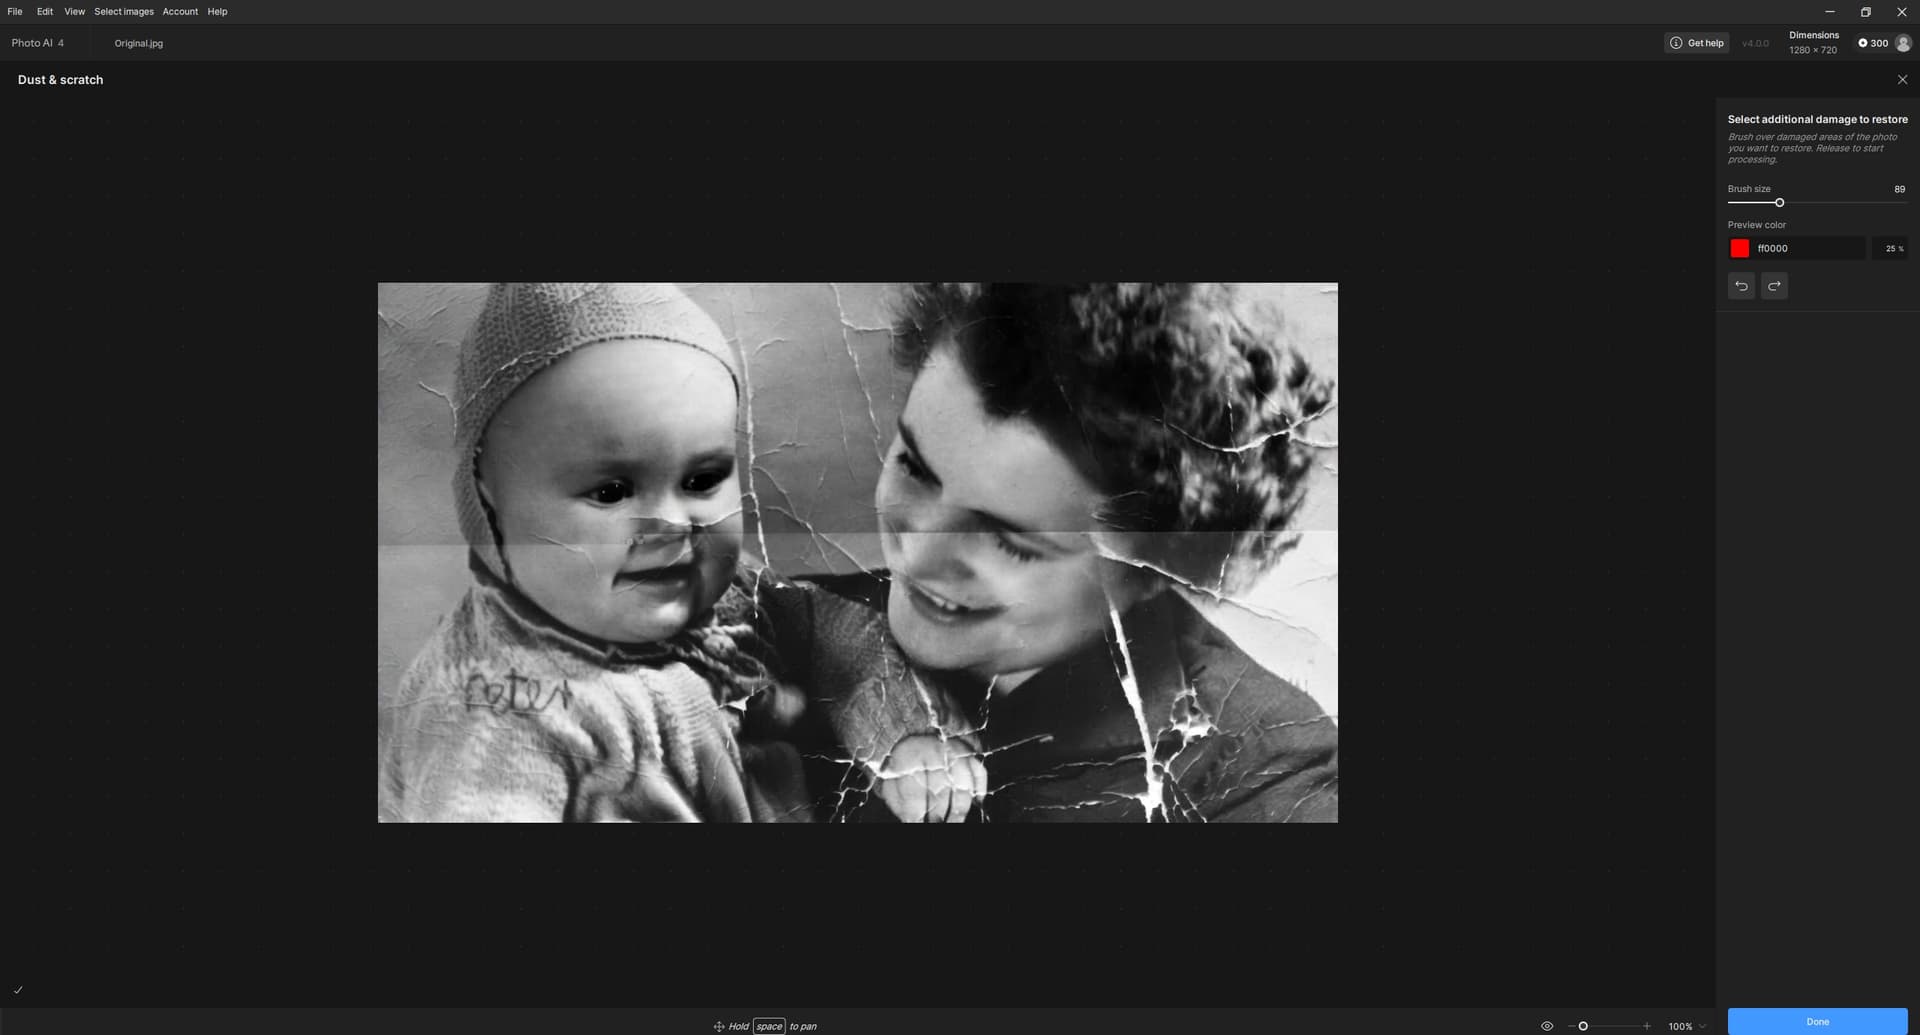
I just used a brush in Dust & Scratch and manually selected the places that needed to be fixed and Topaz Photo restore them. (it’s very fast and quite high-quality, for a full restoration considering that I used three programs it took me no more than 40 minutes.
And I actually you can do better, this is just a quick test, I was just testing a new feature.
Edit in Topaz Photo 4 | Dust & Scratch:
Result:

6 Likes
1.)
2.)
Gigapixel 8 BETA
3.)
Photoshop just to fix the brightness transition.
Sheesh!
Today, still not a one-stop-shop solution! ![]()
I can confirm, it can be done (only!) manually. I tried it out of curiosity. But doing everything that way – that must be a lot of work. Hats off!
1 Like
Thank you. Got it.
You did a lot of manual brush “remove” tool corrections on the large number of scratches that remained after the PAI Dust/Scratch model processing to get rid of them.
Because you use Photoshop, did you compare either using the neural Photo Restoration filter’s scratches removal slider or the Remove Tool in Ps (since you did a lot of remove tool strokes in PAI 4)?
3 Likes
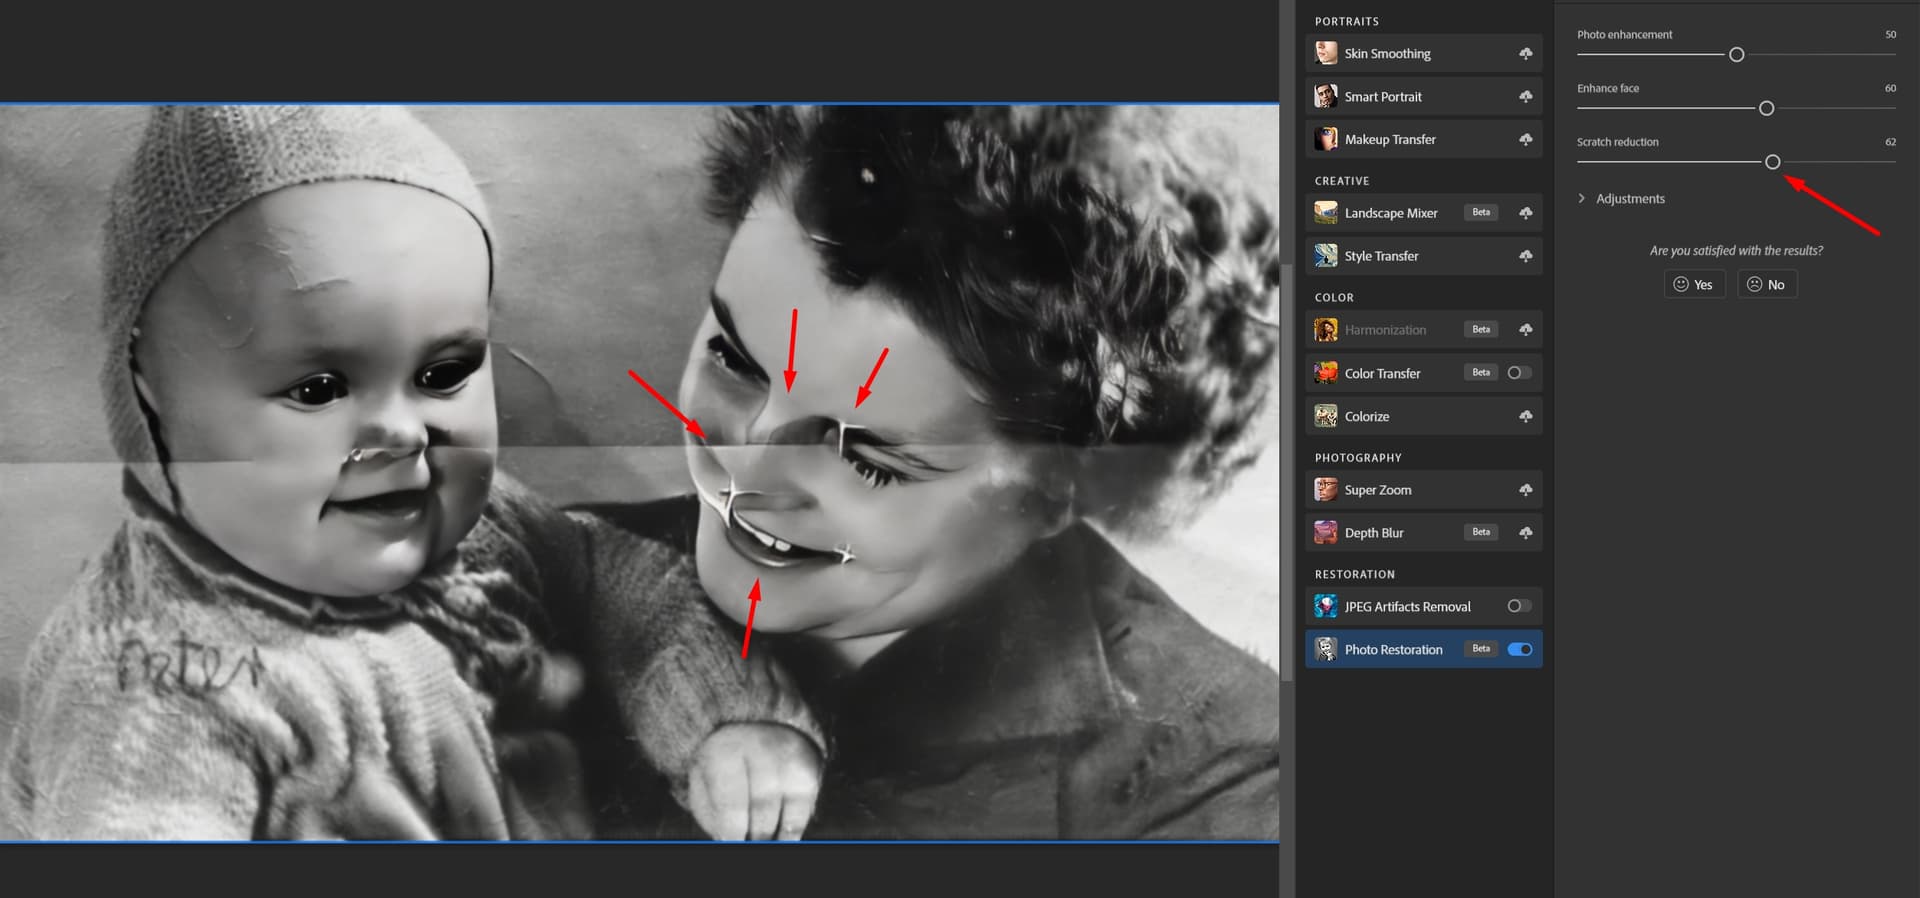
Yes, the neural filter Photo Restoration in Photoshop will remove more defects in one click, but not all, since by increasing the strength of the tool it will remove or spoil the details, so I think you will get a better result manually with TopazPhoto.
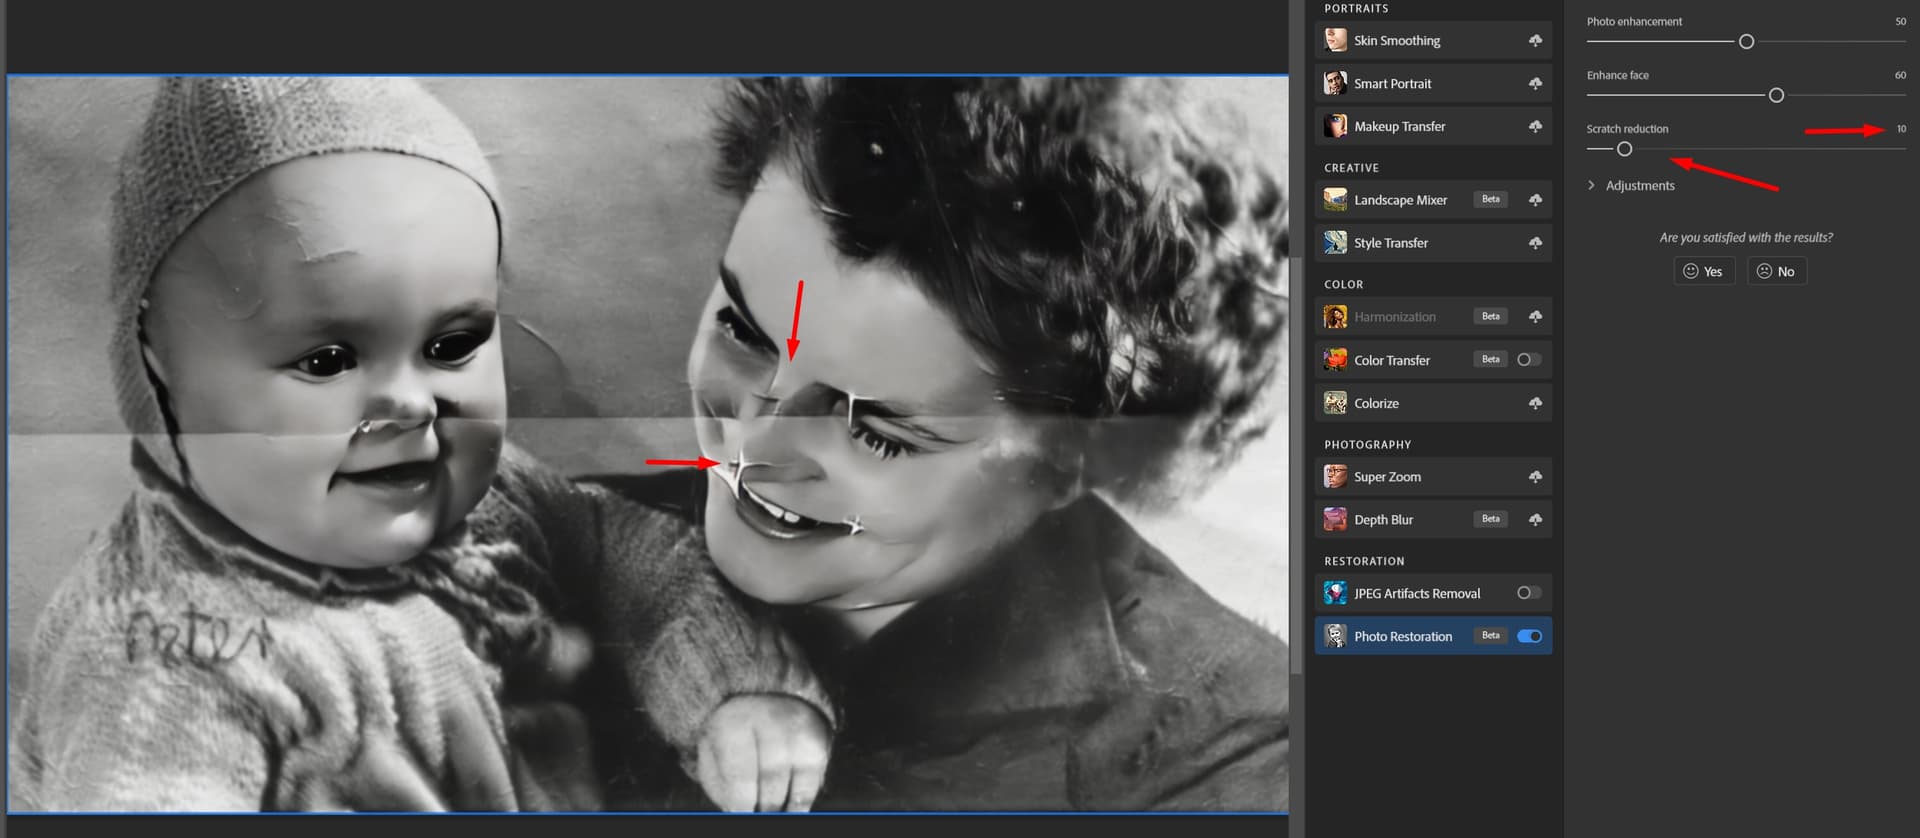
But approximately in the range of values from 10 to 30, the filter removes many image defects more correctly, I think that at the moment you can combine both to perform restoration faster.
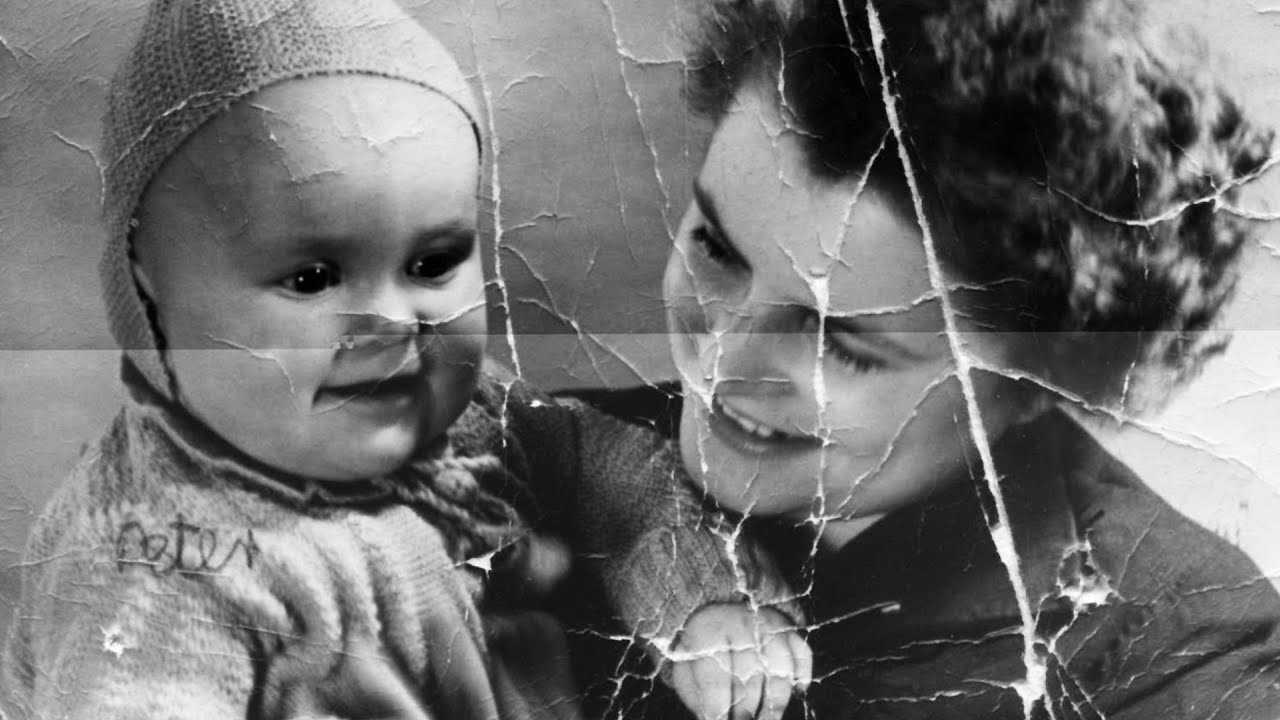
Original photo:
Result of using the Photo Restoration in Photoshop (value 60):
value 10:
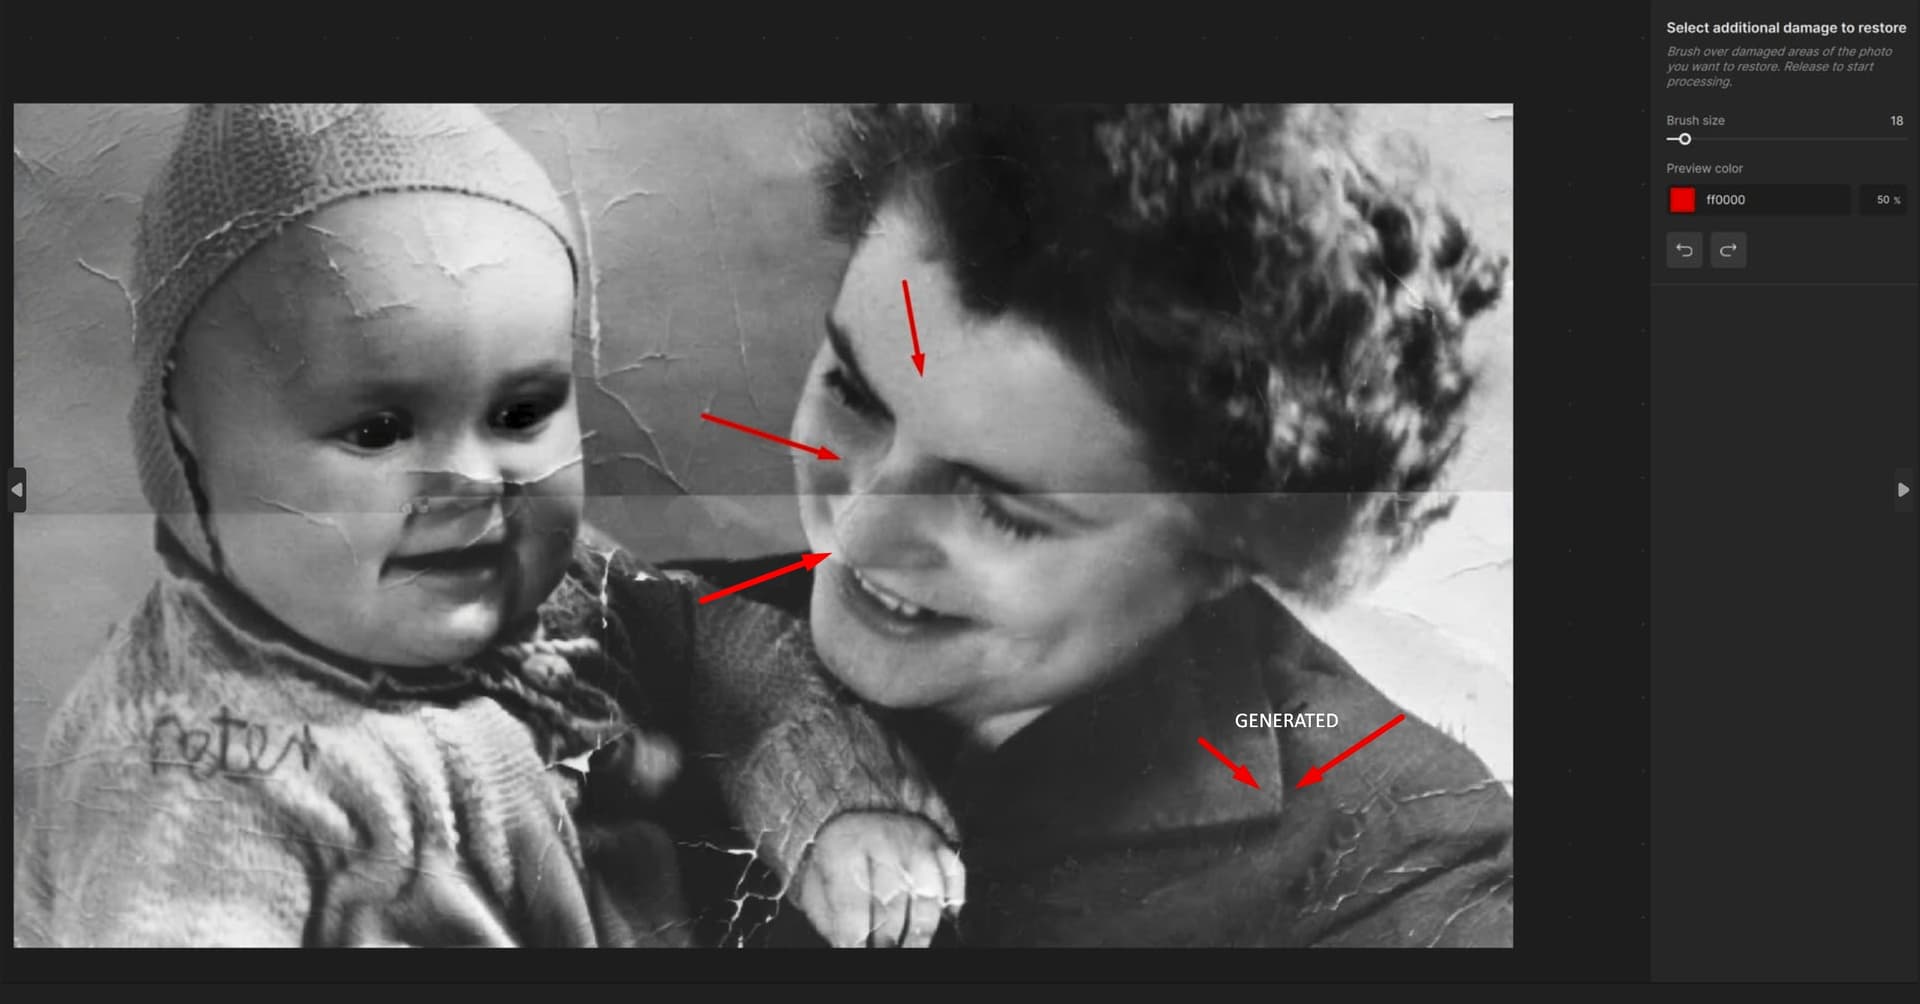
TopazPhoto does it better and you don’t need to select the defect area well, just take a larger brush and select, TopazPhoto also perfectly defines details and generates them, which can be seen on the woman’s collar.
Topaz result:
6 Likes
Interesting. Thanks!
In my tests, the slider was faster (5 seconds in neural vs 60+ secs in PAI). Even if it required some Ps Remove touchups to not pass the tipping point of changing the appearance of key features on my images.
What about the Remove Tool in Ps if doing manual strokes with a brush in both Ps & PAI? Do you see any difference between those two manual remove processes (either results or speed - which could be impacted by computer processing power too..)? Again, for me on my system & on images with a mix of scratch types it was faster with the Ps Remove tool because it didn’t involve the slow, initial Dust Scratch processing or slower PAI remove processing. At least with the variety of images I compared..
But then, Ps may become unaffordable to hobbyists in one month and its value could become moot.
3 Likes