The problem with third-party photo apps is that you’re limited to 12 or 12.5 megapixels. You can’t use the full potential of your camera sensor if it can reach 24 or 50 megapixels. Only the smartphone’s native camera app can utilize the full potential of the camera sensor(s).
If you want a proper test, go and retrieve the source image. And run the test yourself.
That’s spot on! You’re completely right about that limitation.
That said, even though missing out on the full 50 MP canvas sounds like a drawback, shooting a 12 MP DNG through a third-party app still gives you some fantastic editing advantages:
True Raw Data:
You get full control over highlight recovery, shadow boosting, white balance, and noise reduction in post-processing, completely bypassing the phone’s heavy JPEG sharpening and smudgy noise suppression.
Plenty of Resolution:
A 12.5 MP file gives you roughly 4080 × 3060 pixels. That is more than enough for crisp monitor viewing, social sharing, and even solid physical prints up to 11×14 inches.
So yes, as you mentioned, if you strictly want a full, uncompressed 50 MP file, you really need a phone with a native RAW/Pro mode that explicitly supports full-sensor exports, which is usually reserved for top-tier flagships.
To give a little context on why phones handle 50 MP differently than traditional digital cameras:
A standard camera uses a traditional Bayer grid where red, green, and blue pixels sit right next to each other in an alternating pattern (R-G-R-G), capturing distinct color data at every single point.
Smartphone sensors use a Quad-Bayer array instead. Rather than alternating single pixels, they group identical colors together in 2×2 blocks (four reds together, four blues, four greens).
Here is how that plays out when you take a shot:
Default 12.5 MP Mode (Pixel Binning):
The phone combines each 2×2 block to act as one large “super-pixel.” This turns the sensor into a native 12.5 MP workhorse with great low-light performance, low noise, and excellent dynamic range.
Full 50 MP Mode (Remosaicing):
To force a 50 MP image, the phone’s processor uses clever software tricks to re-map those color blocks back into a standard grid.
What this means in the real world:
Even in bright daylight, a forced 50 MP shot (8160 \times 6120 pixels) won’t give you 4x the actual detail of a 12.5 MP file, it’s usually closer to a 1.5x or 2x bump in resolution, often at the expense of higher noise and reduced dynamic range. And in low light, 50 MP mode drops off quickly because those tiny sub-pixels just can’t catch enough light on their own.
At the end of the day, high megapixel counts aren’t the be-all and end-all especially with tools like Topaz in our editing arsenal, chasing ultra-high phone megapixels really isn’t necessary anymore! A clean 12 MP DNG gives you rich, uncompressed raw data, and if you ever need extra resolution for a print, Topaz can easily upsize it with far better detail and less noise than the phone’s native 50 MP mode.
Hope that helps
Yeah, I know. I always shoot in RAW just for that reason.
I’ve also noticed that shooting at 50 megapixels with a smartphone produces photos with a false resolution. However, after processing with Wonder 3/3.5, the quality is better than if I had shot at 12 megapixels with the native app and then enhanced it with Wonder 3/3.5. I’ve noticed this on my Samsung Galaxy S25 Ultra. The advantage of the native app is that you can digitally zoom and use all the camera sensors. The problem with third-party apps is that you can only use one or two of the four sensors I have. It uses the ultra-wide-angle (0.6x) and wide-angle (1x) lenses. And when you zoom, the resulting photo isn’t actually zoomed. It doesn’t take digital zoom into account. Unless you set the shooting mode to JPEG. That’s the only limitation of third-party apps.
An improved version of one of my old photos. Still the red panda, but with a bit more processing. I used Topaz Photo Super Focus for better focus. Then, I went through several passes with different Gigapixel models. Specifically, Wonder 3 and 3.5, + Standard Max, + Recover v2 in None mode + ON1 Resize 2026 and Subtle Realistic Redefine.
A red panda walking on a platform.
Subsequently, I combined it with an improved version via Flux2 Klein 9B, itself subsequently improved with the Standard, Standard Max, Wonder 3.5, and subtly realistic Redefine models.
A red panda walking on a platform. final
Honestly, I’m really happy with the result. It took me quite a while, but the end result was worth it.
1 Like
I just took the original image from the post and cut out the girl’s face from it, enlarged it on the screen purely mechanically, scaling it in primitive Paint; despite the coarse pixelation, it is still better than the cutout in the post; in particular, the white of the eye is visible. There’s no question of an AI-processed photo.
Yes you’re right, and that’s a great point about Wonder 3/3.5
Totally agree about feeding more pixels into Topaz. Even if the phone’s 50 MP file is doing a bit of “software trickery” to get there, giving Wonder 3 a massive 50-megapixel canvas gives the AI model so much more raw detail to work with. It makes sense that the final image comes out looking way cleaner than upscaling a 12 MP shot from scratch!
And I couldn’t agree more about the frustration with third-party apps and multi-camera setups. It’s a real pain that phone makers lock the zoom and telephoto lenses behind their own native apps, leaving apps like Lightroom stuck with just the main cameras.
Sounds like your S25 Ultra Shooting at 50 MP and letting Wonder 3 work its magic sounds like a great setup.
Thanks for sharing your results, it’s always great seeing your image with this kind of real-world testing!
Andy
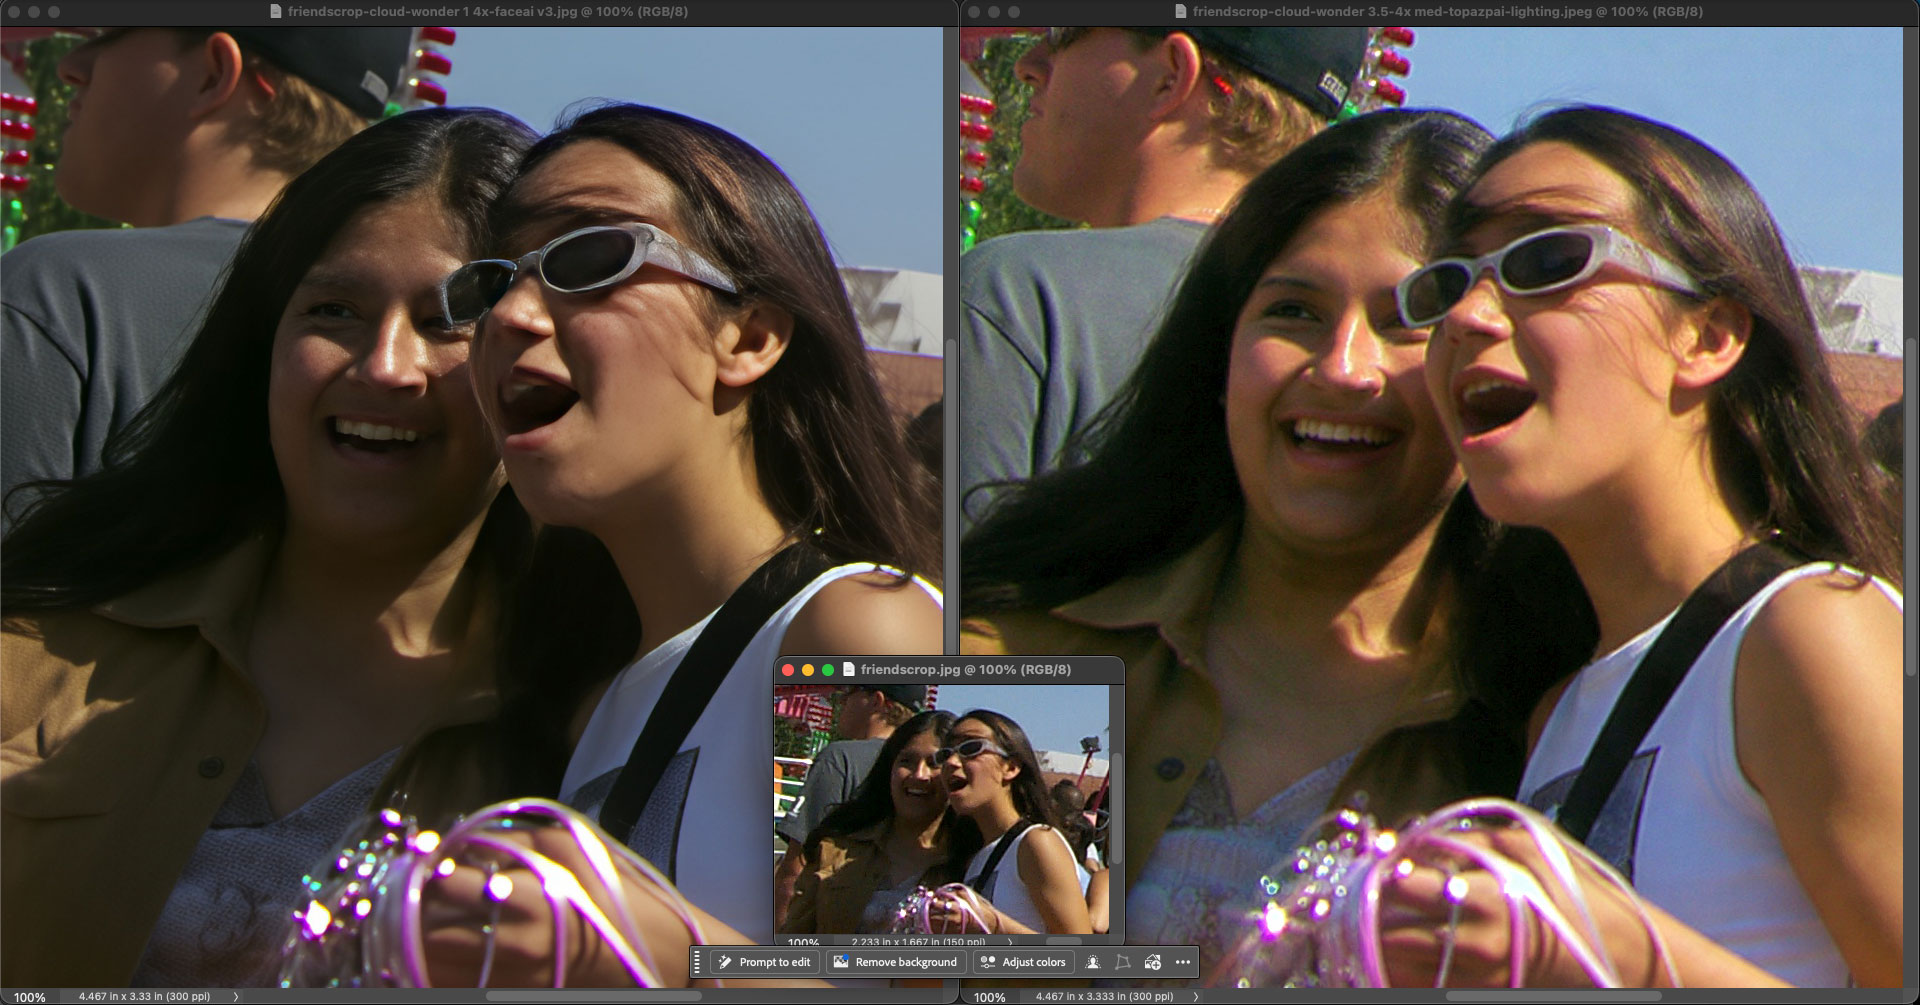
In my tests, Topaz Wonder 3.5 was the best model for the types of digital images I tried, as shown here:
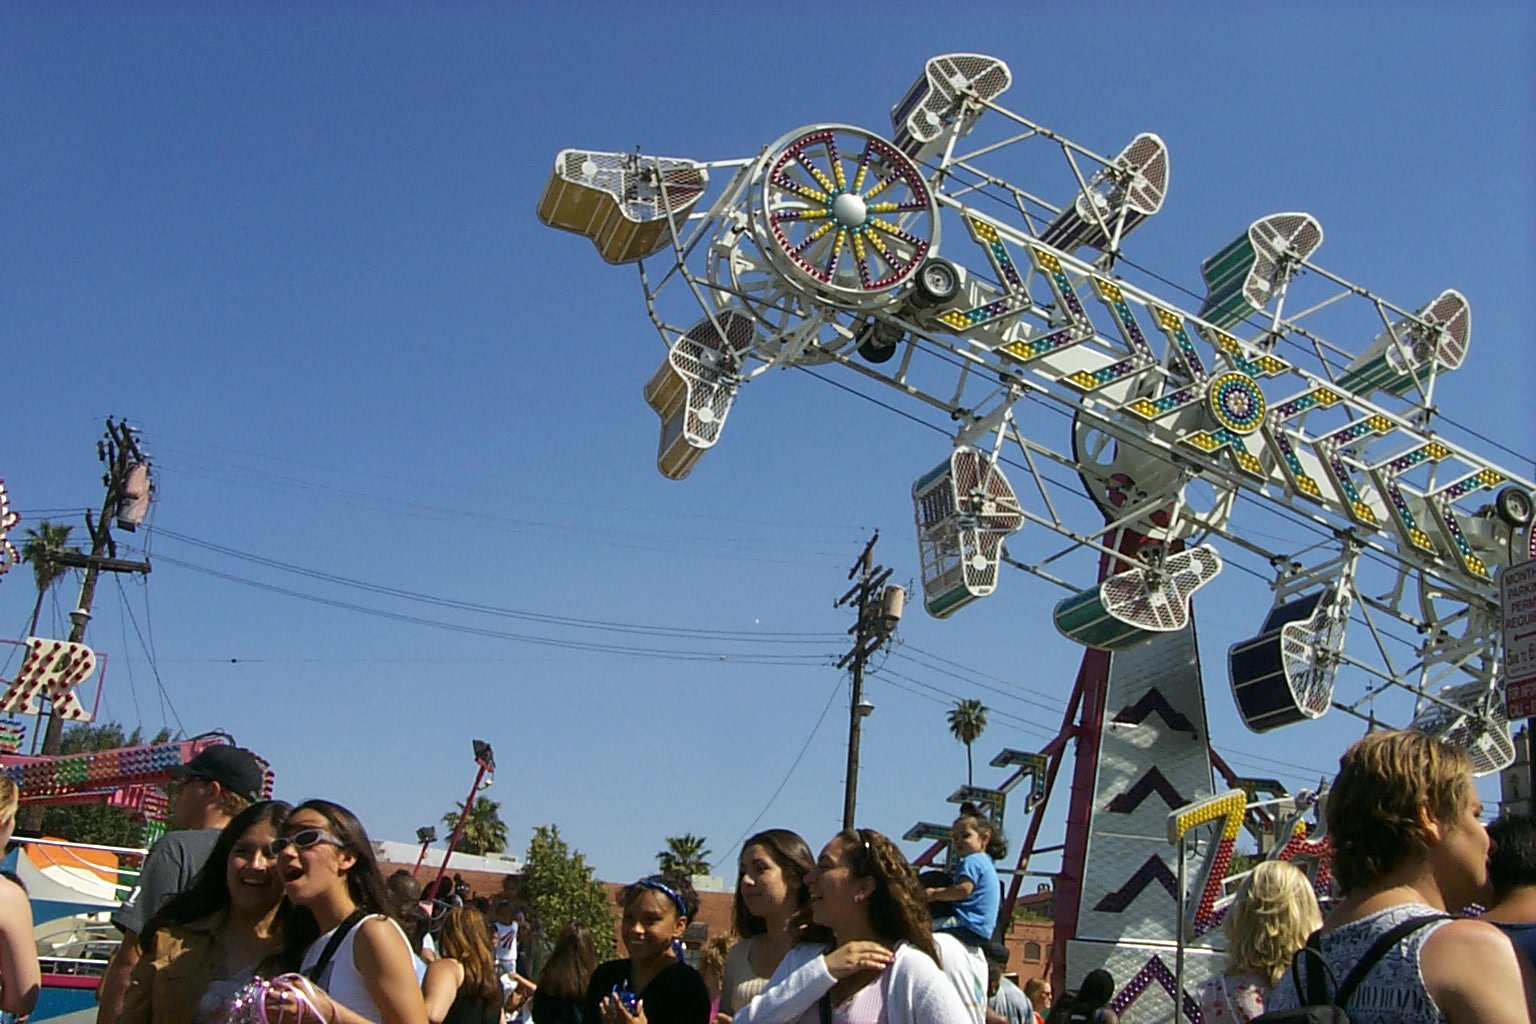
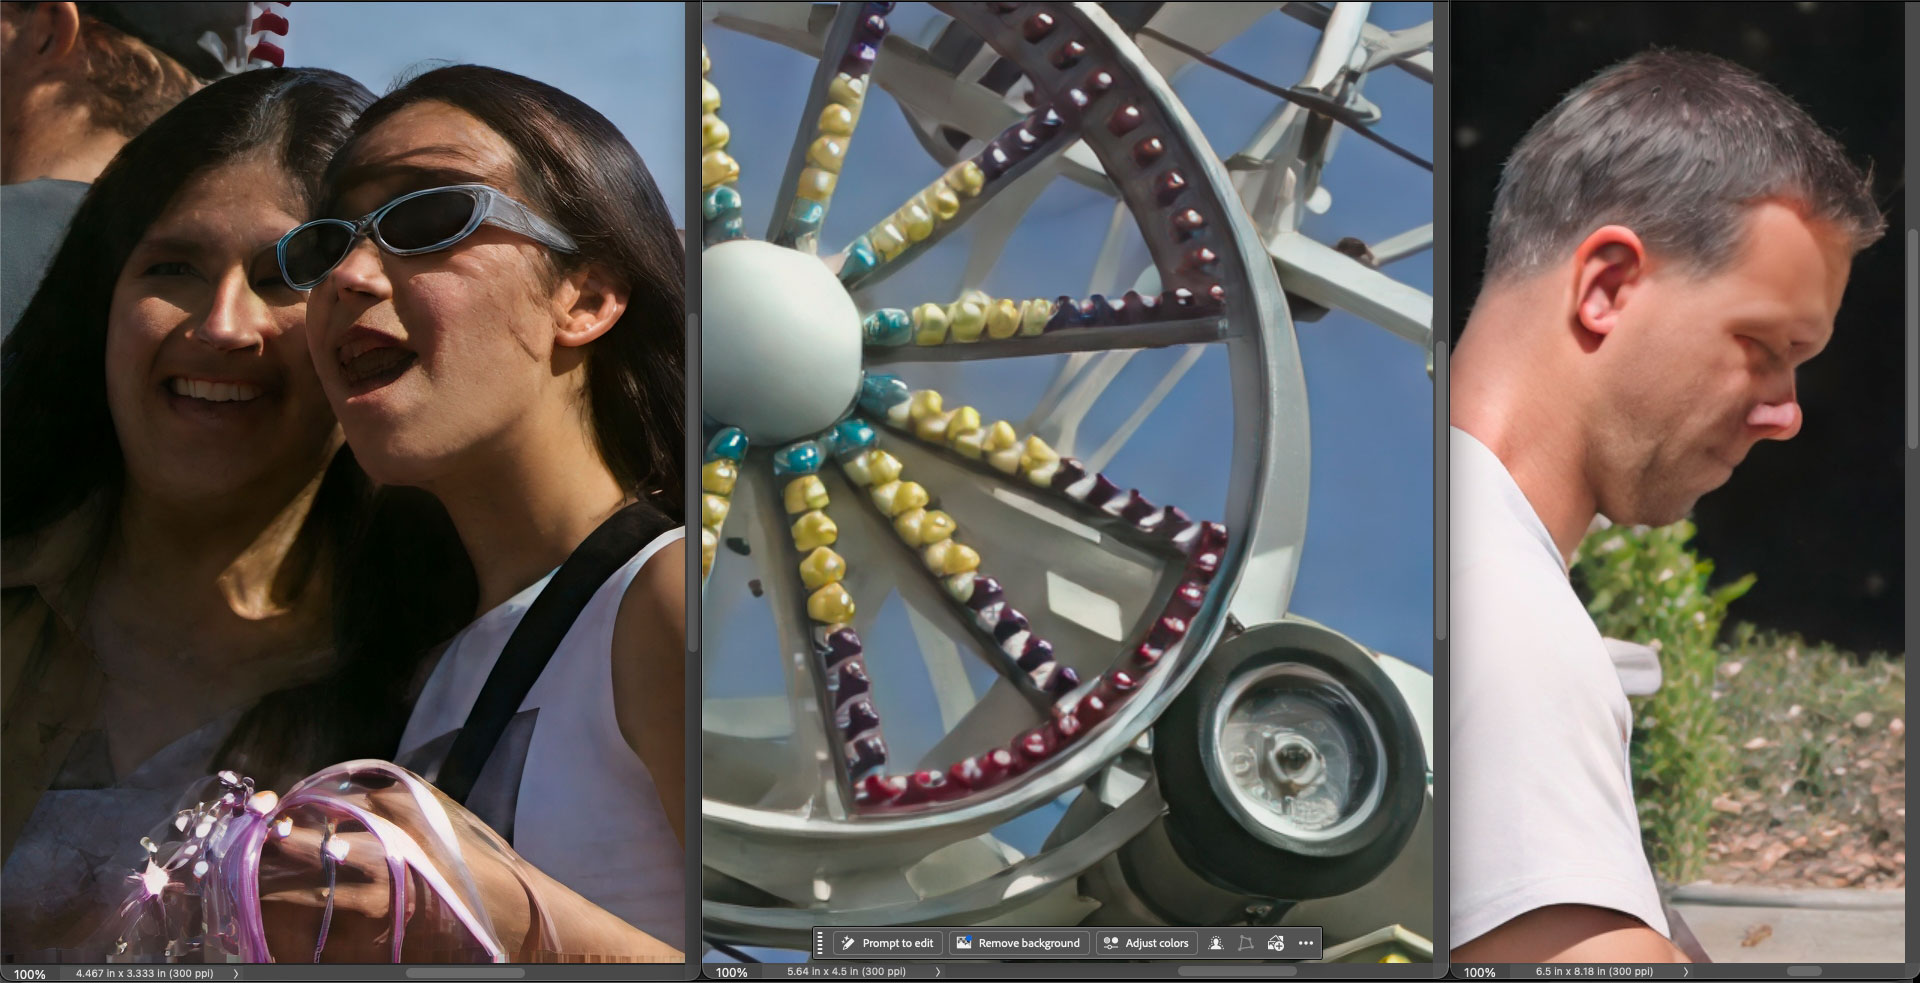
Kodak DC265 1-Megapixel 1999 street grabshot (original posted below). I cropped the girls from lower left and enlarged them 4X in Gigapixel with various models. Wonder 1 vs. 3.5 shown below (result popped in Topaz Photo>Lighting):
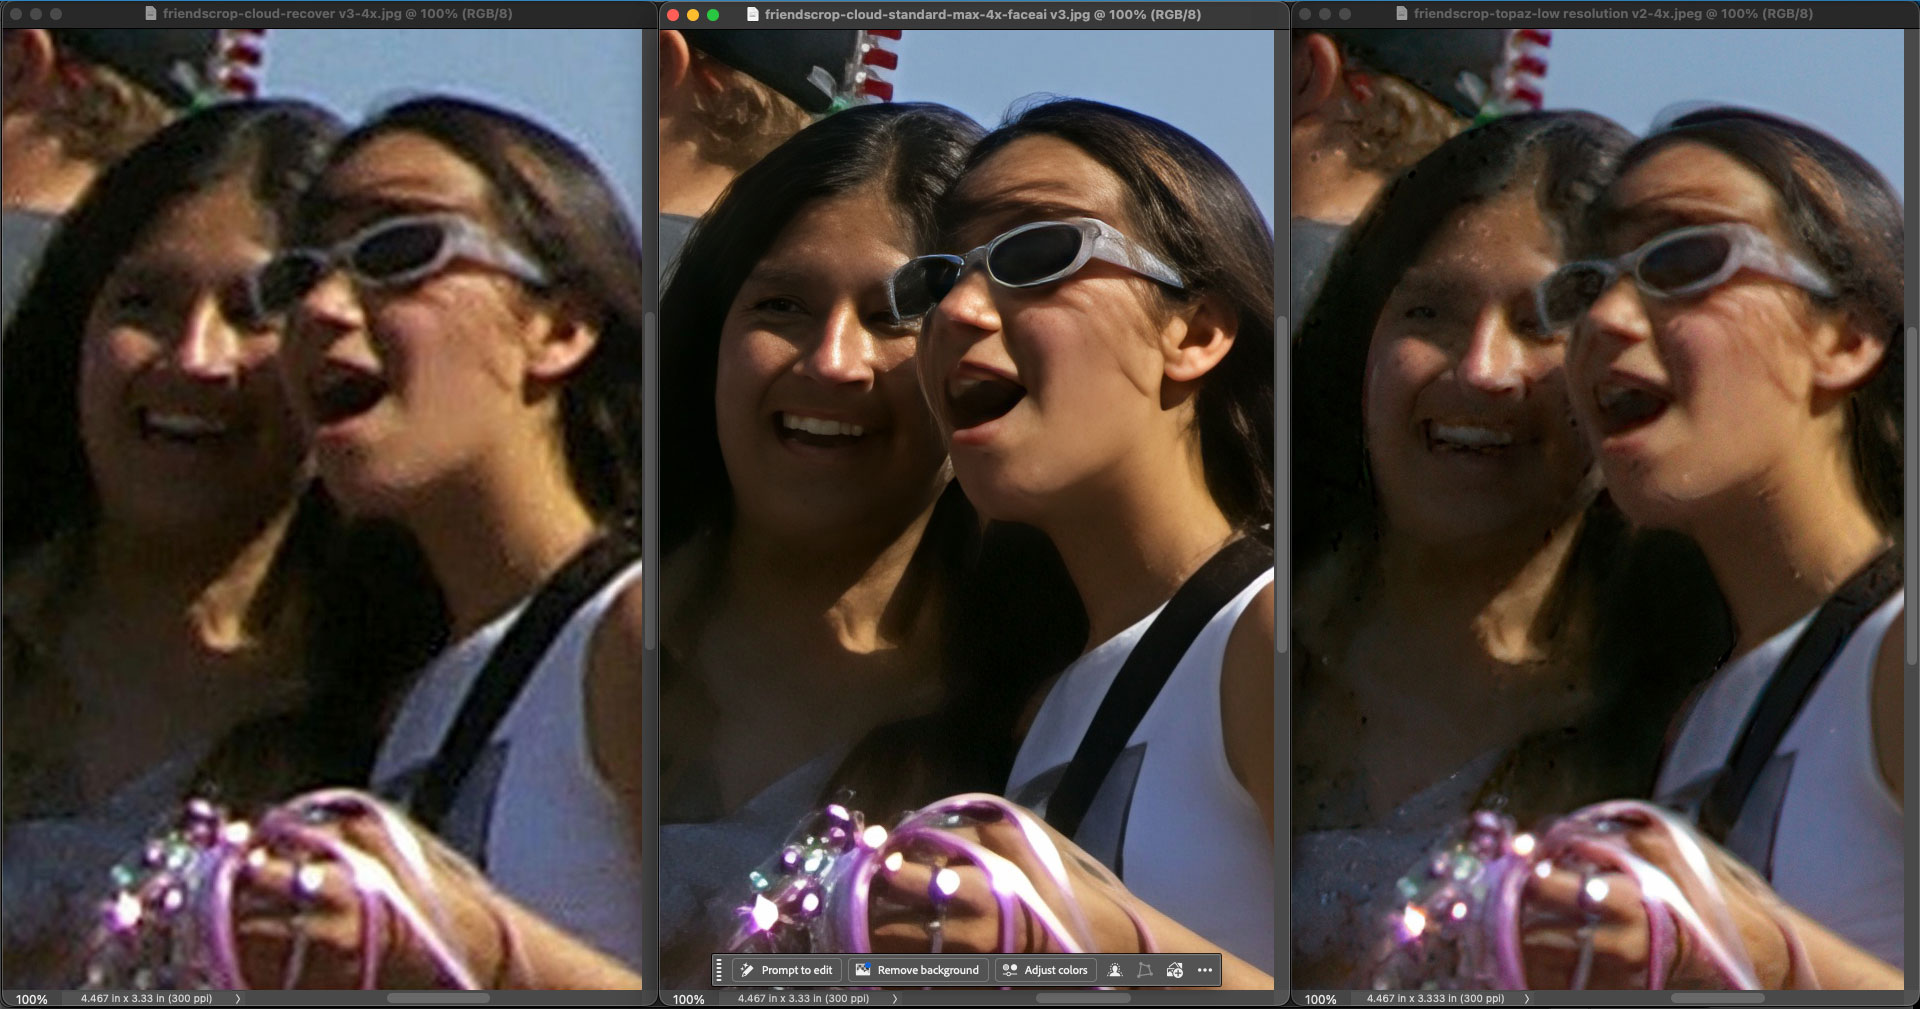
Topaz model fails (L-R): Recover, Standard Max with face recovery, Low Resolution:
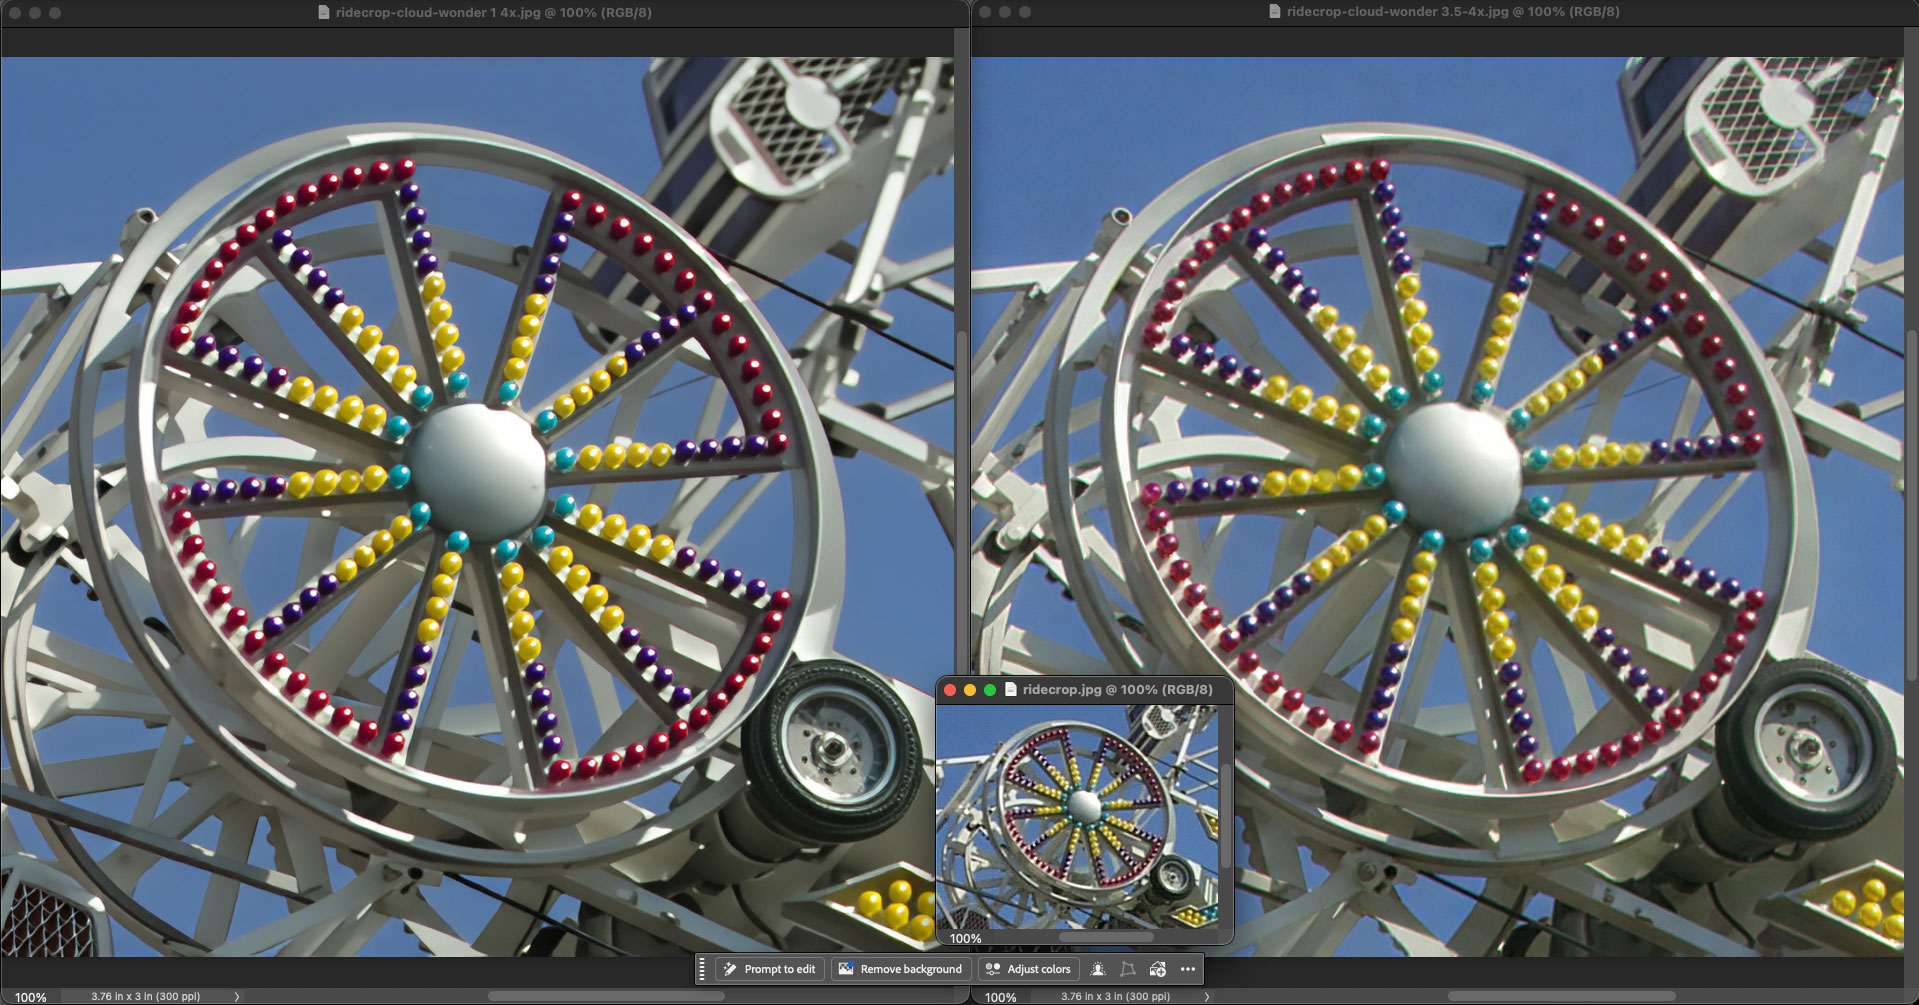
From the same frame, part of the mechanical ride, Wonder 1 vs. 3.5:
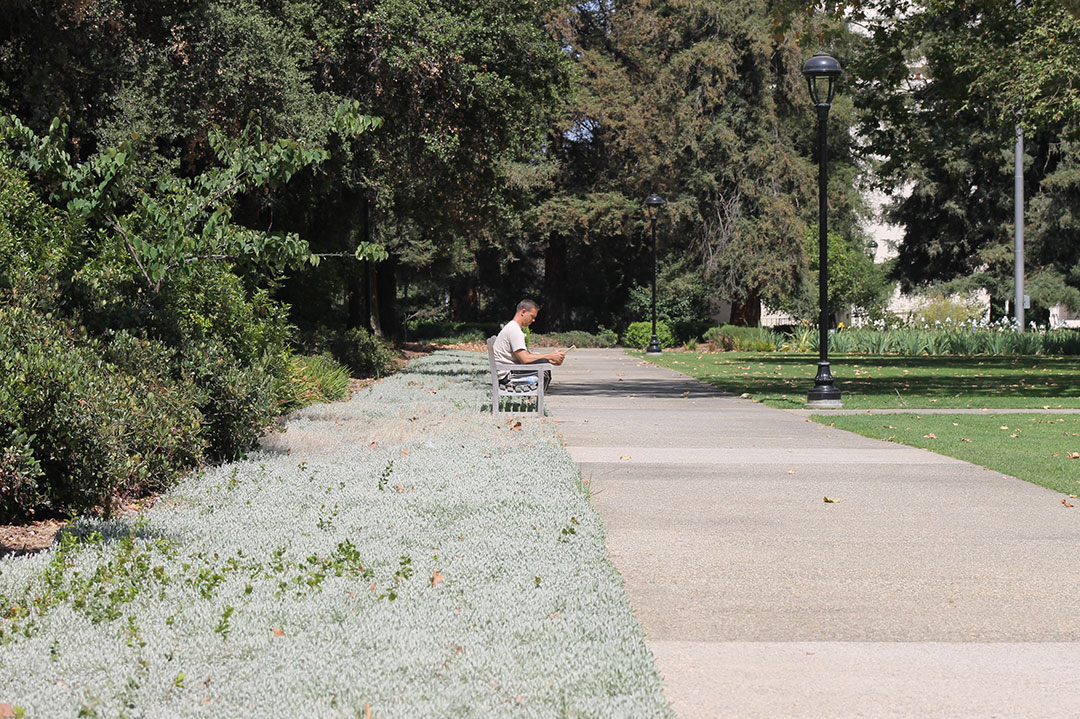
The man on the bench was shot in 2014 with a Canon zoom lens at 75mm (full frame reduced here, CR2>JPEG). This time I did 6X enlargements as above:
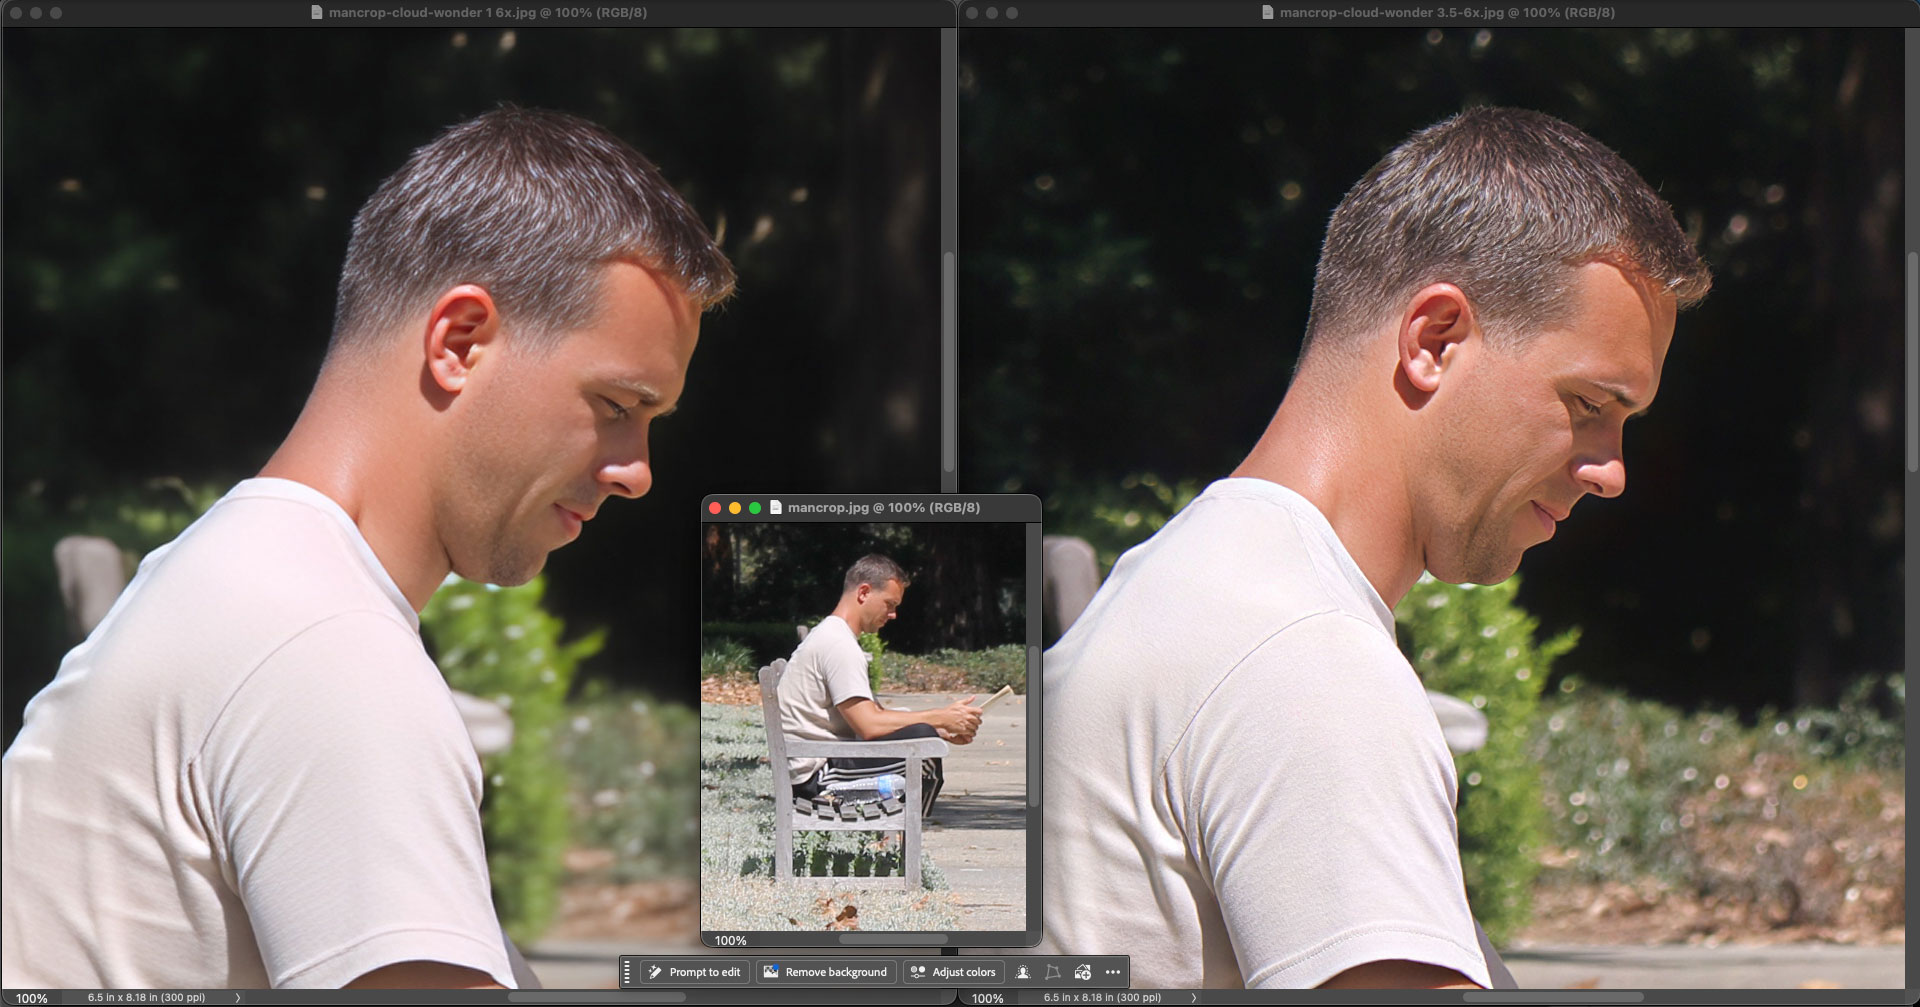
The competition can offer certain creative features that Topaz does not include in their apps, but generally cannot compete with quality of upsizing:
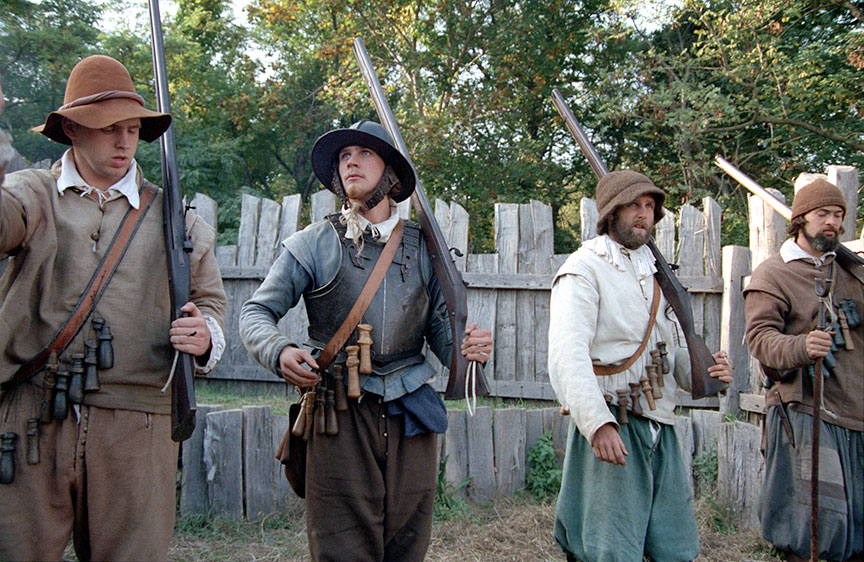
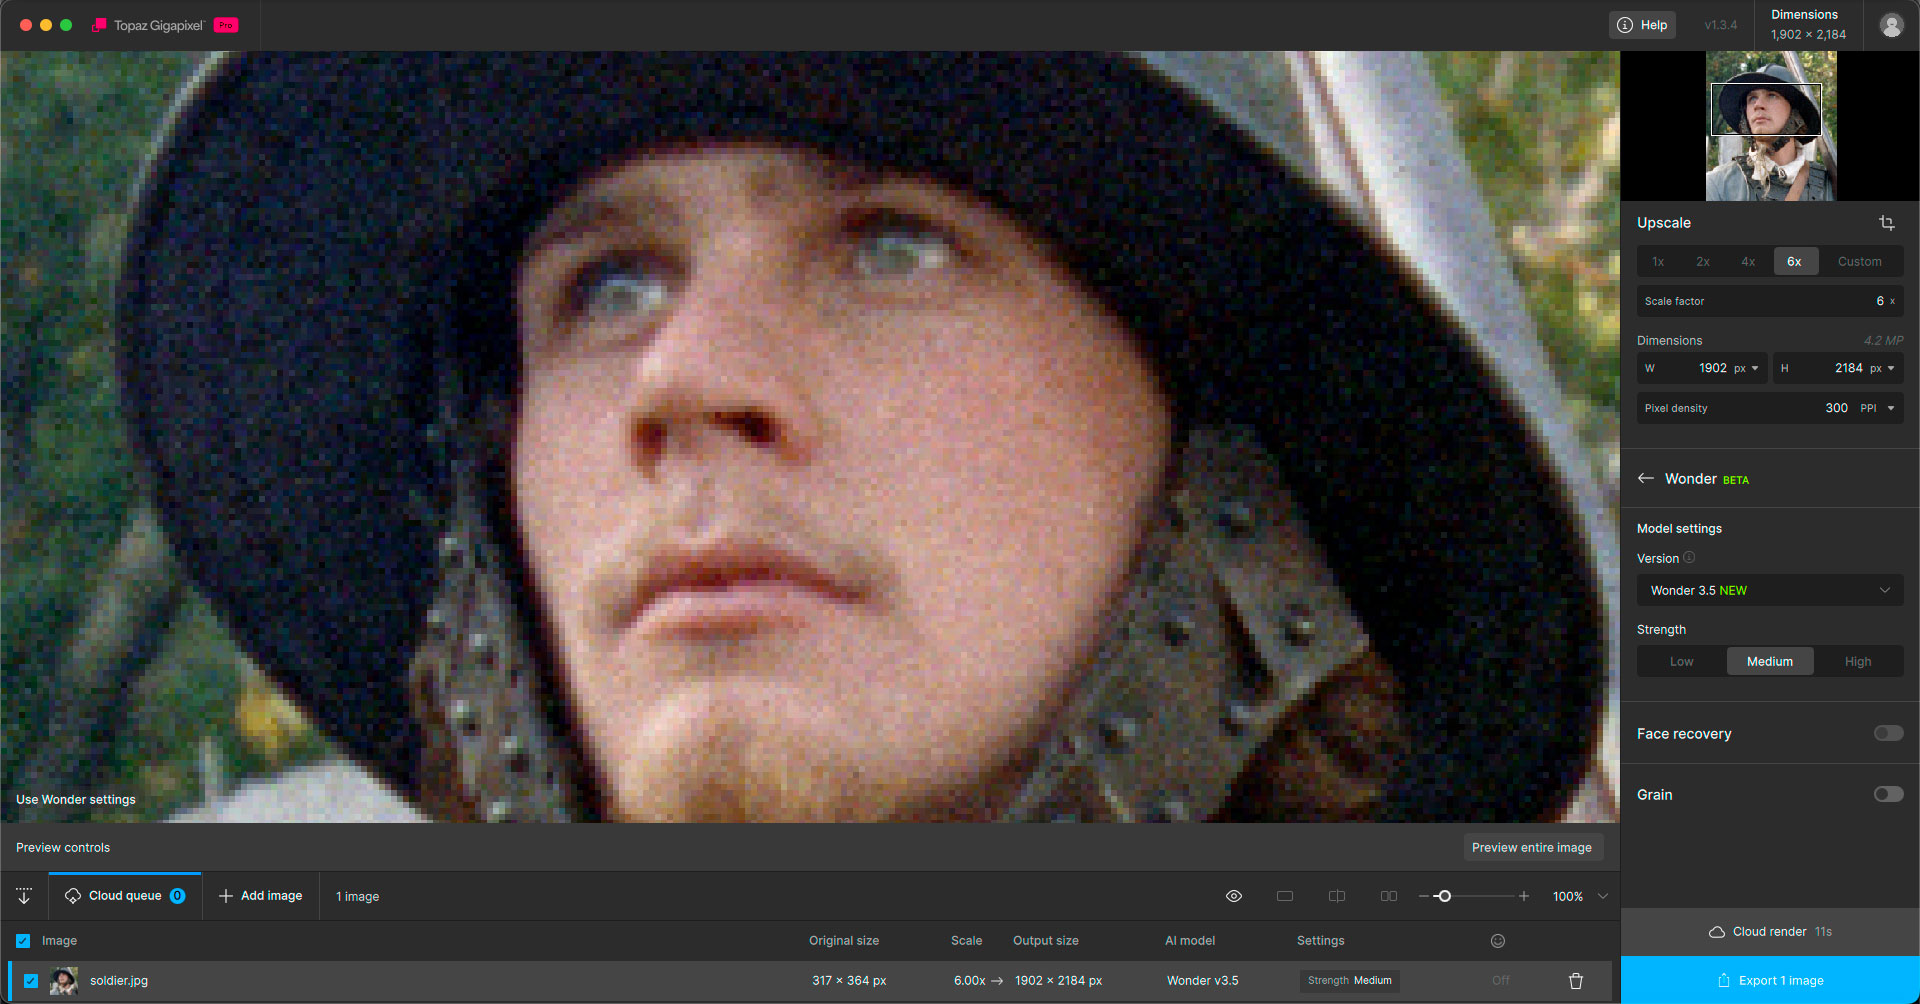
1990s 35mm color negative at 6X with Wonder 3.5:

5 Likes
I like the improved detail in Wonder 3.5. That said, I prefer Wonder 1 for its softer background blur. So sometimes a combination of the two versions can be quite good.
The recovery is impressive. 
2 Likes
 Not bad.
That I don’t know. 
Topaz Photo didn’t complain! 
I did that only because the folder name for the model is the same, as for Wonder 3, and that made me try.
Is this an example of a third party licensing Wonder 3.5 for commercial use?
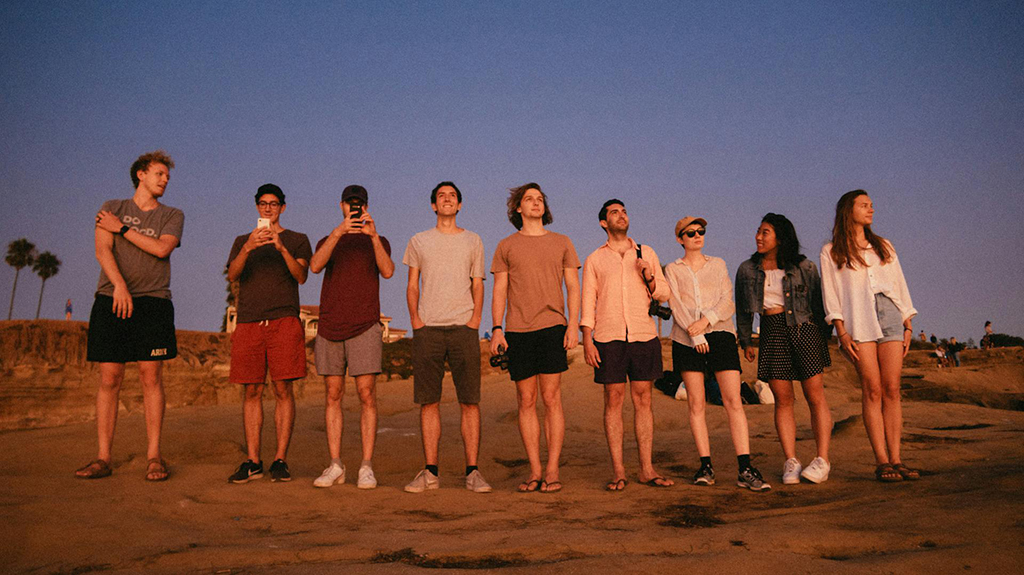
This is the original - i think what you’re seeing is the example image where I stacked the enhancement on top.
2 Likes
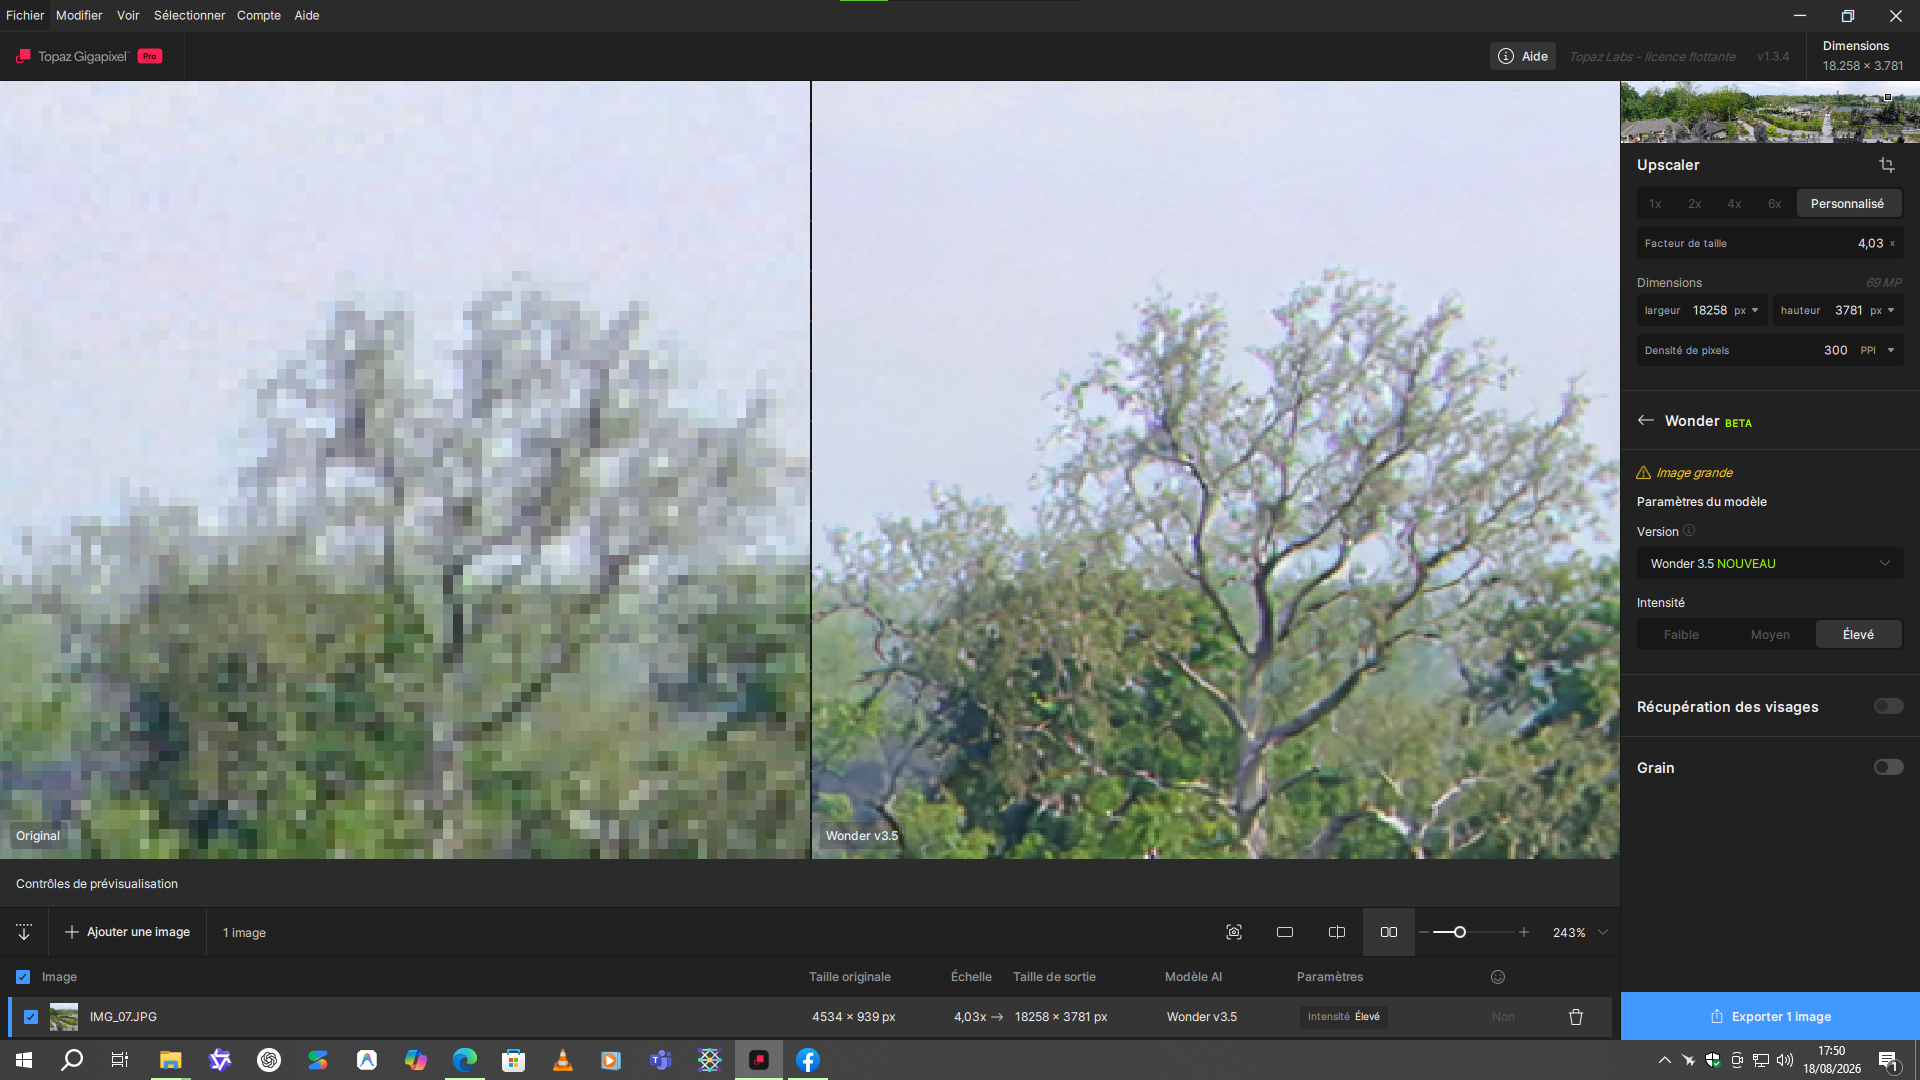
I love Wonder 3.5. Here I’m enhancing an old photo from 2013 at Pairi Daiza. I used an 8-megapixel Canon Powershot compact camera back then. With this one, upscaled by 4.03x, I’ve recovered some really good detail.
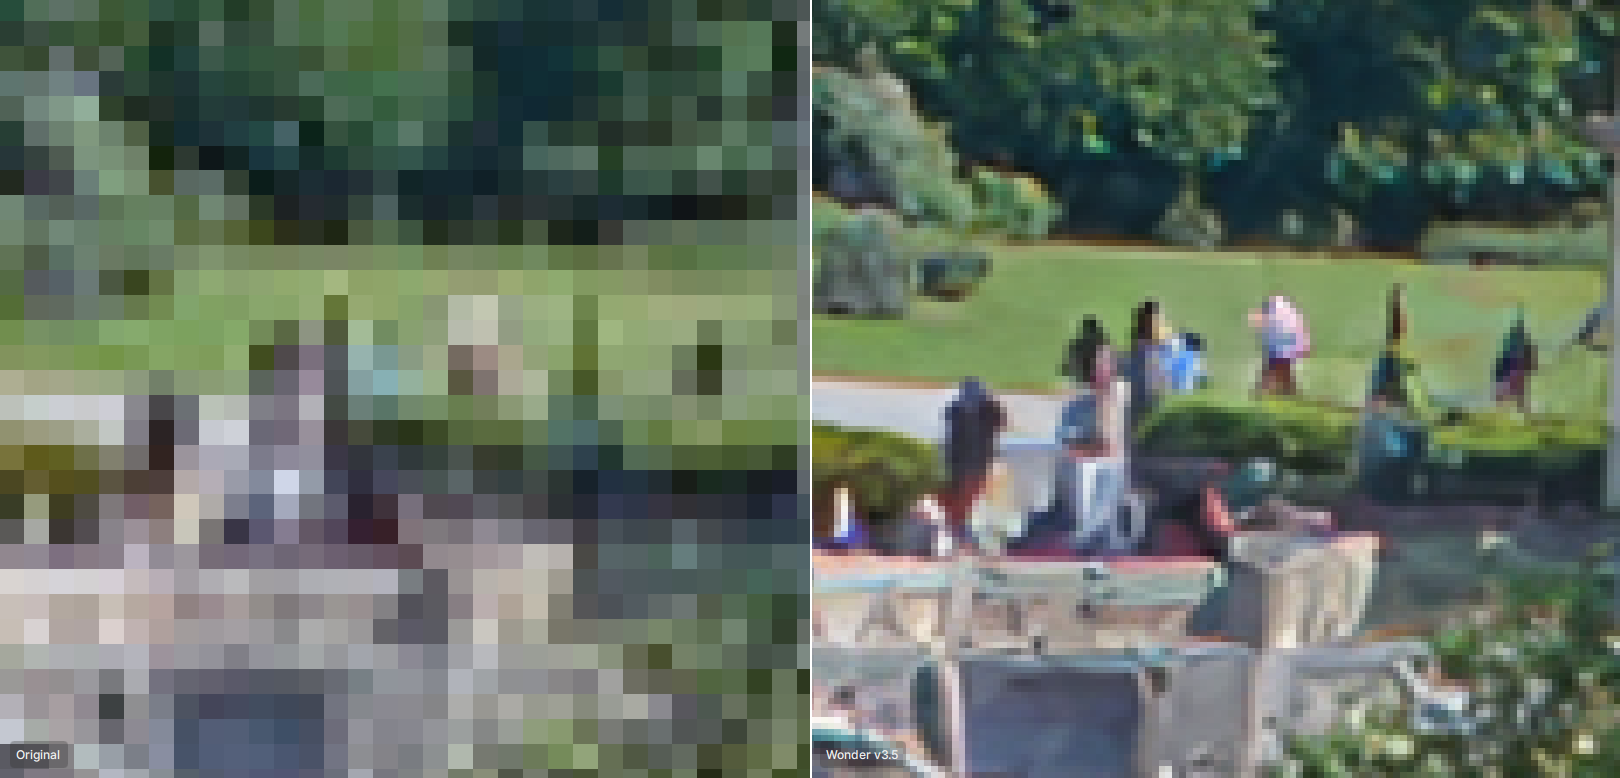
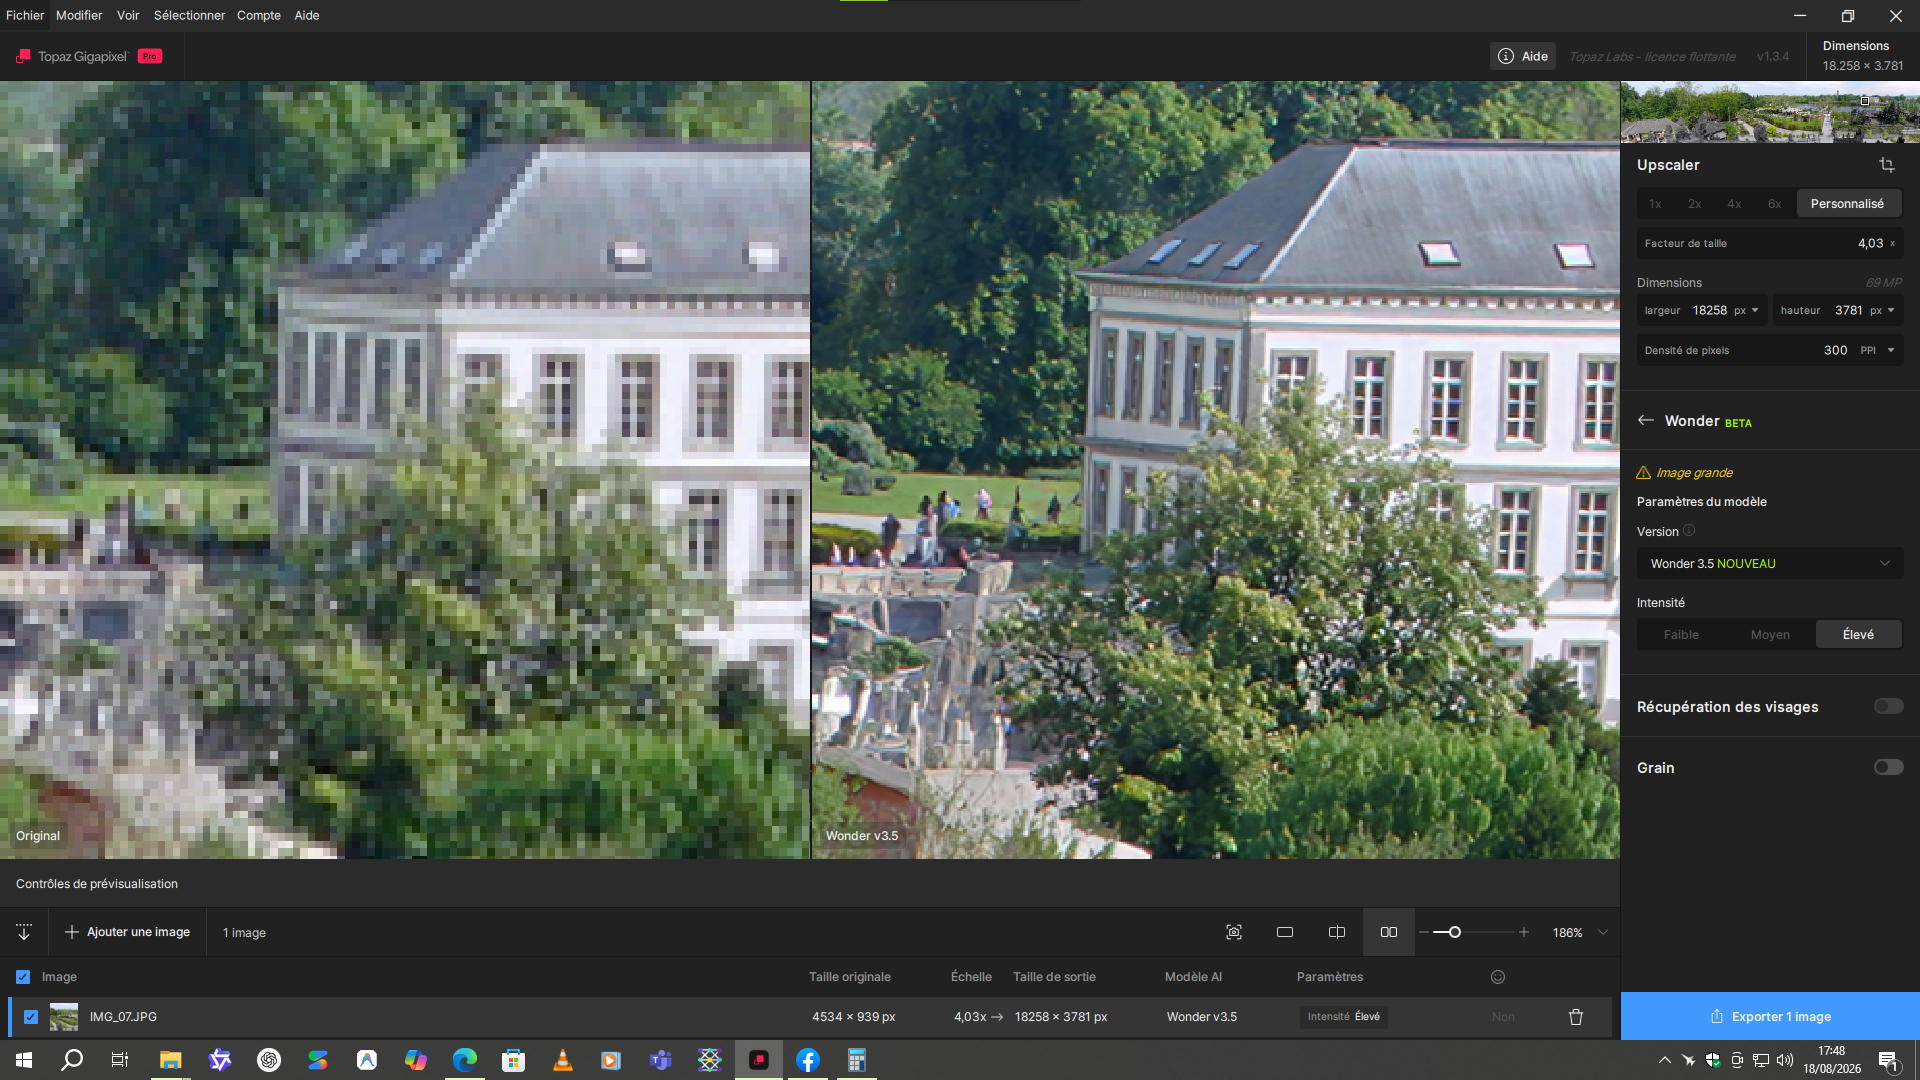
The water quality is really poor, as are the rest of the image textures.
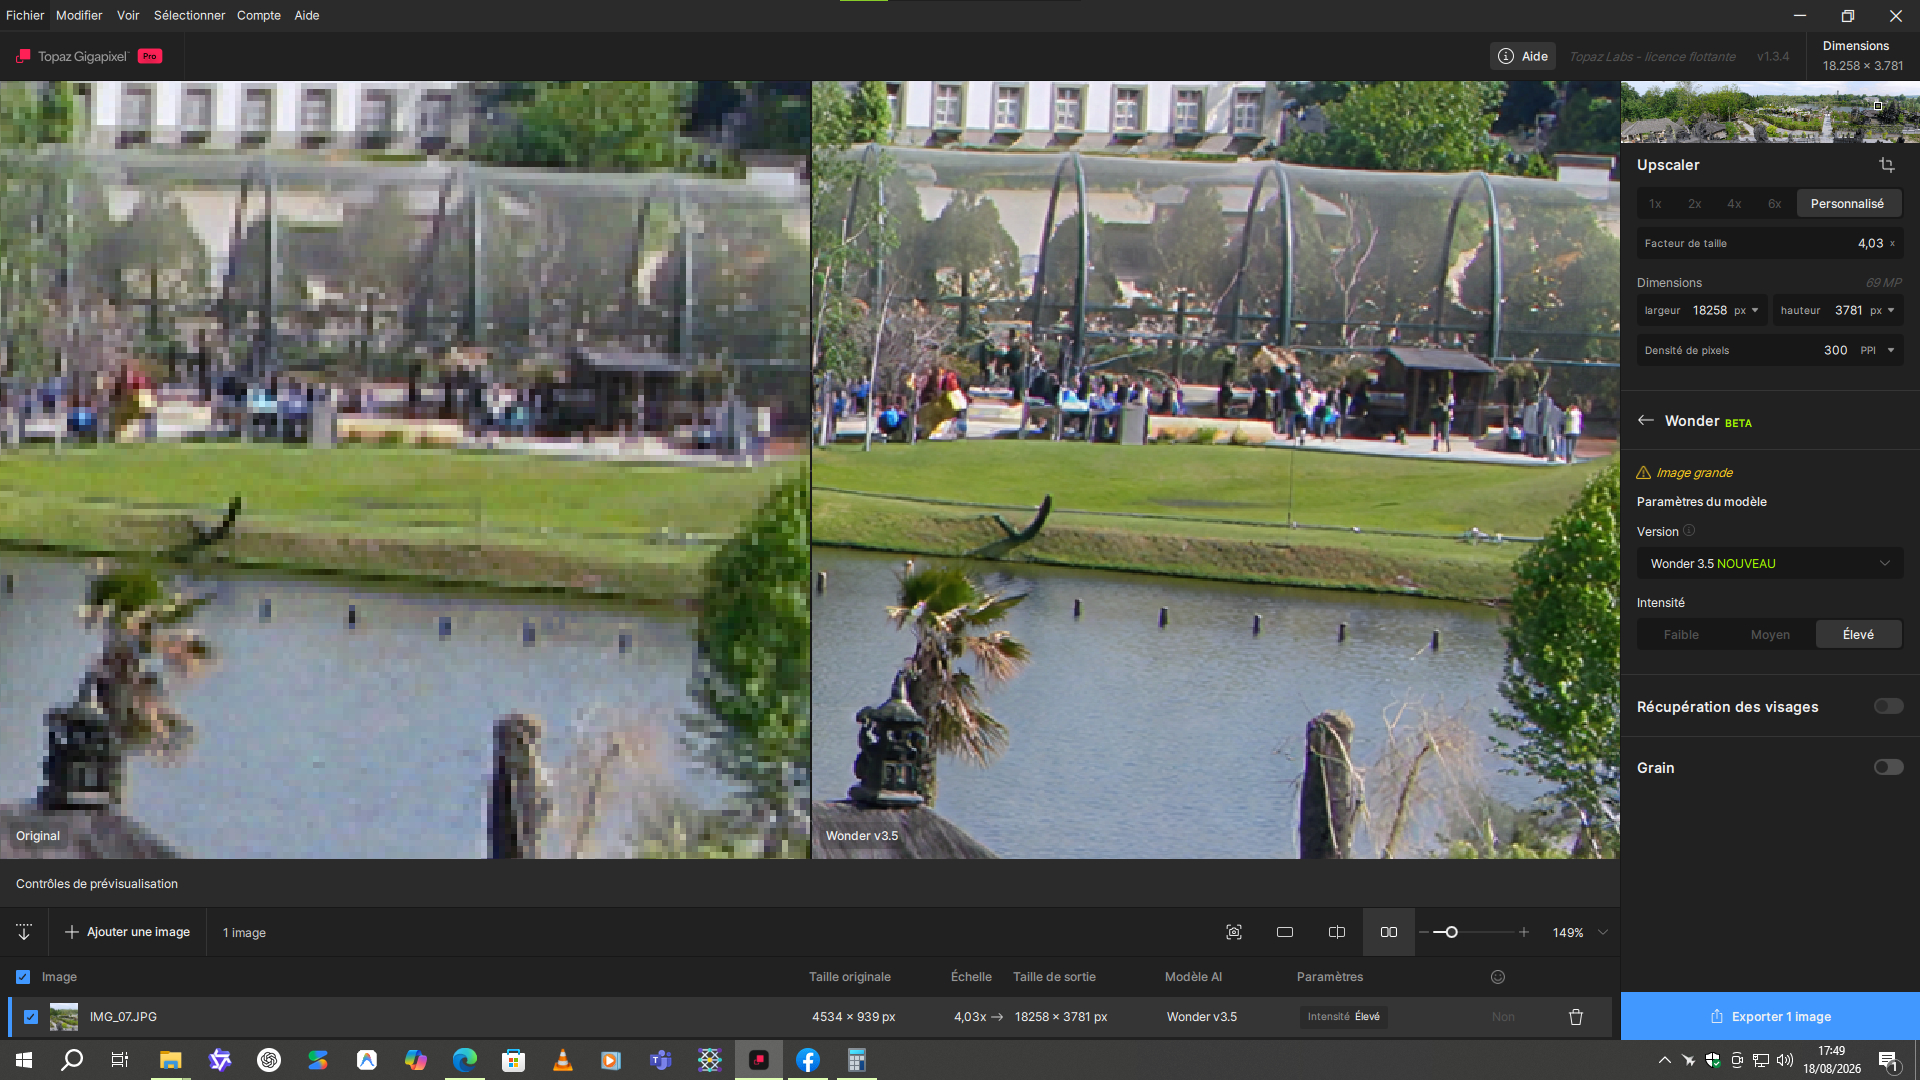
Even the grain and RGB noise are greatly reduced.
2 Likes
This is an extreme example. Considering the really bad quality of the source image, it’s impressive.
4 Likes
Thanks 

PSA with Wonder and Redefine: NEVER do 2X or 3X or whatever - always do 4X! Even if you dont need the resolution - you get WAY more details in the pictures! Do 4X and scale down if you like - but always do 4X.
Try it and thank me later
1 Like
On this one, also from 2013, two passes were necessary. A first pass with Wonder 3.5 without scaling and a second pass with the same model at a resolution of 50 megapixels.
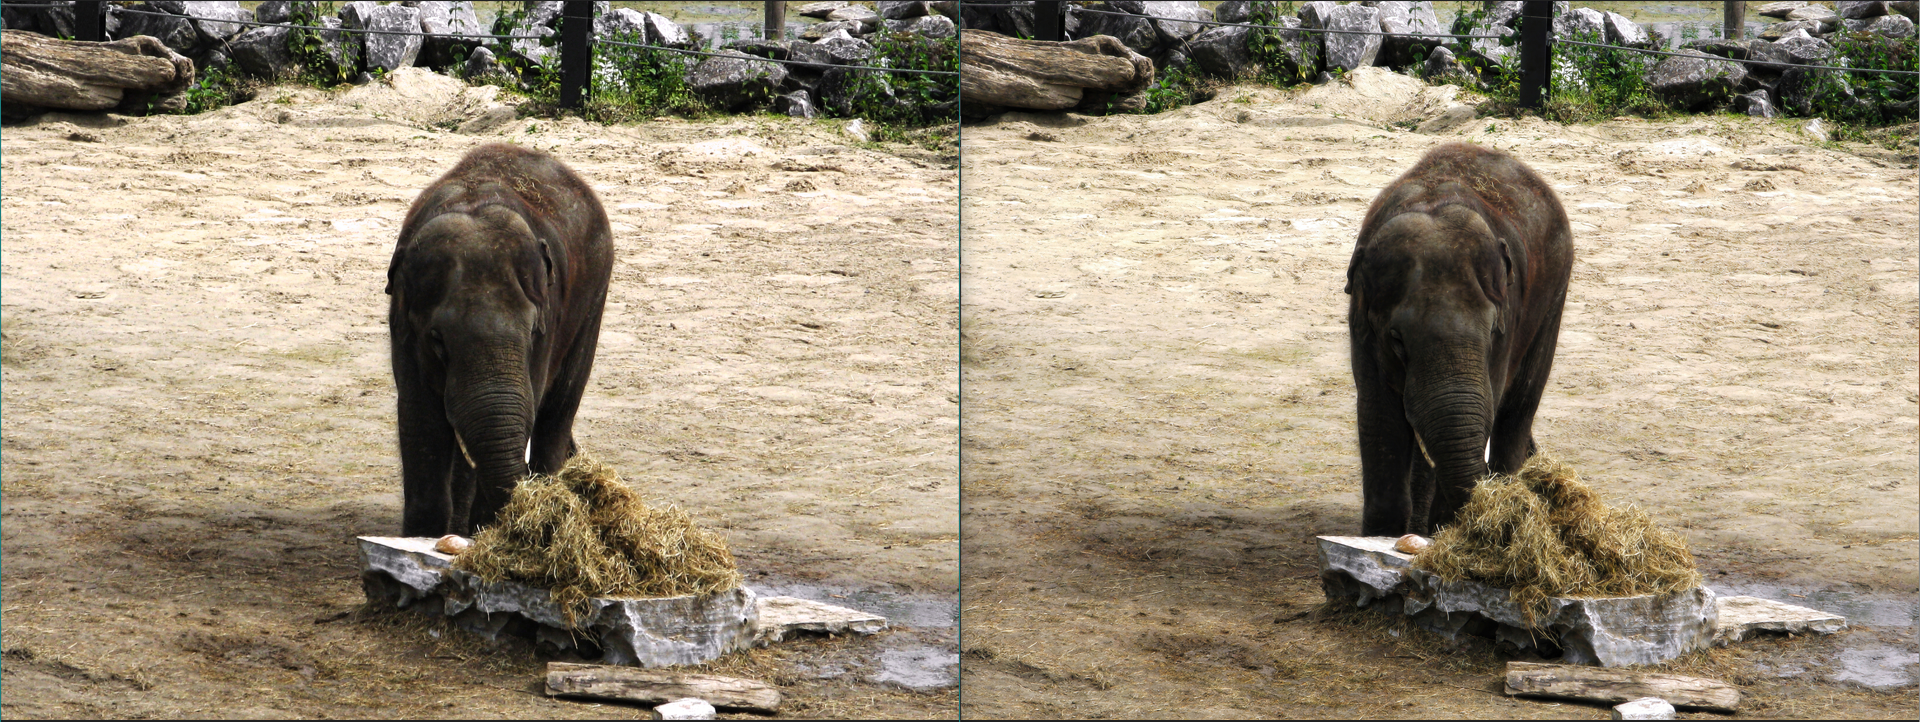
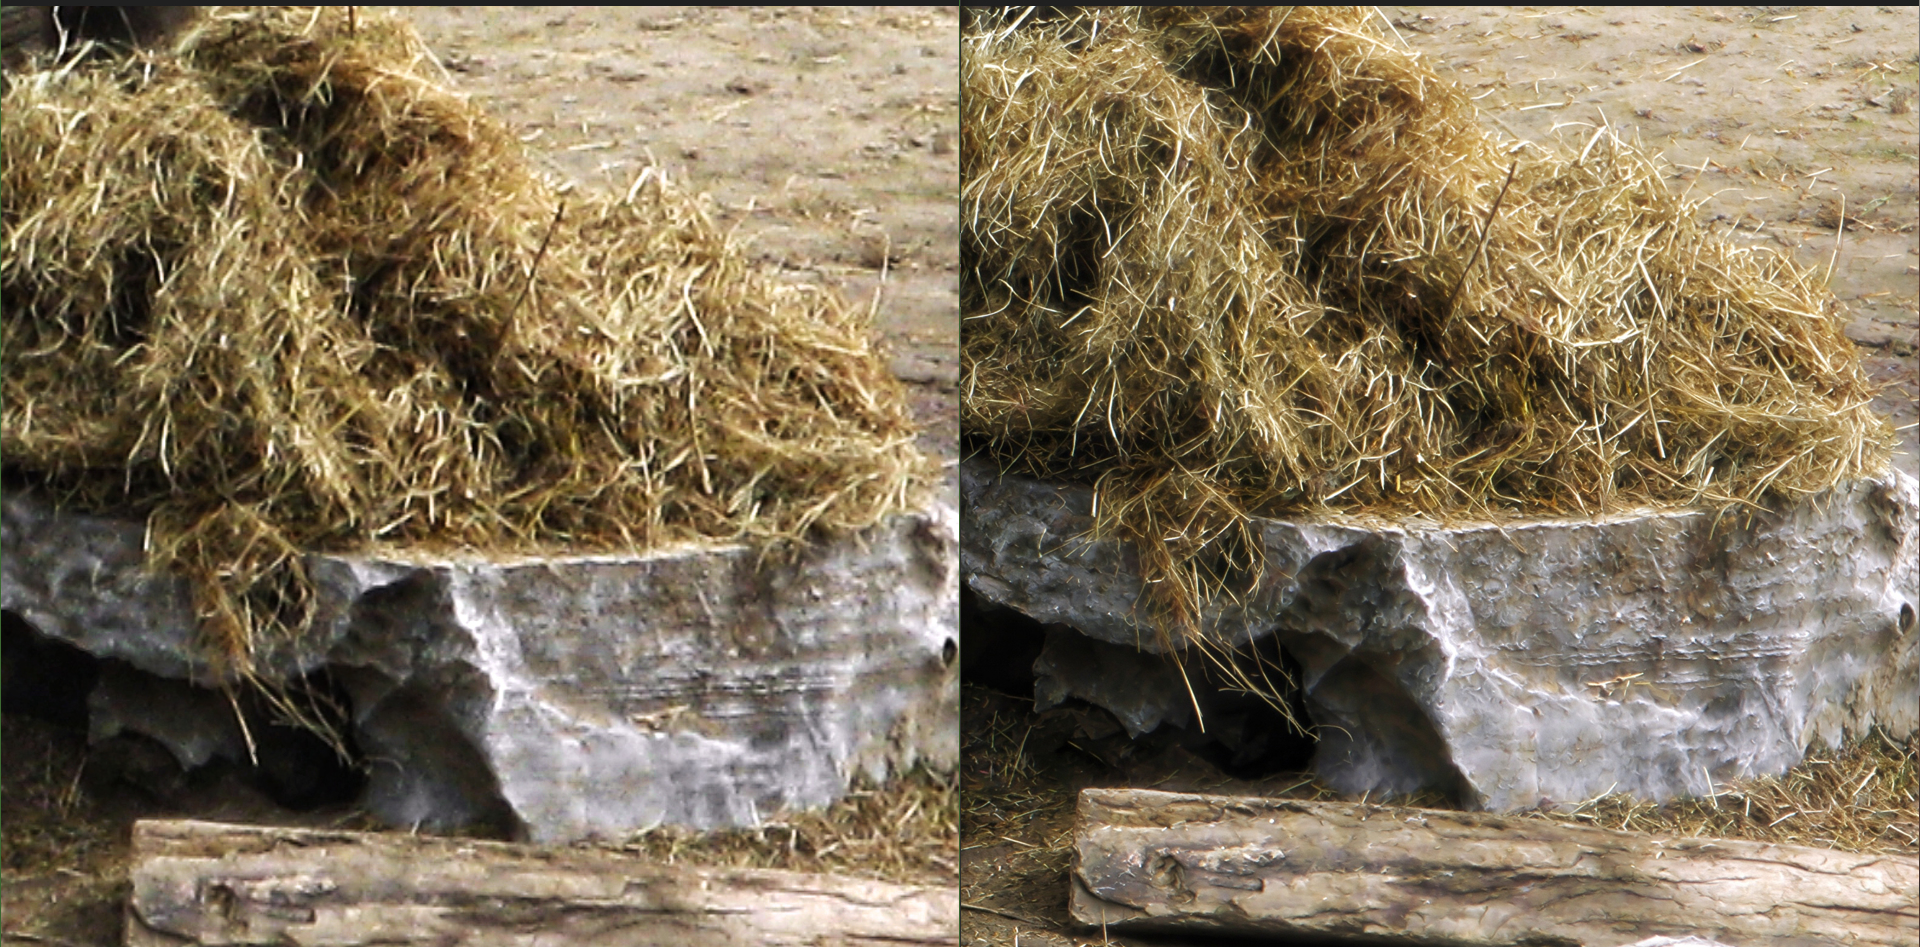
The details of the elephant are rather well restored.
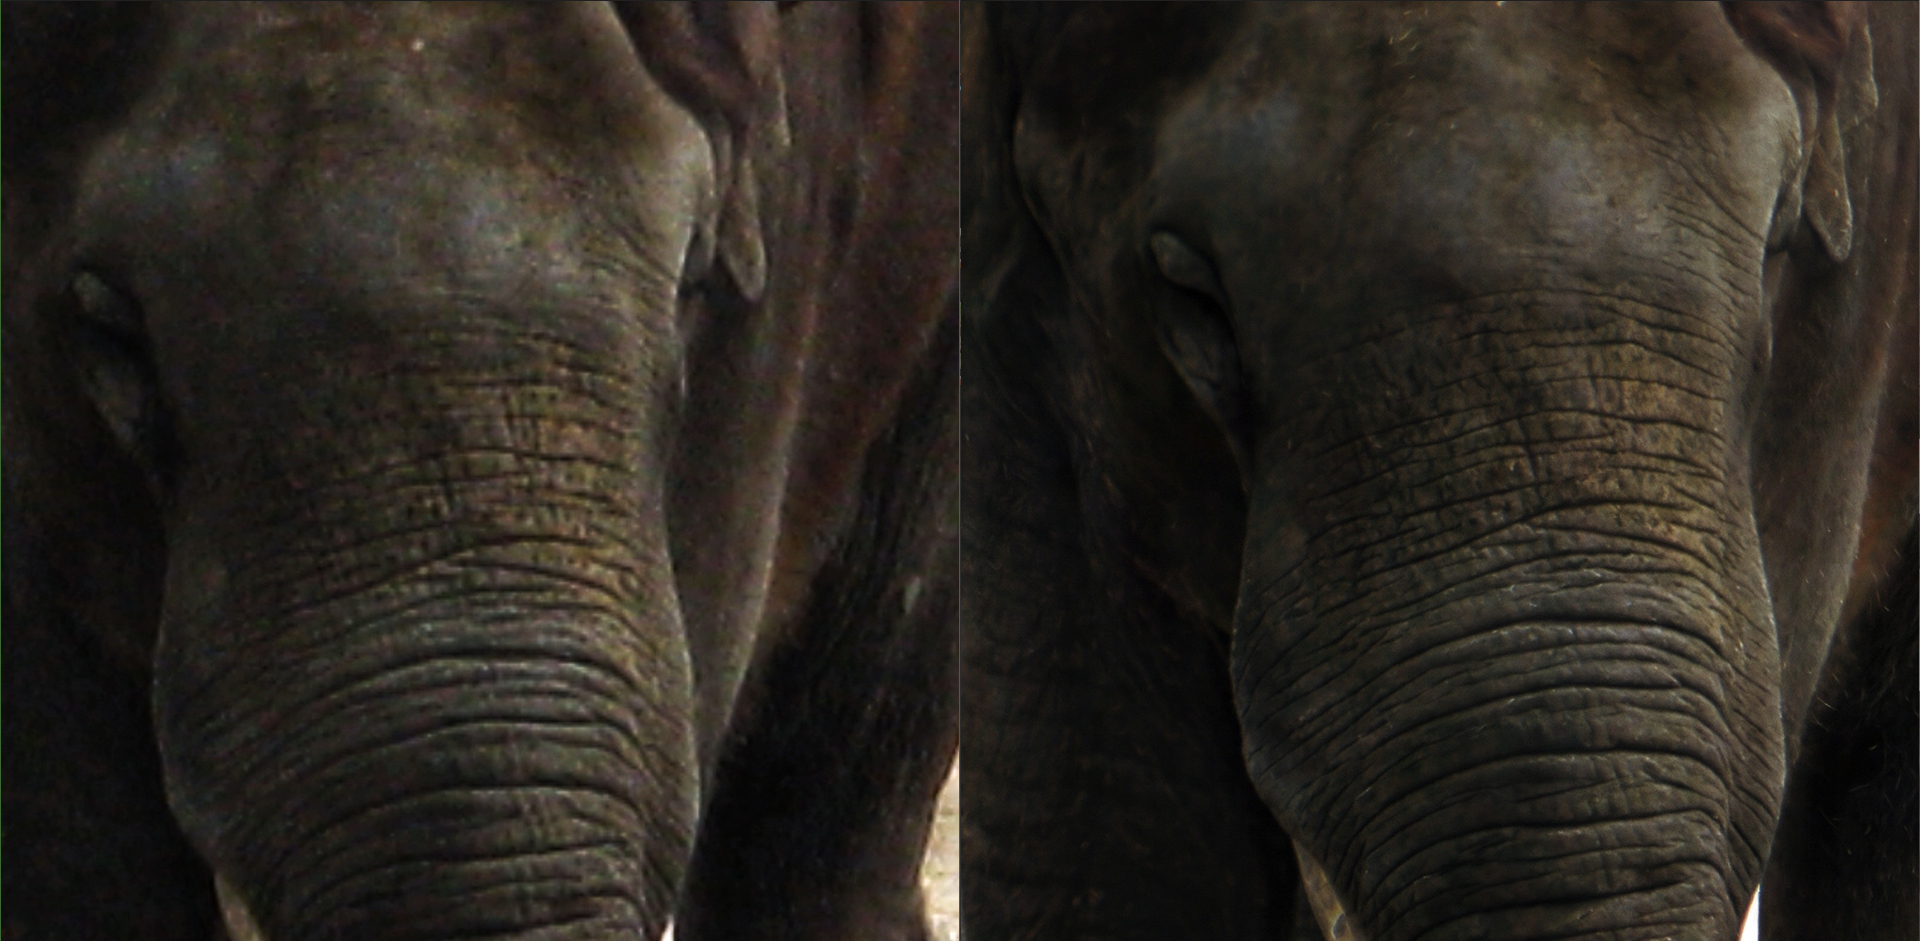
I initially tried a single pass with scaling, but it wasn’t as good. And the rock looked oddly hairy. But with two passes like I did, the quality was significantly better .
Even the background of the photo is really well restored.
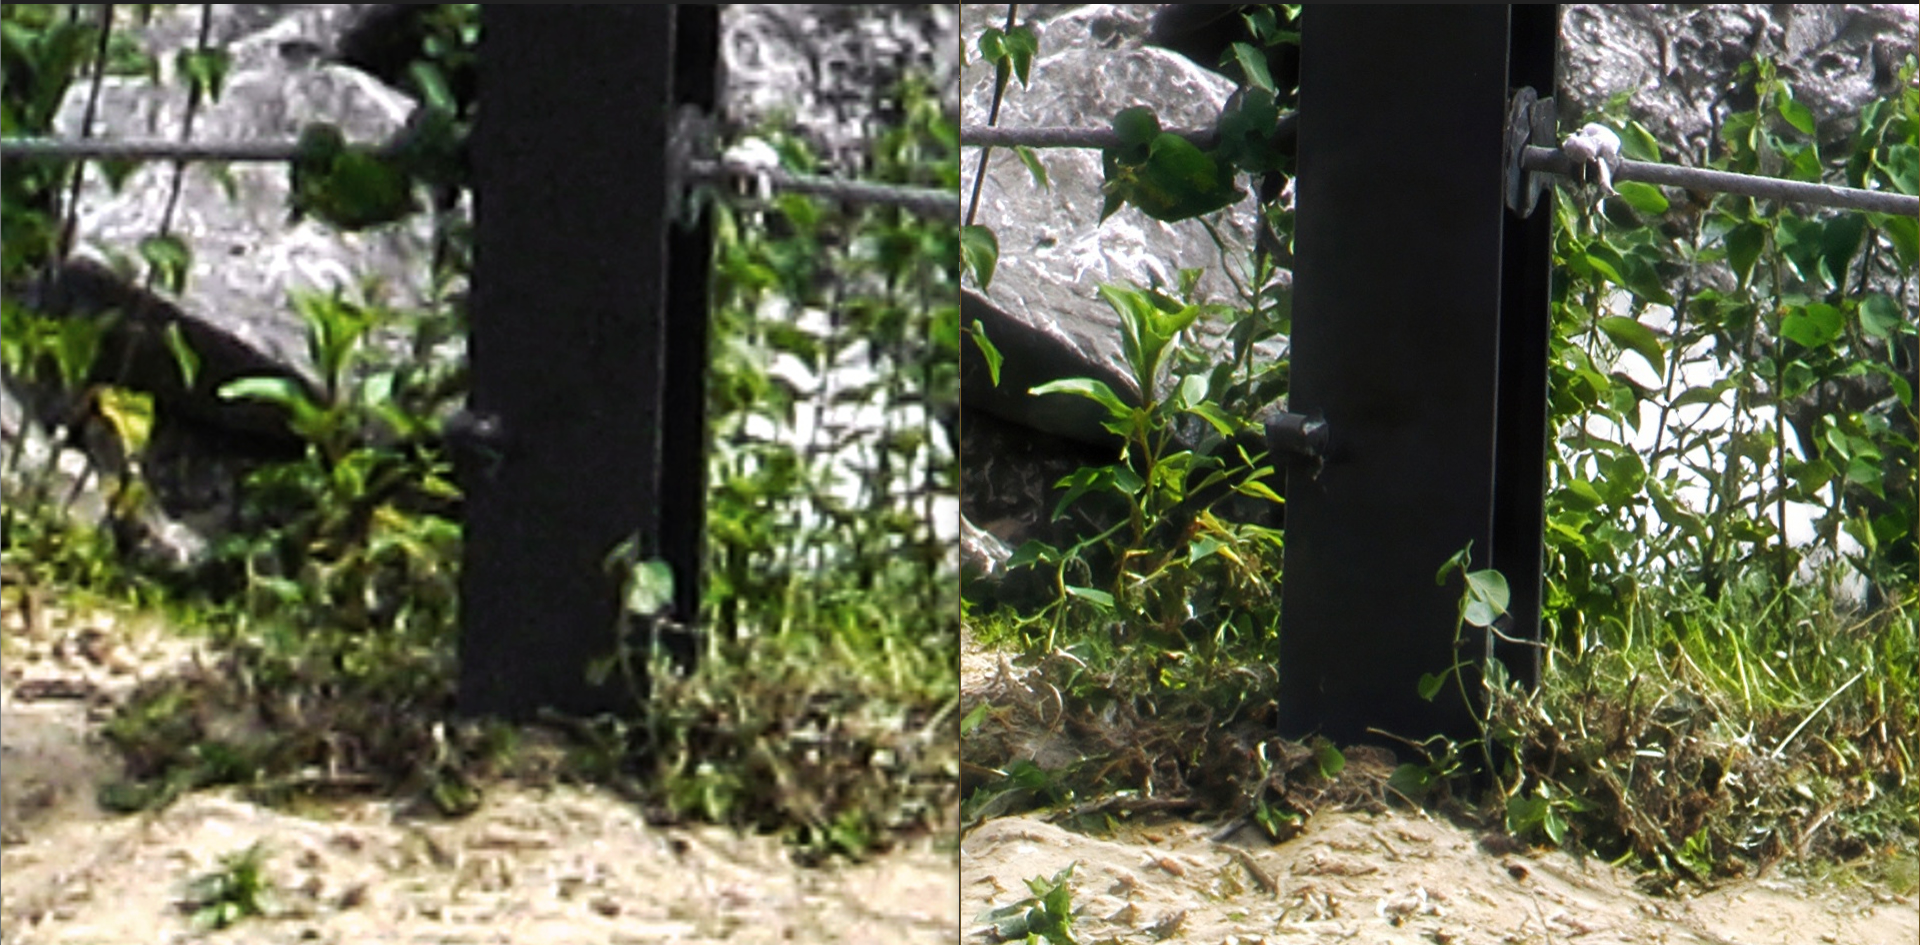
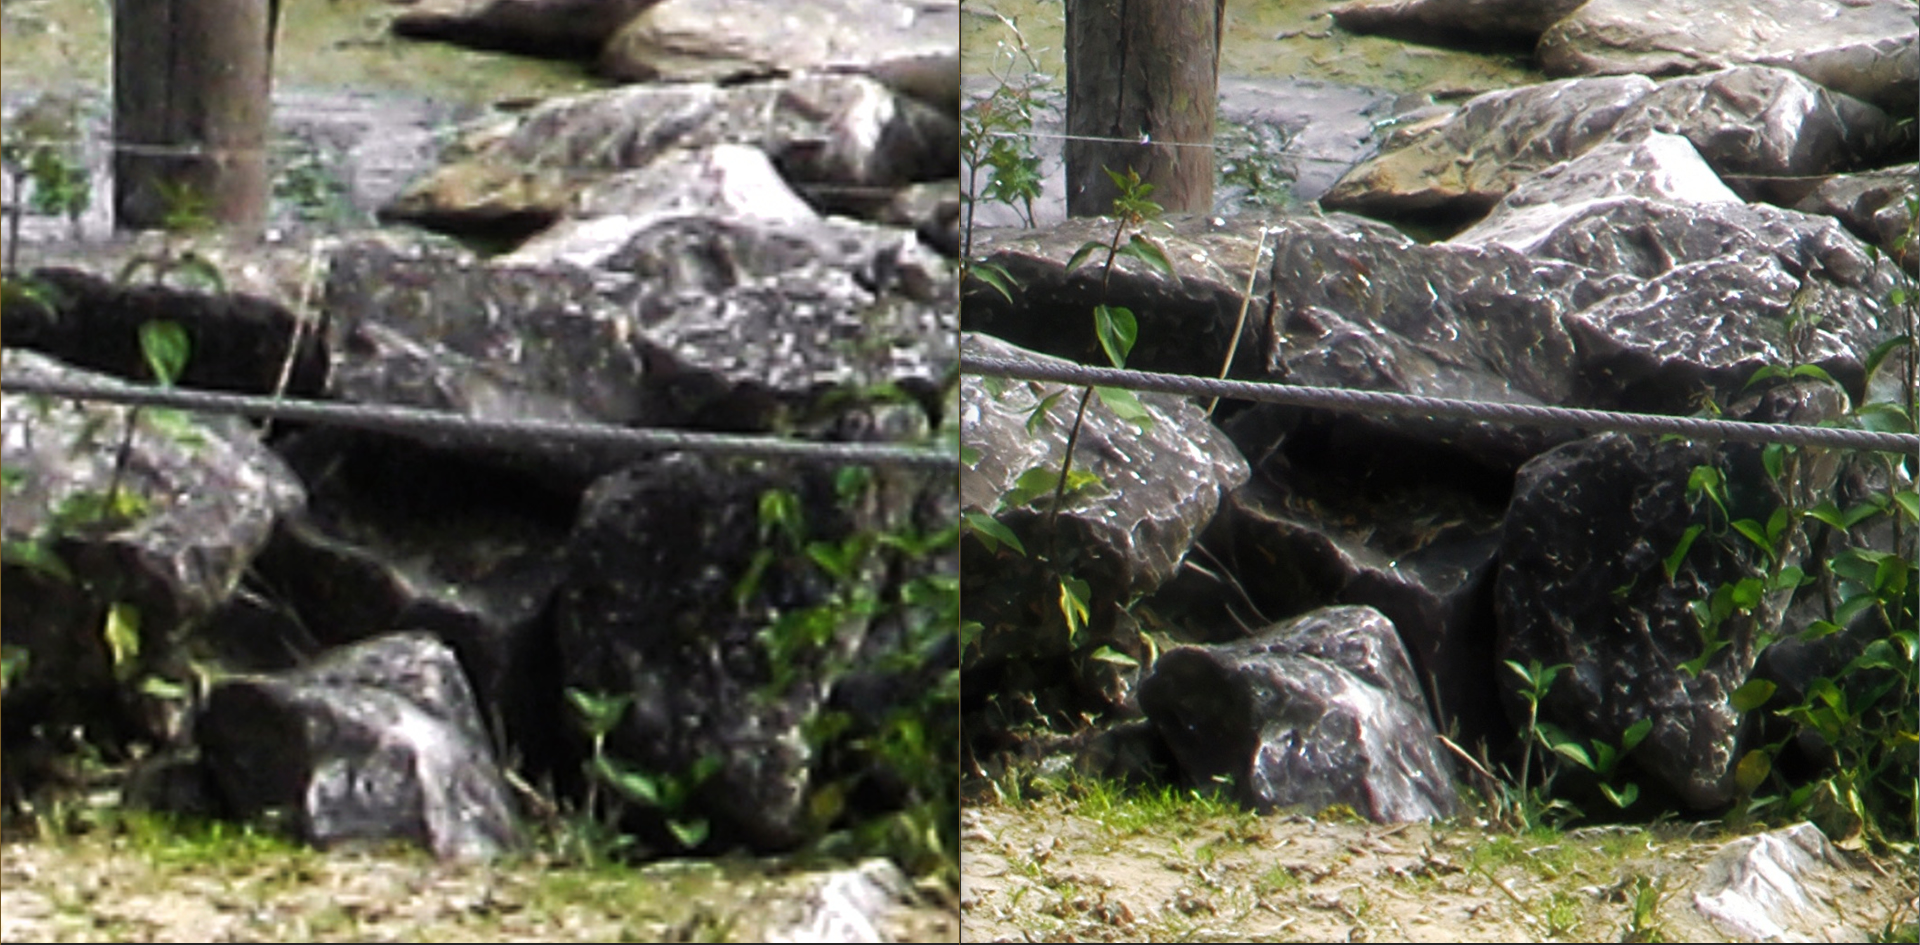
2 Likes
It depends on the initial quality of the photos. On mine, it works very well even with very precise values that give scaling factors even above 2x.
1 Like
