Thank you for reporting this. When you used v4.6.0, OpenVINO didn’t work at all if you turn on enable OpenVINO manually in the preference panel? And in v.4.9.3.1, Can you run it with the GPU & OpenVINO are set to “Yes” without any crash or some issue?
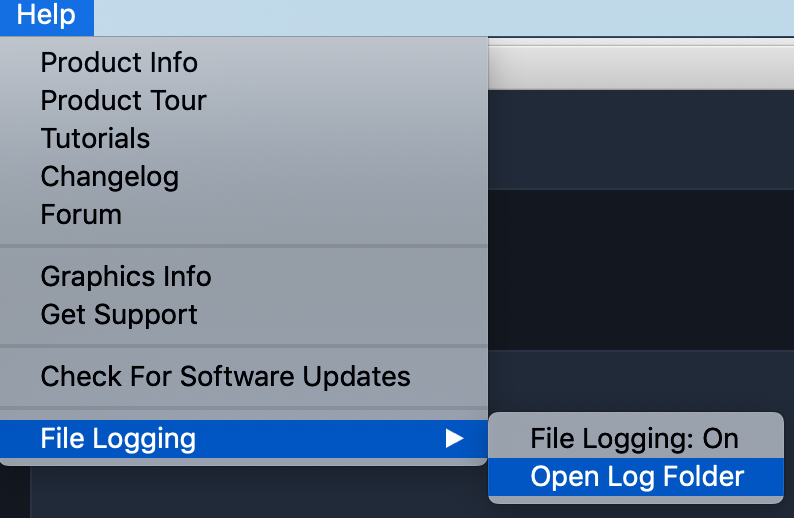
It would be better for me to understand if you can get me the log file after you click Recommended Settings and test an image. Probably you need to test an image including human faces by turning on face refinement. You can get log file from here
4.9.3.1 is still buggy! Any change to the PPI (up or down) changes the dimensions of the file. 300 dpi is the only setting that maintains the set proportions.
This functionality is intentional, and brings Gigapixel’s PPI / physical dimension settings more in line with industry standards. Photoshop works this way, for instance.
Can I ask what your primary use case is? Are you upscaling images for printing?
Firstly, without uninstalling v4.9.3.1 and reinstalling v.4.6.0 I am relying on memory…as I recall the OpenVINO Yes/No was greyed out in v4.6.0 as it is in Sharpen v2.0.5 and DeNoise v2.2.2 (I can discern that “No” is selected but the whole option is greyed out).
In other words OpenVINO was not a selectable option for me and I took that to mean that it was because my 1st Gen Intel CPU would not perform that ‘process’. NB as I said I am relying on memory
I will do a logged test as outline above and will find an image with human face(s) in, I have some but I very rarely photograph people compared to other subjects. Please bear with me and I will update over the weekend
FWIW I normally use pixel dimensions to scale in preparation for printing at 300ppi (i.e. I know how large in pixels I need to make a specific file to yield the 300ppi print).
Having said that I can see that scaling by actual size and selecting the ppi can be a more simple way of getting the pixel dimensions without me needing to calculate them.
Now, as you say 300ppi is a de facto resolution for most printing but not all. Some printers and print labs request 240ppi that being the ‘native’ resolution of the printer. Therefore, how correct is it for software to restrict the ppi to only one print output resolution???
NB Indeed for some prints (e.g. larger canvases) 150ppi is at times (from what I recall reading) a useful resolution as 300ppi is basically overkill for the type of print and the viewing distances.
The above are just some thoughts from someone who tries to make sure the files I prepare for print meet the exact requirements of the commercial printers I use (or am aware of/about) rather than relying on their RIP to make up for any discrepancies or mistakes on my part. NB even printing my own smaller test prints I create the file to the exact resolution etc for the 6x4 paper I use
Please bear with me, I truly enjoy Gigapixel and use it heavily as well as other Topaz software. I write this to you with the intention of contributing to the developement of this great piece of software.
If you are printing to a high resolution printer with multiple inks it is alway best (better color transitions, more subtle color, better shadow detail, etc…) to set your ppi to a multiple of the printer’s dpi. It avoids rounding errors and other errors by the printer/print driver.
My Epson 7900 allow a user choice of 360/720/1440/2880. 300 was a standard that was set in the stone age, when color printer were 4 colors only and the 300 dpi b&w laser printer was the common printer. As laser printer resolution improved to 600 dpi the “300 standard” was still used because it was an easy multiple for the print drive/printer to work with. Then printer technology took off and manufacturers started with improved resolution, more color inks to improve the palates etc… Adobe didn’t keep up with the printer industry! If Photoshop kept up with the printer industry, the manufacturers wouldn’t have invested so much time and budget to creating their printer “plugin’s” to allow (viz. correct) Photoshop to print to their printers properly.
I don’t believe that Adobe is the “Definitive” answer considering the history of printing issues that Photoshop has had over the years and the number of printer “plugin’s” that printer manufacturer have issued to get Photoshop to print without problems from Photoshop to their various printers.
I respectfully submit this question: If you intentionally set Giga to match “industry standards” why do you still allow the user to access and change the PPI setting if your algorithm can not accept a change of the PPI setting with a set dimension and give the user his expected results?
This was never a problem with Giga 4.4.5. It alway produced what I ask for in my settings at 360, 720, 1440 or 2880 ppi.
Please bring back this feature as it was in Giga 4.4.5.
If you’re specifying an image size in inches (e.g. 12" @ 300 ppi = 3600px wide) and then you decide you want it to be 360 ppi instead then the software can only assume you still want it to be 12" wide (because that’s what you told it) and so will increase the width to 4320 px. How can you possibly expect it to know that you want the image dimensions in pixels to remain the same as those it calculated for 300 ppi? You’re telling it 12" @ 360 ppi so, quite correctly, it gives you 4320 px. If you could get it to keep the width at 3600 px then it would print out 10" wide - which isn’t what you originally asked for. If that is what you want then enter that figure instead.
I compared v4.9.3.1 against my go-to version v.4.2.2, both using CPU calculations without GPU or OpenVINO acceleration (both of which produce worse results in several areas anyway).
v.4.2.2 produces many areas that add more “invented” detail and increased sharpness over v4.9.3.1, often at the cost of more over-sharpening and color noise artifacts, though. v4.2.2 also tends to produce more fake texture of the oil-painting/dry clay ground kind of style in these areas. Curiously there are some areas where it is the other way around between both versions, but the tendency is towards v4.9.3.1 being more “blurry”.
At normal viewing distances this might be even beneficial, because those sharper parts of older versions often stick out from their more blurry surroundings and there is an overall more busy look on (very) close inspection.
In any case the visual difference between versions is less pronounced than the difference between using GPU/OpenVINO versus pure CPU calculations. So if you need the least amount of blur possible then disable acceleration, both in old or current versions until they catch up in quality.
My comparison was done using my two favorite test images at noise/blur settings of 0.
PS: I did not notice until now that GP changed tonality/contrast of (Olympus) raw files somewhere between versions. I still would not recommend using GP for raw processing/demosaicing, though.
PPS: The default destination color space of new versions seems to be sRGB instead of preserving the original color-space. Please change the default to “Preserve color space”. Took me several runs until I noticed that the colors of the new version were off, because of the unnoticed conversion.
No version after 4.2.2 is able to upsize to more than x6 properly in one go, so 4.2.2 is my fallback version. And when you compare versions you need to use CPU processing without GPU or OpenVINO acceleration.
I noticed something odd in 4.9.3.1 only just now. One of my test images includes clouds and smoke in the sky and the 4.9.3.1 version looks darker and tonally somewhat shifted. Upon closer inspection it turns out that the 4.9.3.1 version introduced horizontal stripes that cause the difference.
Are the noise reduction and sharpening sliders the same. Could that be different?
Personally I feel the image on the right from 4.2.2 seems a bit too artificial with its details recreation. I would prefer a bit blurry version over one that feels waxy and artificial. And in my experience, foliage or any high frequency details except skin tend to look artificial. I guess they trained the program more with people skin than foliage images.
Also you could try to take the 4.9.3.1version and give it a second pass in one of the other programs like DeNoise AI or Sharpen AI and see if you can pull some details and how it will look.
You can always enable GPU/OpenVINO acceleration if you like the more blurred output. Like I wrote before, the extra “detail” does create extra artifacts, so one needs to decide what fits best for a given image.
If you prefer blurry, you could just scale up the old fashioned way, lots of “blurry goodness“ that way. Of course, I am kidding… But seriously, I find versions 4.4.5 and 4.4.6 produce superior results. They are the last versions before Topaz began “reinventing” Gigapixel AI.
Matter of preference I suppose. I want sharp as everyone, but not artificially sharp. If one looks at the image and thinks that its been tampered with, its a fail. How one will perceive the results is up to the individual person. Ideally we would get virtually identical version to the original just with more them pixels. Unless we are lacking details to begin with and program can invent a believable substitute, ala CSI style.
What gives me hope for the future is that with traditional algorithms, lot of work in making up new algorithms for interpolation often resulted in only minor improvements in output. With AI any new updates have a potential to be exponentially better. So maybe by GigaPixel version 5 or 6, it could fool its own mother, sort of speak. That is what I’m hoping for. For now, its a hit and miss, depending on the usage.
I accidentally disabled “Maximum Quality AI model” in my last v4.2.2 example, so the extra “sharpness” in the trees was caused by that. Stupid me, mixed up the quality setting with OpenVINO (wanting to disable it in 4.2.2 where it doesn’t exist anyway). There are still slight differences in some areas between the versions, but not in this particular tree area. And they are far less pronounced to the point of being hardly distinguishable.
And of course the main issue of horizontal stripes in v4.9.3.1 remains, which was what I aimed to demonstrate originally. If you look closely, you can now see a hint in the v4.2.2 example, too, after switching back to maximum quality AI. So disabling maximum quality benefits the sky area considerably.
v4.9.3.1 left, v4.2.2 right:
Keep in mind that I set noise/blur to zero for comparison’s sake, so the default of 50/50 usually looks better.
Please add a dropdown menu to PPI/PPC instead of automatically changing the unit. Even in the Centimeter world we usually use PPI, because printers and screens are defined by that.
There also is some rounding issue happening in the background. When I set 360 ppi and then change the image size in cm (instead of inch) GP changes the 360 ppi to 359.99 ppi. This only seems to be a visual thing with the ppi number field, but it’s still causing confusion.
Please also give us pixel doubling zoom (200%, 400%) instead of having the algorithm recalculate a new image (cut-out) that does not resemble the final result anyway.
PPI, DPI and LPI can be confusing. Not sure if this is helpful for you or anyone else here on the forum, but many moons ago I made a comprehensive overview on this topic, explaining everything in detail. Its a tutorial on YouTube so I’ll post the link here for those who want to watch and maybe find some usful information.