Upscaling Hi8/MiniDV/VHS – Workflows for longer recordings with less time effort

In the Topaz Video release threads, many users share their experiences, tips, and tricks regarding the upscaling workflow as soon as new models or improvements become available.

Older release threads are locked as soon as a new release is published, which can interrupt discussions. And tips on workflows often get a bit lost among the other posts there and are harder to find later on. Therefore, I would like to suggest that we collect and continue the recommendations regarding the upscaling workflow here, separate from the release posts.


This thread should focus specifically on:

  • Experiences and workflows in the restoration of old SD footage (mainly PAL/NTSC sources, below 720p) from the 1980s, 1990s and 2000s (e.g. Hi8/MiniDV/VHS)

  • How to achieve good quality when upscaling longer recordings without having to spend an excessive amount of time on it.

  • Starlight models optional (e.g. SLM = Starlight Mini; SLP = Starlight Precise)

As rendering can be very time-consuming (especially with the Starlight models), it is usually impractical to render the footage multiple times with different settings for longer films. Which workflow gives you an acceptable result without taking up too much time?

If you’re looking for tips or would like to share your workflow for optimising short clips to the highest quality, please click here: Upscaling Hi8/MiniDV/VHS – Workflows for short clips to achieve the best possible quality


Please feel free to share your workflows, settings, experiences, example screenshots/videos, recommendations, tips and tricks, quirks and flaws…

Hi! It’s been a long time since I last used Topaz, I’d put my old family videos aside until now.

So I decided to get back into it, and for the moment, I’m using a workflow I didn’t use before.

To put it simply, I use DaVinci Resolve before sending the video to Topaz. But to open it in DaVinci, I have to go through VirtualDub first. At first, I used the “Muksun” deinterlacing filter in VirtualDub and exported the video as an uncompressed AVI to open it directly with Topaz.

Now, if I want to open it with DaVinci (which is rather temperamental), I no longer use Muksun or any filters. I make a direct copy of the video stream, and then I can import it into DaVinci.

The second step involves reusing NeatVideo (sometimes on noisy sequences that Topaz handles rather poorly) with a good profile and a mix around 30%. NeatVideo no longer removes as much detail as it did with version 6. It has improved considerably and, above all, is much faster because it manages CPU resources better. In short, most of the time I don’t even use it.

In DaVinci Resolve’s project settings, I set the deinterlacing to normal (or high, I haven’t noticed a difference between the two). I think Neural Engine should be avoided because it still uses AI, and even if it produces less of a combing effect, I doubt it truly preserves all the original details.

Next, I do some color correction. That’s where DaVinci Resolve is amazing. To send the video to Topaz, I make sure to lower the highlights in the “Color Grading” section to around 50 or 60%.
It seems to me that DaVinci Resolve is the only software that can recover detail in blown-out highlights. It’s quite astonishing.

I use the MotionCam app to film in 4K RAW with my smartphone, and when you record a video, you see the three primary channels on the screen. If a single color is clipped, DaVinci Resolve is able to recover the video information thanks to highlight recovery. It’s the same principle, in my opinion, with our old SD videos, even if the recovered details aren’t as striking as with our current RAW videos.

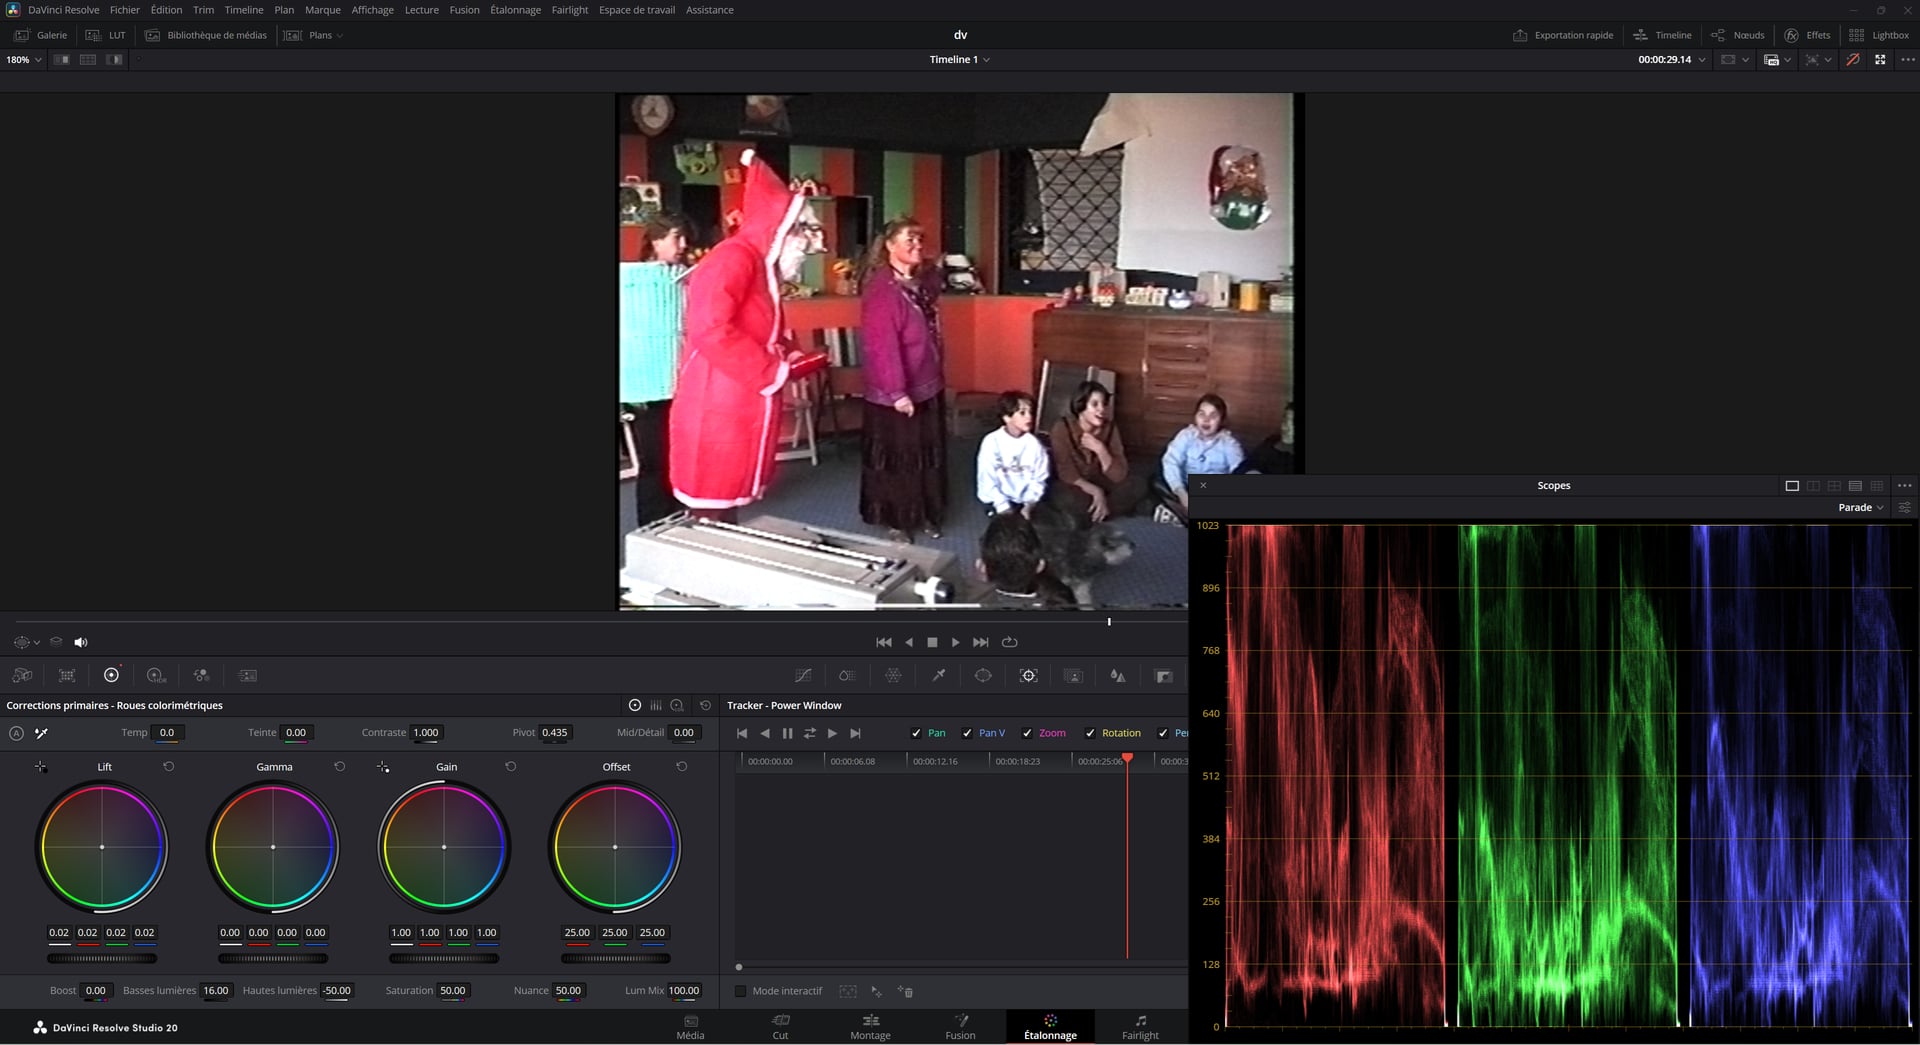
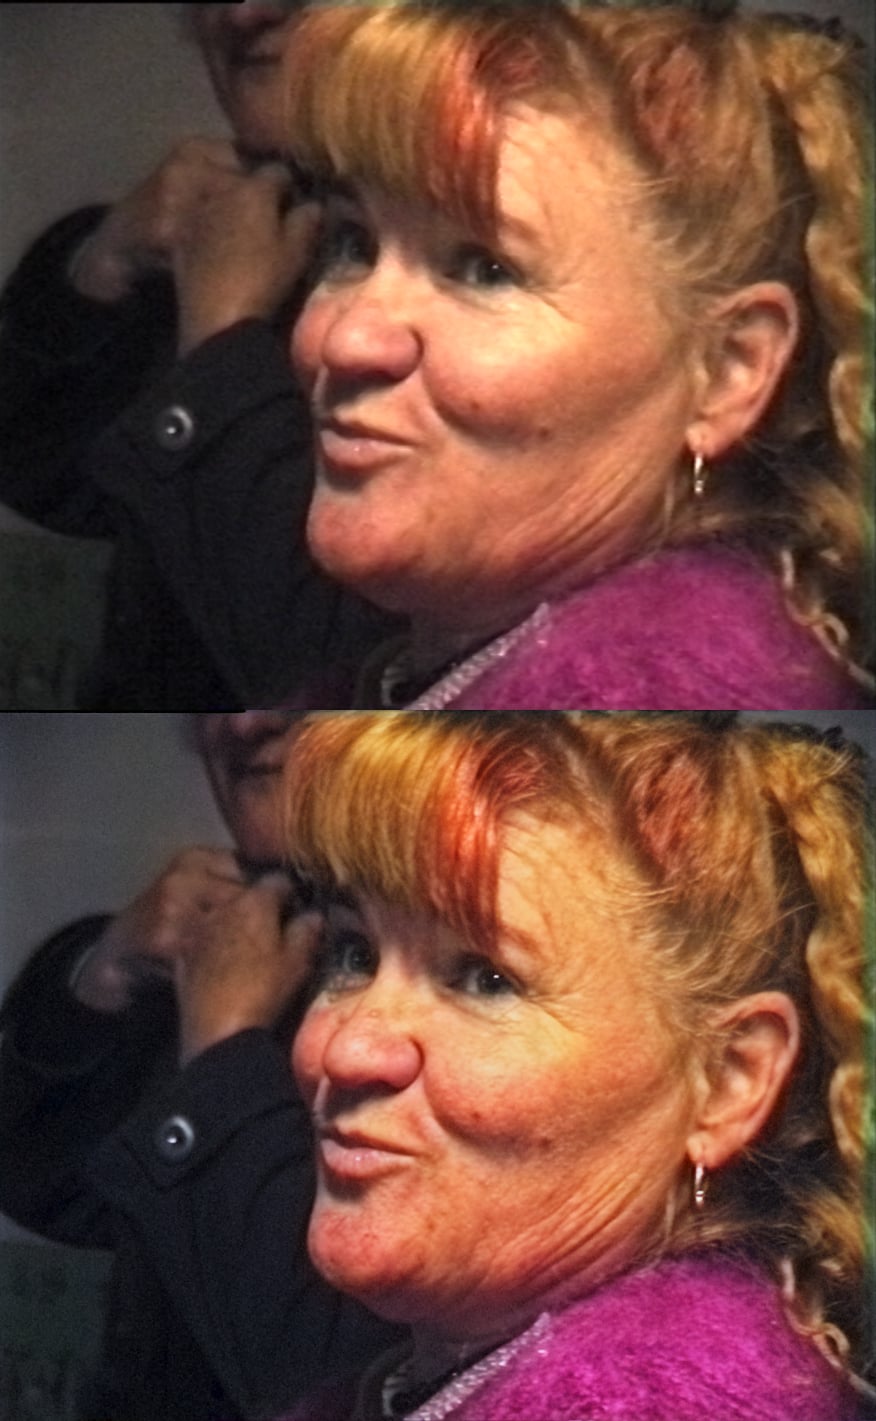
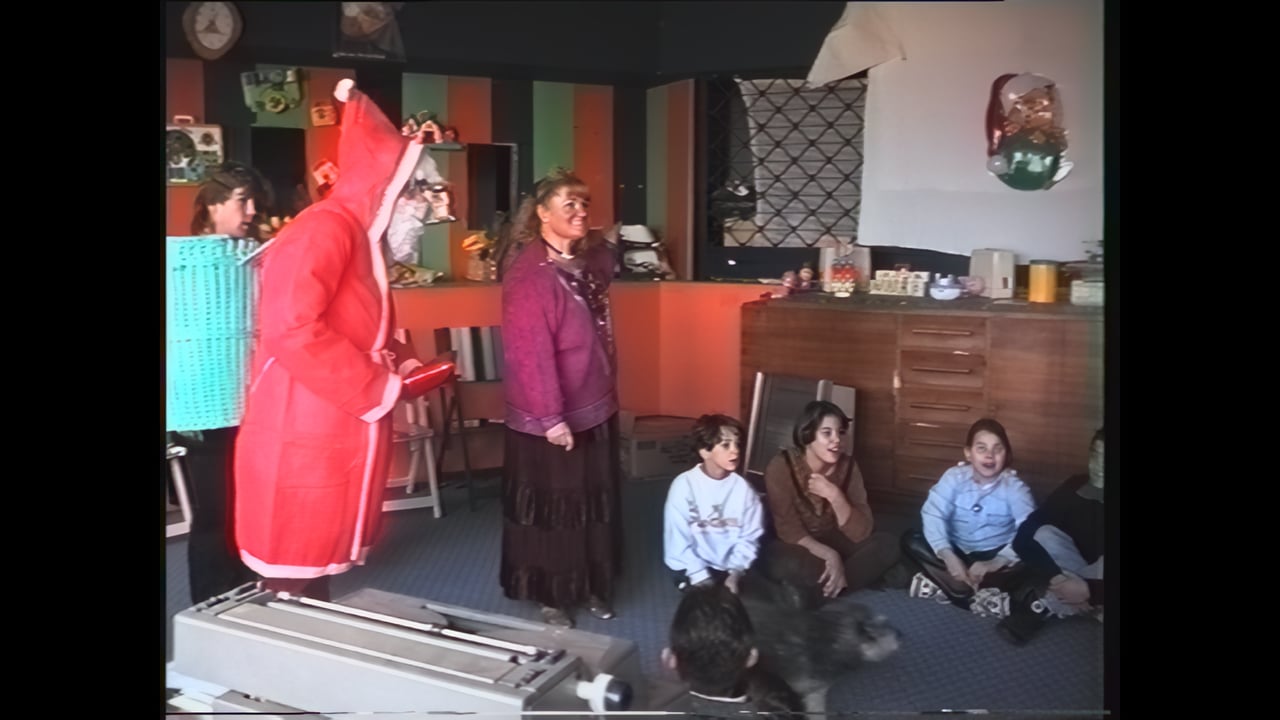
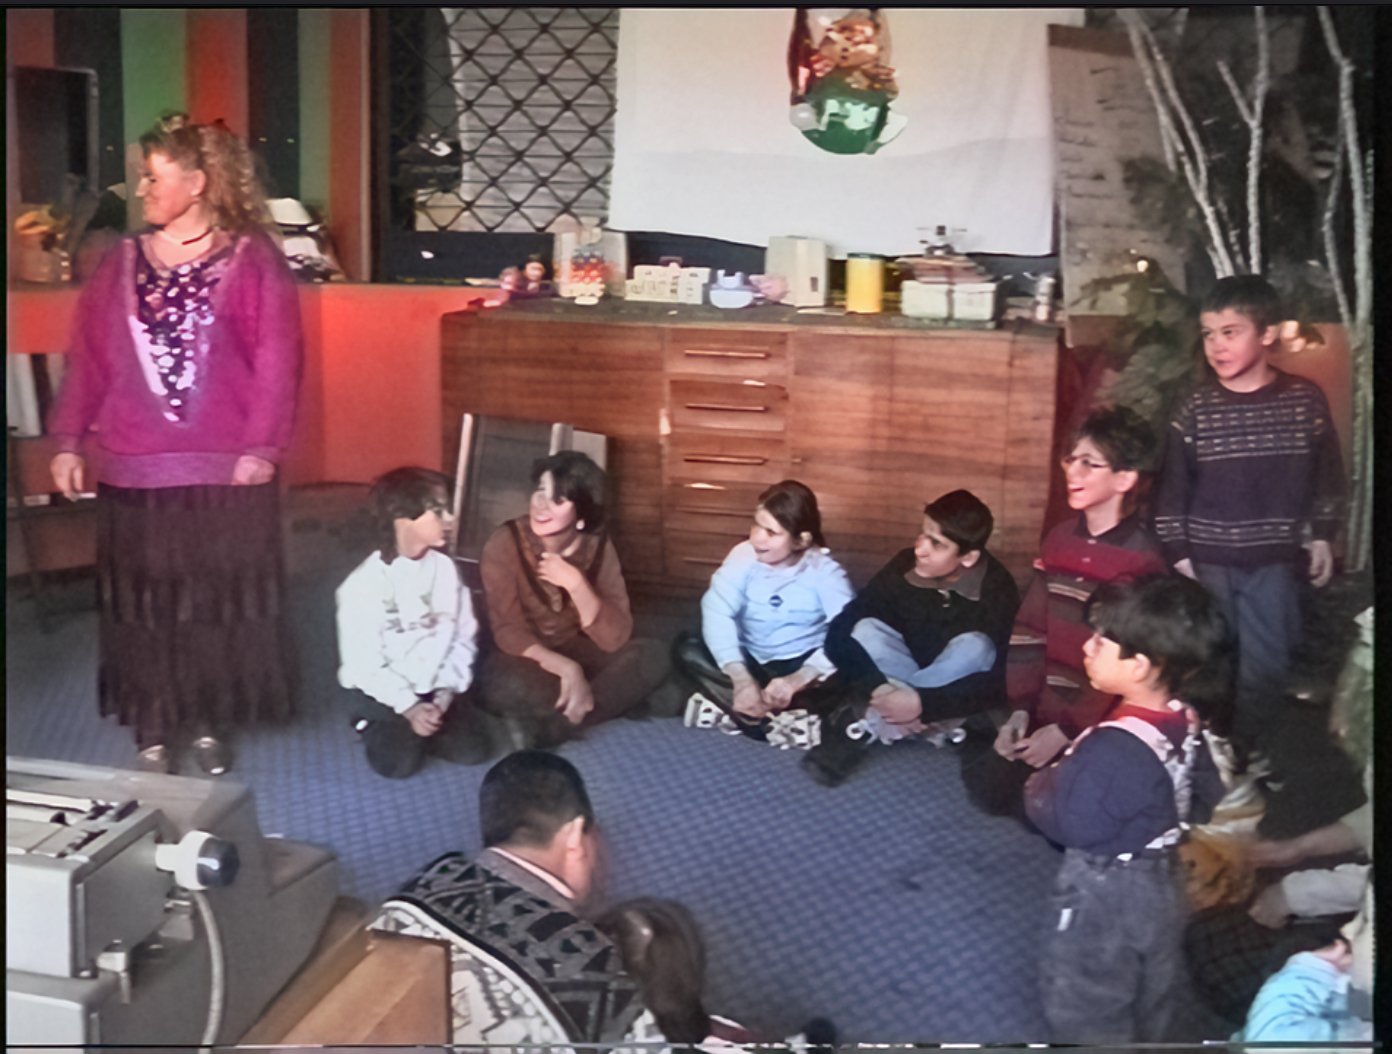
Here’s an original screenshot/highlight recovery:

I modified three options:

  • Highlight recovery, at -50%.
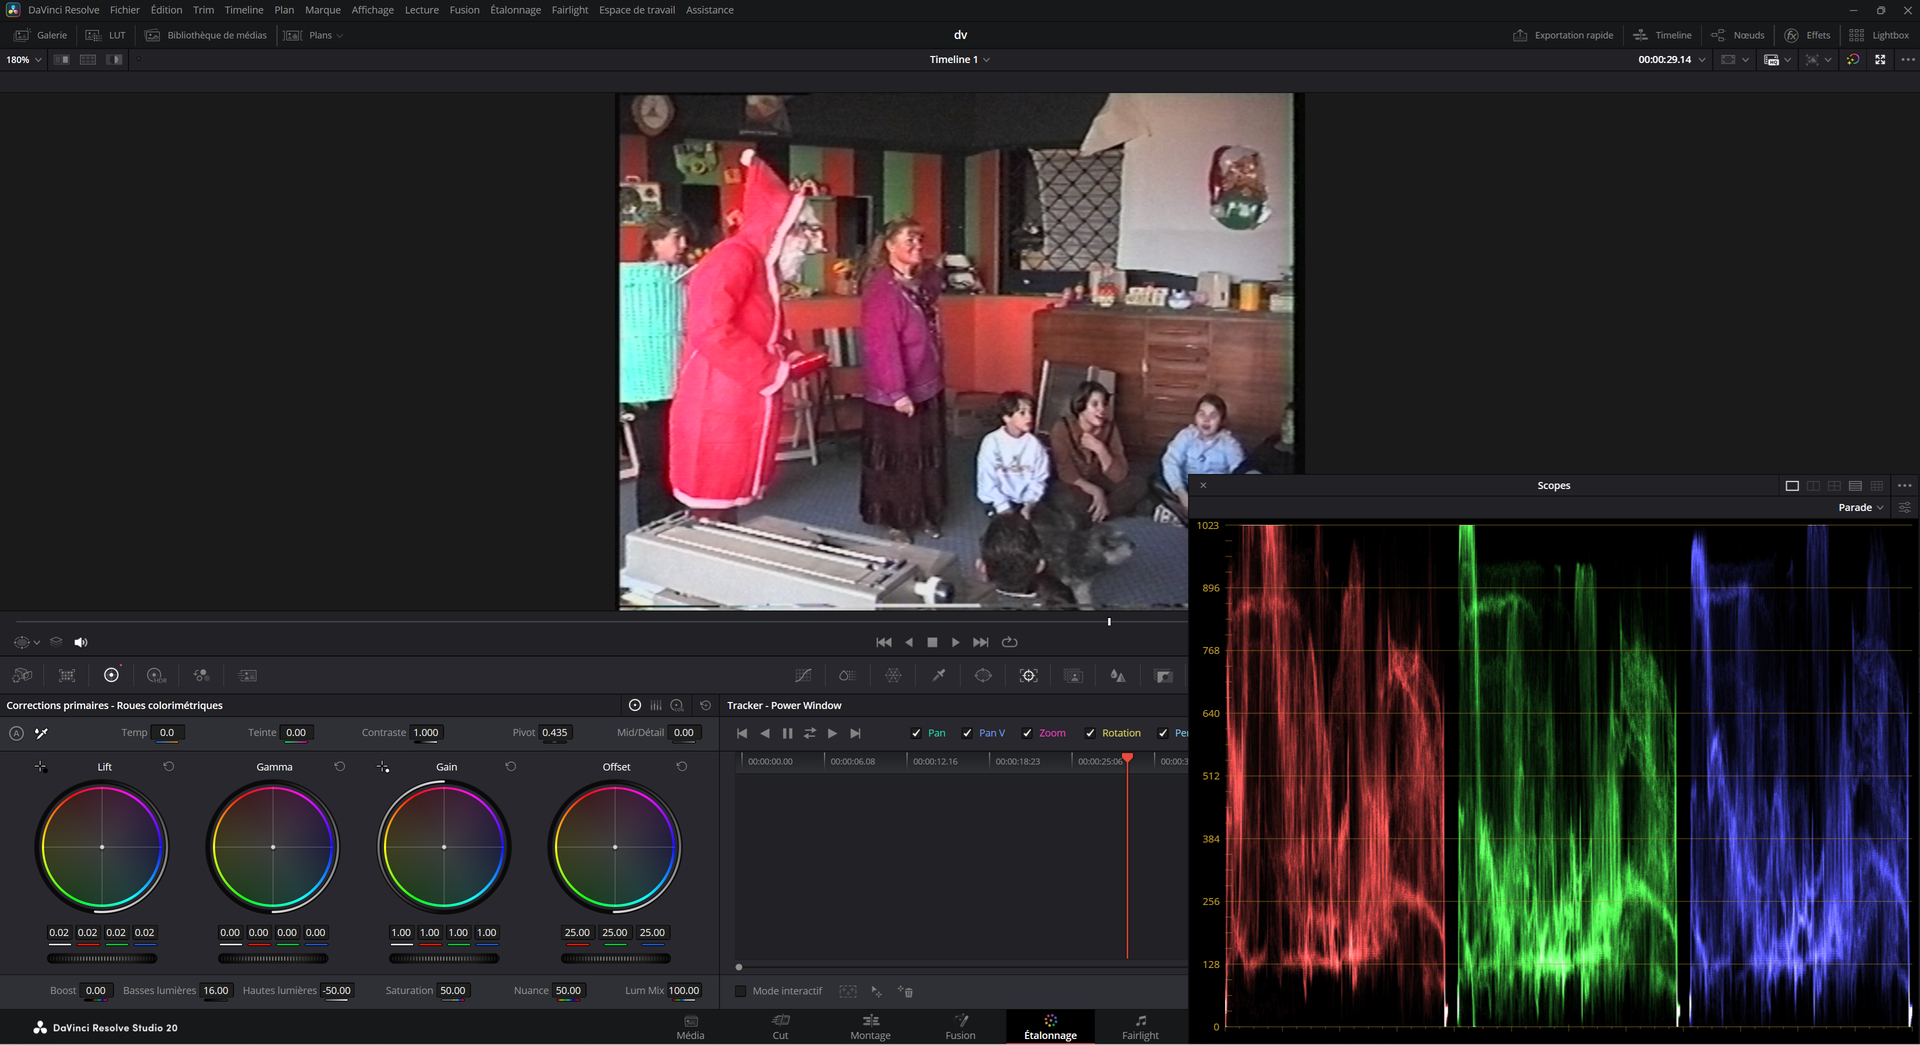
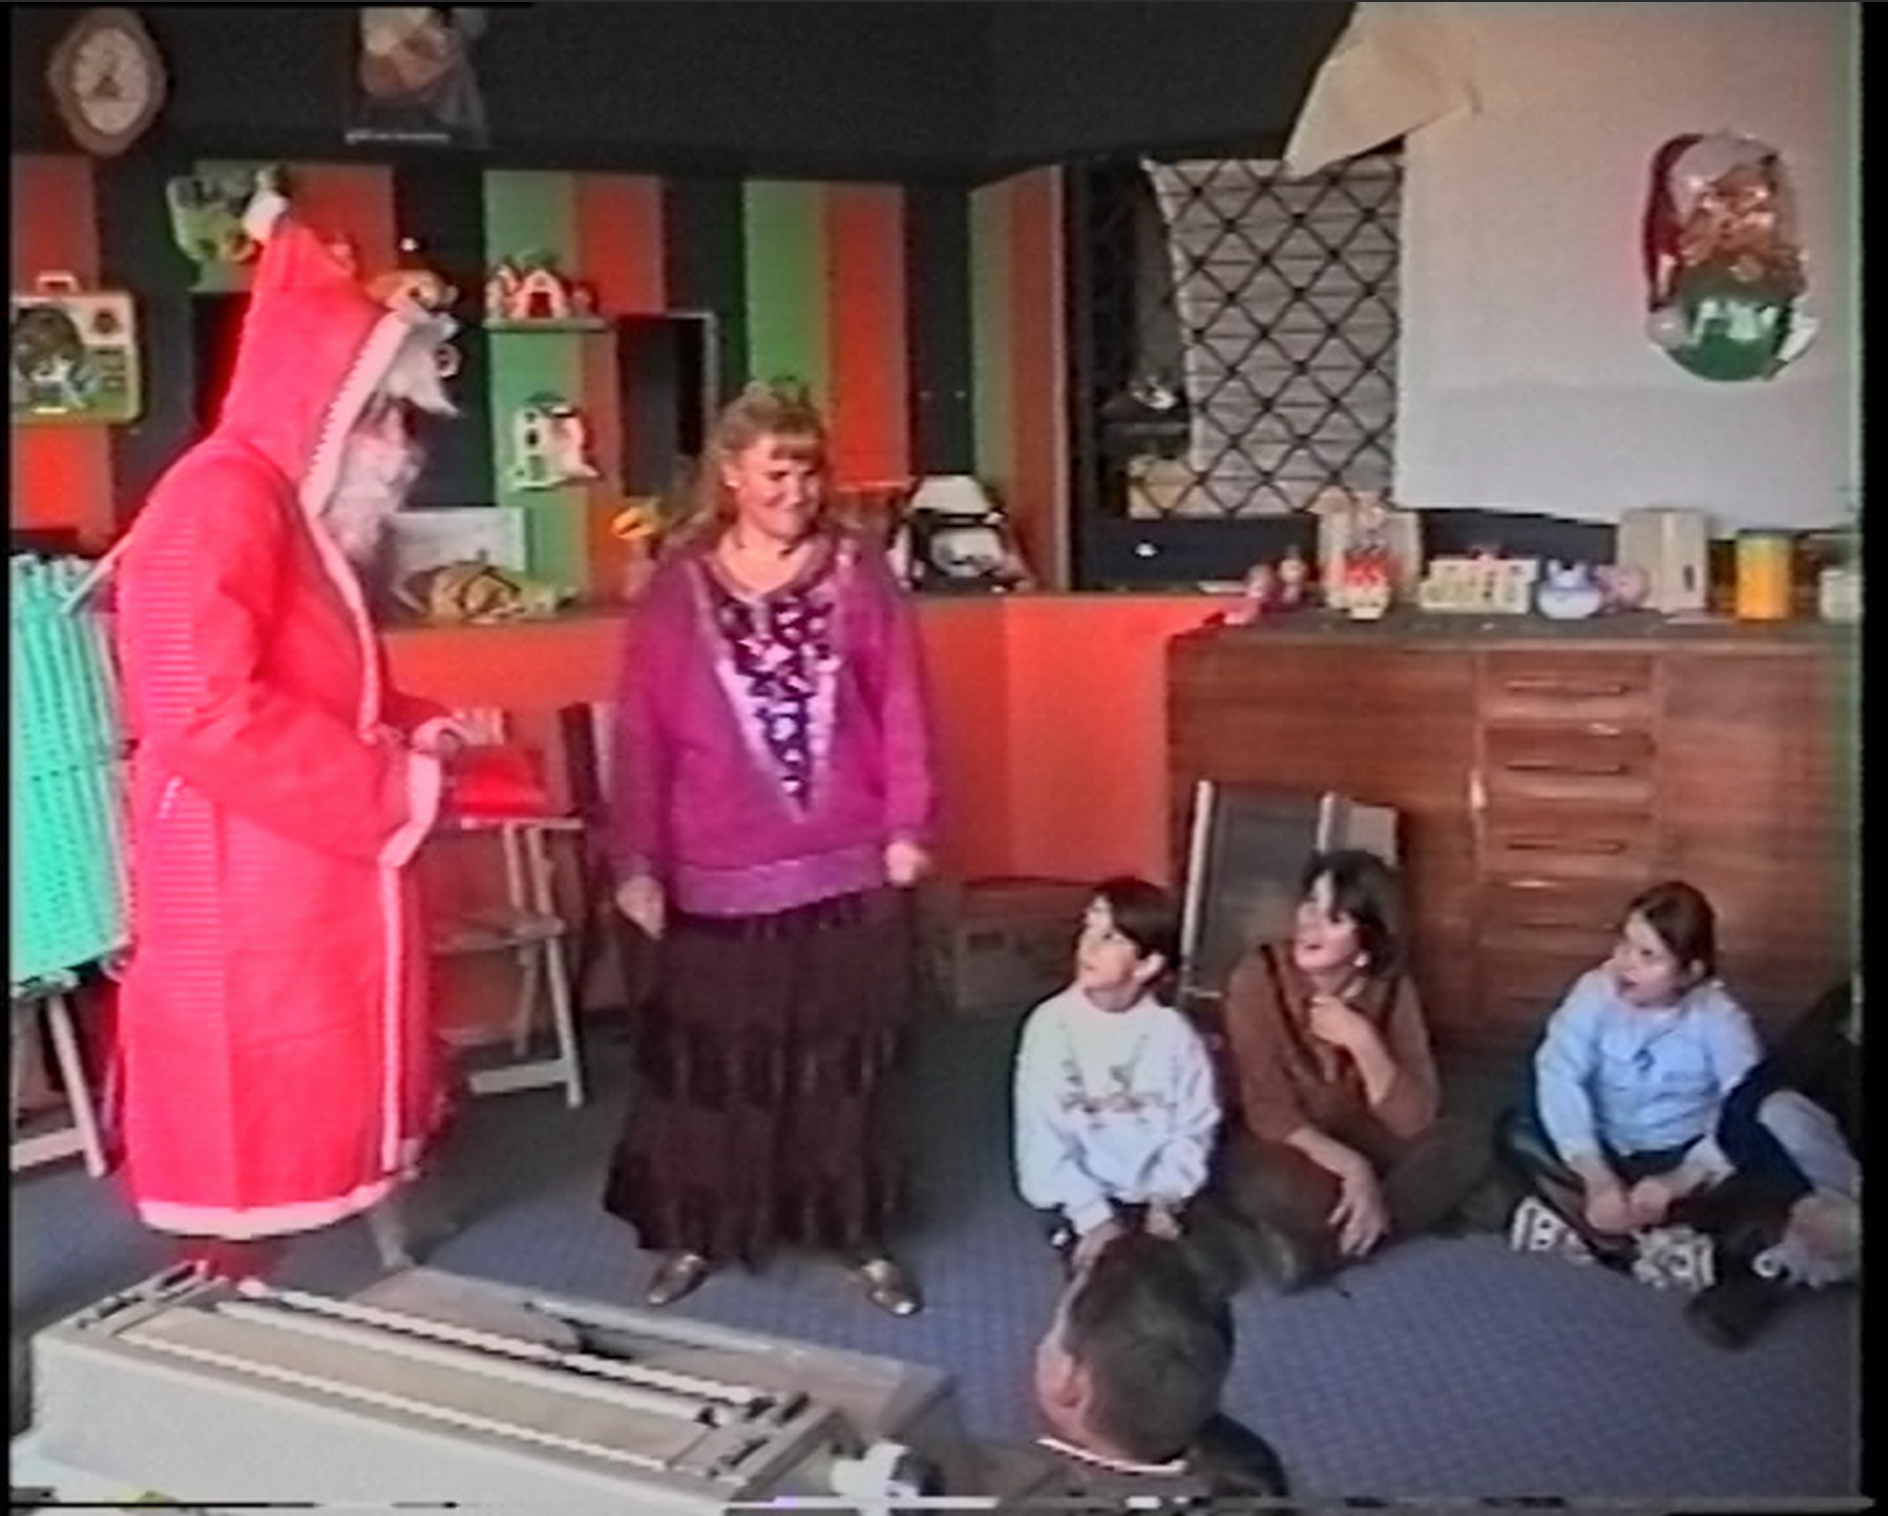
    You can see more detail in Santa’s (my dad’s) basket, a bit more detail on the little boy’s (myself) white sweater, and in general, faces have a better tone. I think you shouldn’t set the recovery to 100% when there’s a blown-out sky, for outdoor videos, otherwise the sky will be too gray and it will look unrealistic.
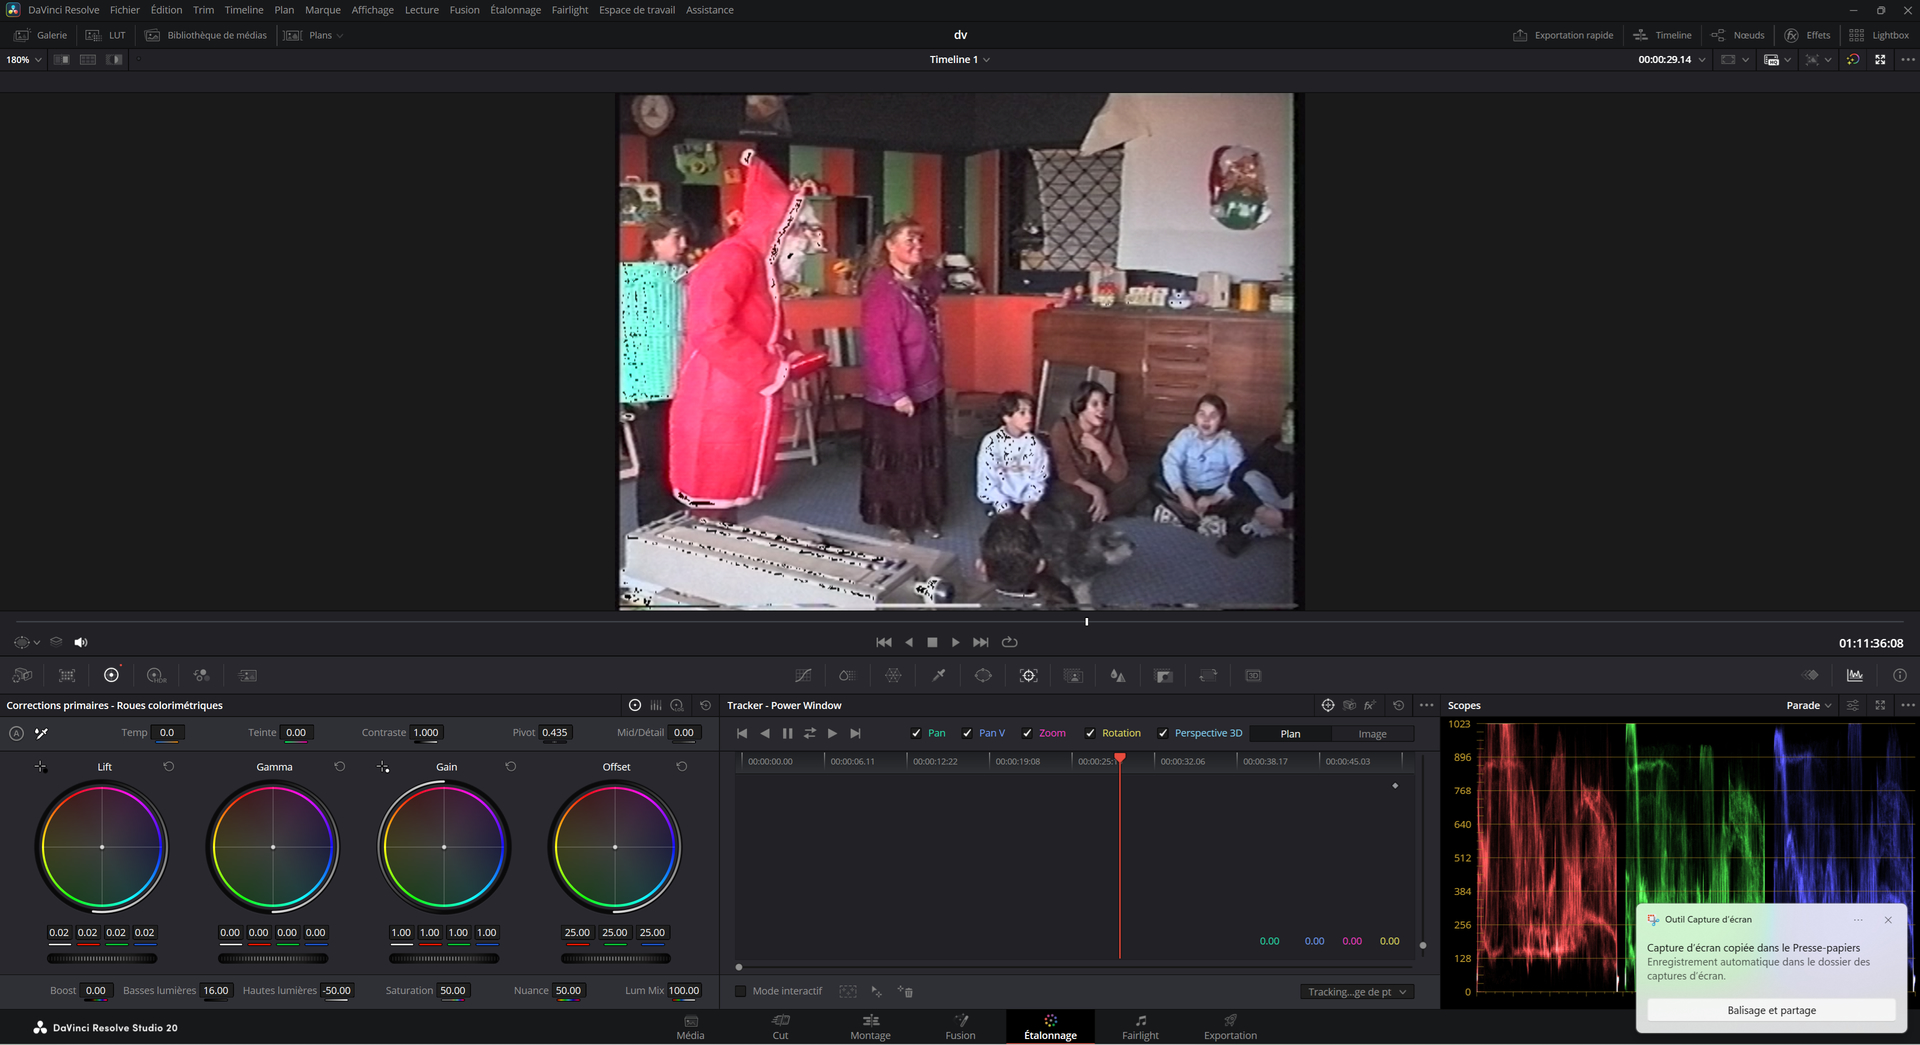
    In a situation like this, it might be a good idea to use Power Windows with tracking to recover highlights everywhere except the sky. I’m not familiar with tracking, but I’m going to learn! It’s worth it when a Topaz model invents details and creates strange lines that shouldn’t be there (Power Windows + tracking with a slightly more aggressive NeatVideo filter in the affected area).

  • The lift is slightly higher (0.2) to boost the blacks (black compression). If it’s set too high, the details in the dark areas are less contrasted, but there’s no noise amplification.

  • The shadows are boosted (16). This works in the opposite way to the highlights to brighten the image. Unlike the lift, the blacks aren’t compressed even though they’re brighter, so the noise is amplified. This can help Topaz better see the details in the shadows.

So I’m trying this setting, even though I’m not a color grading expert, but it seems like a good approach for improving the image with Topaz initially.

Anyway, that was a (small) digression. But you get the idea: to recover a bit more detail :wink:

Next, I usually export as uncompressed AVI, but I think it might be better to import as PNG. I’ve noticed that when I use the 2x upscaling with Topaz in 8-bit PNG, I get visible banding in certain areas. I’ve talked quite a bit with my friend Gemini about how to better manage VirtualDub, DaVinci Resolve, and Topaz, and he advised me to export in 10-bit. When trying YUV2, YCBCr, MagicYUV, in 422 or 444, etc., I recover slightly less detail, which I noticed particularly with the blue or green trash can icon, depending on your perspective.

However, when selecting “422 YCBCbr 10-bit (v210)” in VirtualDub’s color depth settings, I recover the missing detail, but there are lots of black specks in the blown-out areas. So, it’s unusable. I’ve tried many settings, and even with a lot of adjustments to color depth and compression, when saving as AVI, DaVinci Resolve refuses to open them. Only Direct Stream Copy works to recover all the original details.

And so, by exporting as a 16-bit PNG with Topaz, once re-imported into DaVinci Resolve, I no longer have this banding.

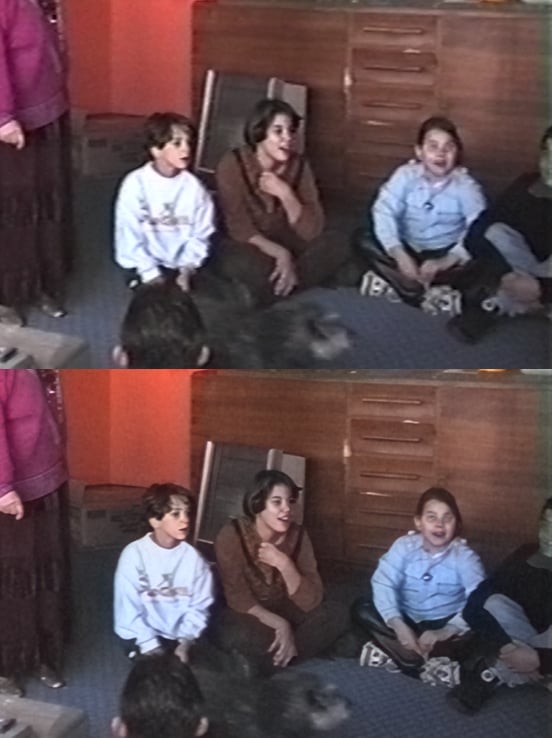
Here’s a screenshot of the rendering with “422 ycbcbr 10 bit (v210)” enabled in the color depth settings:

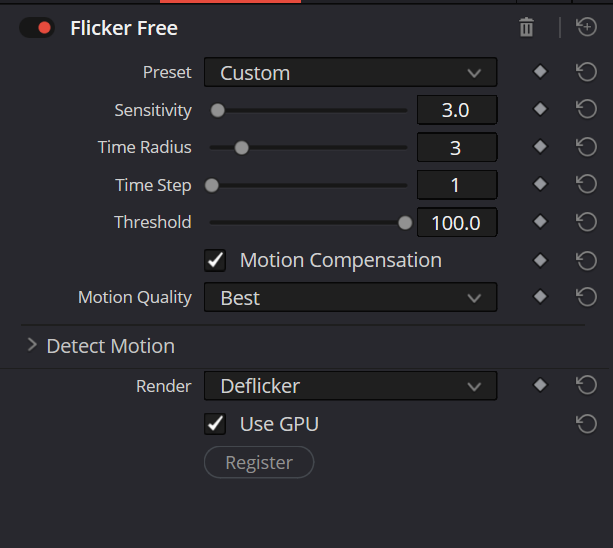
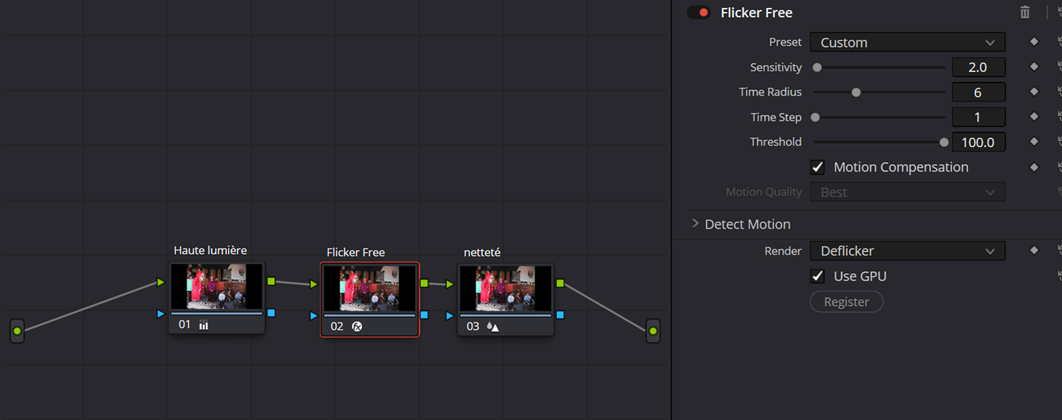
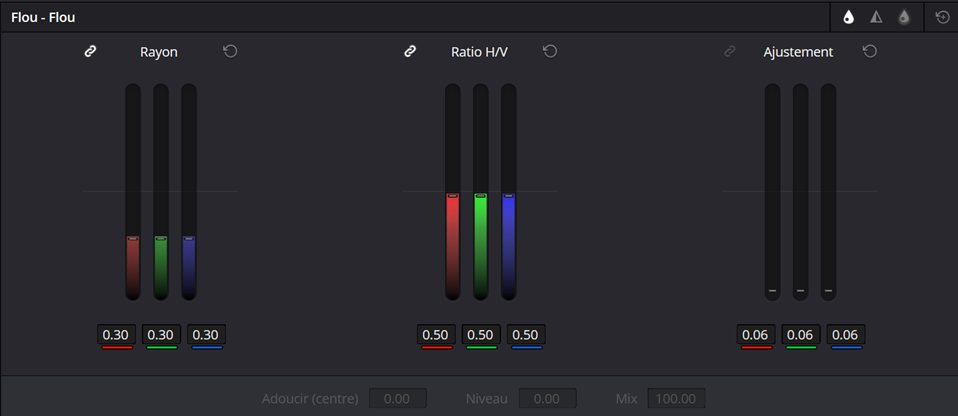
So, I’m going to continue my tests by exporting with Direct Stream Copy using VirtualDub, exporting as a 10-bit PNG with DaVinci Resolve (uncompressed PNG or AVI), and exporting as a 16-bit PNG with Topaz to be sure. Aside from this subtle color correction, I apply Anarchy’s deflicker effect (the best I’ve found, it works very well on my footage) with these values:

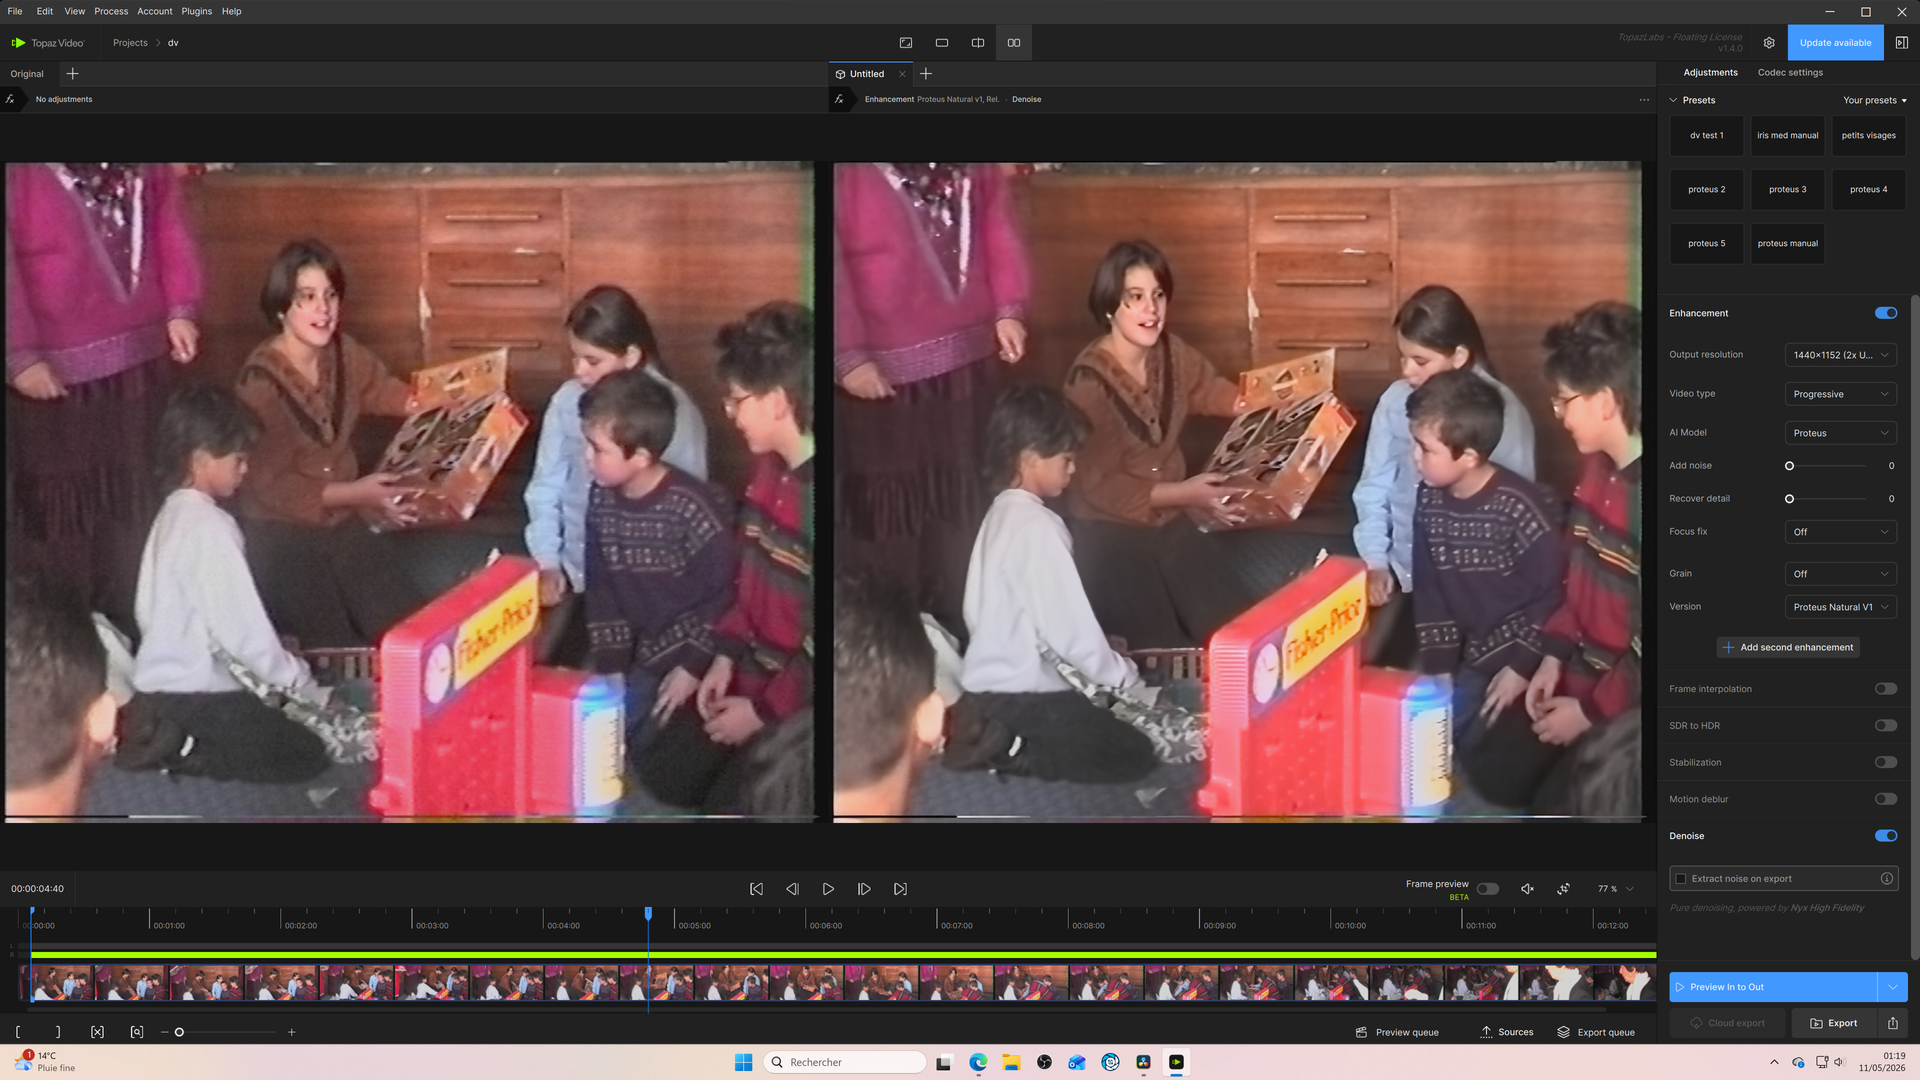
For the third step, I simply use the Proteus v4 x2 template (1440 x 1152) in Topaz. With everything set to auto, I might want to adjust the parameters for certain dark sequences or those with a lot of movement, or even use NeatVideo before sending to Topaz.

I then export as a 16-bit PNG to send back to DaVinci Resolve for color correction and noise reduction, in an HD (1280 x 720) timeline.

I follow this workflow, but I think that for the Proteus pass, I’ll crop the video to remove the black bars on either side and use 20% cropping for stabilization.

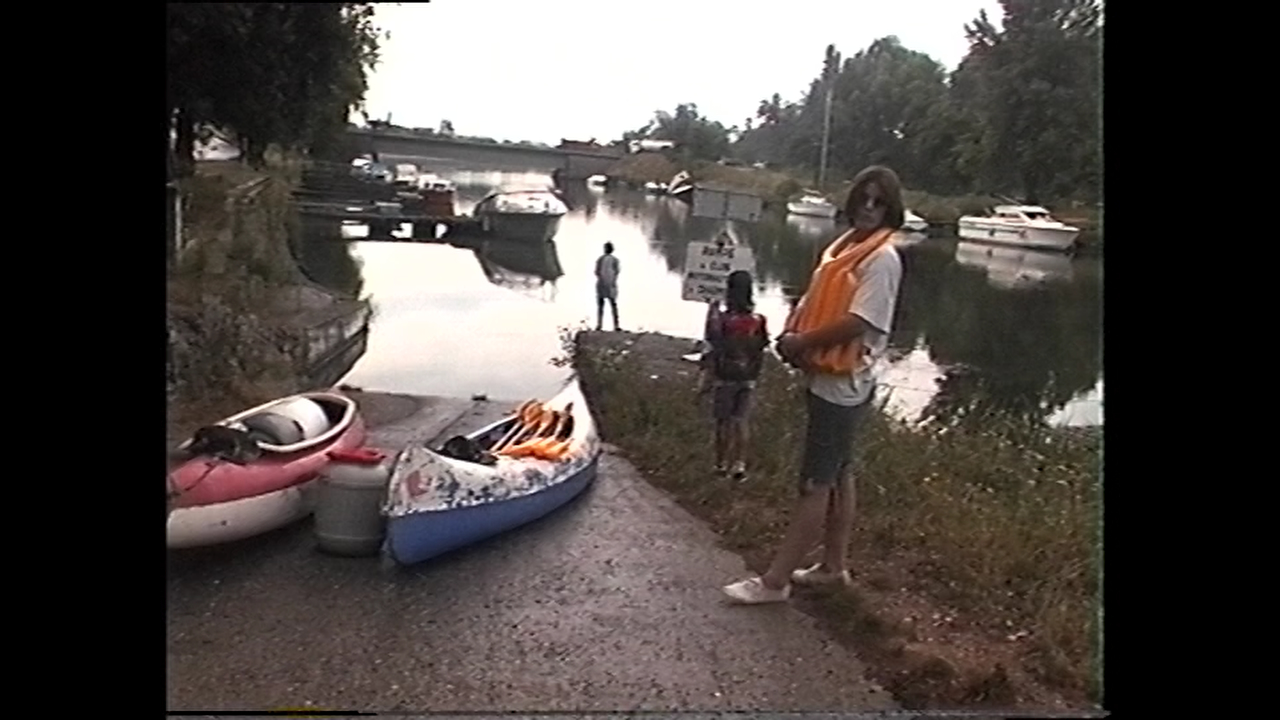
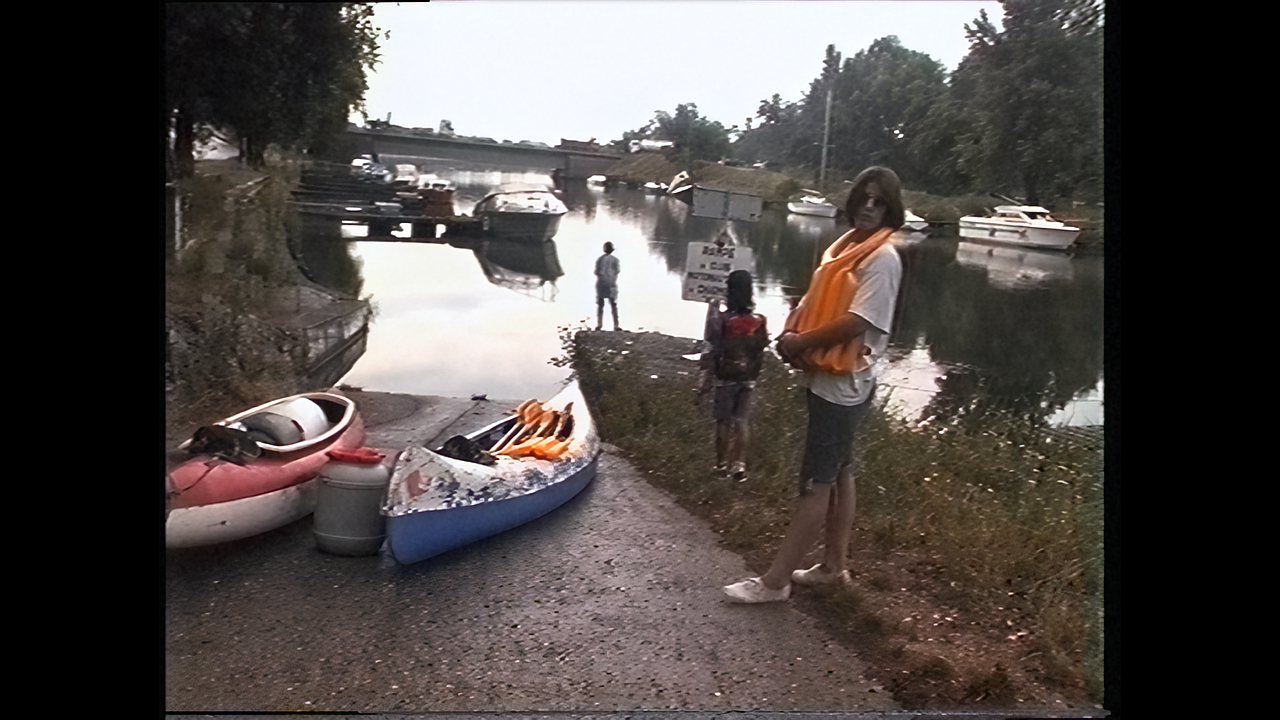
here : original/upscaling:

I’m still a beginner with color depth and VirtualDub compression. Even DaVinci Resolve isn’t quite up to scratch for me. I’m thinking of doing tracking on certain sections only, using specific filters. It shouldn’t be too complicated, and from what I’ve tried, it allows me to save shots where Proteus creates strange artifacts, like here (on the sort of gray plate behind the girl):

This is the workflow I’m currently developing. Any suggestions or corrections would be greatly appreciated! :wink:

Wow, that’s a great write-up! Thank you so much for taking the time to describe all steps in such detail!


With pleasure, for now I’m still testing. Even though my upscaling is satisfactory with this method, there are still some scenes with a bit of noise when it’s dark, during fast movements, or in scenes with small faces. In these cases, I switch Proteus to manual mode to prevent the faces from being too distorted. I’ve tried quite a few settings with NYX: Iris Low, Iris Medium at x1, followed by Proteus x2. For now, NYX Fast v1 at 576 x 720 with 100% detail recovery + Proteus x2 gives decent results depending on the scene.

I’m still experimenting, but in any case, I no longer deinterlace with QTGMC as I did before, because there’s always missing detail in the video, even with “final temporal smoothing” set to 0, or even with the draft preset. muksun with virtualdub restores details better when you do a pass with proteus at x2.

Perhaps the “Proteus Natural” model would be a better fit in these cases?


I also tried Proteus Natural on its own, it’s not great, but I just tried it with the “denoise” parameter added, and it works fairly well on a scene with small faces like this one:

but when the image gets darker, it struggles to remove the noise.

A few years ago, I digitized my old Hi8 and VHS tapes and then threw away most of the physical tapes. So now I have no choice but to work with the digital files I archived on hard drives back then.

But even back then, I thought that the videos could surely be improved at some point. I tried to digitize them using the best quality available at the time (or at least the best method I was aware of at the time for non-professional home users).

To transfer the footage to my PC, I used a Sony “Digital 8 Handycam” (model DCR-TRV345E or similar) with an iLINK-DV/FireWire output. This camcorder had a built-in analog-to-digital converter. It was also possible to connect an old VHS player to the camcorder using an S-VHS cable. This allowed the VHS signal to be transferred to the PC via the camcorder using FireWire.

Adobe had already removed the “capture” feature from Adobe Premiere by that point (I think it was removed in 2023?). Fortunately, I still had a old version of Adobe Creative Suite, in which Adobe Premiere still supported the capturing. If I remember correctly, I ended up with AVI files in PAL format, 25 fps, interlaced. Some recordings were in 4:3 aspect ratio, others in 16:9.

Then I followed these instructions to deinterlace the video files to 50 fps with AVISynth, QTGMC and VirtualDub2 (maybe the instructions are out of date now?):

Most of my “original” files are archived in the ProRes 422 HQ 16-bpc format.

I noticed back then that the image noise varied slightly with each digitization process. This may be related to the magnetic tape read head in the camcorder or VHS player and the built-in analog-to-digital converter.

That’s why I digitized the videotapes that were especially important to me multiple times. Some about three times, others even more often. When the video clips are layered on top of each other, this step alone improves the image quality (slightly more in some clips, slightly less in others).

I haven’t upscaled most of my longer video recordings yet, I’m still waiting for the upscaling models to get even better and faster. However, I keep testing the new upscaling models of Topaz. My focus, though, is currently mainly on individual, short clips, where I don’t mind spending a lot of time on upscaling to get the best possible result.

I understand, we used more or less the same digitization method. For mine, I initially used a camcorder with an S-Video output. The quality was obviously poor, and as I learned, I looked into FireWire, so I bought a FireWire capture card with a TRV 120E camcorder (I think). It can read and digitize 8mm Hi8 and Digital 8 tapes, and it has SP and LP functions. There’s also a TBC function, but I don’t think I noticed any difference. I didn’t think the quality could vary depending on the digitization source. In my opinion, as long as it was digitized in AVI DV via FireWire, it was the highest quality, but I never considered whether changing camcorders might improve things. My tapes are from 1996 and 2002, and everything was filmed with a Canon camcorder back then (I think). That’s all I know. It’s also at 25/50 fps.

Regarding upscaling quality, I just think you shouldn’t go beyond HD with Topaz. I also considered sending my tapes to a company to have them cleaned and digitized, but it seems to me that most digitize in MP4 format.

My tests are also done on several short clips from different tapes.

Hi, I’ve slightly updated my upscaling method with DaVinci Resolve and Proteus. I’m getting better results; the details are now a bit finer, and therefore small faces are better restored with Proteus.Instead of playing with shadows, simply go to the clip’s attributes and set “Data Levels” to "Full.

Then define the flicker like this:

And add a touch of sharpening like this:

Then, for Topaz, I applied Proteus’s automatic 2x upscaling with “Recover Details” set to 5.

Original Upscaled :

without grain Upscaled :

Upscaled with grain:

Other comparison :

I found an exceptional filter in DaVinci Resolve. After upscaling, there’s the “Beauty Mode” filter, which is particularly useful for adding texture!

(Set it to automatic)

Original:

Upscale:

Upscale + Beauty Mode

Hi Guys, I have two steaming hot computers going 24/7 on TOPAZ video projects. As an ex-Broadcast man, I find most of the process gives stunning results if you ‘think ahead’ with the parameters and the different outcomes produced with different ‘operators’ in the enhance process. I have sent a short clip of some awful grainy low light ‘first dance’ off a VHS (second generation) Wedding Tape from 1998. Transferred from my very good VHS JVC dual deck, the timebase corrector helps a lot in to a 'avi file for work. So - the latest trial after some varying efforts at getting the ‘first dance’ to be visible, no noise, and faces recogniseable, I uploaded to STARLIGHT to see what it would do. MARVELLOUS! It is absolutely superb. BUT - it have to pass on the cost to the customer … and it takes ages. I would like very much to ‘ground’ the costs with my machines here. Has anyone got any idea what sort of computer makeup I should use for this? At the moment I am using one AMD 12 process CPU with Nvidia 3080 Ti GPU. This runs twice as fast as my Intel i7 12 process CPU with a 3060 ti GPU. Neither are as fast as I need to do projects which are one hour duration of video that will end up being 16 - 24 hours of processing. I also have the heat dissipation to think of - which is, in itself a cost implication due to the huge power consumption of the computers in continuous process mode. I ‘think’ more cores, and later generation CPU is going to be needed with new Mother Board etc … which is best? Intell or AMD in this application. Also - GPU? Nvidia 5080 was as far as I could think - and would this give me so much improvement in speed with reduction in power consumption, as to notice and be able to work more than twice as fast as now. ANY ideas for a workstation makeup would be appreciated. If you’ve done it yourself - then I’d like to know what is entailed. Currently working through a batch of tapes (32xSD DV) up to double res and framerate. Losing hair over it.

The amount of VRAM is very important when it comes to speed. If you open Windows Task Manager/Performance/GPU, it shows “Dedicated GPU Memory” and “Shared GPU Memory.” During a render, you do NOT want to see shared CPU memory increase, because this means Topaz has exceeded available VRAM and has is swapping blocks of data to much slower CPU RAM. The developers’ term for this is “thrashing.”

With that in mind, a 5090 with 32GB or VRAM is a much better bet than a 5080 with 16GB of RAM, if you can afford it. Even a 4090 with 24GB VRAM would be better than a 5080 with 16GB.

You also want to make sure the motherboards has enough PCIe lanes is of a PCIe version (4 or 5) that matches what the the GPU needs. There’s no sense plugging a PCIe 5 GPU into a PCIe 4 socket.

Topaz doesn’t seem to do heavy multithreading. A lower number of faster cores will perform better than a higher number of slower cores.

As far as power consumption goes, there are other members on this forum that have posted that they’ve used utility software to drop the clock speed of their GPU slightly to decrease power consumption. Speed vs. power consumption is a tradeoff; you have to determine for yourself what the right balance is. Personally, I just let the GPU run at full speed.

BRILLIANT! … thanks you - just the info I need. My present setups are using series 3 NVidia cards with 12GB Vram and when I look at the CPU usage - it is inevitably using all CPU cores almost flat out on the 3060 Ti card and similar an the AMD board with the 3080 12GB VRAM. The CPU RAM running less than 50% use of the onboard 32GB. There are 2 full and one short PCIE slots on each board - these are old boards so have no idea what version. So why is my Topaz runtime showing all CPU cores used at about 80-100% when using Topaz video to deinterlace DV with frame interpolation at double (i.e 25i becoming 50P) ?

What I was suggesting is that, for Topaz Video, 8 cores running at 5+ Ghz will perform better than 16 cores running at 3-4 Ghz. There’s a point of diminishing returns, unless you’re concurrently running more than just Topaz on the same machine. If your budget allows, Intel Core Ultra 9 285K is a great choice. A less expensive alternative is Intel Core i7-14700K.

I’ve not been using Topaz for deinterlacing; I’ve gotten better results with QTGMC and Pegasys Video Masterering Works. Topaz may be using multiple cores for deinterlacing.

I’ve also noticed with VHS-C that I could feed interlaced video directly to Starlight Mini, and the result did not have noticeable interlacing artifacts. That surprised me. I’ve not tried DV, though.

My comments about PCIe speed were aimed at the purchase of new hardware. Pay attention to the specs if you buy a new motherboard or computer. All 5070 and higher GPUs require 2 full length “x16” slots running PCIe gen 5 in order to run at full speed. (x16 refers to the number of PCIe lanes).