What do you do to make thumbnails appear in the timeline? Haven’t seen any so far.
Is there no way to turn off Live Render now? I just want to play sections of video without any processing and I can’t seem to find how to toggle Live Render off. I’m so tired of the GUI changes.
Edit: I found that I can get it to just play a section by toggling off the Enhancement option. I don’t know if that is intentional, but seems clunky. I prefer having Live Render toggleable.
5 Likes
hate that i need to create a new proyect every time and the proyect is open and close every time i open and close tvai. i want the old easy option of import video enhace export done. it could be toggleable the proyects mode VS direct enhacement mode
-edit-
Rhea still in any zoom out/low quality face ends up on a blur/demon face
Jennifer Lopez - Waiting For Tonight (offical video) Remastered
and cloud rendering does not work for me. tried twice, told me will cost something like 90 credits to process X video, upload it and stuck for over 20 minutes on “allocating resources” never took any credits from me, just cancelled and render it locally. if the servers are worse than my laptop just shut down the whole “cloud rendering thing” i guess are second hand i5 cores pcs in a daisy router chain to save money for sure.
1 Like
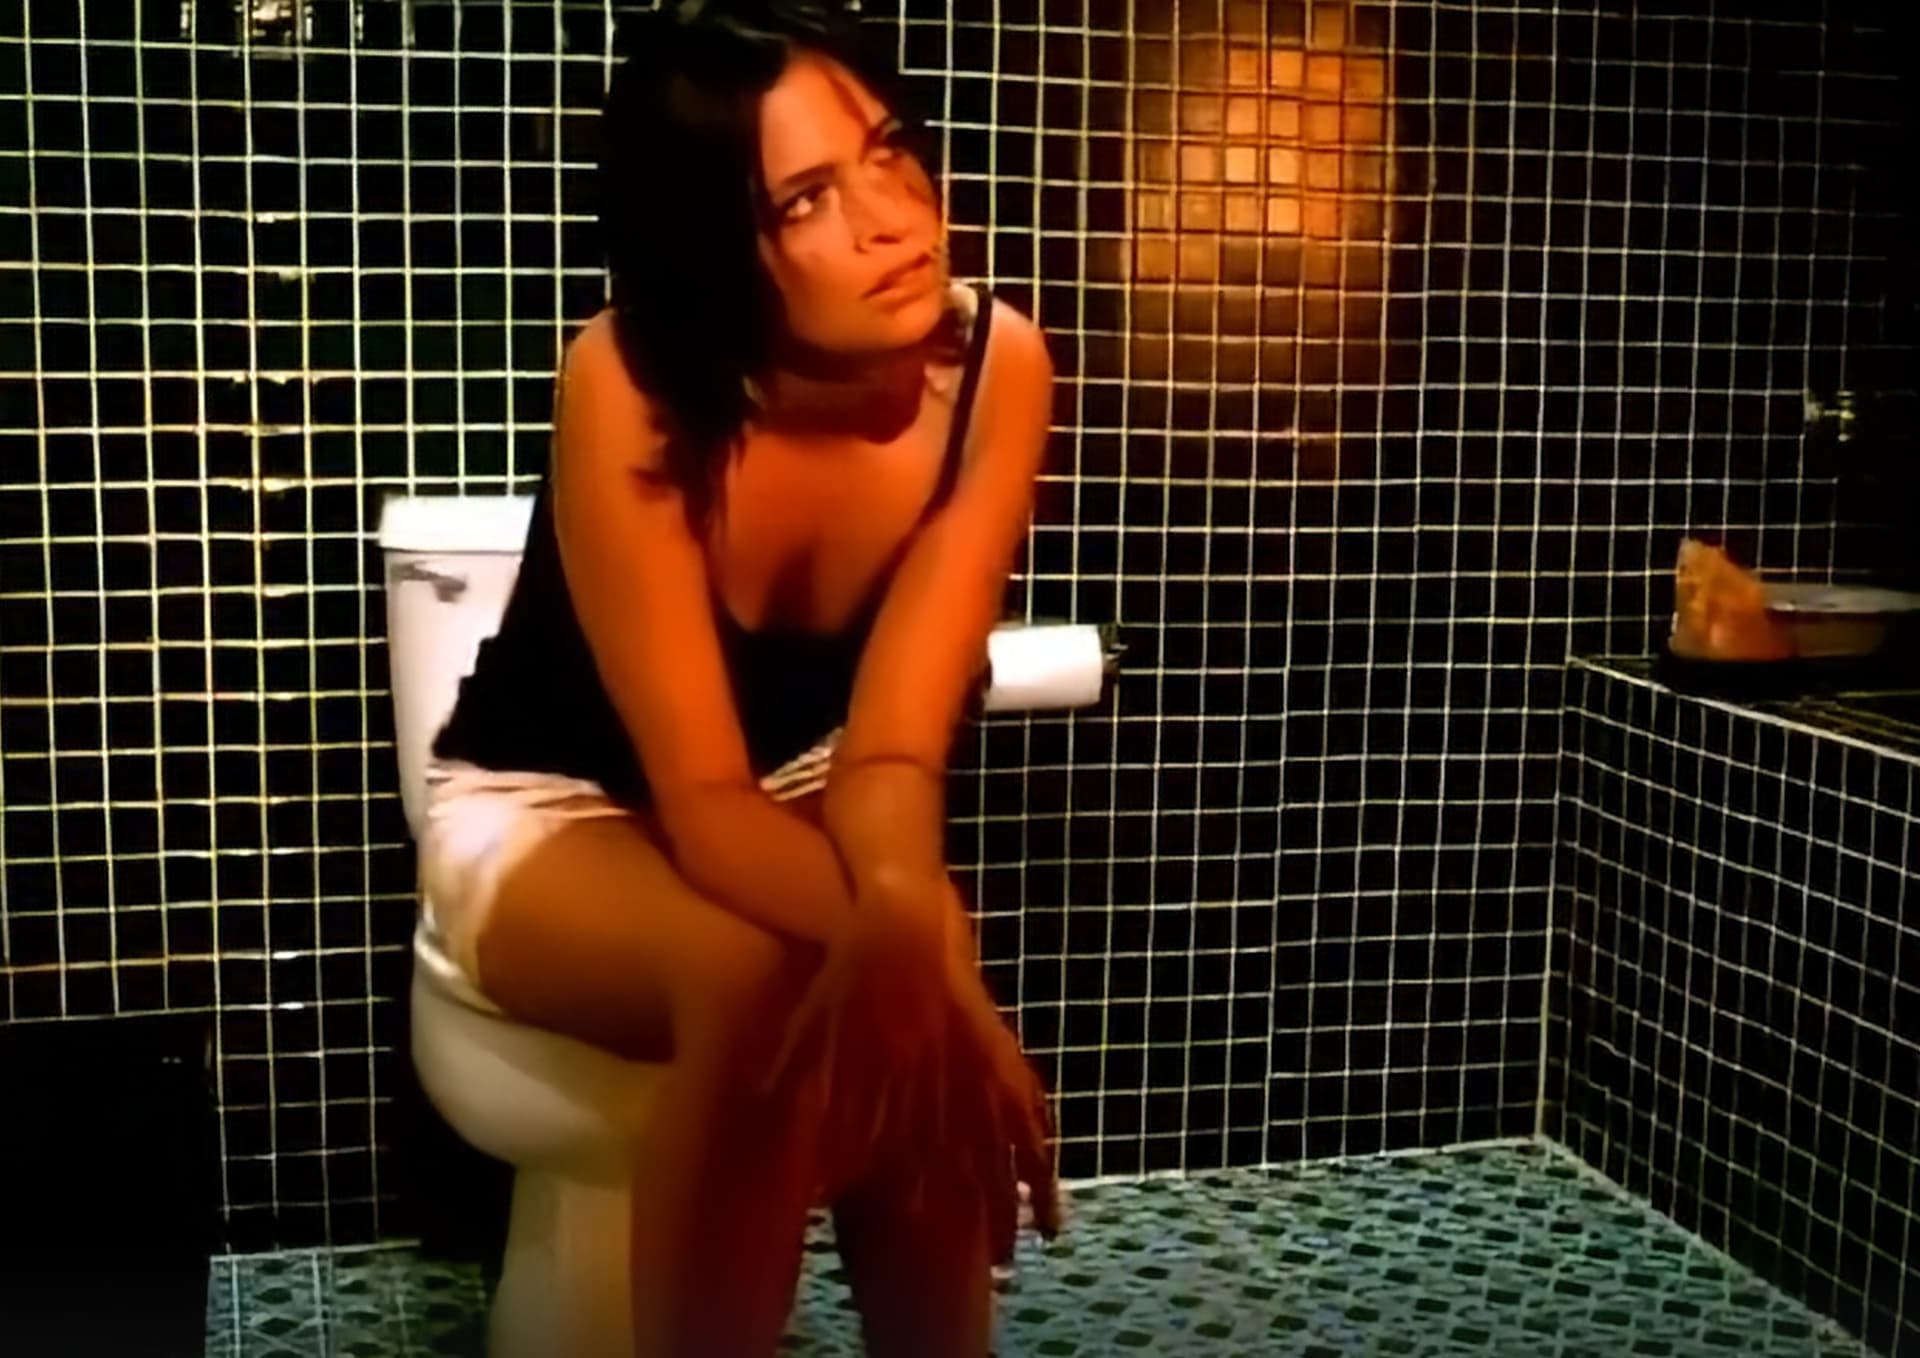
Grids and lines (such as tiles or window blinds) have always been problematic for most models. From my testing, Apollo is the only interpolation model that can handle them properly without turning sections into blurry blobs.
2 Likes
Rhea seems to be particularly bad at this. See: Topaz Video AI 5.4 - #13 by meimeiriver
Just goes to show there’s zero actual intelligence going on, really (they’re just statistical models).
1 Like
With the exception perhaps with Iris for face detection/handling.
2 Likes
Yeah, Iris2 did a remarkably good job there. ![]()
1 Like
I quite like the new interface, but overall the application is slower to respond. In the export overview, it would be nice if the complete file name was displayed, even if it is longer, as soon as you point to it with the cursor. It would be great if live rendering also worked with stabilisation in the future. I would also like to see a button to start live rendering rather than using the space bar. I would also like to see a function that saves incompletely rendered videos with stabilisation, so that in the event of a crash or power failure or an unintentional Windows update, the entire file does not have to be rendered from the beginning. This is always very annoying, especially with large 4k or 8k videos that require several frames to render. I would also like o special AI for improvement of 4k and 8k videos.
run a video in the cloud, this time worked, give me a video that only seems to have been output to H265 and variable bit rate. as well i asked to chronos to give me 60 FPS and the final output is 58.xx FPS
as well a stupid 500+ mbs file when the original is something like 100 mbs.
it cost me 48 credits to realize the cloud rendering is complete garbage. as well it took about 20 minutes when it said it will take about 12 minutes.
run it locally and the output is better, even that strangely this is a video “upscaled” by the artist and once it runs trough tvai the output looks like a 3D filter in some cases. this case was protheus to enhace the video and chronos to take it to 60 fps
Shakira - Te Dejo Madrid (OFficial Video) Remastered
1 Like
Can you explain this for us?
I can’t think of any true 4K videos that would need the kind of enhancements that TVAI already offers, except maybe straight from a camera. And even with that, if you’re talking about any enhancement that’s not denoising, it sounds like your 4K video was not originally 4K and someone just upscaled it with a standard resize filter. (If that’s the case, use the fix focus feature.)
1 Like
You can do free upscale, trained Models are not optimized to a specific resolution, except 4x Rhea and here additional 2x optimized one is on my wish list. With a 2x Rhea optimized model you could do 4k to 8k then, or DVD resolution to 1080p without 4x upscale and downscale gives you plastic look, and it’s faster when this does not happen.
My Rhea wish list
2x
480p → 960p / 540p (DVD) → 1080p / 720p → 1440p (wqhd) / 1080p → 4k / 4k → 8k
2.25x optional
480p → 1080p / 540p (DVD)
Perhaps he’s talking about extra interpolation room? There’s none, of course (when going 4k → 4k). So, perhaps a model designed for in-place enhancements?
Personally, I’ve tried Proteus on 4k material; it does something, yes, but clearly less pronounced than when coming from a 2x upscale.
On the latter, see: Topaz Video AI 5.5 + 5.5.1 - #398 by meimeiriver
Like I said, in that thread, without (near) lossless output options, you can’t really use the output stream for post-processing; and with a lossless option, you effectively can’t grab the output stream. (Who can afford to download a near 1T mov file?) Cloud Rendering is essentially antithetical to home-use.
why is topaz involved in UI building look at how Simple Video Converter AI looks
Look at Open PLI for satreceivers every week an firmware upgrade that works for all receivers but the interface is always the same and you can add plugins according to your needs all open source
Maybe asking a question to Copilot might give a better idea how to create a usefull interface for video enhancing software
Creating a useful interface for a video enhancement AI program involves several key steps. Here’s a guide to help you get started:
1. Understand User Needs
- Identify your target audience: Determine who will be using your interface and what their needs are.
- Gather feedback: Conduct surveys or interviews to understand what features and functionalities users expect.
2. Design the Interface
- Wireframes: Create wireframes to outline the basic structure of your interface.
- Prototyping: Develop a prototype to visualize the user flow and interactions.
- User Experience (UX): Focus on creating an intuitive and user-friendly design.
3. Develop the Interface
- Choose the right tools: Select appropriate tools and frameworks for building your interface (e.g., React, Angular, Vue.js for web interfaces).
- Implement features: Develop the core features of your interface, such as video upload, enhancement options, and preview functionality.
- Integrate AI models: Ensure your interface can interact seamlessly with the AI models for video enhancement.
4. Test and Iterate
- User testing: Conduct usability testing with real users to gather feedback and identify areas for improvement.
- Iterate: Make necessary adjustments based on user feedback to enhance the interface.
5. Launch and Maintain
- Launch: Release your interface to the public.
- Monitor and update: Continuously monitor user feedback and update the interface to improve functionality and address any issues.
Would you like more detailed instructions on any of these steps?
3 Likes
i remember this UI madness was my fault. they where asking what we wanted for improve in the programs, in the times that topaz AI adjust was still a thing, the UI looked from a windows 2000 pro so i asked to update all the programs ui. and the dev team did upgrade and change them. then it became the standard. new version = same bugs new UI.
2 Likes
So you’re the one…
2 Likes
Whatever possessed you to do something so foolish?! ![]()
3 Likes
yes but i dont use neo. i prefer one
well when you purchase a software released in 2019 and the UI looks brand new from windows 98 i think in that point is an issue right?
1 Like