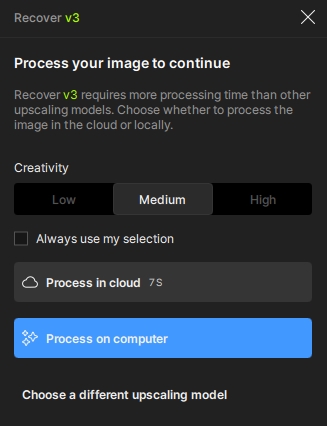
@Fotomaker - the progress bar is still being looked into. You can let the cloud process run through and it will go to Downloading once processed.
For the video questions, yes you can use your cloud credits for cloud processing. For any specific questions, this is the Topaz Photo Releases thread. You can share video details on the Video General forum threads, and the Video team can reply, or send the details on video length, fps, and needs for it (can send a sample) to support@topazlabs.com, and the Video team can help!
Ange.topazlabs
(ange.topazlabs@gmail.com)
Split this topic
31
@mikmod1 - thanks I have shared to the development team.
For the Remove 2 blobs, make sure to be on AI Processor CPU as a workaround until we release a fix. Once the issue fixes we will update this thread here. Send s acr
@unrelent can you cand a real image example that shows the issue, to support@topazlabs.com - we need to have the original and details on what model is used, your logs (to see if corrupted models) and system profile (to see if any errors or updates needed for graphic card). There is no open grid development team ticket for Upscale. Grid like this can be a processing error, missing or corrupted model, graphic card update needed, or incorrect model being forced on the file. We would know more and can send steps to resolve or open a development team ticket once we see the original file and what upscale model is used, as well as your machine details.
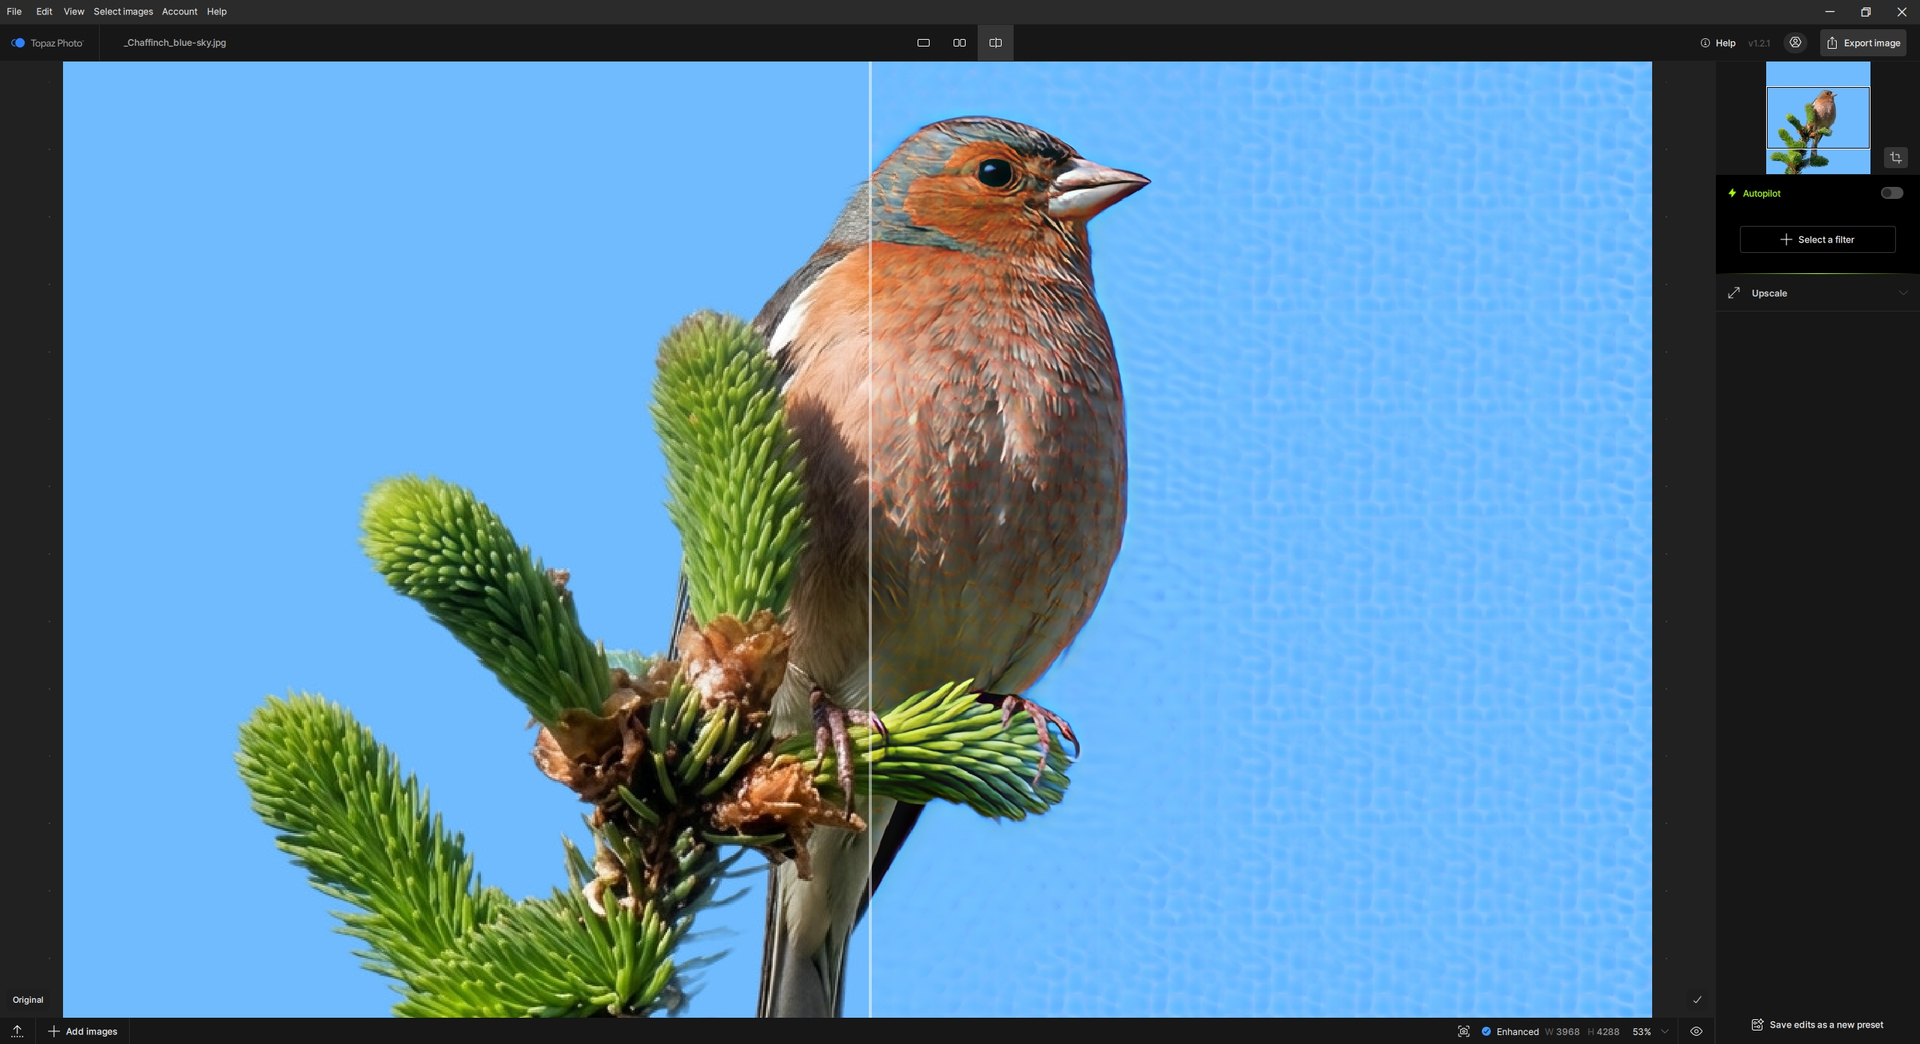
per Lingyu -Technical Product Manager: For this blue sample, the model is not made for plain samples with nothing to process. It’s a recovery model, if they want a minimal upscale then High Fidelity is probably a better case
@mrtoyota03 - can you DM me the original that you import in Topaz Photo and screenshots of the enhancements when you get to this result? We will have a look when sent
I did what was requested and sent it to Support (DxDiag, Logs, input & output JPG). BTW, I tried it for Cloud as well, but it didn’t work there (some generic yellow error message, maybe too big file?). Anyway, thanks in advance for your support.
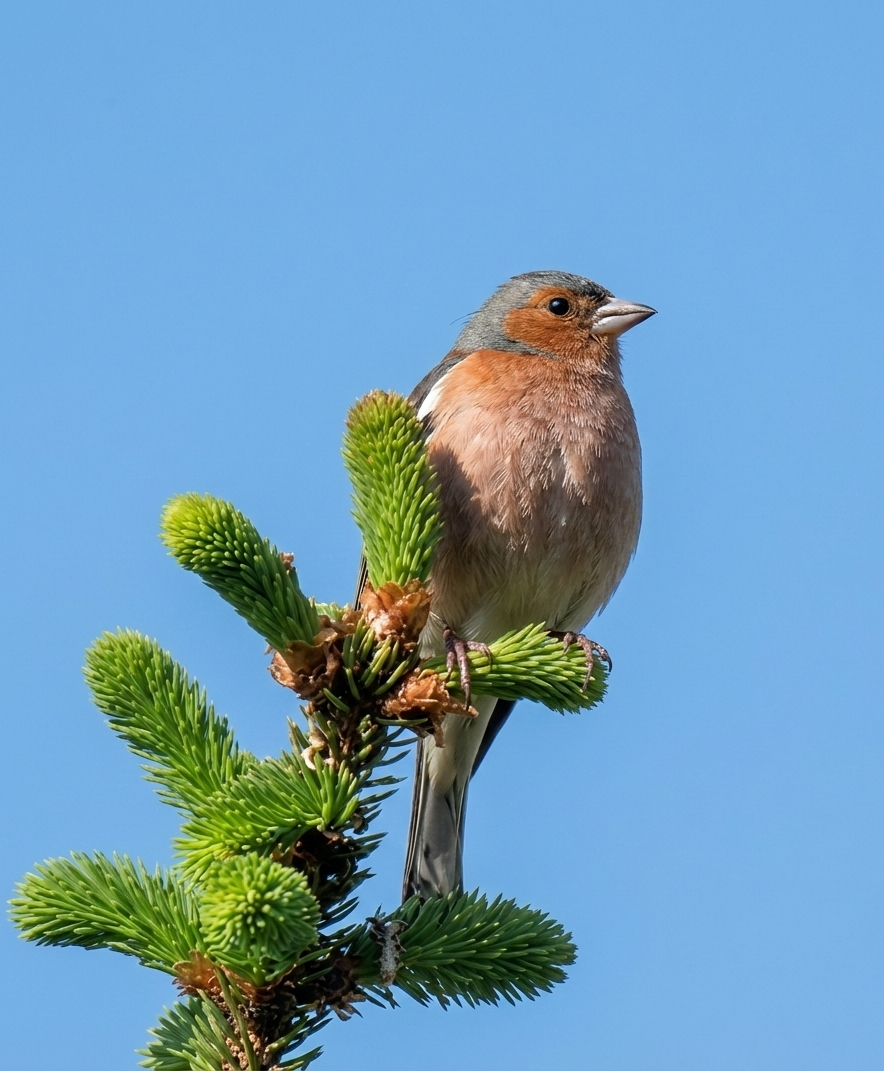
I am attaching (just for information) the original and the provided result (with honeycombs). I also sent it to Support. Chaffinch bird on a twig, blue sky in the background. I just wanted to test the artifacts (they appeared there). There is a different and good way to process the photo. I will report the result here (maybe there is a mistake somewhere on my part).
I guess that your example it’s way overprocessed to enhance the artifacts?
What I experienced is that with Remove v2, on small things like a leaf from a branch, it worked OK’ish but it added some grainy texture very easy to spot at 100% (and even more at 200%).
That grain “added” can be reduced to almost nothing by applying the Denoise but, it didn’t happen with the former versions.
Besides, it’s as slow if not slower than before and I honestly see no benefits in return compared to V 1.1.1
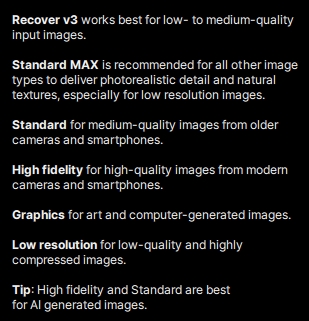
This is the issue. Recover v3 is for very low resolution images. This is a hi-res bird image. The only model to use here is High Fidelity. Forcing any model on a file past what its intended use is will create artifacts as it is misused.
You can use a low-resolution file (not the image you are testing) and test the Recover v3 model once you have one!
Thanks for the information. High Fidelity (and many other methods) do not produce those artifacts. I also tried HiFi, but I didn’t like the bird’s eye. But some solution was found even without artifacts.
I probably didn’t quite understand exactly what is meant by the term low- to medium-quality (i.e. that it specifically refers to low/medium resolution). In my experience, those artifacts are created when creativity is used (if used in the method). Low resolution method is explicitly mentioned as an individual method. One is always learning. I based it on general hints:
First of all I know that Wonder model family is intended to offer a one-click solution to enlarge low quality files. But I’d like to share my thoughts.
The Wonder model is great at giving smartphone pictures a better look/definition. That’s how I use it the most. The only criticism I had toward the model, is that fact that it tends to add a smooth/plastic look on some faces, especially if files are of low quality.
Apart from that, it works great at enhancing a whole scene.
Another thing is with hairs. I think it’s a bit too much. If there was an intensity slider, I’ll probably set it around 40%. Too bad that there isn’t.
I wish there would be an option before the rendering, to select the intensity on the face/hairs or to select a zone of the photo manually.
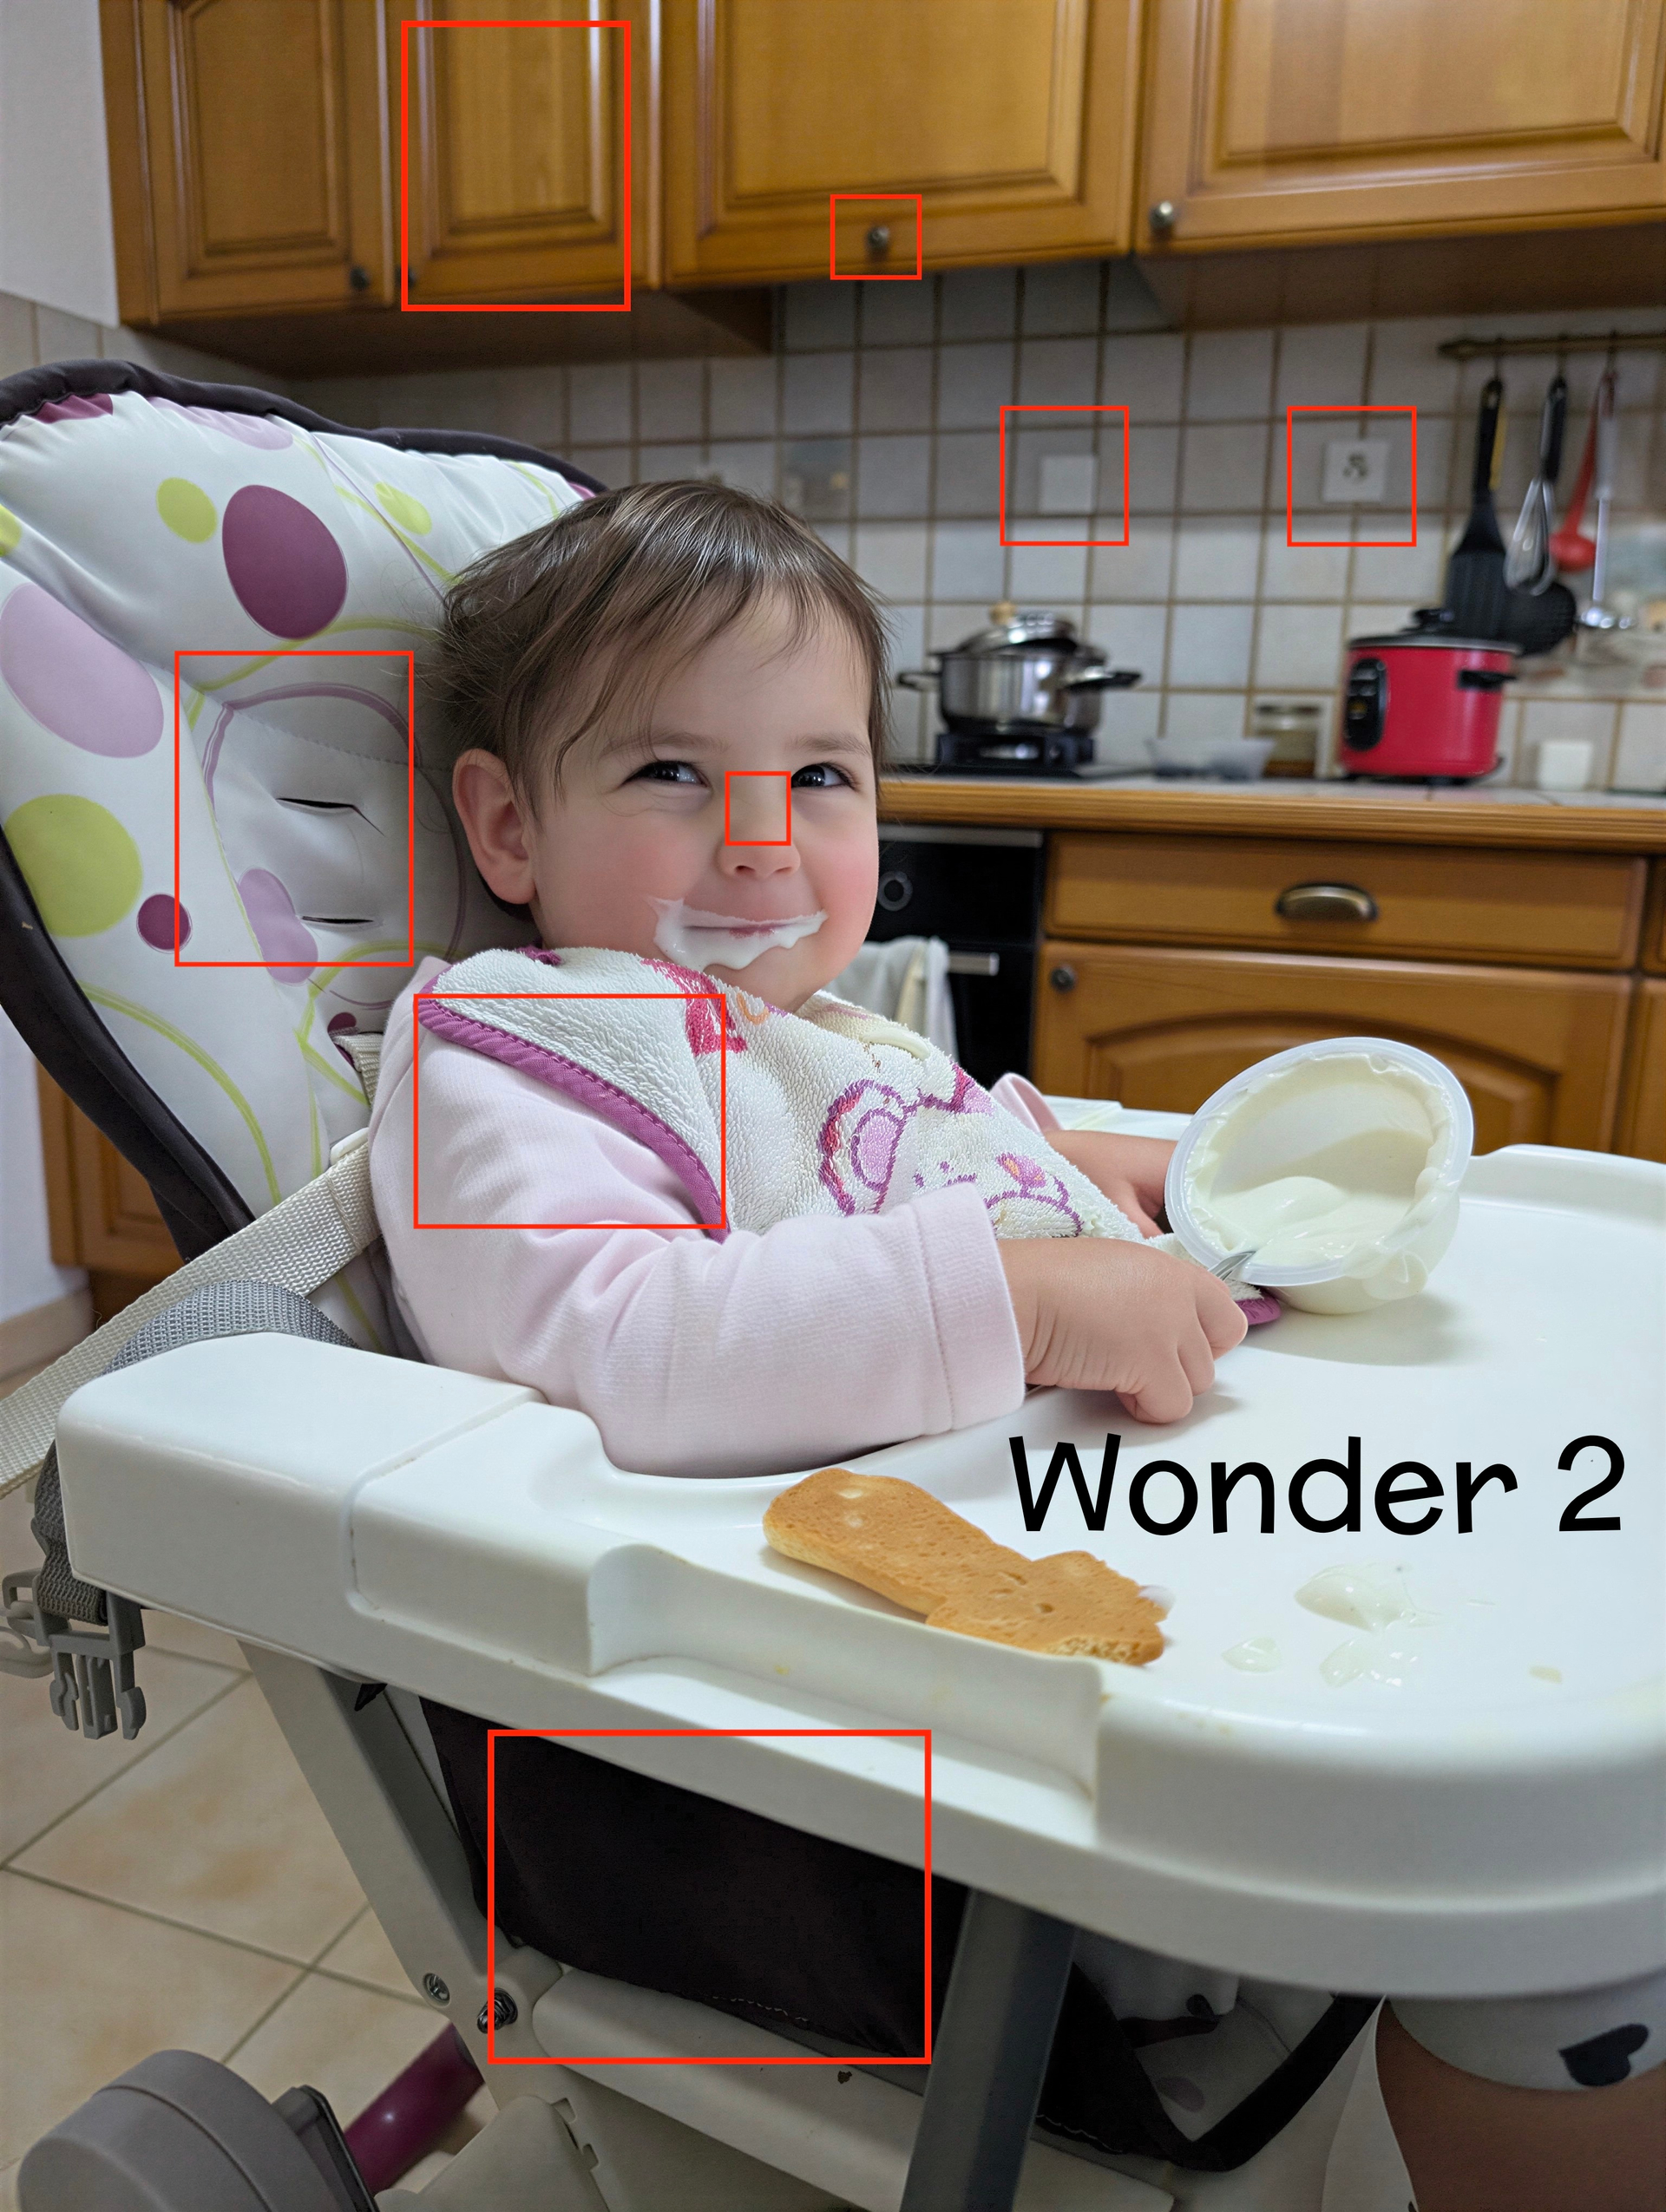
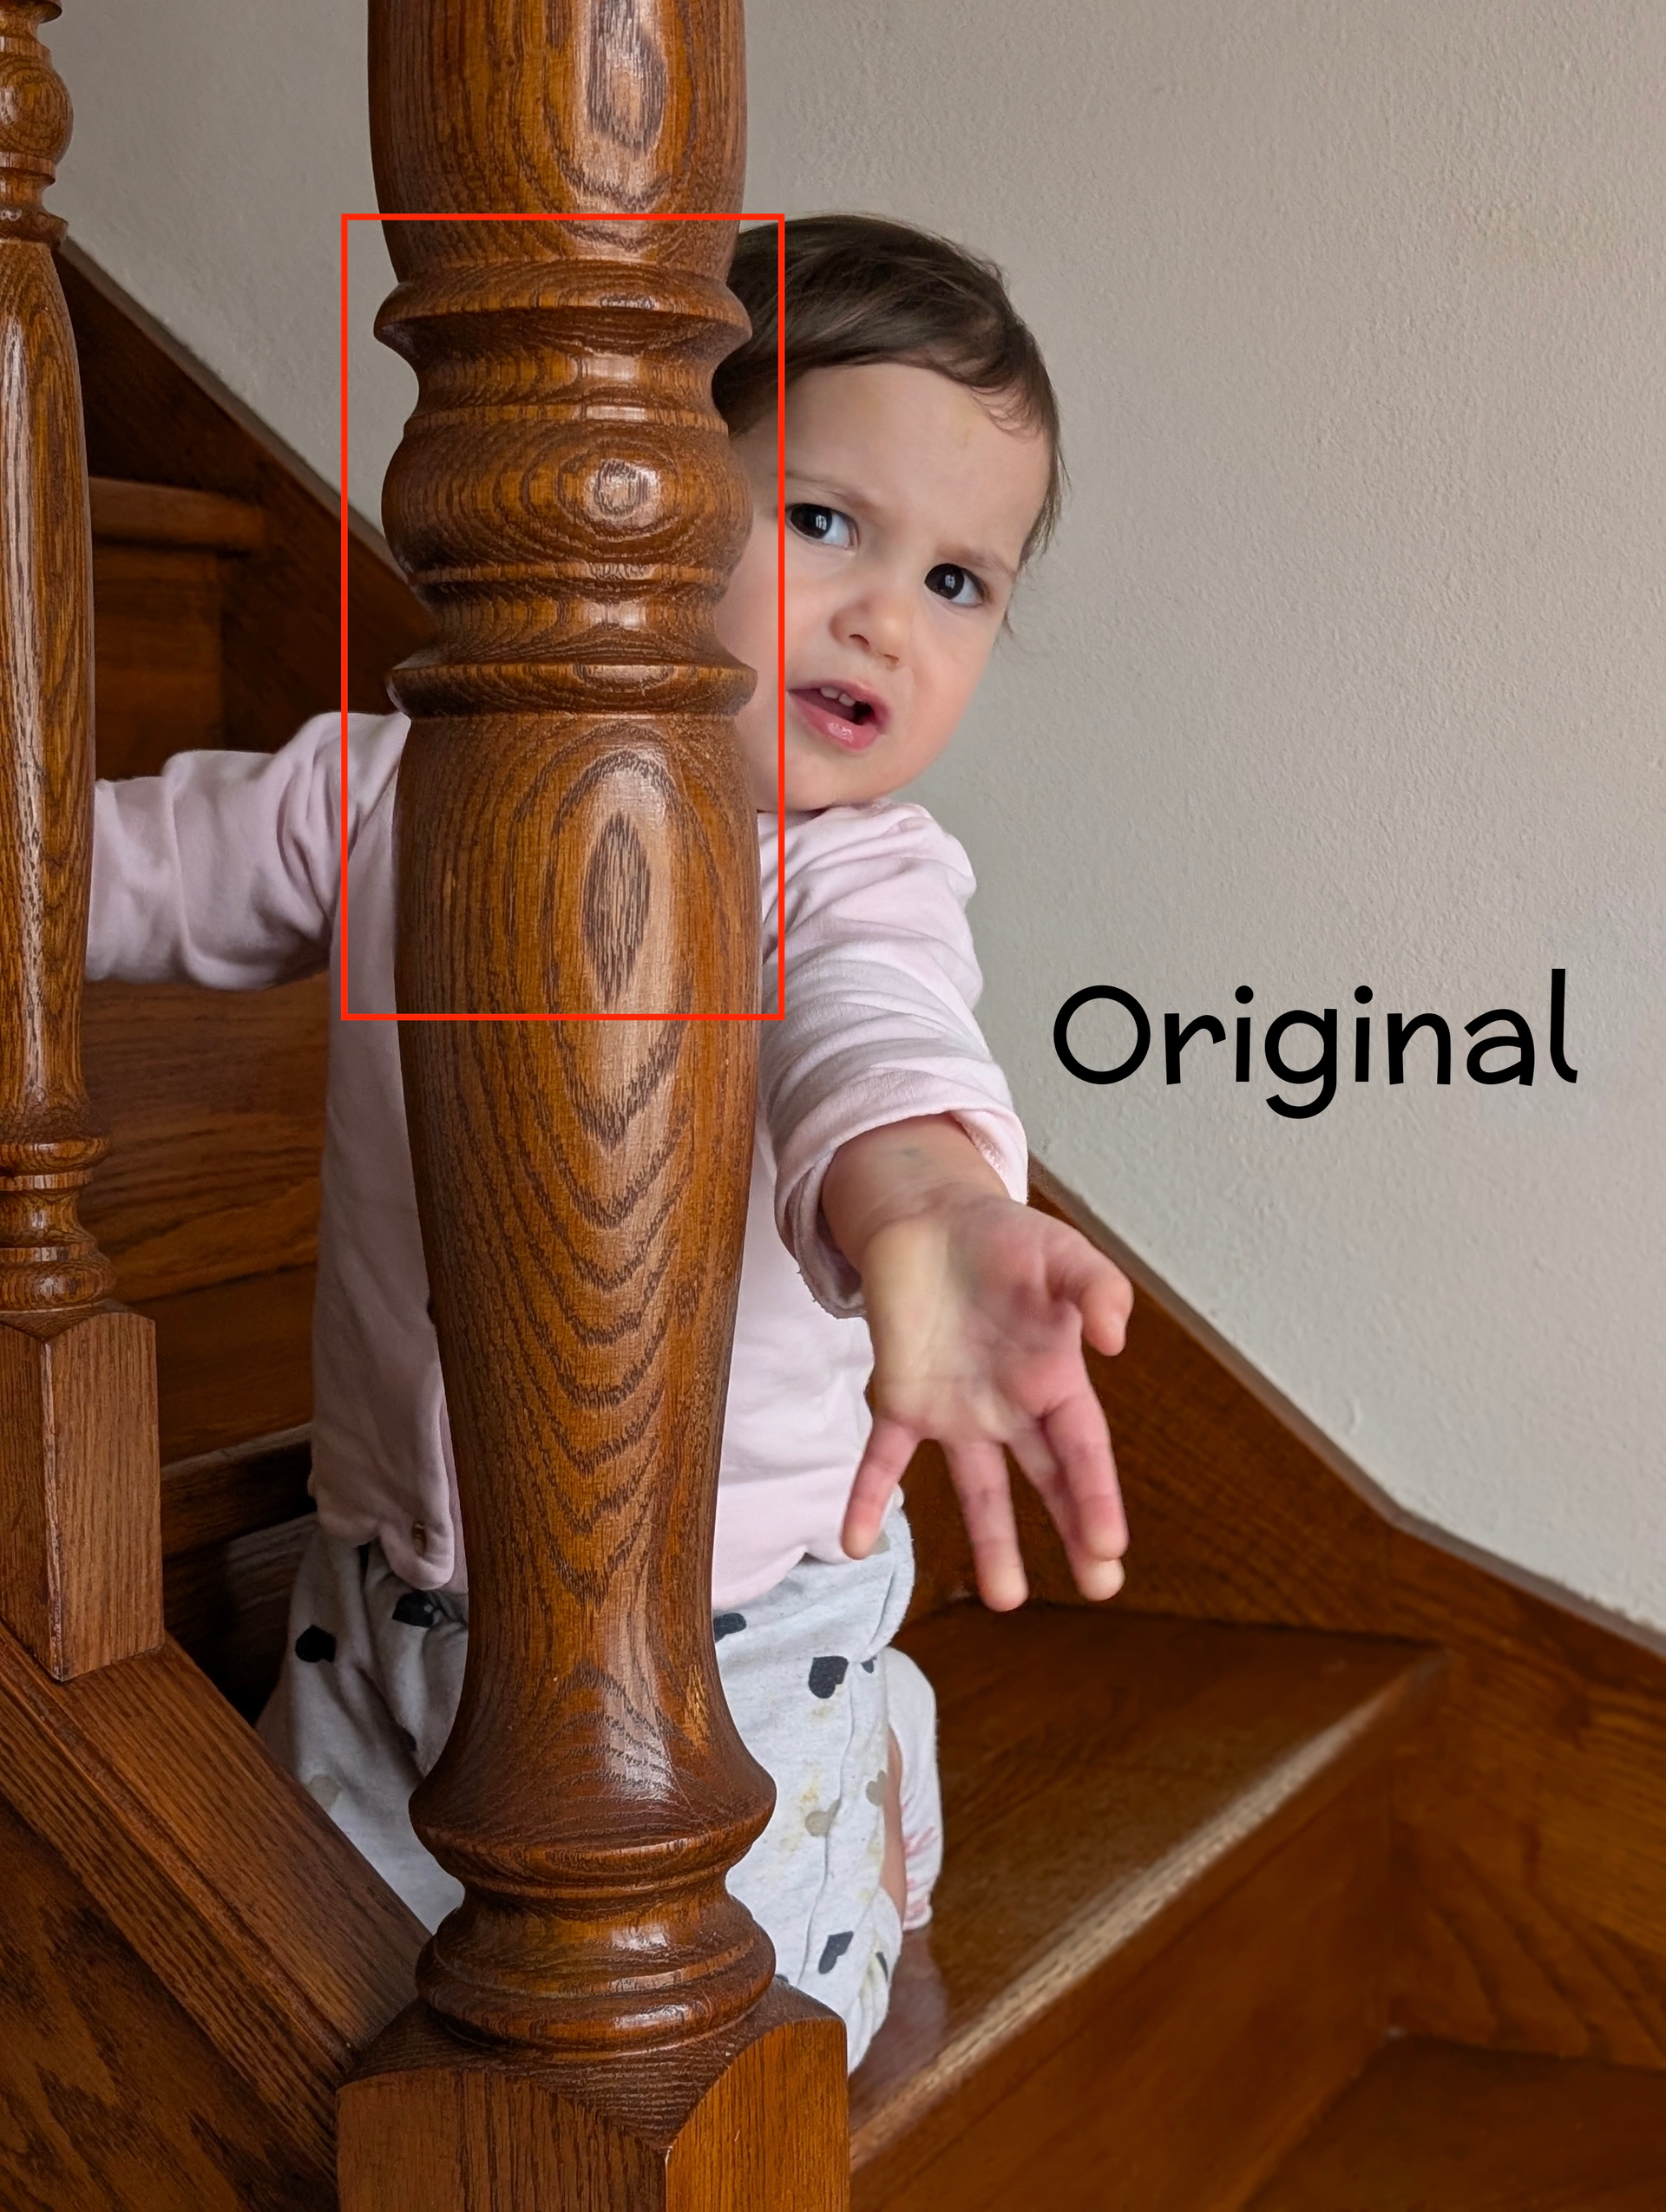
Now to compare Wonder and Wonder 2, here is a picture of my daughter.
You can see that Wonder 2 is smoothing things a lot or changing things:
the shadows became too soft, and have less contrast
the bib details with completely disappear
the electrical outlets are completely different
the side of the seat shows details that are not in the original picture
with Wonder 1, one of the handle of the furniture got “changed“, like if it was re-generated with AI
All in all, I like the skin texture of V2 but the overall render of V1 better. And if something could be done to avoid this kind of exaggerated/over processed effect on the hairs, it would be welcome.
I only asked b/c Lingyu said - in this forum - our credits were going to be removed. It wasn’t clear to me whether that was a different way to say ‘wiped out’. I’ve been experimenting with shooting some very low res video (with some of the current crop of ‘toy cameras’). So thought it might be bad timing to have my over 4500 credits wiped out if I wanted to also experiment with the video processing (which is not my usual thing to do…).
Good to know status re: the functioning (or not) of the processing status bar.
5090, cow. The problem Topaz has with it’s casual fixes, is the ai editing model train is rushing in from behind, that fix, change and remove things from a simple prompt. I only really need remove for small details that are hard to explain. The times basically without competition are gone.
What is not gone is that “fixing” taking ages. Or half cooked, unwanted Ui changes with tons of bugs being pushed that then need months until they work remotely as well as the old ones. OR new models replacing old ones that then need weeks/months to work properly again. (Why not leaving RemoveV1 as an option!?)
And of course you might well run out of update subscription time before such a new/replaces version is fixed.
Which actually doesn’t matter anymore as you now completely lose access to the software after the subscription runs out. (so not as it was earlier where you could still continue to use the last version that was released in your paying period).
Changelog says Recover v3 not available on M1. I am on an M4 w Tahoe, and it is not showing as an option. Maybe you need to amend the changelog accordingly.
@unrelent - Yes, this would not be a low-resolution image either and Low resolution would not be to use here. Best to use High Fidelity if Upscaling is needed at all (do you need the file bigger? If not, you can skip Upscale altogether).
@yabino974 - Thanks! I have shared the feedback to the development team. When you get issues with the faces, does applying a Recover Face (test both Realistic or Creative) help a bit?