How thumbnails are viewed unfortunately seems somewhat variable among software. officially IFD1:orientation should control thumbnail orientation but it appears some viewers use it while some follow the main image orientation, and some ignore both.
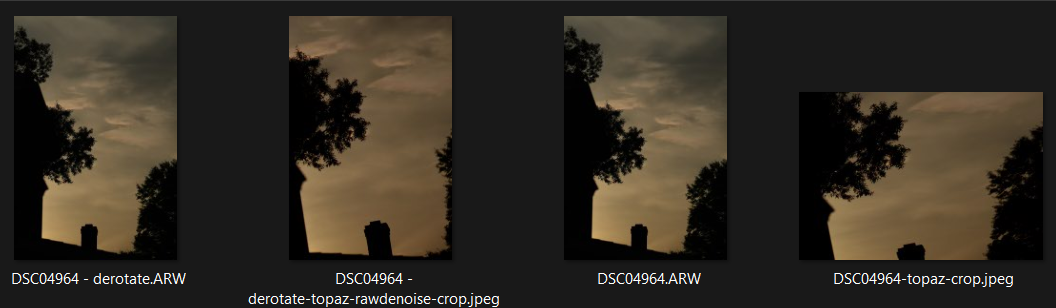
If I set -orientation#=1 for the “derotate.arw” and then pull it in to tpai (it comes in landscape), do rotate (about 275deg) and crop, and then save that image, it ends up correct. If I do the same process without changing orientation (initially it’s 270 CW), I get the squished output:
(right pair) DSC04964.arw is the original and the jpg is the cropped/rotated; (left pair) the arw has orientation# set to 1 and the jpg is cropped/rotated.
Unfortunately it does look like you have to set the orientation flag before loading into tpai - I wasn’t able to fix the squished version. On the other hand, given that any shots you take in landscape mode already have -orientation#=1 set, doing this across the entire file set will only change those taken in portait mode (and you don’t have to change your camera settings).
At least for me, adjusting the crop (size and pan) on a derotated/rerotated image in TPAI is very jumpy, and doing a simple 270 rotate without crop is kind of a pain. I might be able to play around a bit more today, but if you don’t have a lot of portrait images that need crop+rotate, this can be sort of a workaround until Topaz figures out a real fix.
And yes, I do agree that this is a bug.
Yes it is… I tried doing it manually a couple of times just by pulling it out but it it really “jumps” around so much that it makes it impossible to get there…
Me I’m thinking that it should be possible to rotate a photo (in the crop tool or separately) in for example 90 degree steps without actual crop.
You can just type a number in the rotation box and hit tab/return and the image will rotate. But the big problem is that panning and resizing the crop box (even to full) just doesn’t work well in TPAI at rotations of ~+/- 90 deg. It feels like something is really messed up in the internals.
I might play around a bit - now that you’ve brought this up I’m a bit curious.
Hi @Ange.topazlabs , for a bit I was puzzled as to why thumbnails looked ok while the actual image was squished, but it eventually became apparent that TPAI is not updating the embedded thumbnail (eg in a jpg) with the cropped/rotated result but instead is leaving the original (uncropped/unrotated) thumbnail embedded. That’s at least part of why I see different images in FastStone, Windows explorer, and XNView. (another thing to add to this ticket)
(this is also the case for a straight non-rotated crop)
one more fun fact - crop+rotate works correctly in gigapixel 7.3.1 (latest I have). reading that jpg into tpai and doing another crop+rotate still produces incorrect output.
Since yesterday, versions 3.6.1 and 3.6.2 crash completely when i open them on my Mac, triggering a restart (with Black Screen).
Previously these versions worked perfectly, I can’t explain it.
My configuration:
MacBook Pro Apple M3 Max, 64 GB, MacOs Sequoia 15.4.1
Version 3.5.2 also works, as does version 3.60.
Otherwise I have no problems on the Mac, first help with the hard disc utility already ran, without success.
Where else could I start to find the error? It is certainly an individual problem, otherwise there would already be more posts here.
I have just been able to solve the problem myself, it was more of a coincidence because I had not connected my external monitor for once.
At that moment Photo Ai worked again in the latest version 3.6.2. So I was able to look for the cause in special settings for the external monitor. I use the BetterDisplay app to control it
And I found the cause in the settings. The external monitor was set to ‘High resolution (HiDPI)’, which the monitor cannot do. If I remove this setting, Photo AI works without any problems.
I processed a large number of files and then closed TPAI.
After that I deleted the source images.
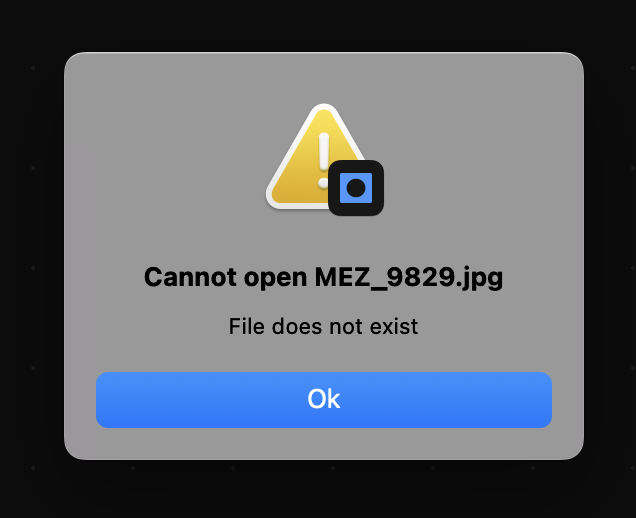
Reopened TPAI, and now it is trying to read the files from a previous session, but they don’t exist, as I deleted them.
For each file, I am getting this prompt:
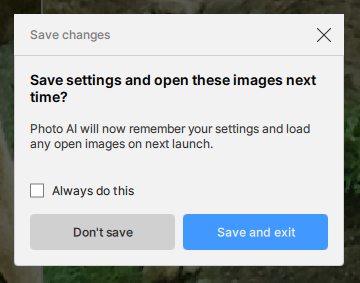
When you close Photo AI, it will ask if you want to preserve the session and reopen the files in the next session. This pop-up error you get would mean that you have clicked on “Save on Exit” here, to continue the edits later.
Since that is not what you wanted, you can test closing Photo AI again by force quitting it.
Make sure to hit “Don’t Save” next time, you can also click on “Always do this” so it never asks you again. You can also force this “Don’t Save” option in the Preferences: Topaz Photo AI menu in-app, then Preferences > General > Resume Session Automatically > Put from “Ask on close” to “Never” then click Save.
There has never been a Photo AI version where Upscaling is applied before either Denoising or Sharpening, automatically or otherwise.
Originally, there were three separate applications DeNoise, Sharpen and GigaPixel AI where, the user could decide in which order they applied the individual software.
However, Topaz discontinued these three applications in favour of combining the three into a single application called Topaz Photo AI.
With the premise of automating and simplifying the process of image enhancements in the form of Autopilot thus, taking away most of the guess work and confusion around which application should I use first or in which order.
This inturn leads to a more structured RAW Workflow for example,
Firstly, RAW Denoise is always applied first because you certainly wouldn’t want to Upscale the noise before, you had a chance to remove it from the image.
Secondly, Sharpening, sharpening is optional however, it’s recommended to apply sharpening after denoiseing because, even AI denoiseing can soften an image plus you have the chance of defining and enhancing the details within the image before upscaling.
Finally, Upscaling, upscaling is always applied last for the simple fact that your images are now free of noise and the images now have sharpened detail therefore, leading to a more defined Upscale.
As for the discontinued Gigapixel fortunately, Topaz had a change of heart and reintroduce a more powerful Gigapixel AI
But at first there is no folder Application Support inside user’s home folder (${HOME} in script) and at second I’m not sure that even in path “${HOME}/Library/Application Support/Topaz Labs LLC/Topaz Photo AI” folder “coreMLCache” exists.
At my Mac folder “coreMLCache” is inside folder “${HOME}/Library/Application Support”.
ayacalip - Andy-E’s workflow answer is correct, at the moment Upscale will always be placed last and show a warning for this. The development team is actively working on “unlocking” Upscale to be placed anywhere, and will be something possible in the near future. This is because in some cases, upscale can give better results, on very specific files, if placed somewhere else in your workflow. For most images, this is the recommended workflow order (upscale at the end): Workflow Tutorials | Topaz Photo AI