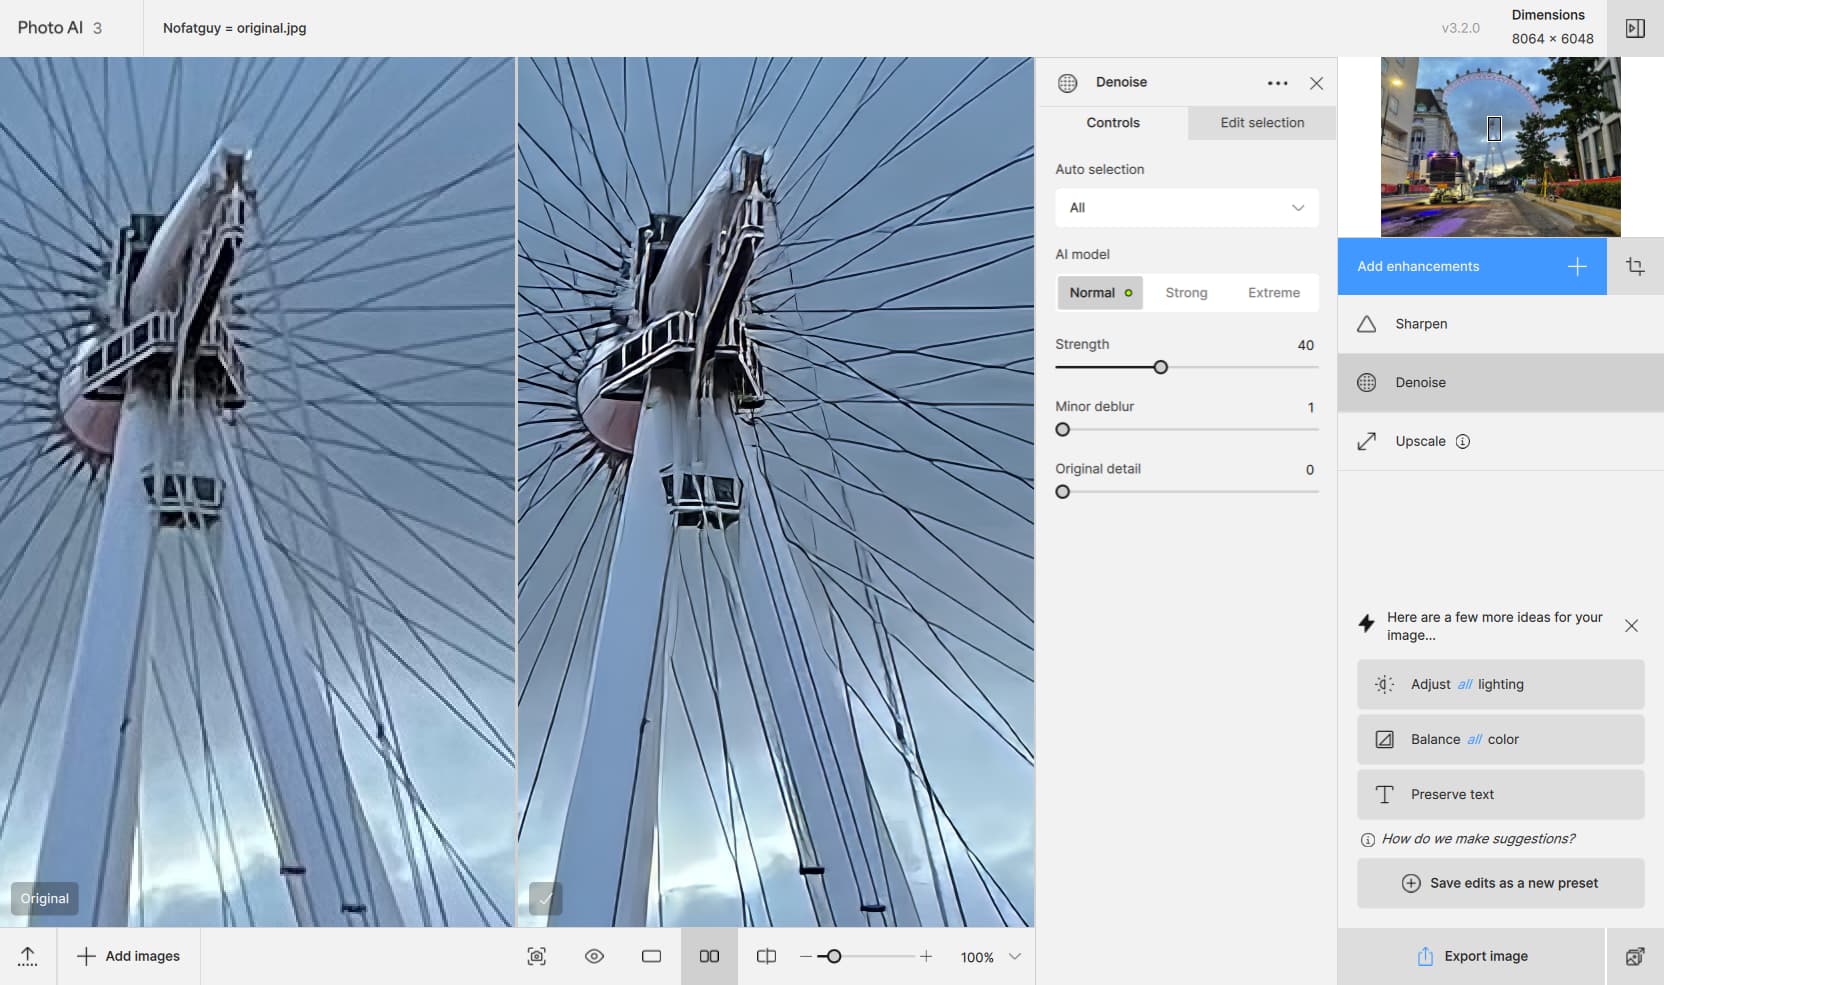
Unfortunately, denoise warps and breaks thin lines, like here on this Ferris wheel. If I remove the denoise, the lines are enhances correctly and look fine. This is just a zoomed-in portion of a large photo, not an isolated “special” use case.
Thank you… You just wrote and showed everything I have found and have not had time to write yet.
This is all true. This is probably the reason that many folks report better results with Sharpen AI – we always upscaled first for very small images.
Balance Color has almost never once worked.
Lighting adjustment is sometimes useful, but with just one slider it is hit or miss.
For the larger images not needing much upscale, v 3.2.0 is great, but it still has those flaws you mention.
…Sam
1 Like
You’ve got bad halos there too! In addition to the broken lines/cables.
It’s not just denoising your image, it’s sharpening too.
It seems like the product should be taken down to the studs and rebuilt from the ground up. (With an integrated/integratable single right panel, comparison view and discrete, non-overlapping functions for denoising & sharpening).
To me, it feels like a kluge of 3 formerly independent products Band-Aided together rather than a pre-planned integrated system of pre-processing features.
It made sense to have a bit of sharpening control in an independent Denoising product. Ditto vice versa for an indie Sharpening product. But there shouldn’t be those same overlaps in the panels for each of those functions (enhancements) in a sophisticated, integrated product. Especially b/c the inverse function to the one being performed cannot be entirely turned off (set to 0). That impacts how images are being processed in ways we don’t want them to be but have no way to override or control.
Out of curiosity, if you treat those cables as if they’re Text (which you shouldn’t have to…) and activate Text Preserve and paint an overlay on them to suggest they are lines of text, does that prevent them from breaking?
3 Likes
Tomorrow afternoon we expect a new version. Probably 3.2.1. Wait for it.
OK, I will wait for 3.2.1 before downloading.
The previous demo froze multiple times when editing different images. Should I expect the same to happen with the purchased version or is that some bug in only the demo? Also is the demo version fully featured but with only the SAVE function disabled?
Thanks
If I EXCLUDE the area that suffered the blurring / halo / broken line effect, then everything works fine. I didn’t think of that. 
 I propose a new feature. Let me click a part of the final image and run a troubleshooting wizard:
“There’s a problem in this area” → ( blurriness, lost detail, broken elements, discoloration, etc )
And get recommendations and auto-correction. This will help Topaz retain many users who would leave otherwise (in the Trial phase or even after buying the product). It’s hard to KNOW which settings can fix which problems. This solves that. (You don’t go to the doctor asking for 120 mg of XYZ, you tell the doctor “IT HURTS HERE”, and troubleshooting begins).
Topaz will also get lots of high-quality feedback this way.
This troubleshooting should help with the TYPE and ORDER of enhancements, their STRENGTH, any inclusions / exclusions of parts of the image, and more. It’ll basically guide the uses to image perfection.
3 Likes
FYI there is no Photo AI update planned for tomorrow.
I have been testing the various options, including the new modes. Here are some conclusions:
- For most images to be upscaled Strong is the best option. It has the fewest artifacts and seems to best determine what to sharpen.
2.For most images not needing upscaling, Natural is a great choice, but it should never be used with Upscale. While we are currently forced to upscale last, even the tests with Sharpen after Upscale show the same about this mode.
-
Refocus and Lens Blur 2 occasionally work when others don’t quite do it. but in most cases they are not the best choices. Lens Blur 1 is best for most out-of-focus images or those with unintentionally blurred areas due to shallow depth-of-field.
-
By default, noise reduction should be first, unless Lighting Adjust is done, in which case it would be better after it. Sharpen should almost always be last on small low-res images, after upscaling. On cleaner, larger images it is probably fine to sharpen before upscale.
-
Some basic manual sliders for Light and Color adjustment would be better than the current attempt to automate these. Perhaps Auto could be a preference option – if OFF, these would start neutral and allow the user to set them.
-
Gigapixel’s Low-Res 2 is better for some pictures than anything in Photo AI. It would be great to have it here.
Hoping these ideas help…
Sam
6 Likes
Great feedback, thanks Sam!
J have set up my editing route from photoshop to Photo AI for upscale if i need it ,otherwise use sharpen AI old product, which has more control . instead of having too many clicks in PAI with annoying interface.
1 Like
Where does Face Recovery fit in?
@ dakota.wixom, can you answer this?
Also, see my related post on 2024/07/24:
Does Photo AI do the processing steps in the optimal order (determined by Topaz) or does it do them in the order you use them?
For example, if I select Sharpen, Denoise, Face Recovery, and Upscale in some random order does Photo AI process them in the order I selected or does it know the best and proper order to do the actual processing and do that?
Lightroom Classic processes adjustments in the proper optimal order so it doesn’t matter the order you as a user make adjustments.
2 Likes
Interesting idea!
I see that a Topaz product mgr has read your suggestion.
I’m a ‘mere’ user who beta tests. And who comes from a tech biz (small to Fortune 20) strategic planning, M&A, strategic alliances, tech mktg & CTO background. Not on Topaz staff. 
2 Likes
The filter stack is adjustable, with a few exceptions - upscale is a notable case worth mentioning. We generally process the enhancements in the order you specify in the stack. You can drag and re-order them to see how the effects change when stacked. This is a departure from the previous versions of the app which had a pre-determined order.
At the moment, you will need to upscale and export first, then import the upscaled image if you don’t want upscale to be last in stack.
2 Likes
I may not press “like” on every suggestion or comment on our forums, but I do promise I read almost every single comment on our release threads - sometimes it just takes a few days to catch up. 
A ‘mere’ beta testing user? You’re quite famous in our Topaz office. Also I think we should order prints of some of our user’s photos when we set up our new office, and I’ll be asking you first.
Cheers
9 Likes
Here’s an idea to test it…
The restriction on the order of the stack is probably one simple line of code, maybe two or three lines. Make a 3.2.0-based Beta with either this restriction removed, or an exception to allow one or more Sharpen items after Upscale.
Let your beta-testers try it. You will have many comments and examples. I’ve wanted to do the test that a couple other users did recently by running it, exporting, running TPAI again on the export – but never had time to do all of this. It would need to be tried on multiple images to be of value. If it were as easy as less restrictive order, I’ll try a bunch of them.
It’s such an easy change that if we find it is not useful, or should be limited in some way, it could be left out or modified in future releases.
…Sam
1 Like
Nice! I do this type of product consulting, propose new features and enhancements in UX, usability and quality. I’d love to collaborate  if you know companies that want to make their products even better.
1 Like
Prints? Nah. New product, new manager, new poster. But a tattoo is forever.
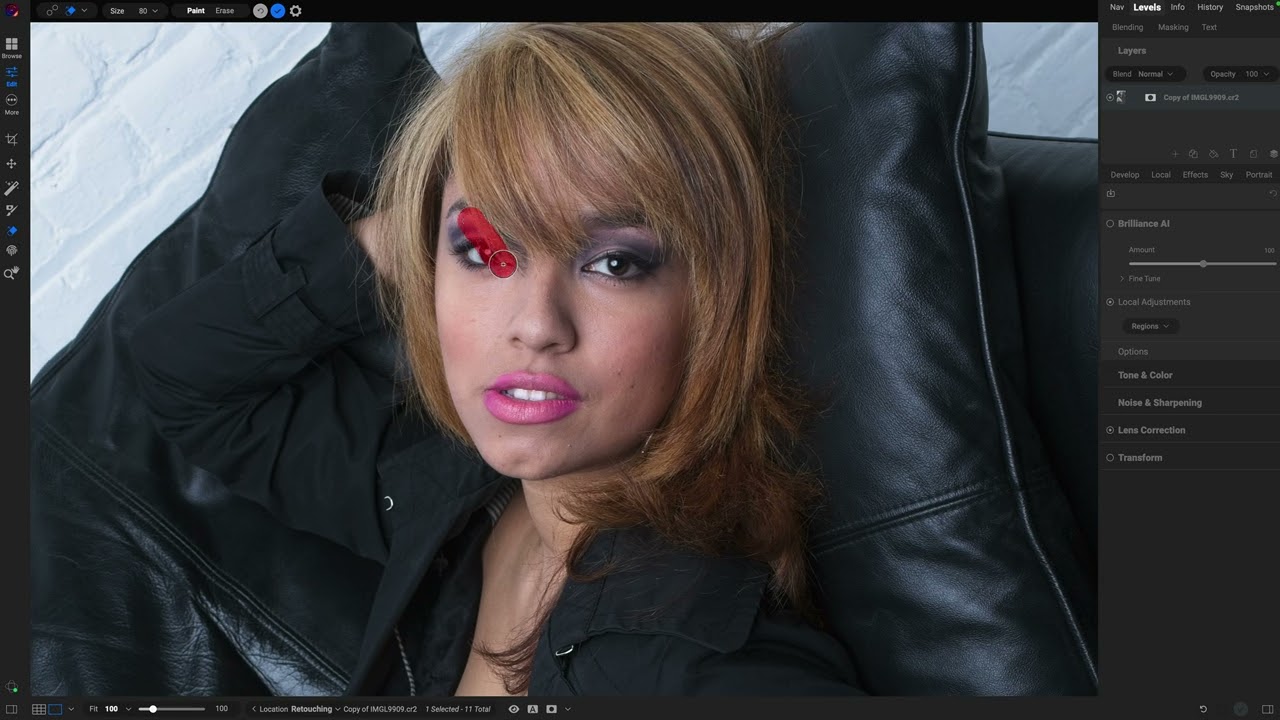
I’ll have to take a look at that in a few days.
But my expectations are not very high.
But the fact that it ignores a sweater in the selection, when generating, is a nice thing.
If the output wasn’t mud, that would be another plus.
After some 3 weeks of vacation and with only my (about 7 year) old Dell Latitude 7480 as my travel companion I’m finally back home and browsing through some of the photos taken during my travels…
This years touristic photo adventure have been a bit different compared to previous years, mainly because I haven’t really let people obstructing my view shooting an interesting monument or landscape bother me - something that isbound to happen just about everywhere most people go. Instead I’ve snapped away thinking “Doesn’t matter - I’ll just remove them in PAI later…”
So - getting to the removal part I opened up one of my “subjects”, started “brushing away” and suddenly thought “why can’t I just paint the outline of what I want to remove and then use a “bucket” (apologies - I have no idea what that one is called) to fill in the rest? Can it really be that no one have thought about that?”
So my question would be @dakota.wixom (for example)… 
How complicated would it be to add a “fill” tool to the removal process? Am I the only one thinkning that could actually be useful?
4 Likes
