@Lingyu photo AI not seeing Canon CR2 as raw only out puts 16Bit tiff as best quality.
1 Like
Sometimes when I use multiple enhancements, the suggestions area mostly covers up the ‘Export to Photoshop’ button. Closing the suggestions panel reveals the Photoshop export button again. I mostly call PhotoAi from within Photoshop from the filter menu.
Ciao Bob. Volevo sapere se hai risolto il problema della visualizzazione spostata verso il basso della schermata di Photo AI 3.1.0.
Ho lo stesso problema e non capisco come risolverlo.
Devo attendere il prossimo aggiornamento?
Grazie
Miro

1 Like
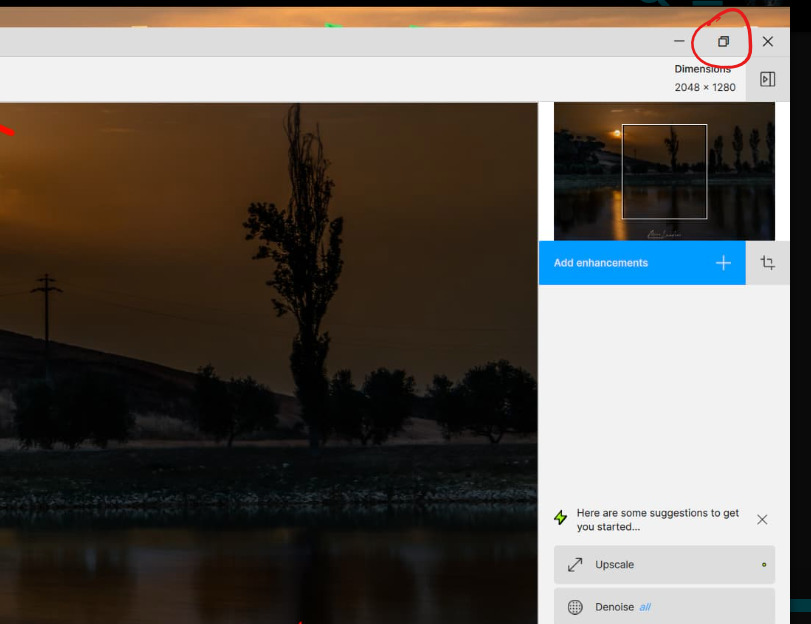
I’m on a Windows 11 PC.
You need to click the maximize icon in the upper right corner.
You have a CPU Like ThreadRipper ?
I have an AMD Ryzen 7 5800X 8-Core CPU and an AMD RX 5600XT GPU.
Se guardi bene l’icona è già massimizzato ma il problema persiste. Io uso windows 10.
My I max Uses an RX 580 Internal.
@dakota.wixom @Lingyu @john.topazlabs I uploaded Sharpness And Color Charts Scanned in at 1200 DPS To Johns Dropbox ![]() Enjoy
Enjoy
Physical zoom, or real enlarging vs TPAI / GPAI
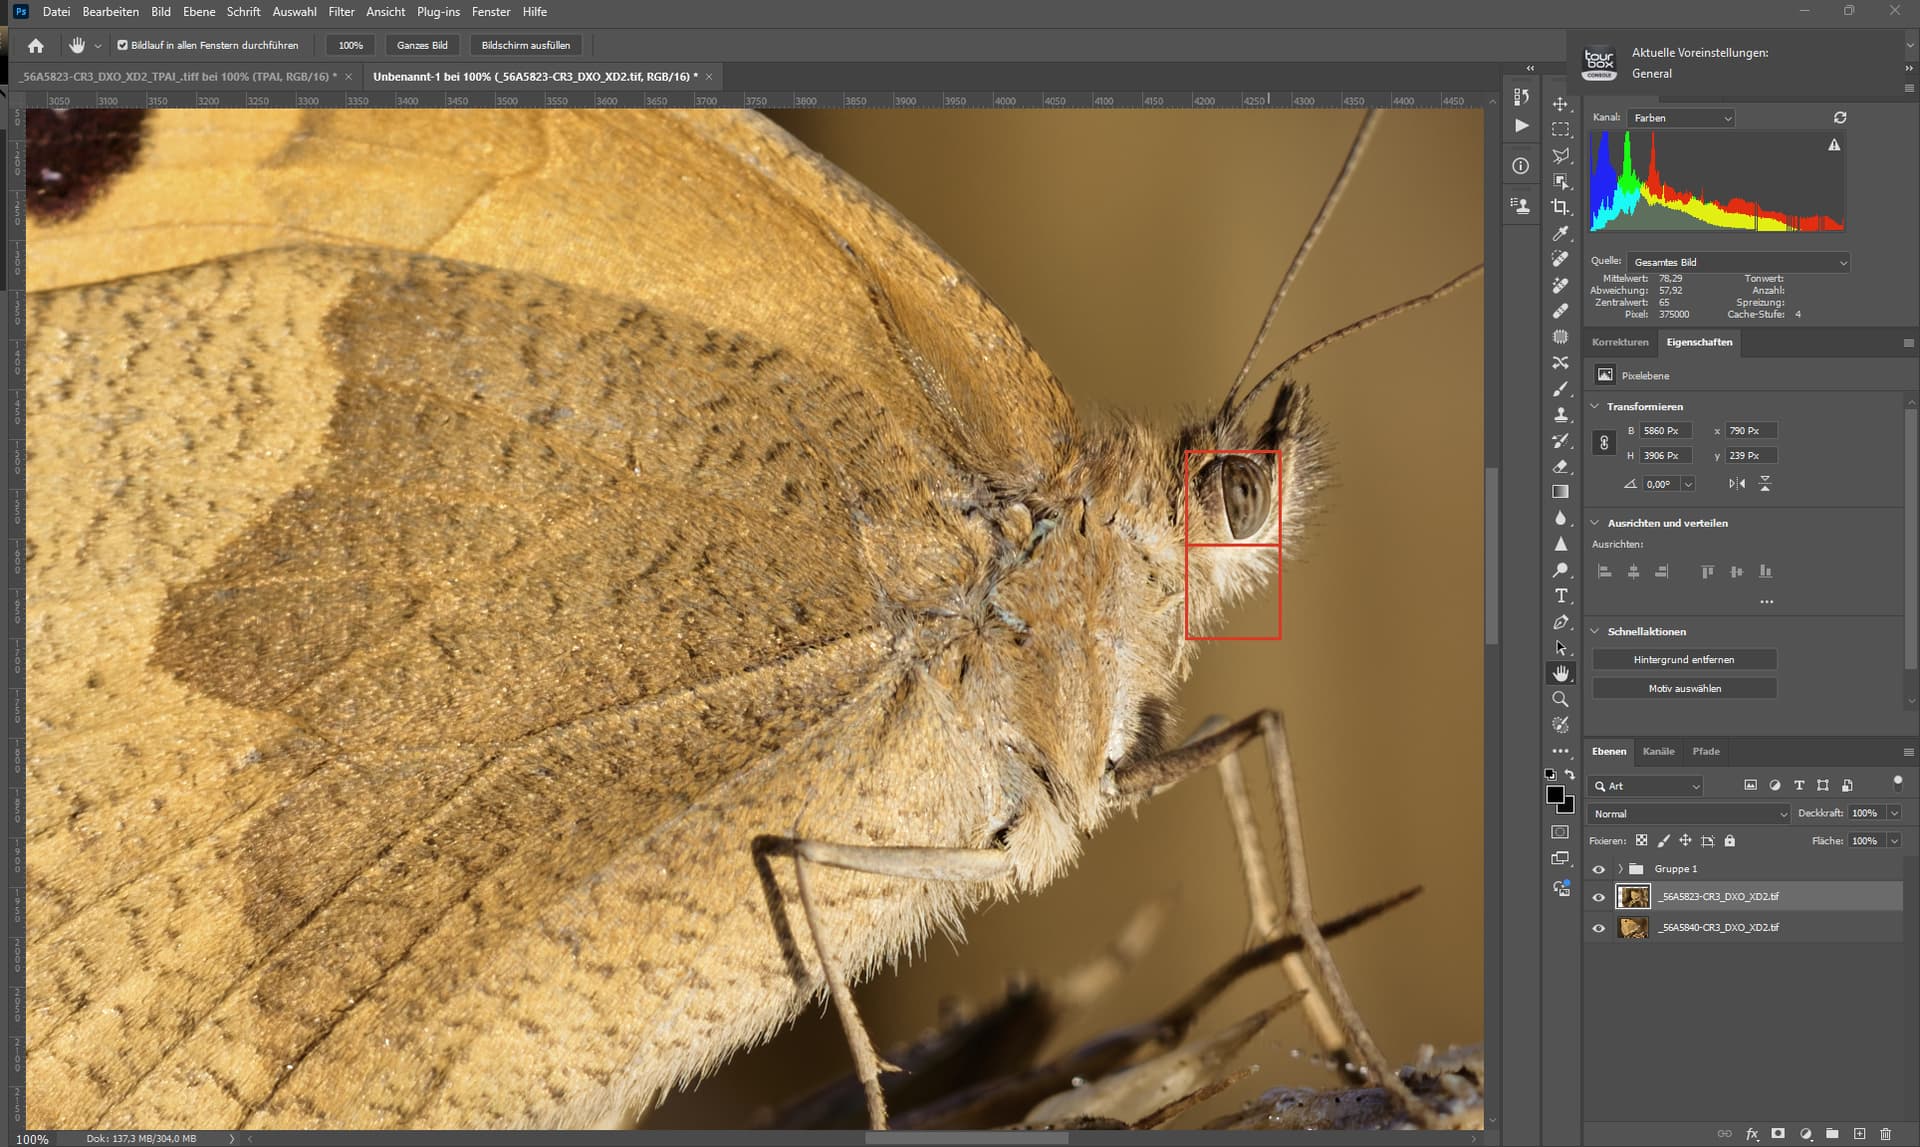
EOS R3, 180mm, f7.1, ISO 200
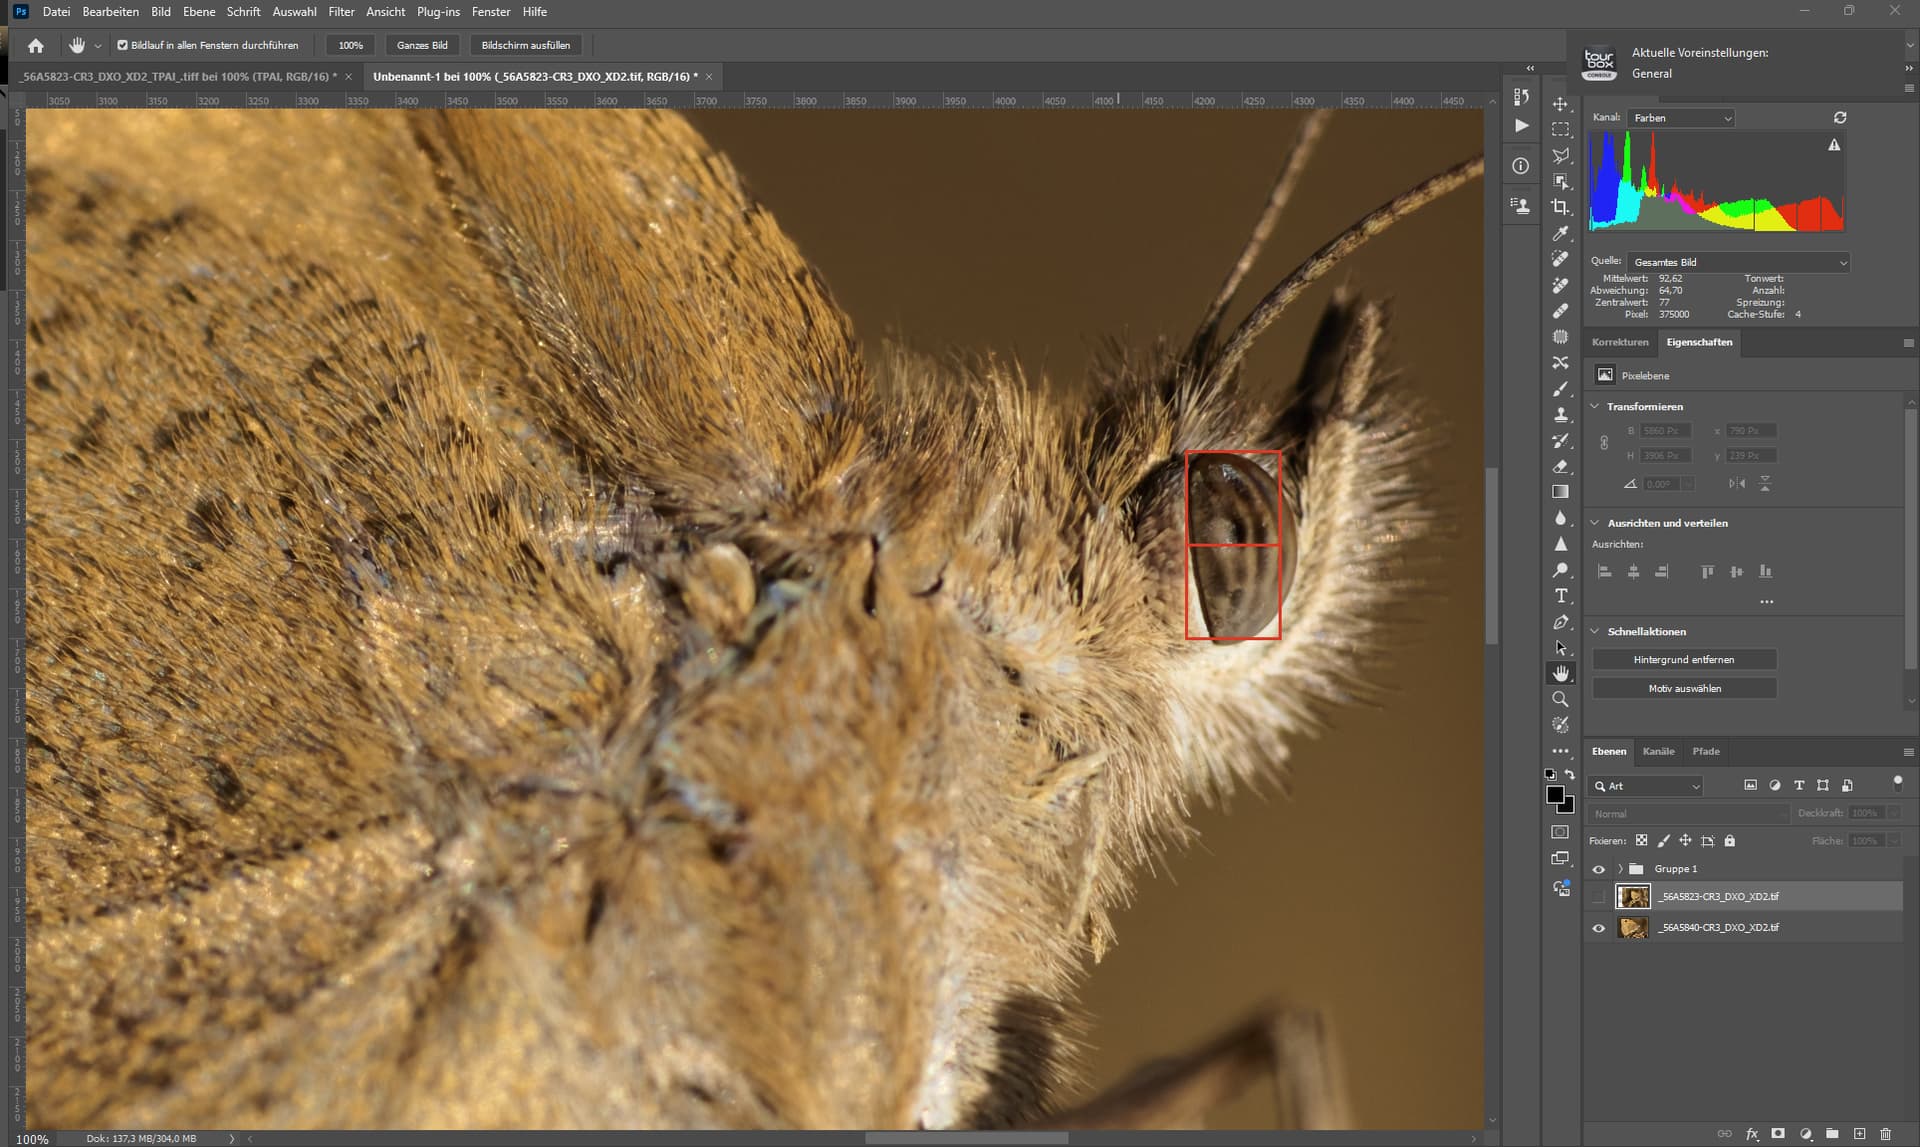
EOS R3, 180mm, f7.1, ISO 200
I did get closer to the Butterfly - it does look like a 2x size increase - see the boxes.
This is 1:1 of the closer shot.
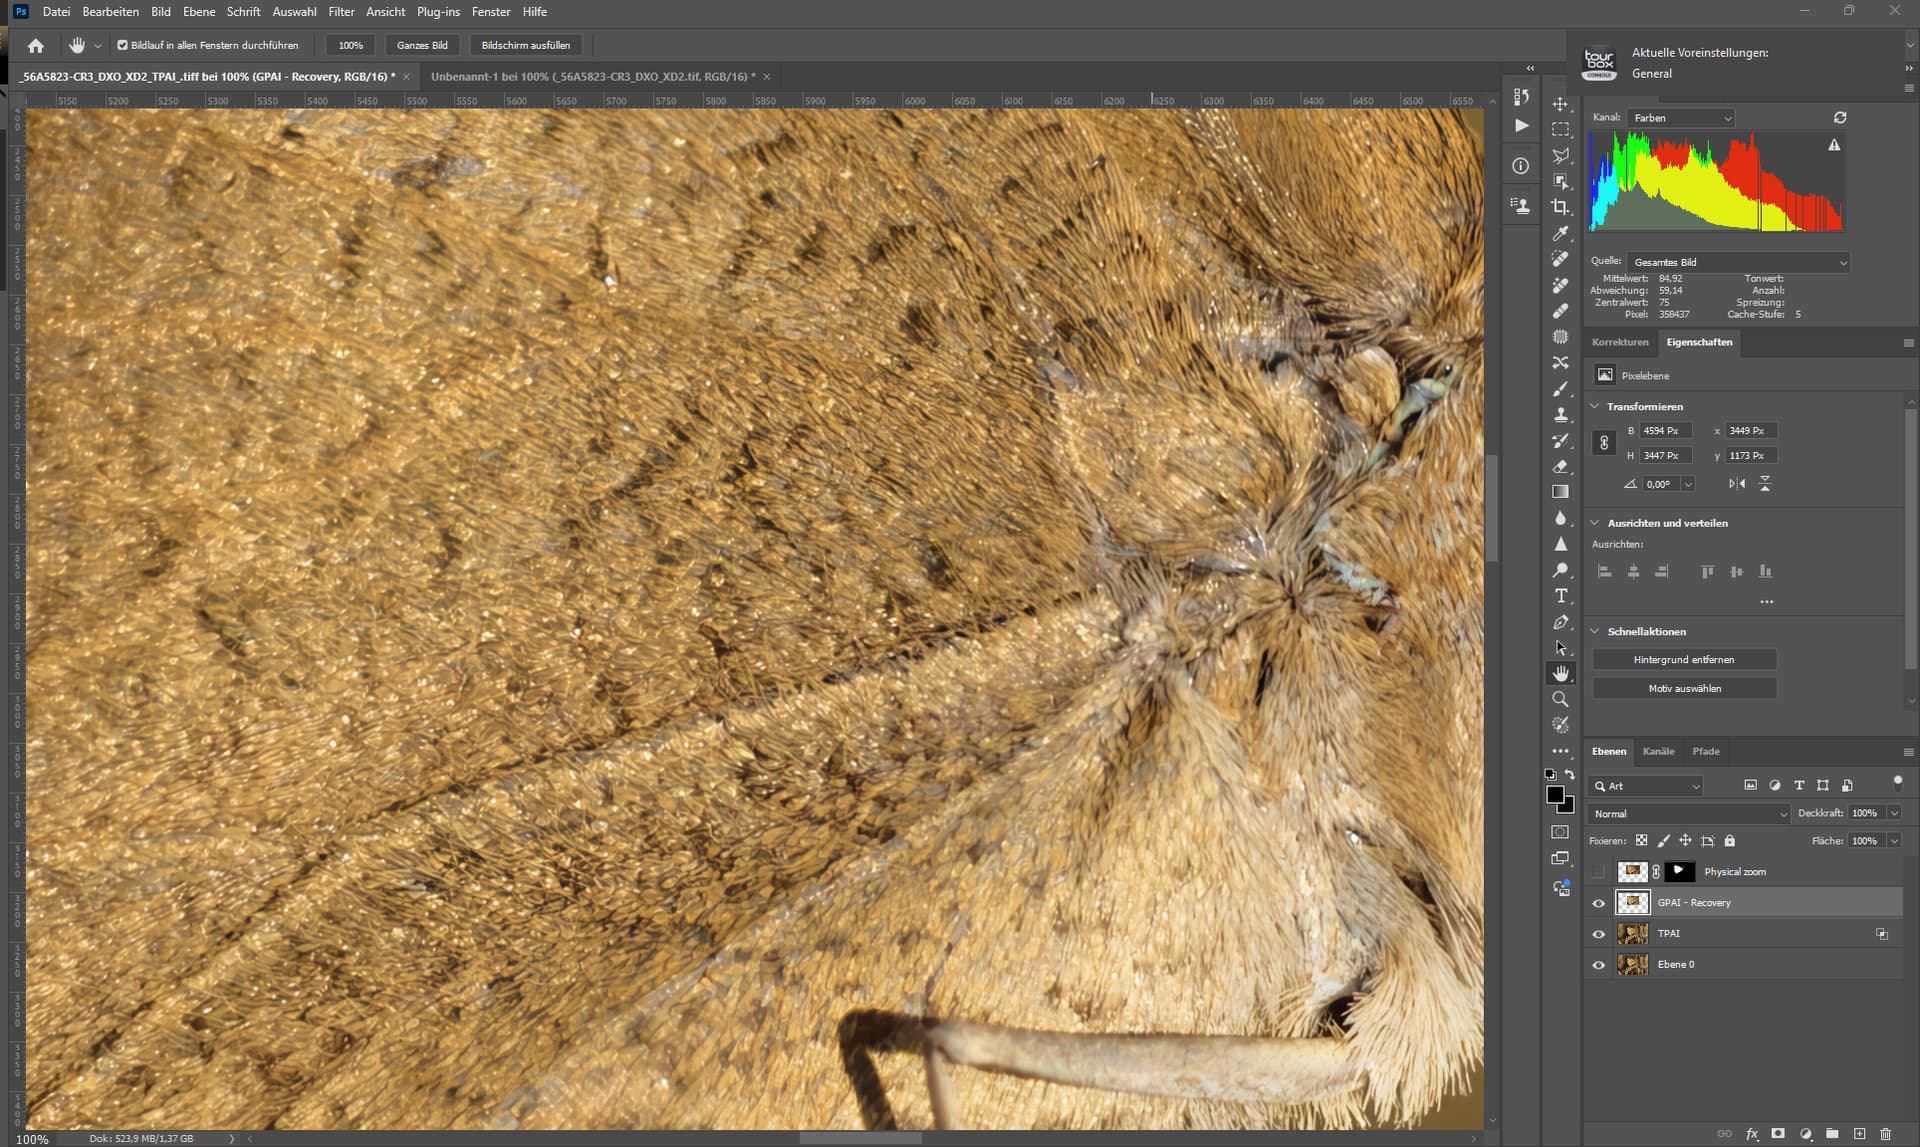
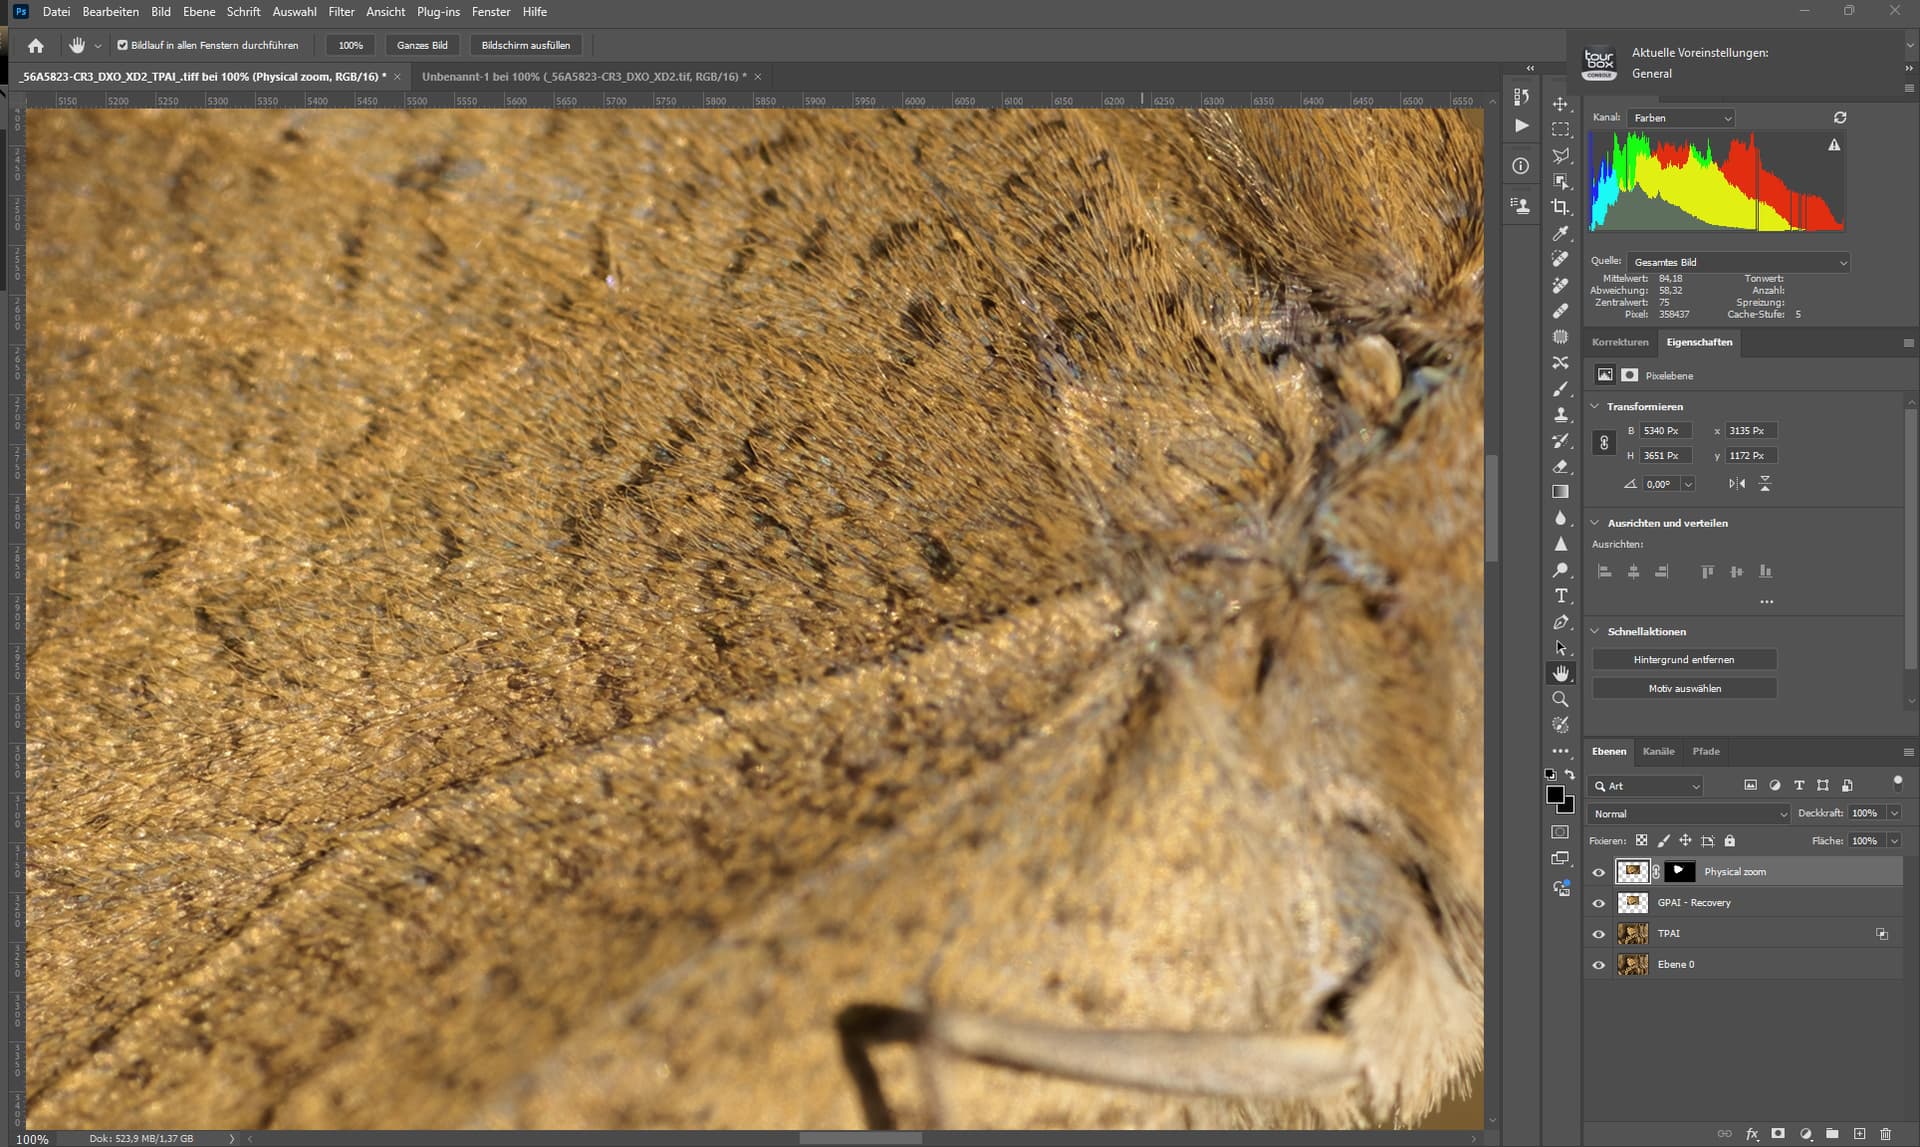
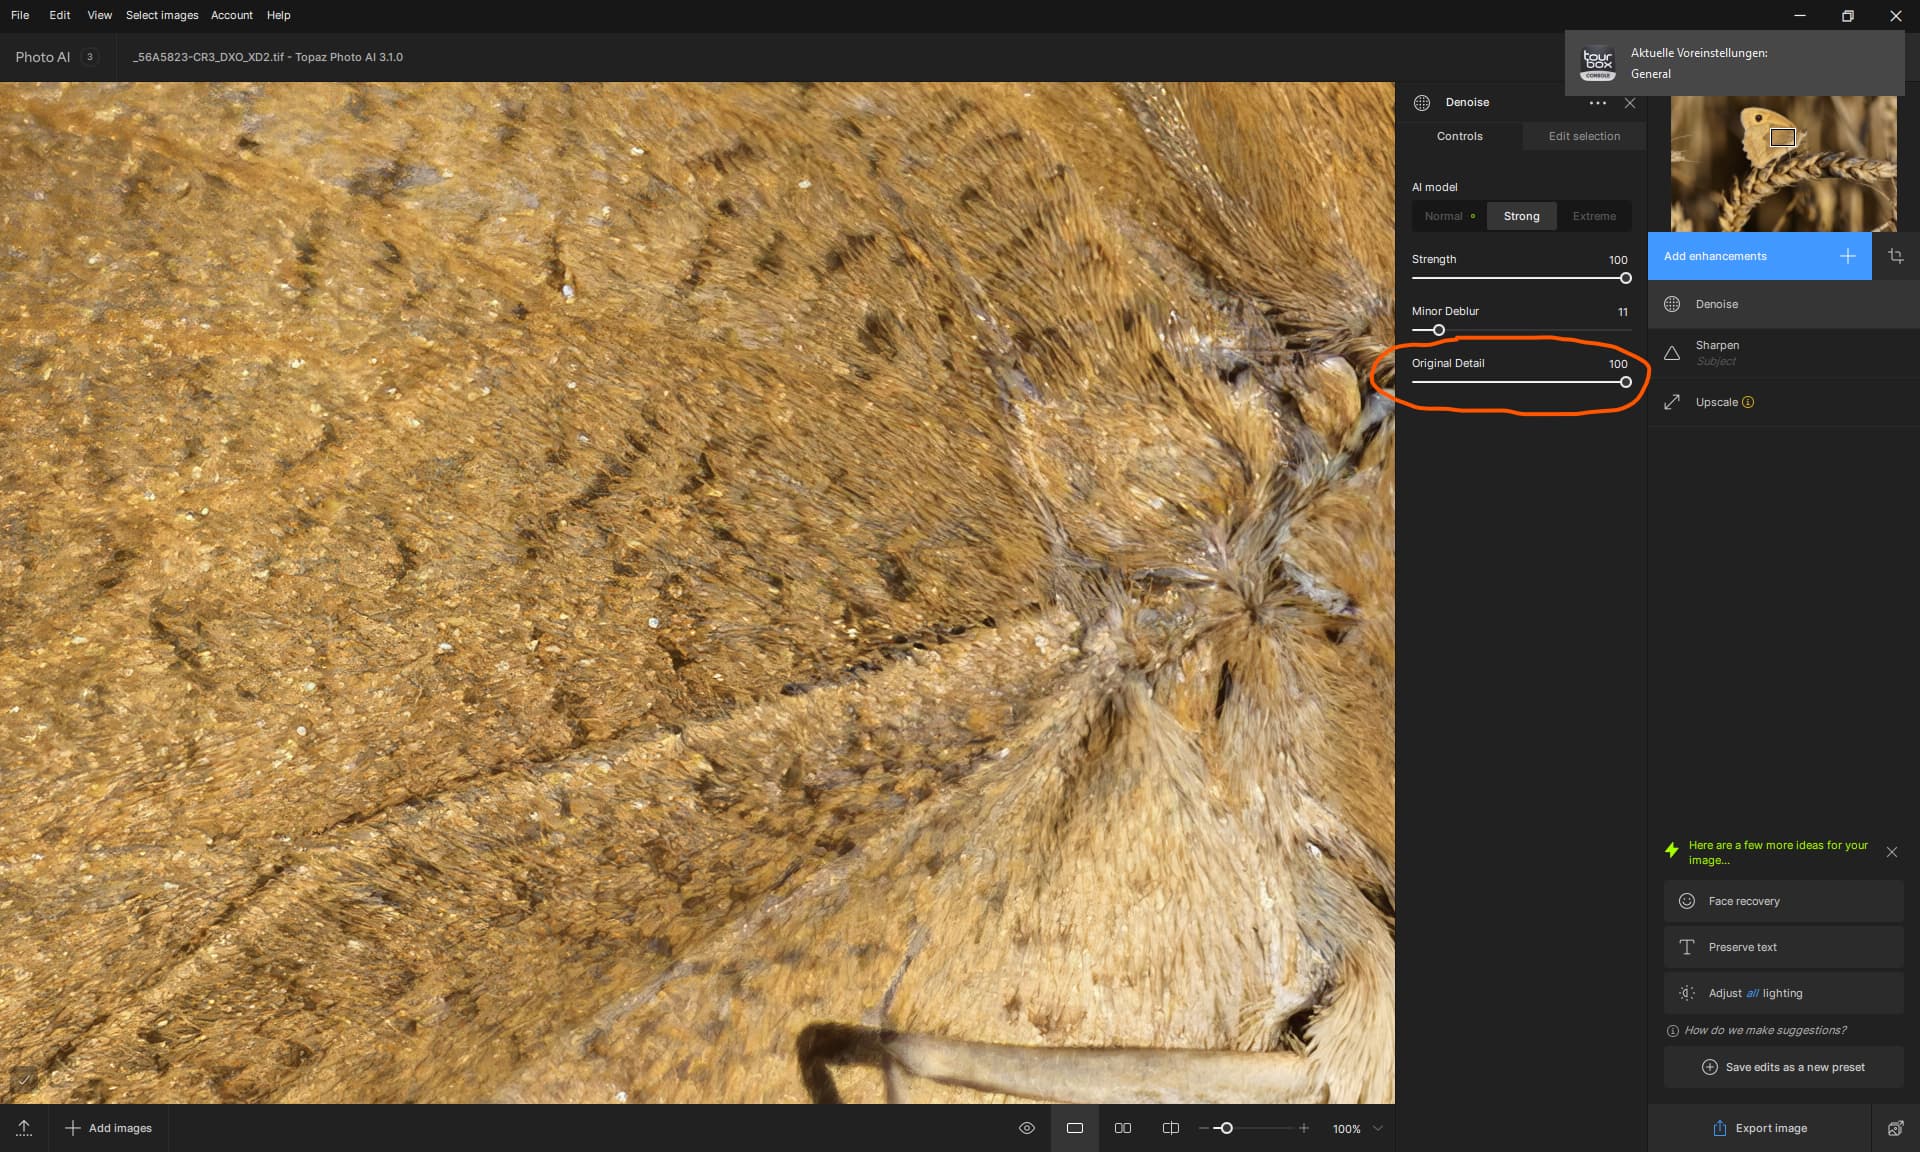
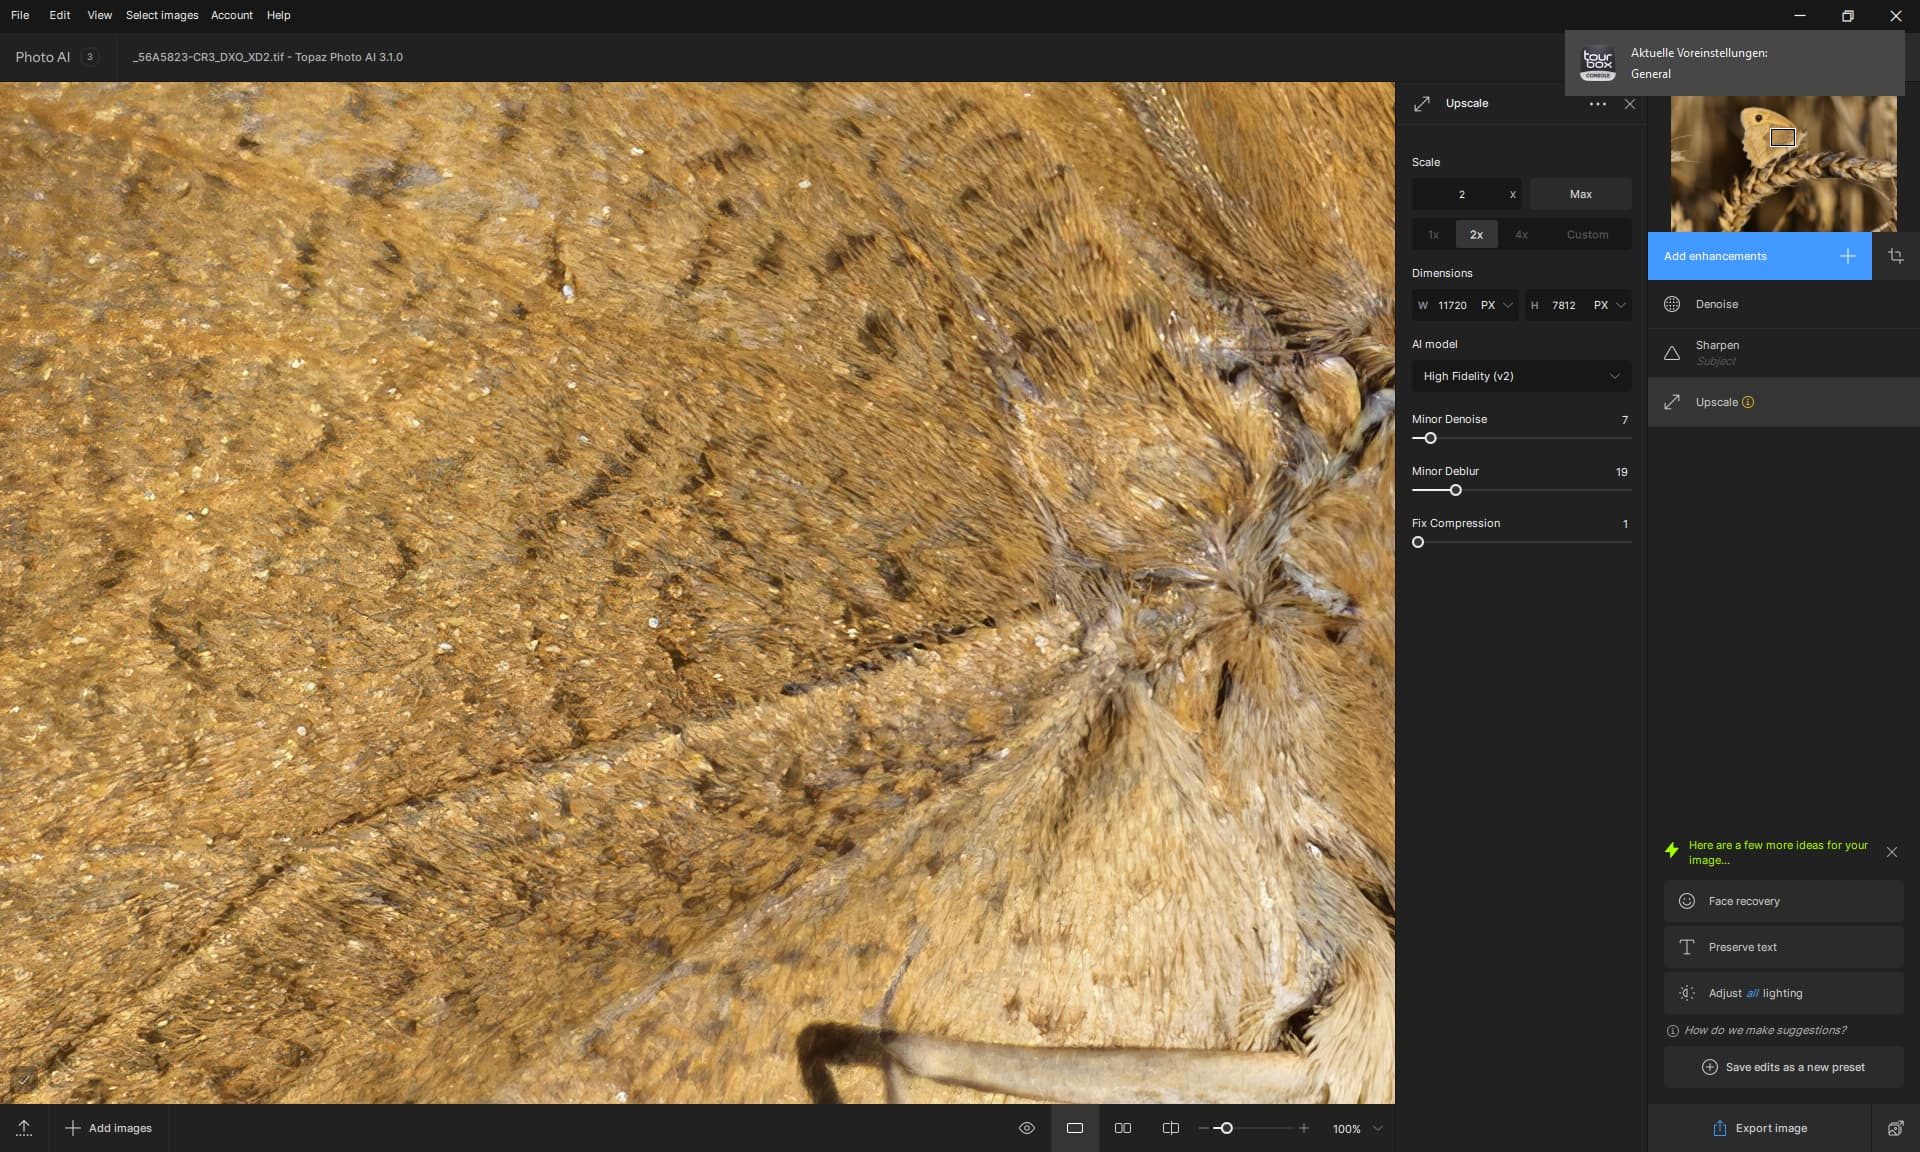
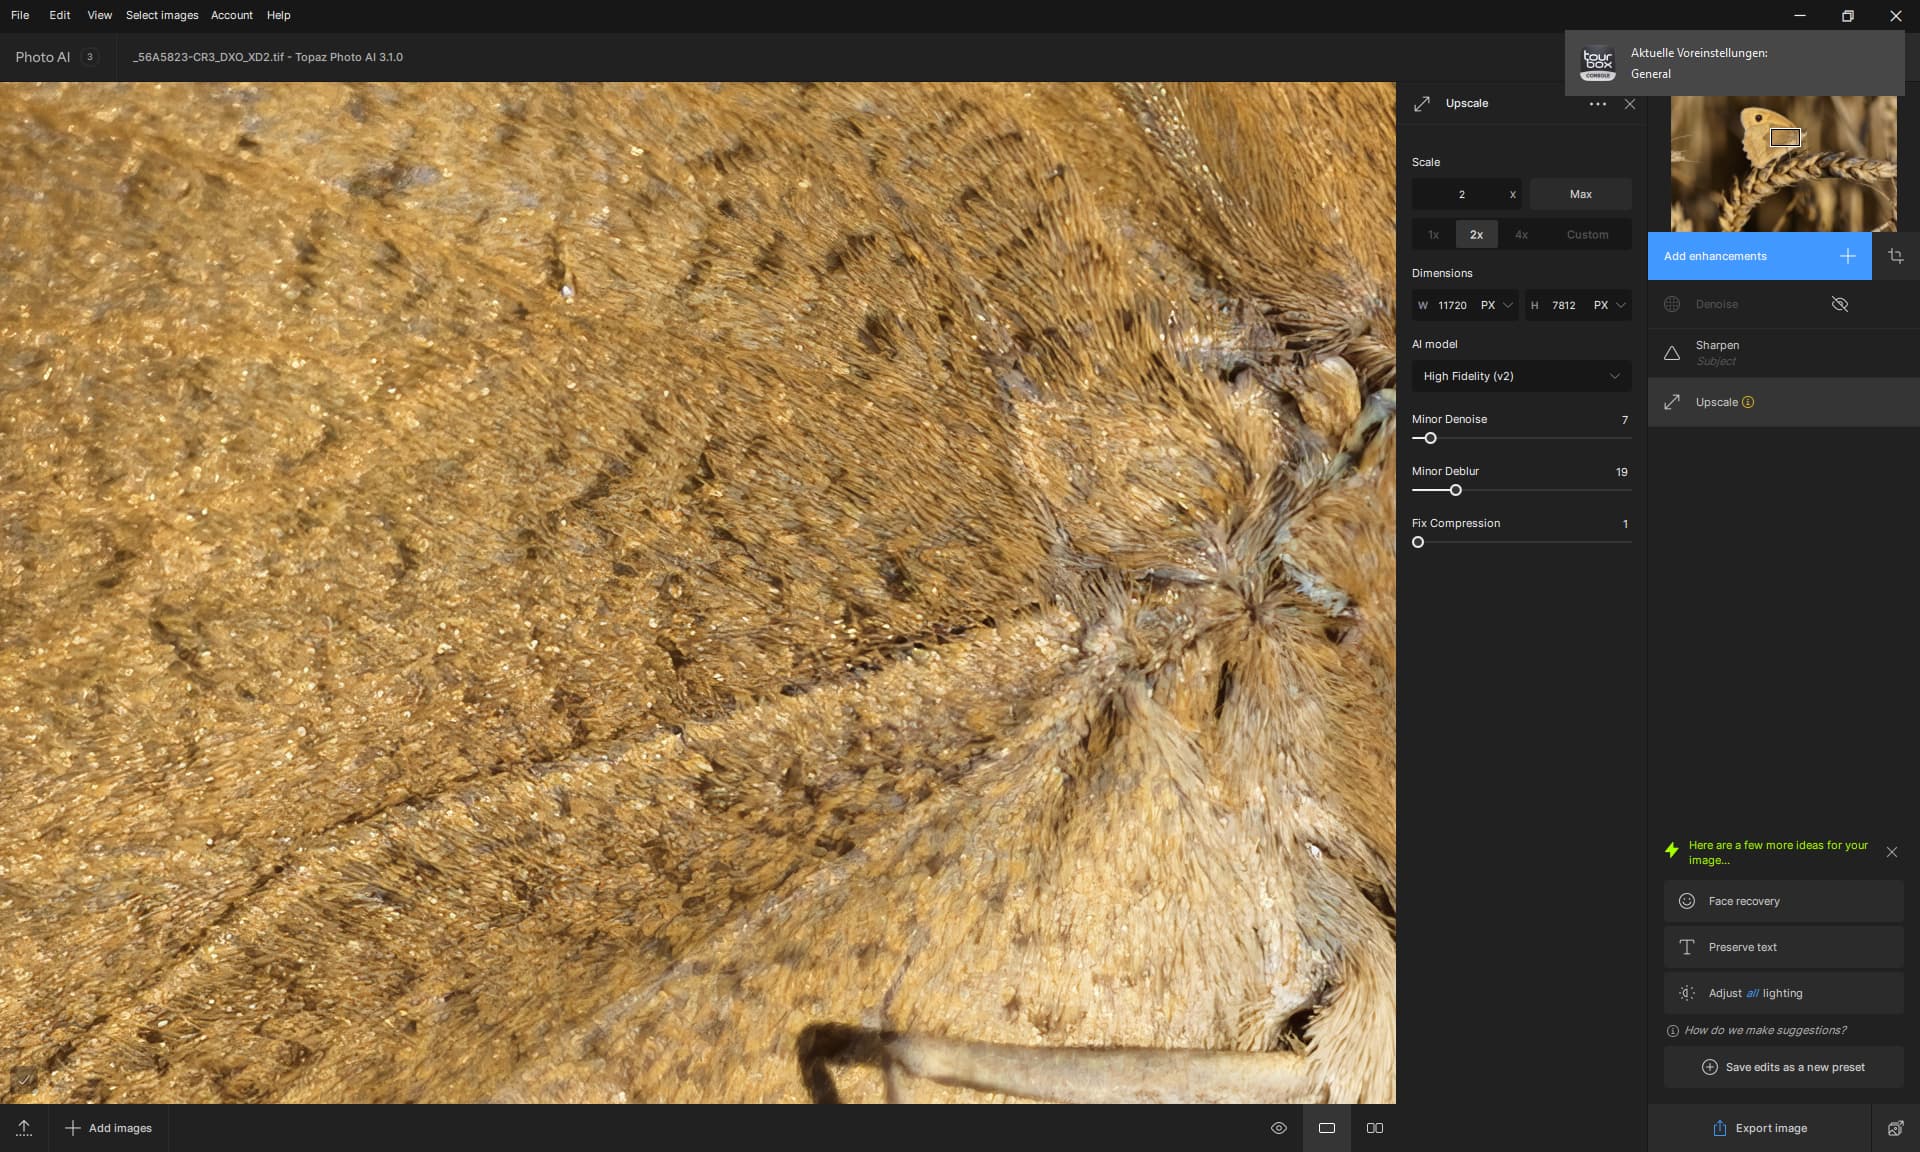
This is GPAI Recovery Model - the best GPAI Model for enlarging so far.
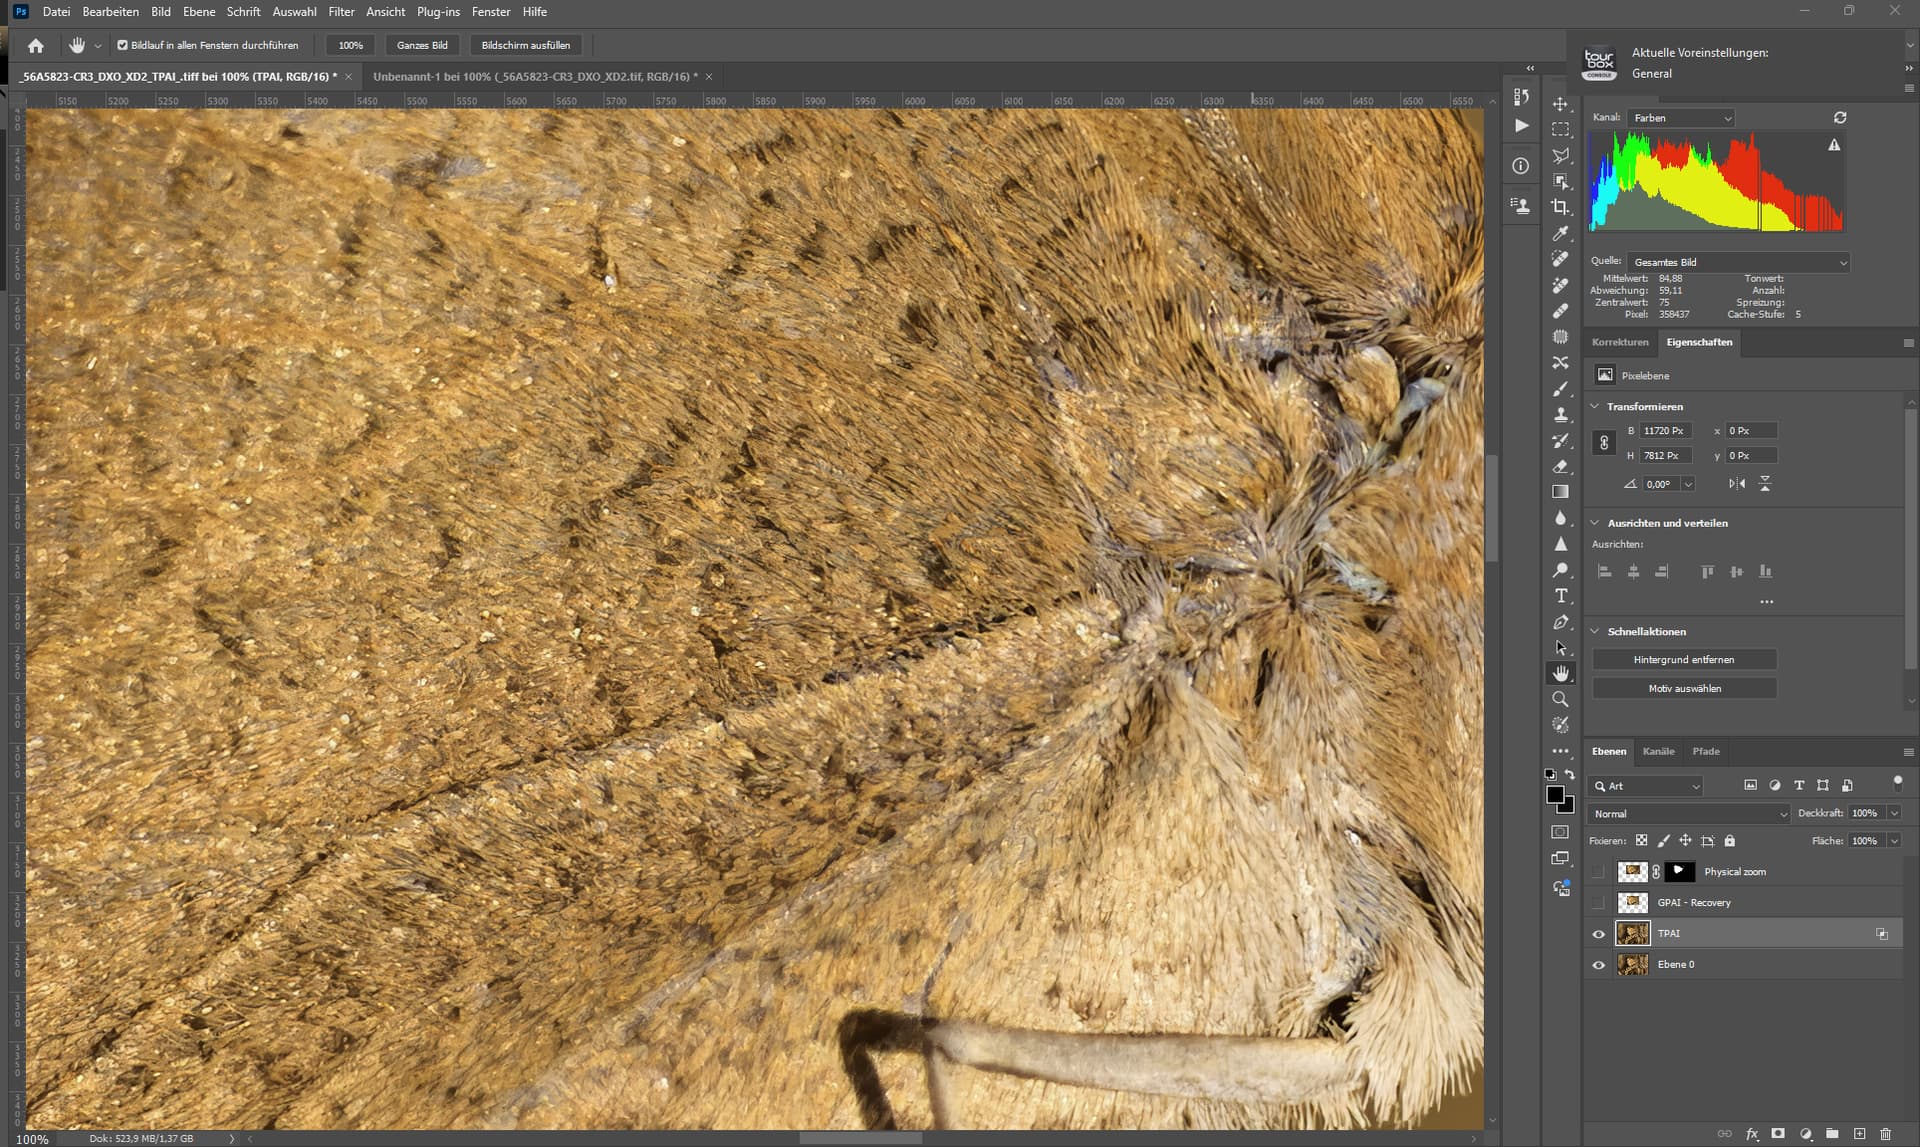
This is TPAI - HiFi Model + Denoise Strong and Sharpening Standard
But how did it create all the detail in the Hifi Model image??? ![]()
Its not enlarging that did create the detail … its denoise Strong. ![]()
The Hifi Model is not as good at creating detail as Recovery of GPAI, but in TPAI we are able to cheat. ![]()
For me, TPAI is still the more specialized software than GPAI. ![]()
The closer image corresponds approximately to a medium format camera with 100 megapixels and a 324mm lens.
If you compare it with the enlarged image.
The camera (R3) measured that the butterfly was about 0.8 meters / about 31.49 Inches away from the sensor.
So the distance (0,8 meters, about 31.49 Inches) would have been the same for both shots but since the medium format camera has the higher resolution we can zoom in more.
The effects of the lens also have to be taken into account because the higher focal length of the medium format and the larger sensor change the physics a lot and make the image look different, but I’ll leave that aside because it complicates everything.
The result of the closer shot looks comparatively similar to the test shots I took with the Fuji GFX 100 II, which disproves my experience that the medium format shots would look very flat at 1:1 and would not quite offer the resolution I was hoping for.
Keep in mind that the result of Hifi is not 100% what you see here, I added a slight high-pass filter to make the dark areas darker as they get brighter when you enlarge via AI.
And here is how it did work.
Changing the strengh of the Filter does change the detail - its like changing the seed of the AI model.

Settings of the Standard sharpen filter.
And these are the settings of Hifi.
Now reverse.

Denoise and sharpen off
Denoise off

Sharpen and denoise on.
I think the lens that comes closest to the butterfly image, if i would use with a medium format camera with 100MP, is the GF 500mm that was introduced this year, there are also extension rings that can be added, to get closer.
The medium format with its color depth and resolution as well as sensor size is still very attractive to me, even though I am now able to simulate the whole thing.
But as someone who also photographs weddings and people, speed and precision when focusing are very important to me, as well as low noise from the camera.
1 Like
Did you folks not notice that in the demo video showing the multiprong green and gold signpost that the lettering on the signs was all distorted?.. especially the & symbol. This has been my biggest bugaboo with PhotoAI. I keep giving PhotoAI a go and always end up back at DeNoise and SharpenAI because they don’t muck up lettering. You shouldn’t have to select text to protect everytime you edit a photo that has text somewhere in it. Please figure out why PhotoAI warps text straight up by default while DeNoise and Sharpen do not. Thanks.
2 Likes
Using 3.1.0 I notice something very annoying about Face Recovery. I cannot find a way to see the results without the yellow rectangles obscuring the view. With 2.3.2 I could see the results without the yellow rectangles. Is there a way to make the yellow rectangles disappear when I am using and adjusting Face Recovery?
2 Likes
Beautiful artwork.
I love Luminar Neo! Not their Upscale though lol but the rest is great and very easy to use.
Hold Shift-F down and the yellow rectangle will disappear so that you can adjust Strength without the face being partially obscured. The yellow rectangle reappears when you let go of Shift-F.
1 Like
I agree that NEO is a very good program and much easier than many others. Also, Topaz PAI is better and faster for upscaling.
1 Like
In the demo video the text distortion is caused by the upscaling. This was the reason for creating the text preservation model.
Hey Mik - I believe there should be a way to install both, you may inquire with our support team. Or look into our Beta program which installs alongside your existing program.
Can you elaborate though - what are the functions from the Remove tool in 2.4.2 that you want to see in 3.1.0 Mik?
1 Like
I believe there’s been several mentions about the possibility of having two versions of PAI at the same time, and from what I can gather it’s fairly easy to achieve…
From a quick search it seems this is possible both in Mac OS and Windows 11 (haven’t seen Windows 10 mentioned)
Apologies if I’m doing the linking wrong…
Maybe this info deserves a separate thread/post somewhere? (Or maybe it already exists?)
2 Likes