It looks like this is a version before the final release. We recommend downloading once it’s released to avoid issues like this. Please follow the below steps:
Go to Add/Remove programs and uninstall Topaz Photo AI.
Delete the previous 3.1.0 installer.
Redownload a 3.1.0 installer from this thread or the downloads page.
Dakota, the product mgr, might be able to help you better than I can.
But… can you look at your Preferences for AutoPilot (AP) under the Edit menu to double check that a setting to allow all AP processing wasn’t accidentally turned off there (which could be limiting what AP is handling…).
Wow - So far, I’m joining those expressing favorable responses!
I’ve been running v2.4.2 to avoid dealing with all the issues of v3.0.x, but I’m seeing nothing but improvements here, in both performance and flexibility. And I’m running hardware that doesn’t even officially meet the published minimum requirements (Ryzen 3, integrated GPU with 2GB VRAM, plus RX 6400 with 4GB VRAM). For some operations, Photo AI uses only the CPU and integrated GPU, but it still feels very responsive. Nice work, folks!
I do understand the comments about menus and stuff encroaching on the image workspace, but I’ll gladly accept that in trade for the other improvements.
I’m running into a really annoying problem where the image I load just shows up as a gray square/rectangle. This only seems to happen after I process and export an image beforehand.
First serious bug encountered. Previous update editions seem to work fine.
Just installed the most recent update (July 12, 2024). This one, I believe?
On launch the “New Feature” video sticks in perpetual and endless loop.
The only way out is to open Win 11’s Task Master and force it to stop on exit.
The same behavior occurs from a stand alone launch, or launch from within Lightroom Classic.
Hi,
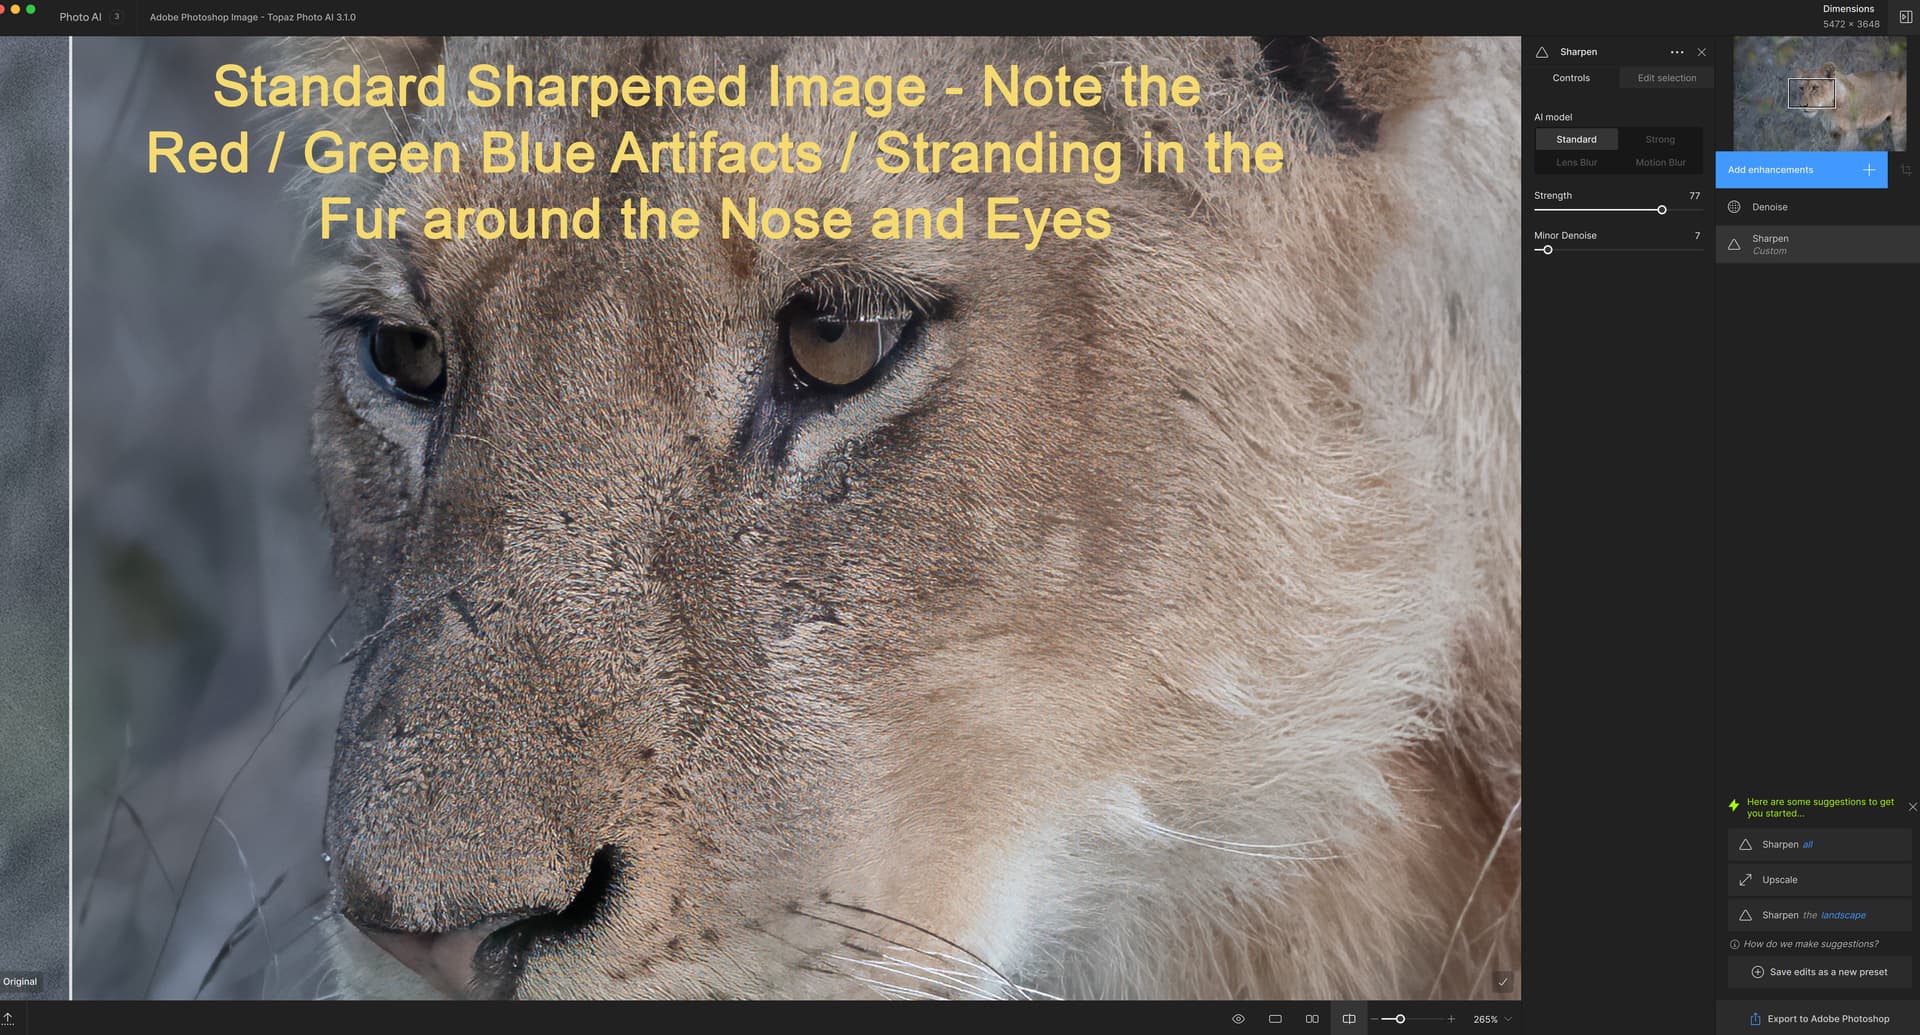
Using the “Standard Sharpen” the sharpened wildlife image has red, green and blue artifacts / stranding. This happens with animals that have fur or birds with feathers. See photos below
Also
Topaz Photo AI v3.1.0 Crashes / Freezes my whole computer when using UPSCALE on any image.
I have to power off and power the computer back on
Using: iMac 27-inch, 5K Retina 2020,
Processor: 3.8 GHz 8 Core Intel i7
Graphics: AMD Radeon Pro 5700 XT 16GB
Memory: 72 GB 2667 MHz DDR4
MacOS Ventura 13.0.1
Is there an issue with supporting the AMD Radeon Pro 5700 XT similar to Topaz Video AI issues?
Edited Image Using Standard Sharpen - Note the Red, Green and Blue artifacts / Stranding
IMO, you have significantly over-sharpened your wildlife photo. And, may not have added enough denoising to get rid of the RGB color noise. I base that on the appearance of your After image (there is halo-ing around every strand of fur) & the settings you show in the righthand panels (sharpen strength is almost at max).
As an experiment, what happens if you lower the handle on the Std Sharpen Strength slider to about 25, then move it up in small increments until you start seeing the edge halo-ing, then back it off 1-2 pts? After that, if you still see the Color Noise you reported, what happens if you equally gradually pull the Minor Denoise slider handle more to the right (I say gradually so you don’t soften the fur detail)?
If that still isn’t right & you want more fur delineated what does a combo of the Stronger Sharpening model (at low, conservative level) + a Denoise enhancement (vs denoise with sharpen) do for your critter image? I assume you want the fur to look natural and be sure the animal has sharp eyes. As you know, you can use masking to handle those elements separately.
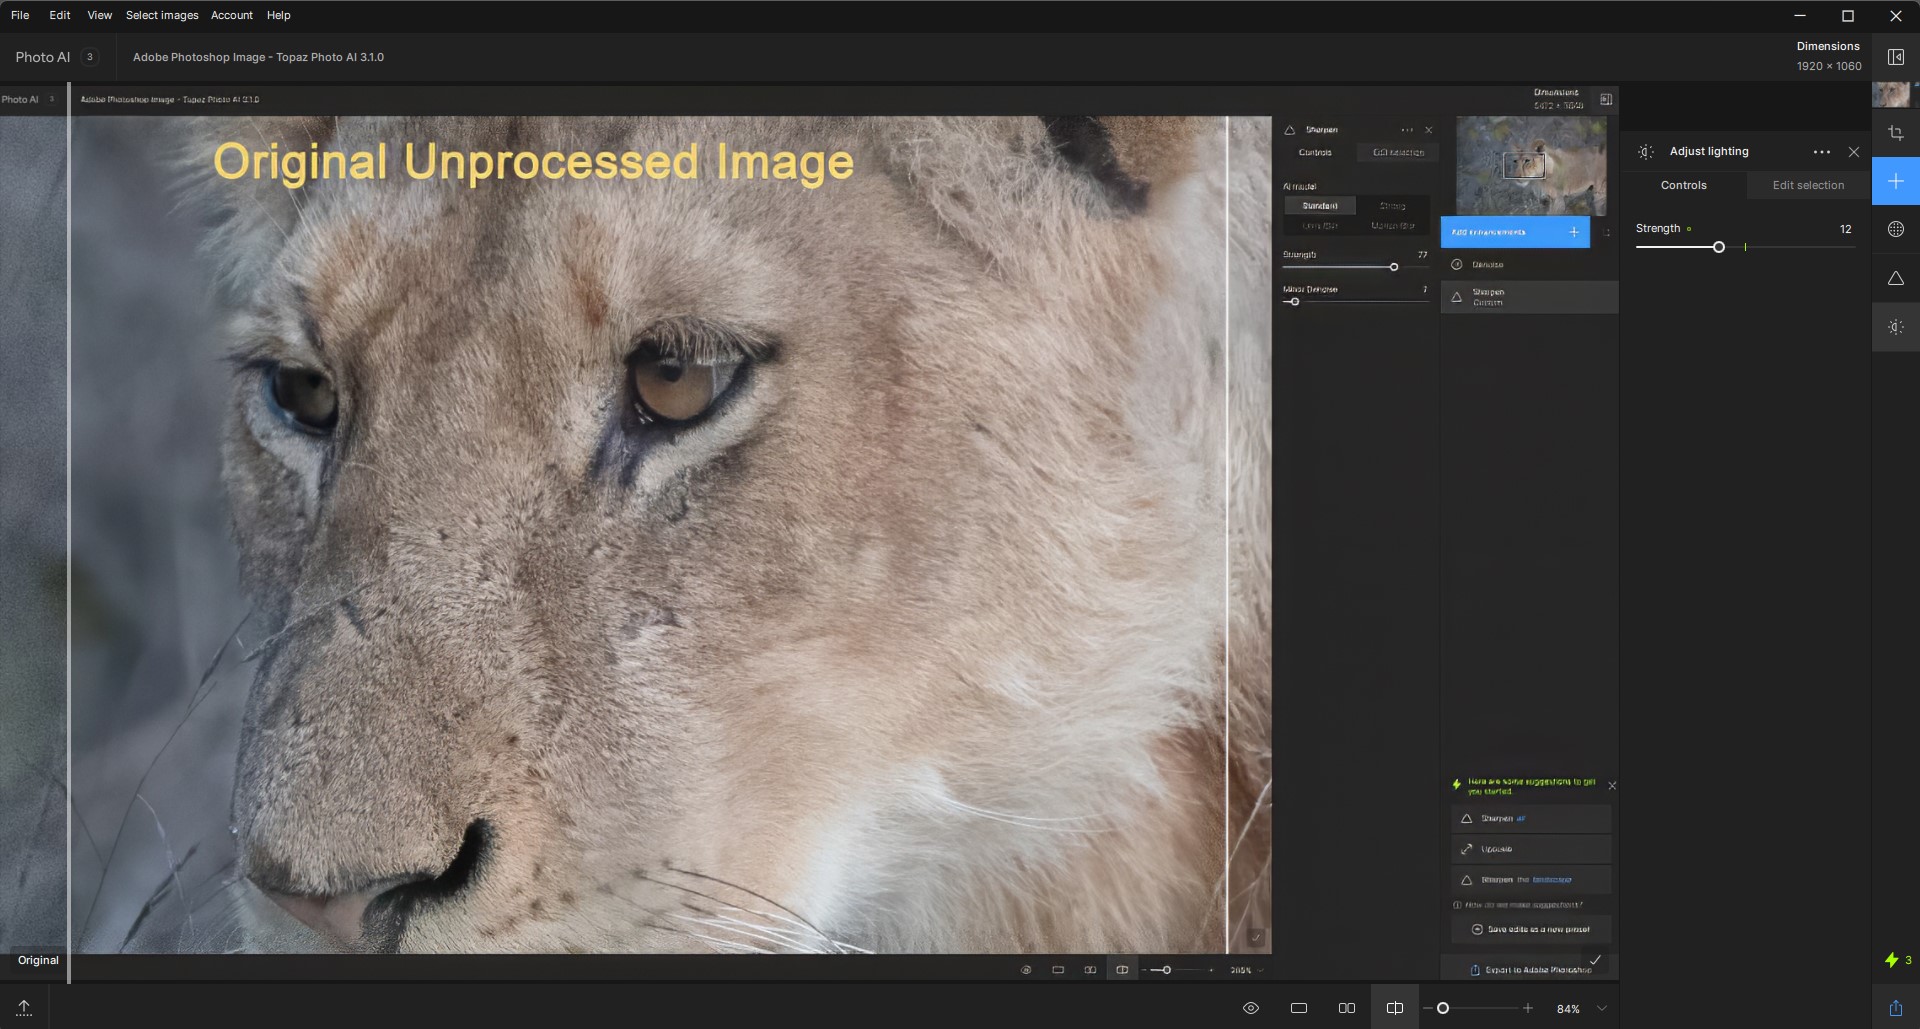
UPDATE: I just downloaded the truncated snip of the Original you posted above and gave it a quick test.
Step 1 - PAI Denoise (as an enhancement, not as a sub-enhancement to Sharpen). My snip shows the settings I used over in the righthand panel. If you look to the left of my vertical Split View divider you’ll see the denoising difference b/wn the original and the PAI processed.
Step 2 - PAI Sharpen (ditto, as an added enhancement, not using deblurring as a part of Denoise). Again, settings in my snip for you to see what you think.
Step 3 - Lighting adjustment quick test. I don’t know if you have a host program and can work with that. If it were my own wildlife shot I might brighten the animal a bit and darken the background a bit to make the wildlife pop (but w/out going nuts…still maintaining a realistic look). I can’t really do that from a partial image snip. But it’s opt. anyway. And, I would do it in Photoshop (Lr or Affinity would work too).
I’m a beta tester user for Topaz. Either the Topaz staff who read this forum or if you contact Customer Spt on the main website you can get an answer to your question.
I believe there are offers at different times, but I can’t help you with the specifics. I believe if you pay for an annual license all the interim updates in that annual period you get as part of the license fee.
I notice something. I have a TIFF photo, I did Denoise first, then Sharpen and nothing else. Then I look at overall pict at 100% and hit the spacebar for before and after, and I notice the highlights are just a little/tat darker. What about you? Bug?