Not in relation to Topaz but after having some minor audio issues with Baldur’s Gate 3 I tried updating some drivers, including updating my GPU driver to 456.33. After reloading the game my GPU started making some pretty horrific noises that sounded like something more than just bad coil whine. Found quite a few people on Reddit complaining about various issues and most had performed a rollback. I did the same, rolling back to 546.29 and have had no problems since (weirdly including the audio bug). Others suggested earlier builds but I find .29 to be fine.
I had to go back to v.2.2.1. I had worked a nice workflow with this version for dealing with low light, local rock show pics taken with either my Sony ZV-1 or A7S II: I use Imaging Edge Desktop to initially brighten the dark ARW files and save them as new ARW files; then I use Photo AI to denoise/sharpen even though it doesn’t show the increase in brightness done by Imaging Edge; but when I then export the processed images as DNG files, the brightness is back along with things being denoised and sharpened. So at that point I just have to do a little bit more tweaking on brightness, color and rotation.
But with the v2.2.2 upgrade, the DNG files are exported dark with none of the Imaging Edge brightness adjustments. And they’re pretty much unworkable if they’re especially dark.
Downloaded 2.2.2, no problems from the message when going into PAI.
Did one simple remove which took about 3 minutes, seems to be getting slower. Actually the remove has made a mess. This used to work quite well but on the last 2 versions not working, adding people into images, pretty weird stuff.
Plus the interpolated images look computer generated rather than natural. I found that creating a larger mask around the object you want to remove is less likely to generate another person. Also, someone else reported on another thread that if you switch from Erase Area to Keep Area, you get a better result. I haven’t tried it myself and am away on a trip for a week.
Funnily enough, I did have a larger area around the object than usual. This is just empty space, there are no people in the image at all, it is a seascape.
Just used it on another image and it worked reasonably well, although I had redo several parts, it seems to have problems near the edge of an image, difficult to remove and it keeps putting something in.
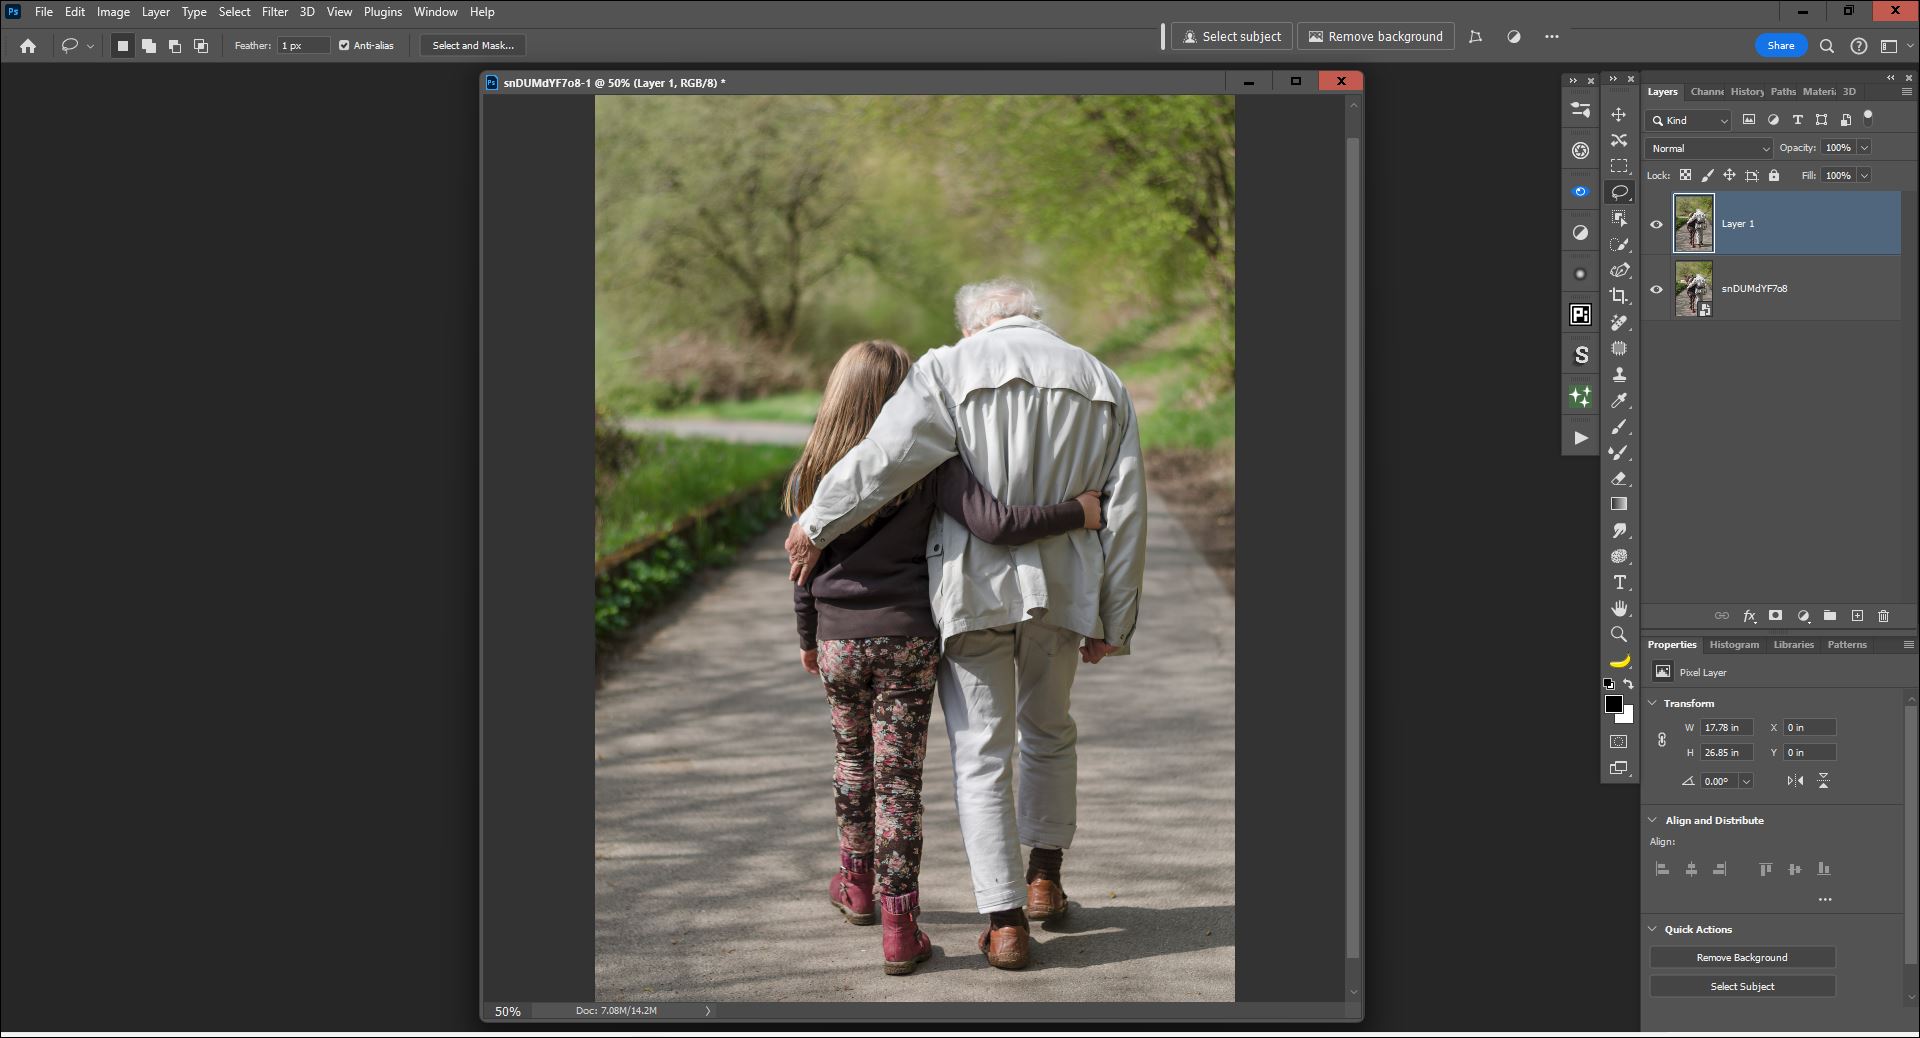
I just tried PAI 2.2.2 as a plugin (Filters menu) to my Ps 2024 on my Win 11 Pro PC - to see if I’d have issues with the Remove tool in this rel. (after seeing the comments above).
My Remove test did a nice job of removing extraneous people and dog from the scene to keep the focus on a grandfather and granddaughter out for a walk together. And, honestly, it did a great job of cleaning up the frizzies on the girl’s hair w/out giving her helmet head!
I always go a bit (not tons) beyond the edges of what I want to remove, make sure that all contiguous aspects of something I’m removing are highlighted in my remove mask and don’t try to cover too much territory in one remove process. In this test, I did 2 sequential removes (one to get rid of the background people and a 2nd to get rid of the dog). I also crank the slider more to the right to better Quality (vs faster Speed).
** But, I do have a QUES. for the Topaz staff.… When in the Remove Panel (ie, where we can designate what we’d like removed), at the top of the panel is a tool tip (i) re: the Green Box. It’s just a partial sentence - so it’s not clear (at least to me) - What does that Green Box represent?. Either the full Description is cut off (at least in my plugin) or someone didn’t complete the sentence saying what that green box is for or what it tells us. It also would be nice to be able to disable that Green Box if it’s not something we like having appear and we think it’s distracting.
At the top is the Model Input Size Width and Height. The tool tip is trying to explain that the pixel values shown are the size of the green perimeter square automatically placed around the items you’ve painted with red to be considered for removal.
It seems to be a bit of an artifact that is intended more for the developer than the user. Model Input Size Width and Height are not user adjustable, but may give you some relative indication of how long this is going to take. Paint too big of an area and the green box turns red to warn you that it would take too much memory to process. Other than that, it seems irrelevant to the Remove function.
I would have assumed the pixel dimensions were the image pixel dimensions. Not those of the model. And, the tip was unclear.
I absolutely don’t need to see that green box and really dislike it. I don’t like any popups, green boxes, icons or nav boxes over an image I’m trying to process. If someone wants to (optionally) turn that on to see a padding range, that’s one thing. But it shouldn’t be there otherwise. As you point out, it’s an (to me at least) unwanted artifact.
It’s challenging enough to develop an impactful image without having to maneuver around ‘landmines’…
I thought they want the images for training purposes. And I agree with the OP, it should not be so blatantly in your face every time you save an image. I have to be extra careful that the option is deselected and even then I don’t trust it. Also every time you work on an image it creates a thumbnail in the upper right. Is that thumbnail saved only locally or also on their server? Potentially a huge privacy issue.
Oh, that’s interesting and clever, but my dark concert photos (due to my prefering to use a relatively fast shutter to reduce performance blur) usually come out a bit darker in Sony’s ARW raw format. But going back to v.2.2.1 seems to have solved my issue (although it is kind of annoying that I can’t see the denoise/sharpen results until after I export them).