It was important to me that you take a tiff, then the raw conversion is missing.
Also I can make a tiff in any size but not raw.
But thank you for your effort.
It was important to me that you take a tiff, then the raw conversion is missing.
Also I can make a tiff in any size but not raw.
But thank you for your effort.
thanks
what was the resolution of the file?
Unfortunately, slightly dissapointed to where we are so far.
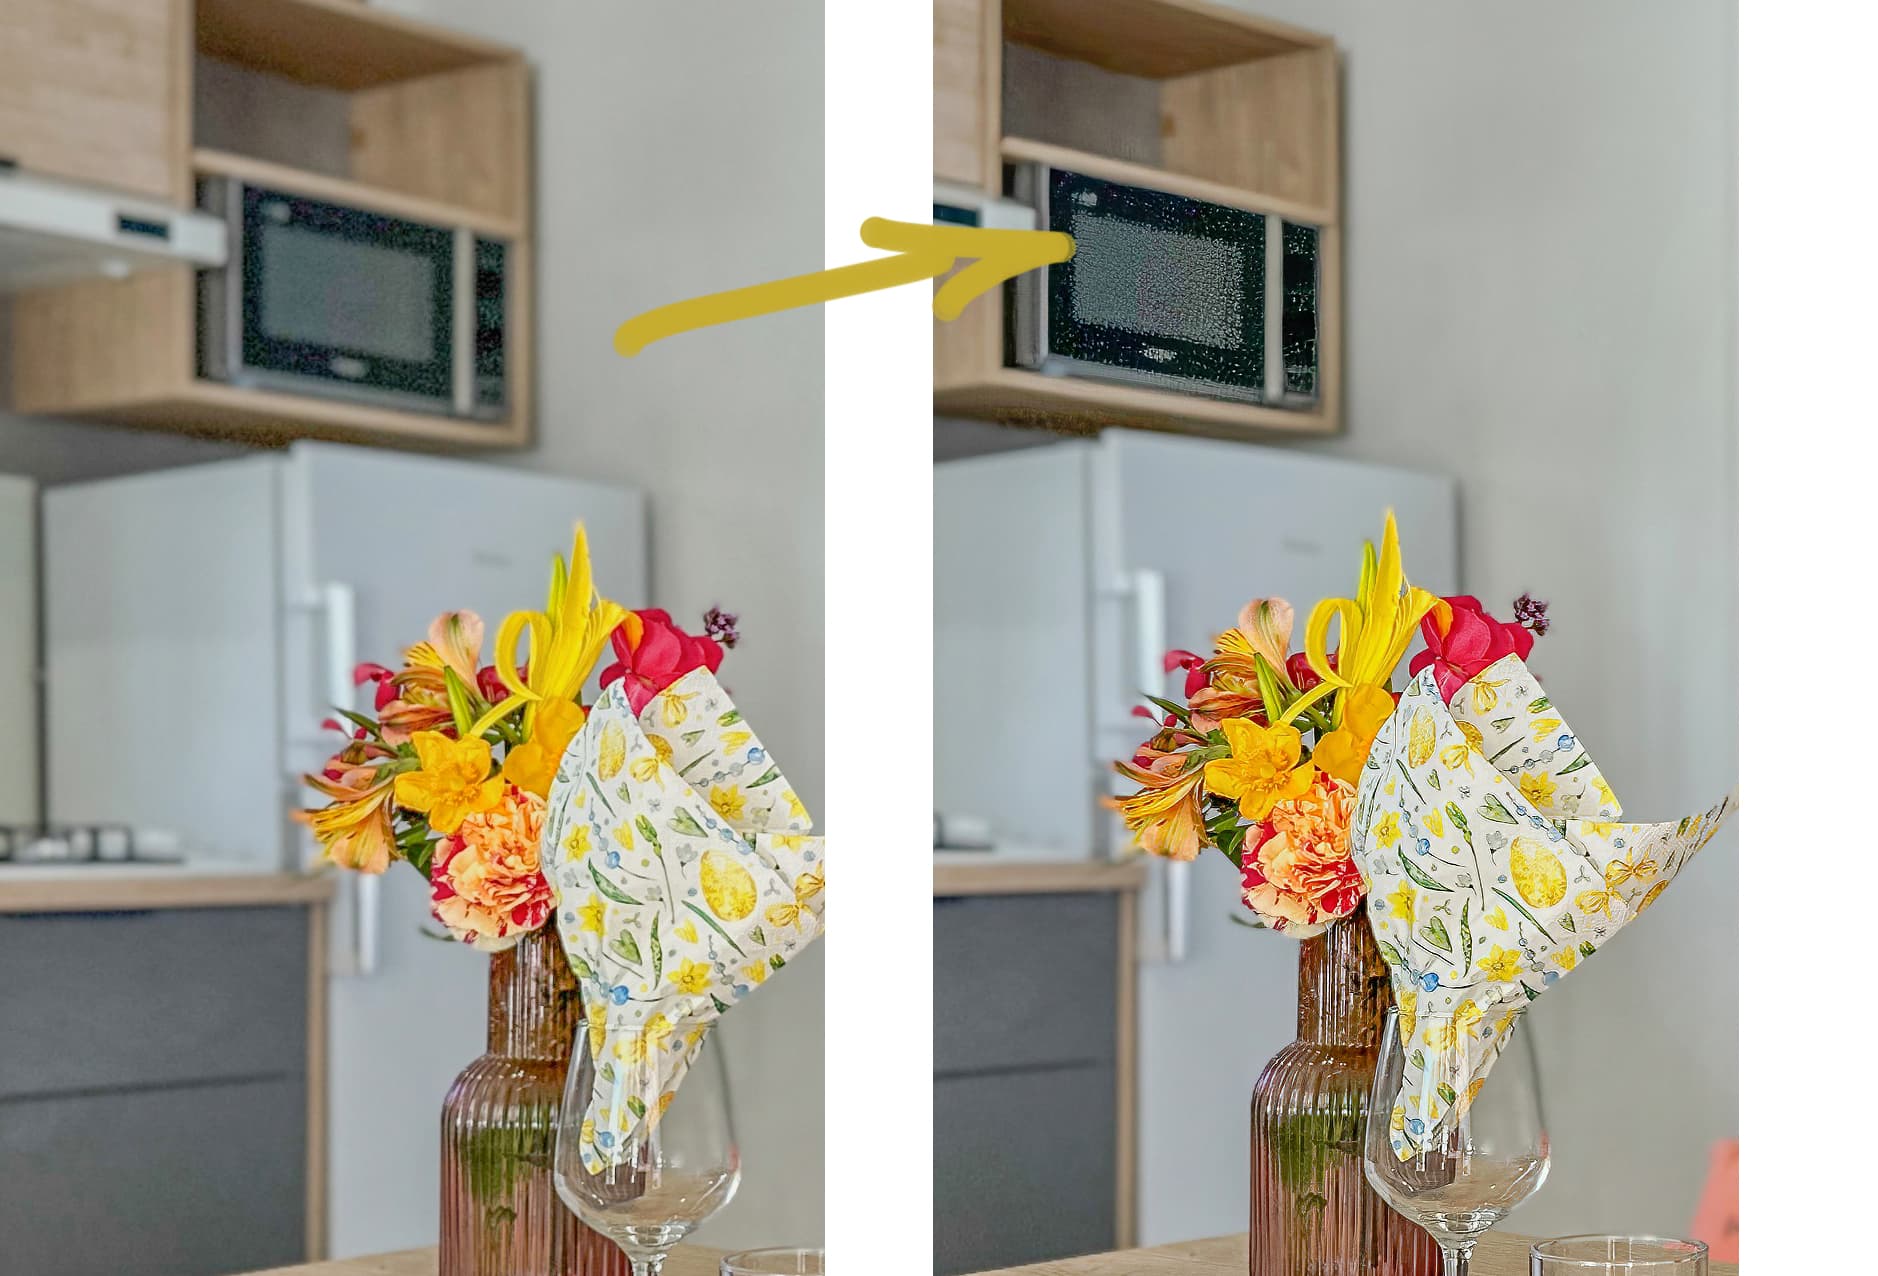
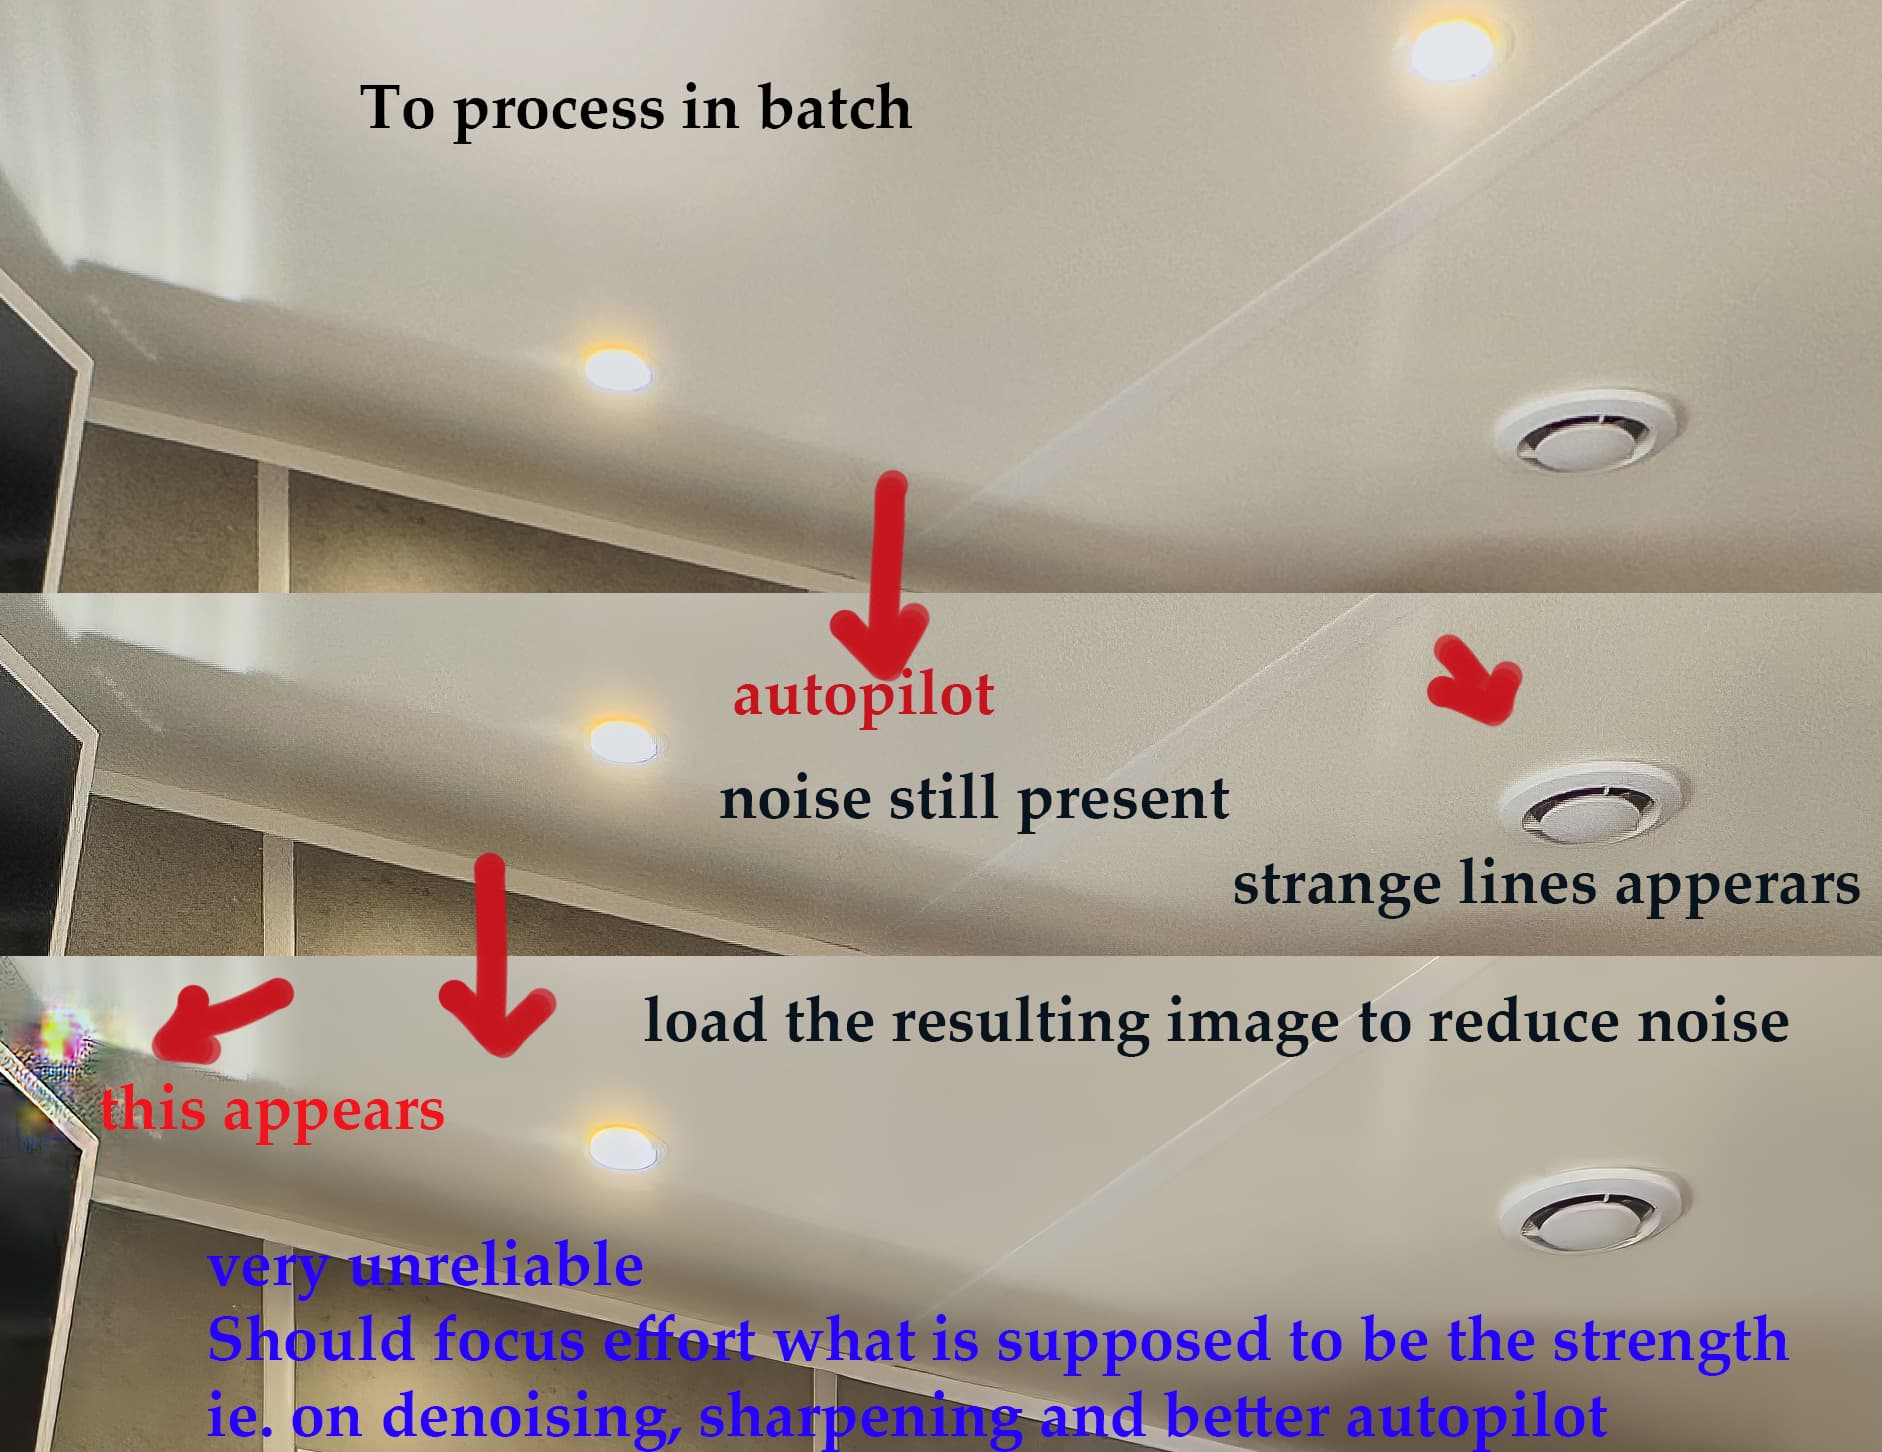
I highly recommend that TPAI focus on improving on what is supposed to be its main strength : better denoising, sharpening, upscaling and most of all, better autopilot (and not really on what other programs can already do, ie. cropping, demosaicing, …).
Please find some samples of why TPAI is still very unreliable on what are supposed to be its strength.
Thanks
@Lingyu Requested files were uploaded
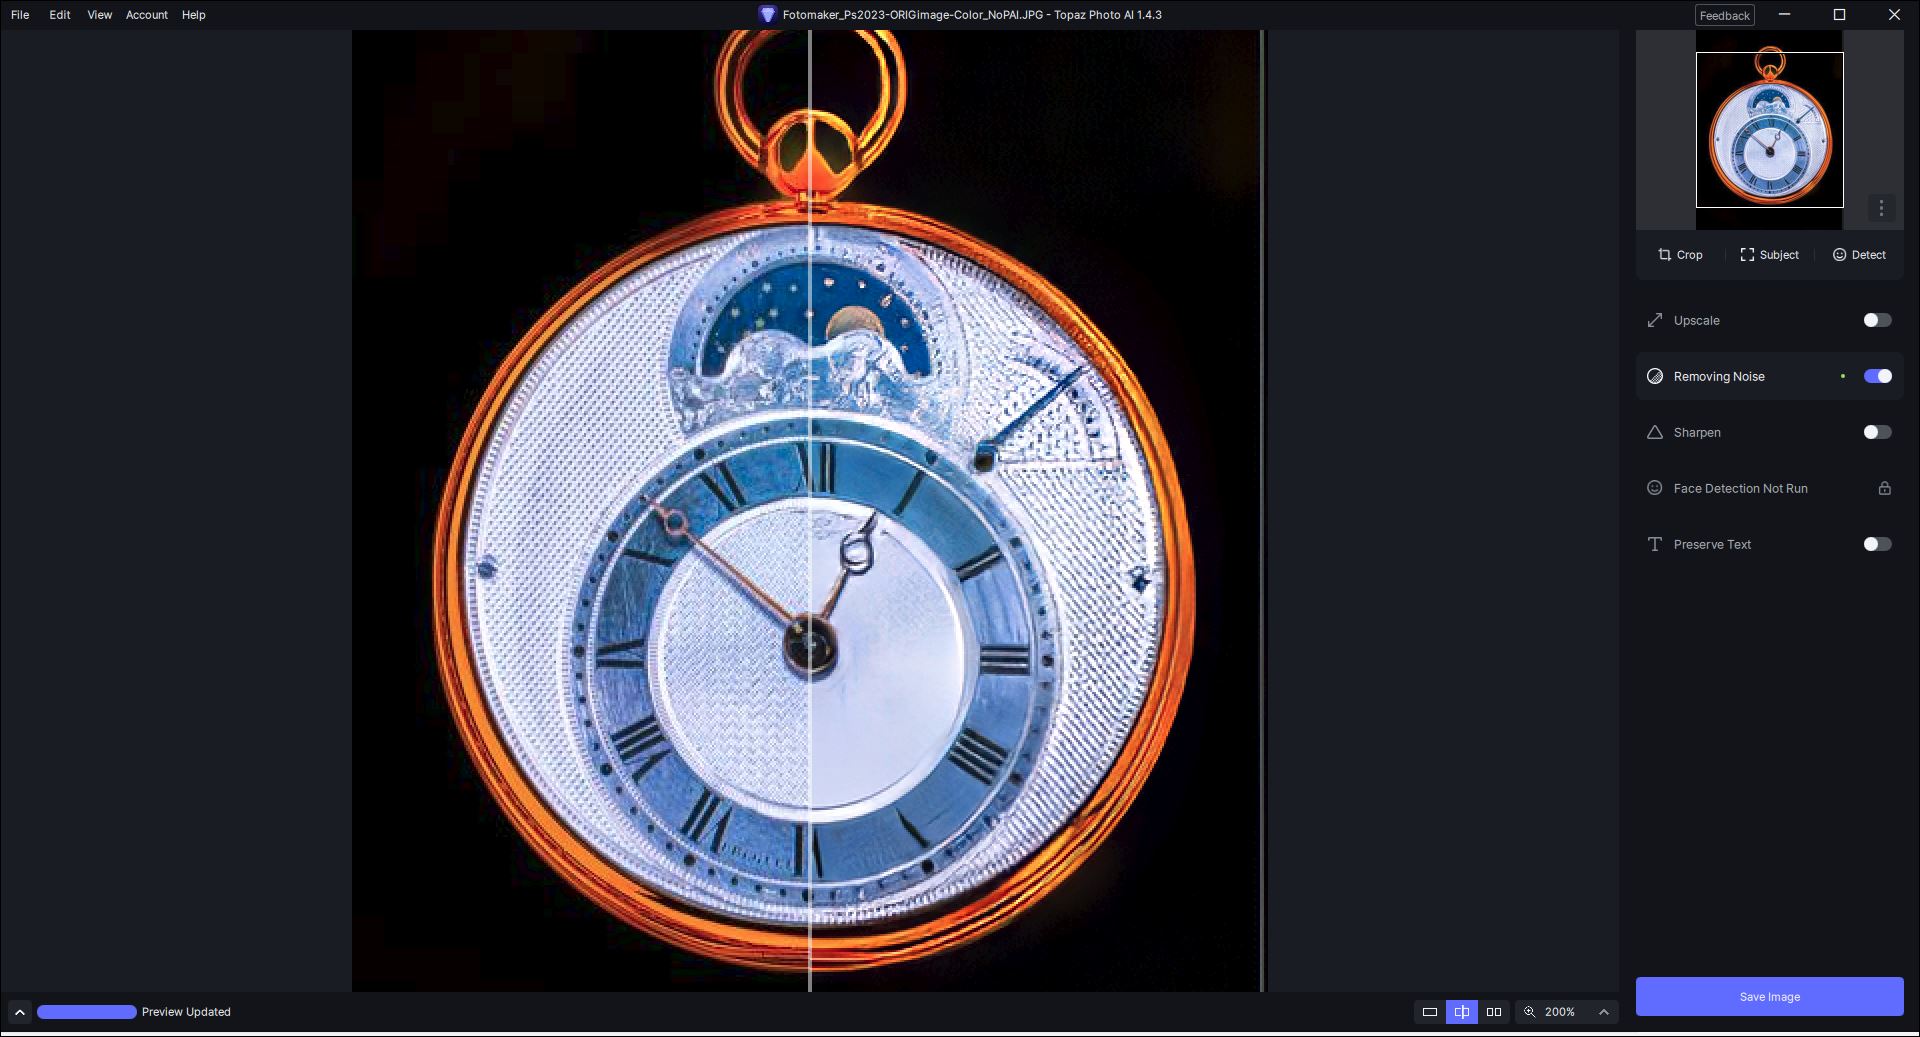
I’m not able to do PC work yet. I just ran the attached thru this 1.4.3 rel. of PAI (Win 11, Standalone) & this is what A.P. produced all alone (Std model) - it chose Only Remove Noise. I have set all A.P. settings except Sharpen Off in Prefs. My usual setup is split screen. I still would prefer whatever gen of models were in 1.4.0.1b. I got excellent results in that rel. - just didn’t like the “knobs & switches” & collapsed model lists in it.
I do not know the answer, but DXO, Lightroom, Photoshop, On1, and other programs use the GPU also. Do they also have this problem?
We test batches of files internally and release a beta to have users review and help catch issues as well. Our internal file collection may not include all camera models and variations in image data that can cause these artifacts.
We will continue looking for ways to improve our QA for the models like gathering more Raw files from various cameras.
Are you able to share these examples so I can reproduce the issue?
You can securely submit your image(s) to my Dropbox using the link below. Please be sure to send me a note to let me know you sent something.
Dropbox File Request
Please attach the logs to my Dropbox link above so I can investigate. Open Topaz Photo AI, go to the menu bar on the top and click the Help > Open Log Folder menu option.
Love the product but there is a huge remaining problem: except for faces, it makes human skin look like it was formerly owned by a desiccated reptile, all ‘crunchy’ and dry. This is a glaring, basic defect far more important than the procedural tweaks and cleanup that seems to be your current focus.
Thanks for looking into this. Perhaps this is a key, you may need to broaden the baseline automated testing. This will pay off in a long run (very significantly), as you can always run same test to ensure the baseline is clean.
You should be able to detect that results of baseline testing are same or comparable (as applicable) release to release. If this is done automatically, you can empower yourself to substantially expand the baseline coverage and thus ensure higher quality of releases, every time.
So I’ve done my usual thing where I leave it a few versions, before testing again, and I’ve got to say it’s still an absolute shambles. I have zero confidence in the software, and I’m coming up to the point where you will be wanting me to renew, so nearly a year and it’s still barely out of Beta! Get the basics of the app sorted first before you start tarting it up with all kinds of features. If it can’t sharpen and denoise with consistence results it’s worthless.
This release still has simple issues.

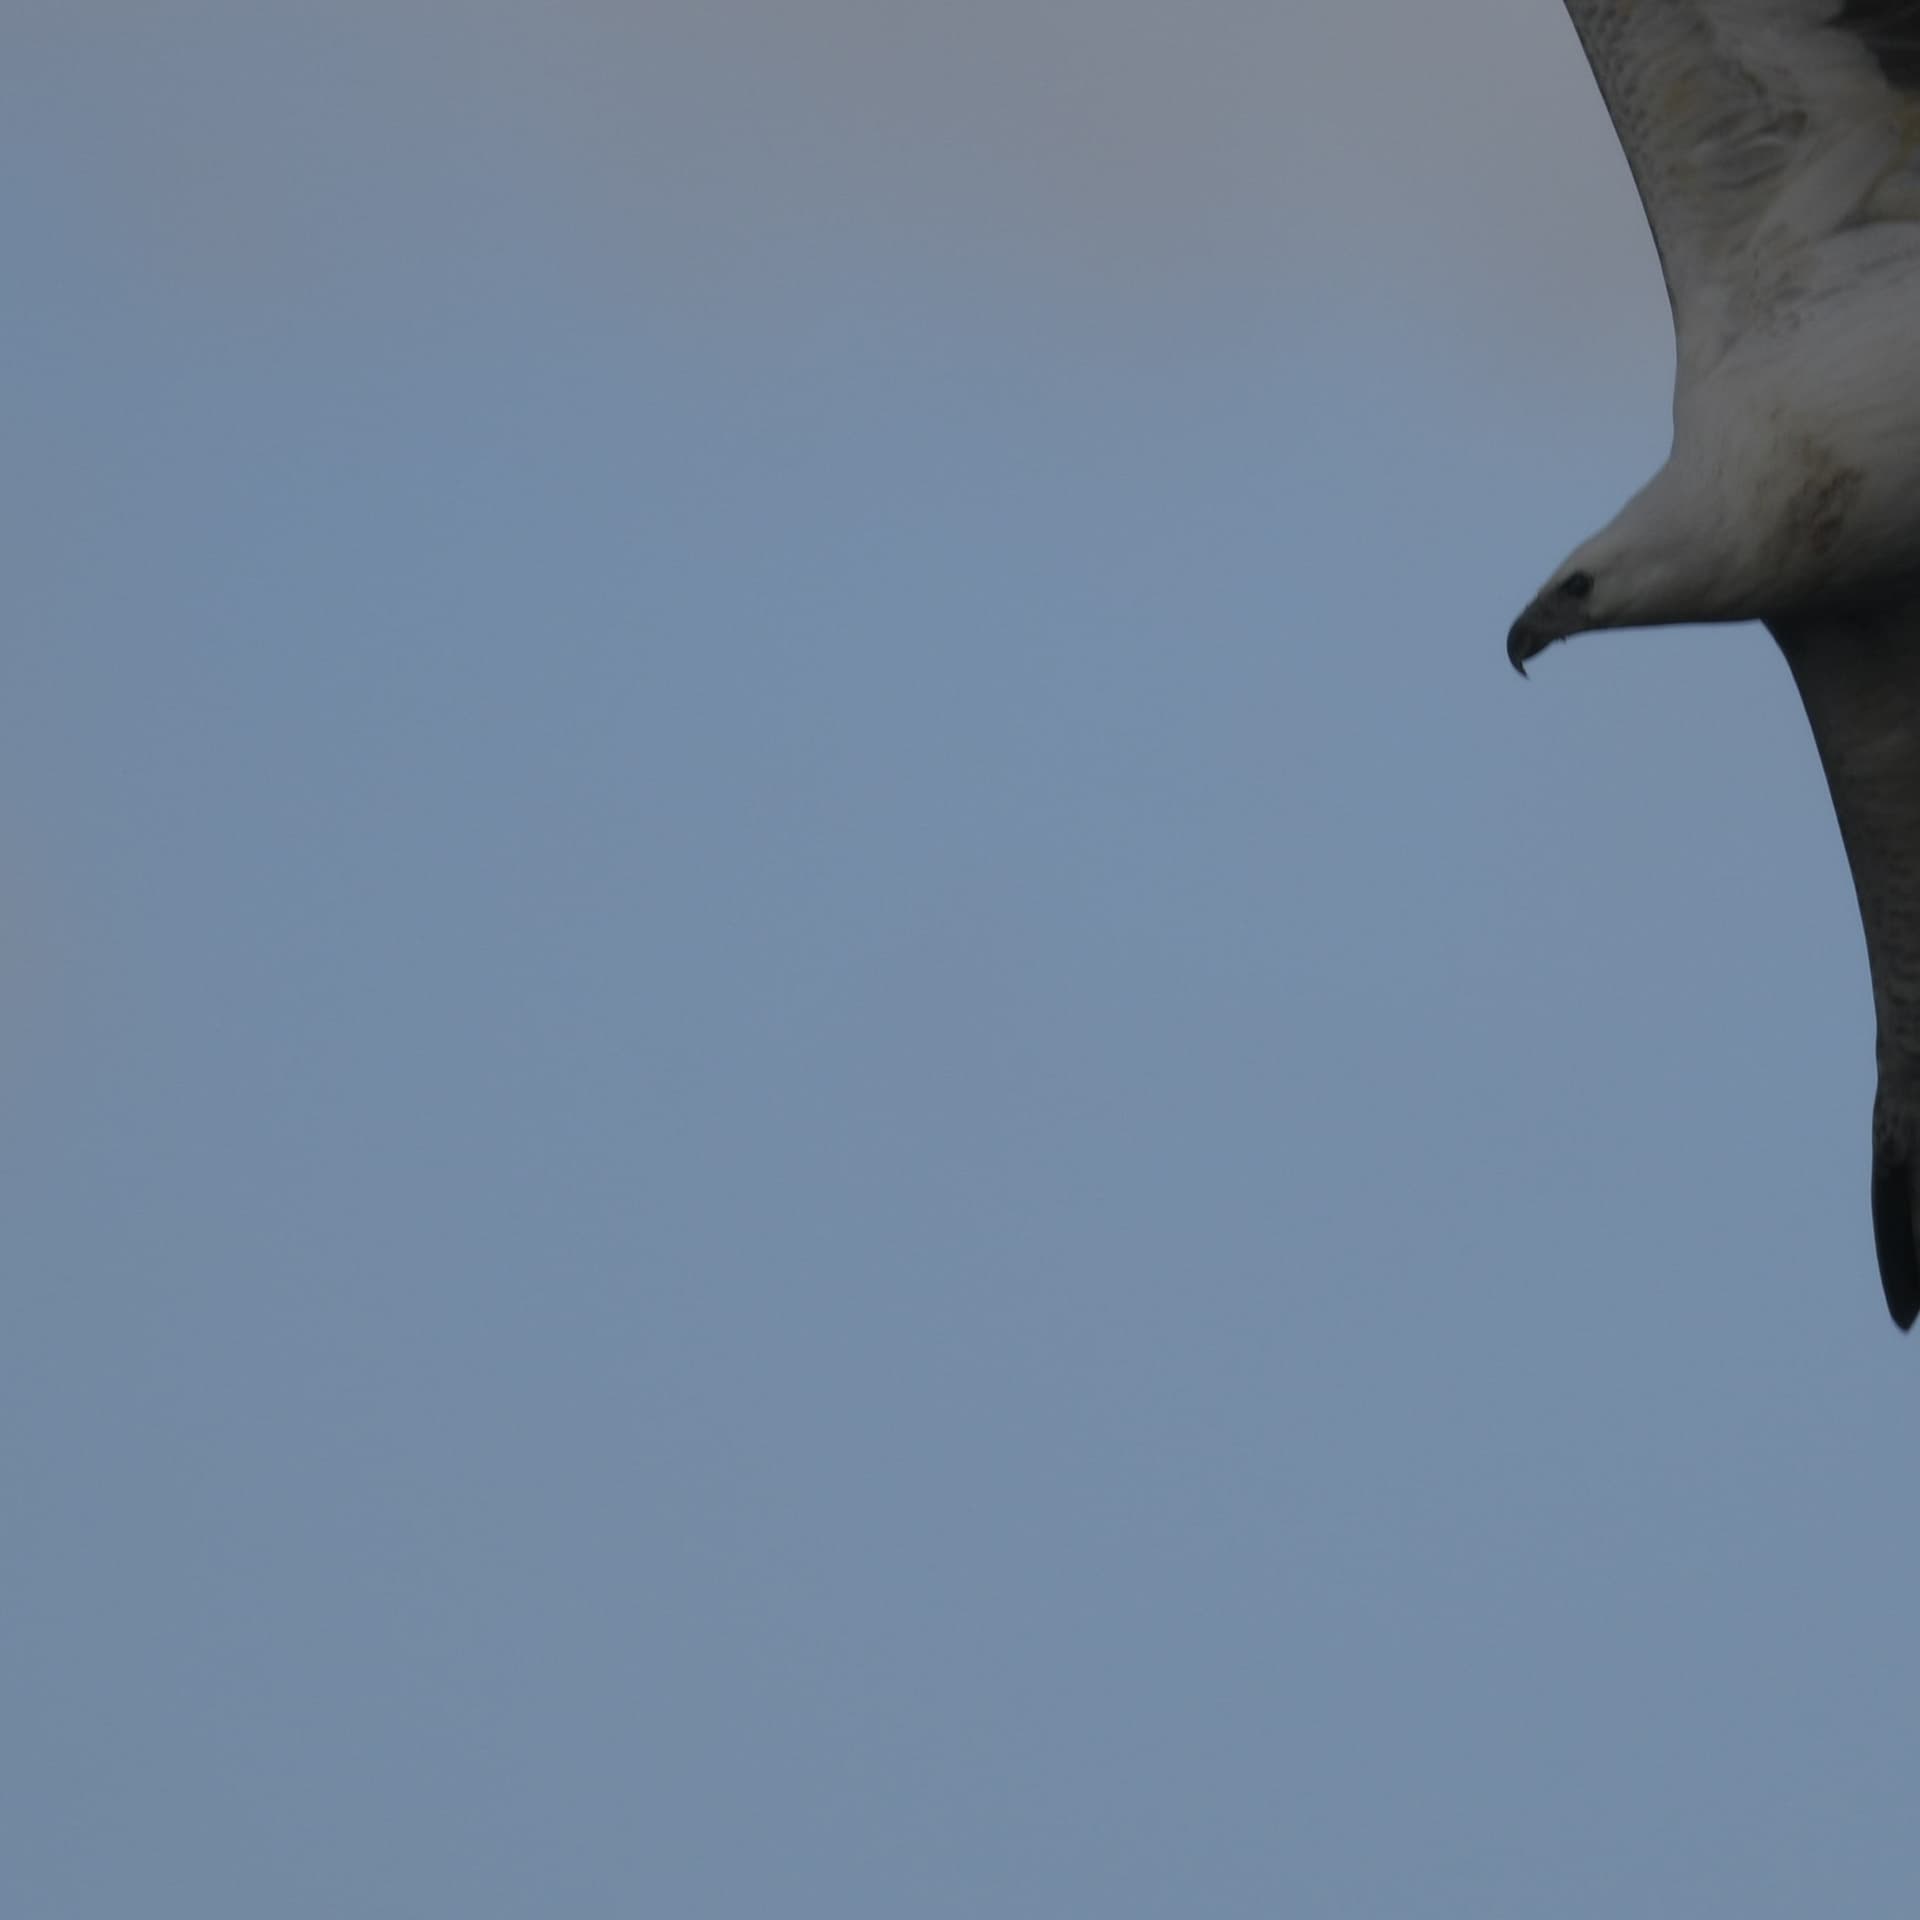
So you need to check if the subject is fully detected (this usually means moving the subject into view), remember you are at 100% and not all the image is shown.
If subject not fully detected - then select “Subject”, then change pixel size (I needed 25 pixels), check you have “Add” selected, then select the end of the beak area, then select “Apply” and continue to the next image, quite a large waste of time.
Next time you start PAI the “Brush” size is back to the default of 516 pixels, it would be nice for it to stay at the last selected size.
“Ctl W” does not move the BLUE highlight to the next file to the right in the displayed thumbnails.
If you have 10 files thumbnailed on the bottom of the main display and you find that you need to delete “Ctl + W” the file number 5, it is deleted correctly from the display but you then are automatically positioned on either the last file (at least twice in my tests) or the first file of those shown - not the next in line.
Not easy to find your way around when you may have quite a few eg. more than 20 files loaded.
Tif images saved are mostly 4–5 times the original .nef file size (49.4 - 221.2MB) , any “normal” nef to tif conversion is around the same resulting file size, compressed tif is somewhat smaller.
This may be one possible reason for running out of VRAM?
Image display always starts at 100% no option to change this?
Last chosen to be the default for the next session
No option to set enhance default at 1X (default now is 2X) sometimes the results are better for doing 1X and was/is similar in Gigapixel.
I can find no method to select more than one file from the displayed thumbnails for removal. Normally in Windows you can use the Shift and Control keys to assist in selecting files.
Colours change dramatically when images are processed.
Not sure there has been consistnt improvements with PAi, I know I prefer some of the older versions of PAI for some tasks and can sometimes get better results than with the latest release.
I may well have missed something but if I never bring it to someones attention nothing can ever be done to remidiate some if not all of these issues.
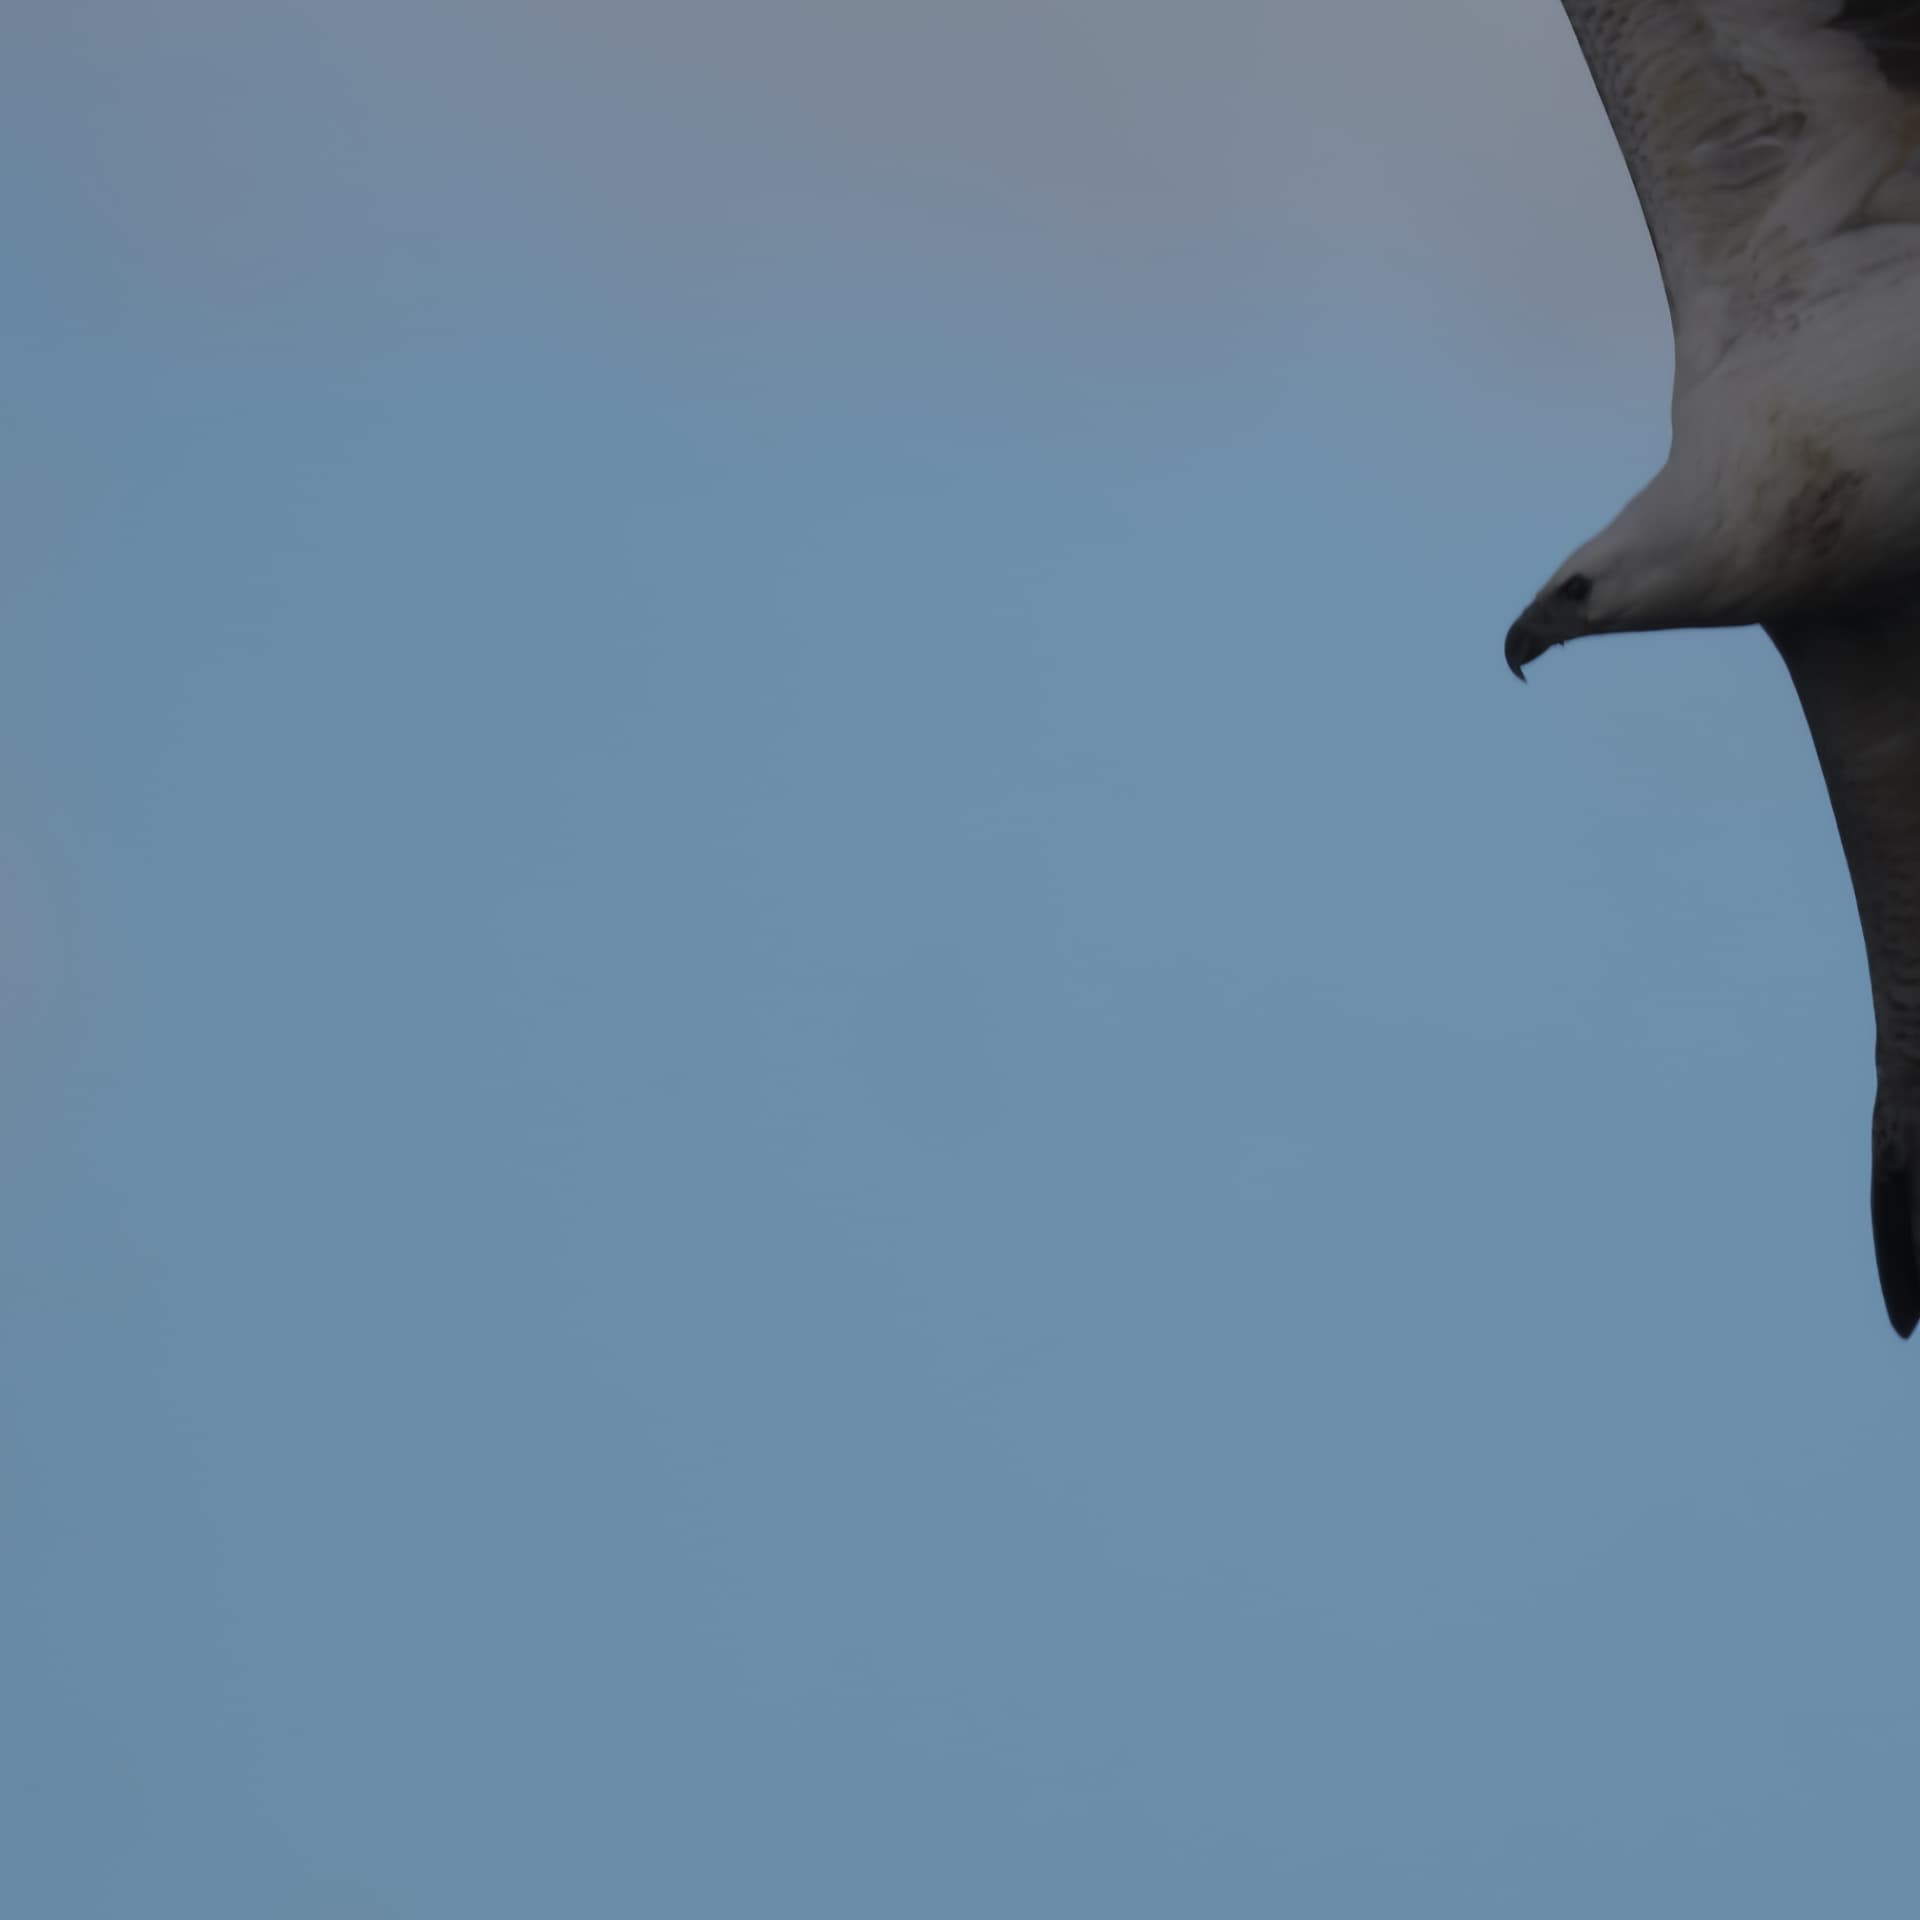
The third picture with the wolf looks very much like a drawing. hahaha
Still returning to start on Ctl + W. Ctl + Shift + W nothing happens.
100% default ensures that you have to search around the image to see what happens when settings are apllied correctly,
A good way for checking your work when you need more detail but not to start.
Upscale is set to “None”
Grin ![]()
Sample images, colour changes.
Original.
Topaz PAI 1.4.3 output.
To be sure, I wasn’t putting into question your experiences with TPAI. I mentioned mine, merely as a point of reference – see my setup’s specs.
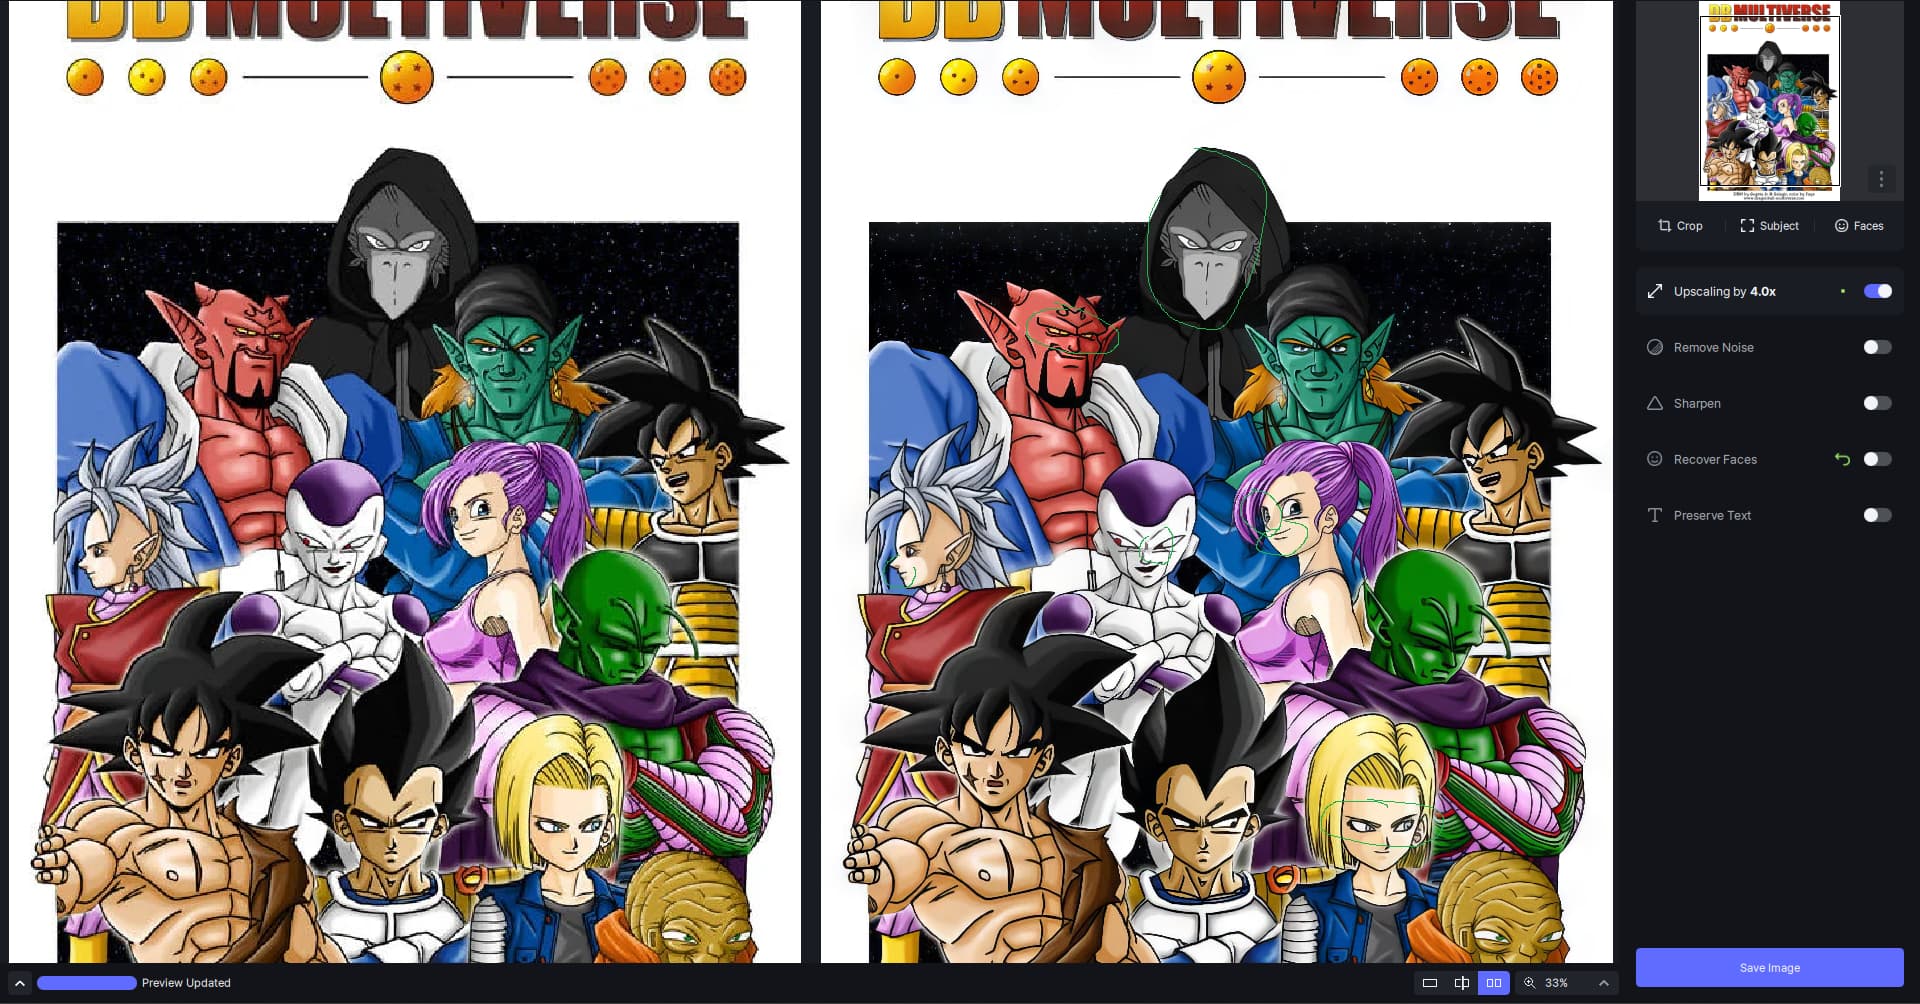
Try inserting templates for comics - this would be awesome to retrieve and optimize some stories. It always changes color and shades of the eyes, facial details and shadows. They are very noticeable.
And for anyone who thinks the current “comic” template is comic books, you’re mistaken. This current model is High Quality. ![]()
These types of issues should NOT be missed by QA.
Given the state of Photo AI and the constant need for updates I believe that Topaz should grant owners a free year of updates so this product can settle out. We purchase a product expecting high performance, but this is not what we got. It would go a long way for Topaz’s credibility to give us a year (let’s say until 8/1/2024 before expiring) before requiring payment for updates.
Since the other mayor products like Denoise AI, Sharpen AI and Gigapixel AI are essentially finished products it seems odd to require us to pay $99 for a full update plan for products that won’t be updated. Topaz needs to revamp this model and lower the price or discontinue the update plan until 8/1/2024.