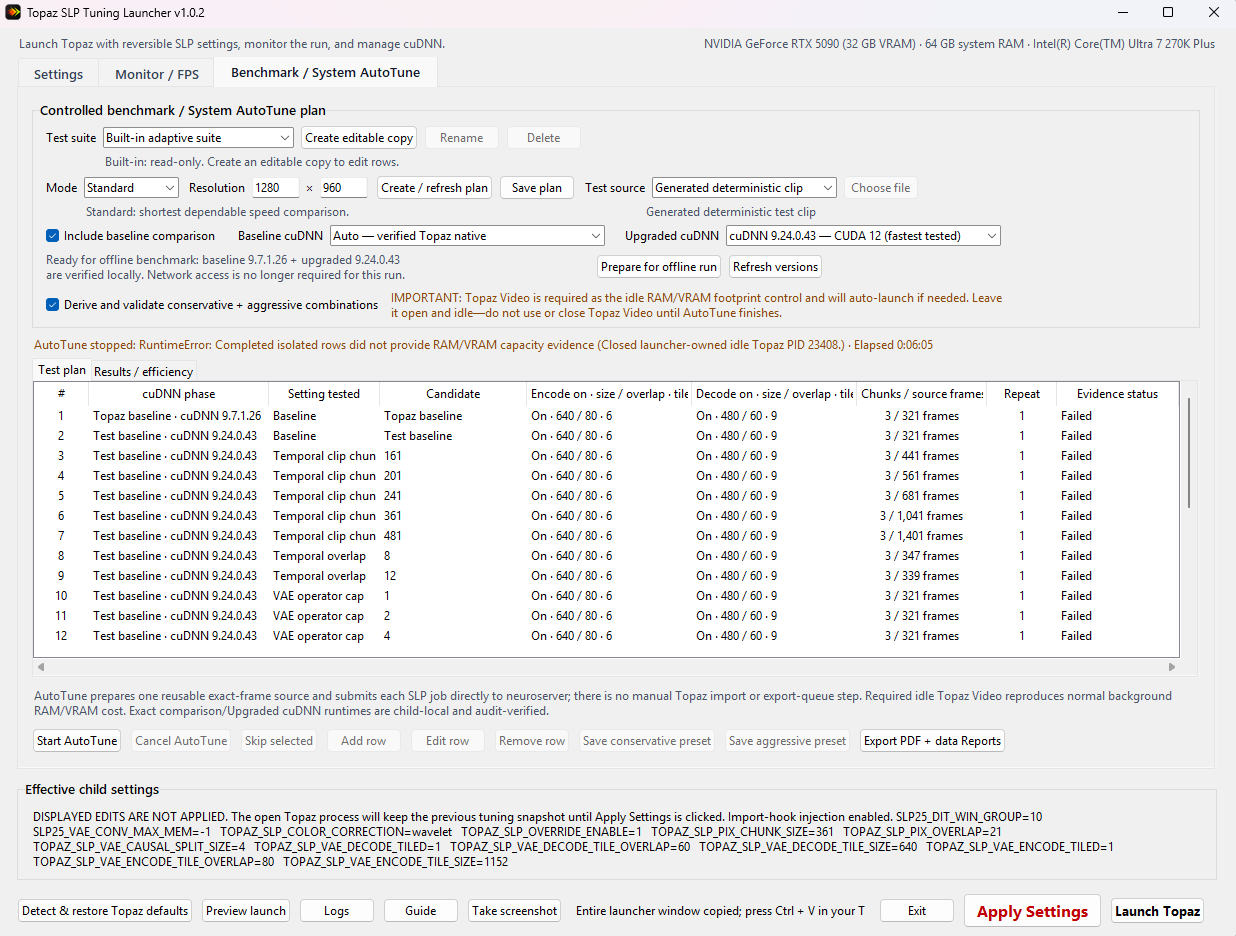
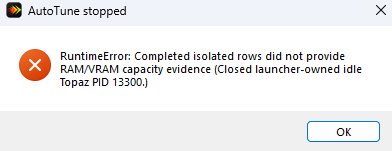
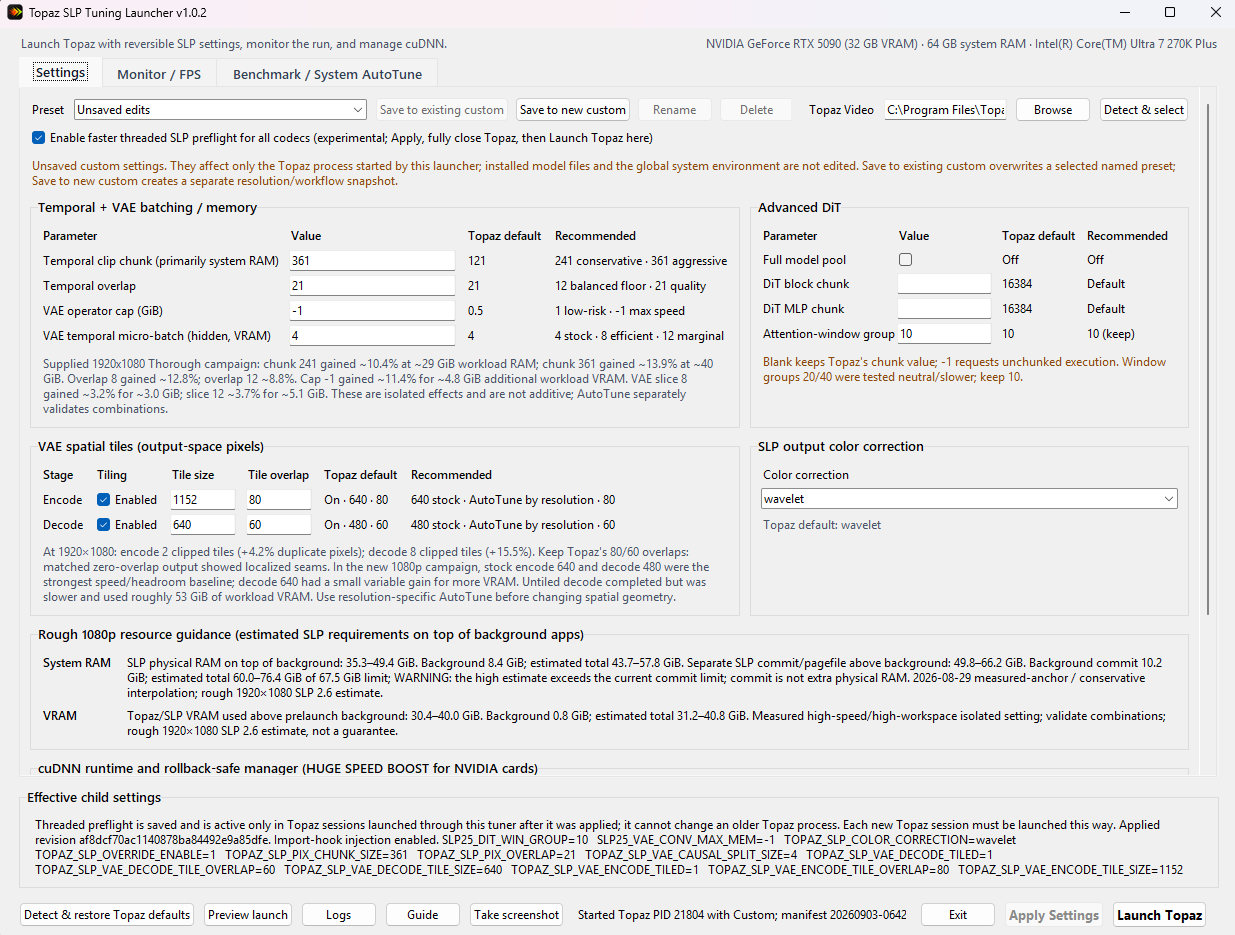
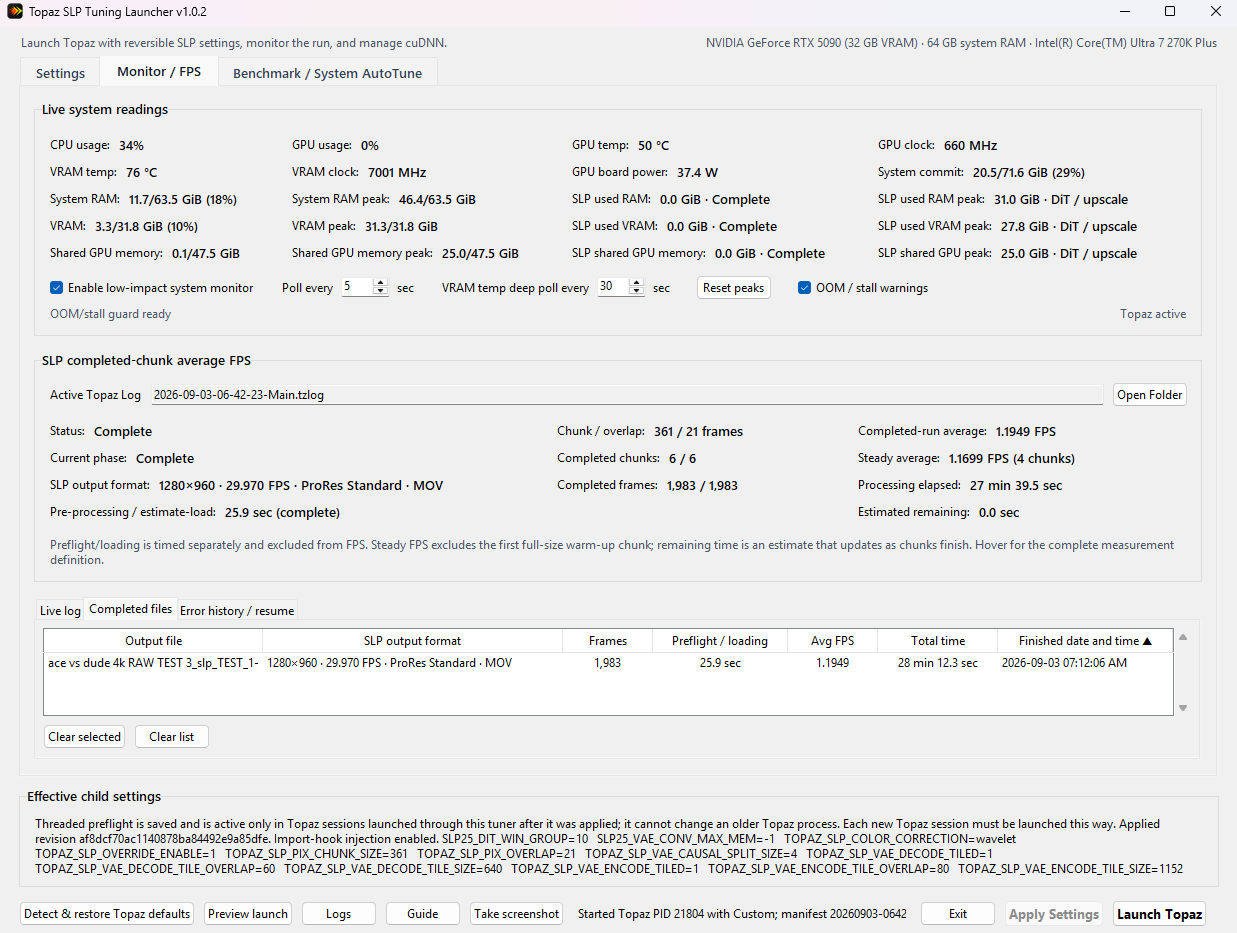
I started this new thread because, with the new Autotune feature and “Take Screenshot” button built directly into the launcher, it is now extremely easy for users to share their actual results.
The previous thread had a lot of comments along the lines of “I feel like it’s faster” or “I don’t notice any difference,” often without including hardware configuration, settings, benchmarks, or other information that would help me diagnose the results or help the community understand what actually works and what doesn’t.
I’d like people to use this thread to share their findings along with screenshots, so we can build a much more useful collection of real-world results across different hardware and output resolutions.
The launcher’s Conservative Starting Point has been tweaked many times, but it is still essentially a ballpark estimate extrapolated from benchmark data collected on my own machine. I do not recommend simply sticking with that starting point, because it has not actually been tested or optimized for your particular hardware and target output resolution.
Instead, I recommend running Autotune and letting the algorithm determine the optimal Conservative and Aggressive settings for your hardware at the output resolution you actually intend to use.
This is important because the same parameters can affect performance very differently at different output resolutions. A setting that works well at 1920x1080, for example, may behave very differently at 1440x1080, or 960x720.
Faster SLP Preflight
This version also includes a feature intended to fix the extremely long pre-flight loading time before SLP even starts processing.
It has worked very well on my machine, but I’d really like to hear whether it fixes the problem for other users as well.
To test it, make sure you check:
“Enable faster threaded SLP preflight”
If you try it, please post your results here — ideally with screenshots (use Take screenshot button) showing your hardware, resolution, settings, and Autotune results. The more real benchmark data we collect, the better we can understand what settings work best across different systems.
Topaz SLP Tuning Launcher v1.0.2
v1.0.2 is a major reliability, safety, monitoring, and automatic-tuning release for the portable Windows launcher.
Why I made it
I have tried nearly every AI video enhancer I could find, from precision/traditional models such as Proteus, Iris, Rhea, UniFab, Aiarty, VikPea, and Nero to generative/diffusion restorers such as SEEDVR2, FlashVSR, SLM, SLP, and LTX-2.5 LoRA. For my material and standards, SLP is the undisputed king of quality—but it is slow. I built this launcher to make SLP faster, safer to tune, easier to understand, and much more enjoyable to use. SLP once ran slowly enough on my workstation that I sometimes used SEEDVR2 for less-important videos; with the gain I now get from this launcher, I personally no longer have a reason to do that. Your results will depend on your own hardware, source, driver, and output resolution.
Important RAM + VRAM correction
The v1.0.0 and v1.0.1 starting presets used installed VRAM but did not account for system RAM. v1.0.1 also made several preset recipes more aggressive than v1.0.0, which could leave VRAM-rich but RAM-constrained systems vulnerable to paging or OOM. A separate migration defect could silently refresh an older serialized built-in preset by name and substitute the newer, more memory-intensive recipe.
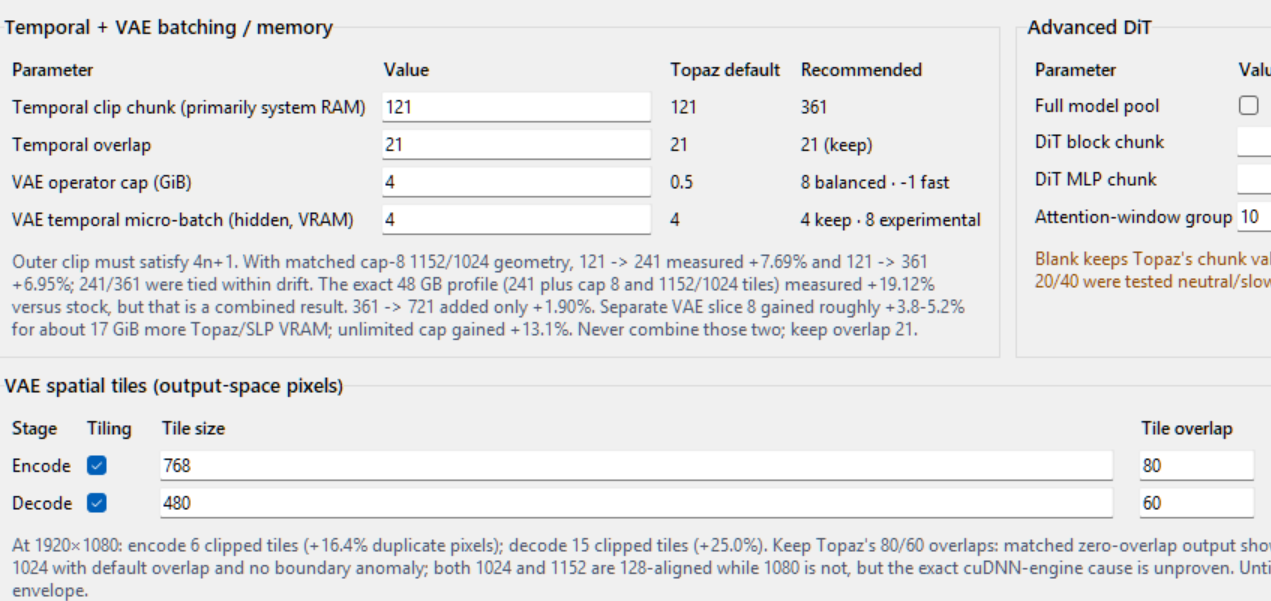
v1.0.2 replaces that approach with a conservative starting-point matrix selected from both physical RAM and VRAM. It also preserves the exact values of a differing older recipe as a custom or unsaved preset instead of silently replacing it. The matrix is only a rough 1080p starting point, not a guarantee. Run at least a Standard AutoTune at every output resolution you use: VAE encode/decode tiling and other settings can gain speed at one geometry but become neutral or slower at another.
Benchmark / System AutoTune
- Builds guarded Quick, Standard, or Thorough plans from a deterministic clip or your own source. Standard discards the first warm-up chunk and measures the next two; Thorough repeats that three-chunk measurement three times in randomized order with drift controls.
- Compares an explicitly verified baseline cuDNN runtime with the upgraded runtime without repeatedly modifying the installed Topaz DLLs. Prepare for offline run downloads, hashes, extracts, and freezes both child-local runtimes before the campaign.
- Runs bounded one-factor tests, then derives and separately validates conservative and aggressive combined presets. Successfully measured, warning-free custom-suite rows are included in that decision evidence.
- Tracks whole-system RAM, Windows commit, dedicated VRAM, workload deltas, warning evidence, exact settings revisions, output integrity, and matched repetition baselines.
- Exports an evidence PDF report with speed, memory, efficiency, and frontier views.
- Adds compact, responsive Benchmark controls; explicit mode hover help; editable custom suites; resolution-aware temporal and tile candidates; and sortable live Results/efficiency tables.
For the most trustworthy results, close unnecessary applications and leave the machine as idle as possible during testing. After any required online preparation is complete, consider disconnecting from the internet to reduce the chance of background downloads, updates, cloud syncing, or other network-related activity interfering with the benchmark. Even light typing, web browsing, or other seemingly minor activity can reduce measured FPS.
It is also important to keep the system thermally stable throughout the test. Make sure the computer has adequate ventilation, and use an open window or air conditioning if necessary. During a long Autotune campaign, the CPU, GPU, case, and even the room itself can gradually heat-soak, causing performance to drift over time.
During one of my approximately 19-hour test sessions, I experienced a drastic 16–17% drop in FPS across the board. Because of this, I strongly recommend minimizing anything that could introduce variability into the Autotune results. The goal is to keep the testing environment as consistent as possible so the settings selected by Autotune reflect the actual performance of your hardware rather than temporary background activity or thermal conditions.
Speed and quality
The launcher does not increase speed at the expense of output quality. It uses the same SLP model and exposes the same runner’s scheduling, chunking, overlap, tiling, memory, cuDNN, and preflight behavior. My extensive SEEDVR2 testing found that pushing these controls can slightly improve quality while using more memory: larger or untiled spatial regions create fewer artificial tile boundaries, and lower overlap reduces the amount of independently processed imagery that must be blended. Larger temporal chunks can give the model longer continuous context and reduce chunk-boundary resets, potentially improving motion continuity and jitter.
Those are tradeoffs, not universal rules. Zero spatial or temporal overlap can expose seams; this project observed localized seams at zero overlap and therefore keeps guarded floors. Larger or untiled VAE geometry can consume far more RAM/VRAM and can even run slower at some resolutions. If you have substantial spare headroom - especially 48 GB VRAM or more -you may still test larger or untiled spatial regions for quality even when they are not the fastest setting. Topaz already starts at a relatively large chunk 121, so the visible improvement over stock SLP is likely smaller than the differences I saw in SEEDVR2.
Judge representative output yourself with SKV89 Video Compare. Static frames can reveal spatial boundary/blending differences, but they cannot demonstrate smoother motion or reduced jitter. Use modes 2, 3, or 4 to play the videos side by side.
Live monitoring, warnings, and history
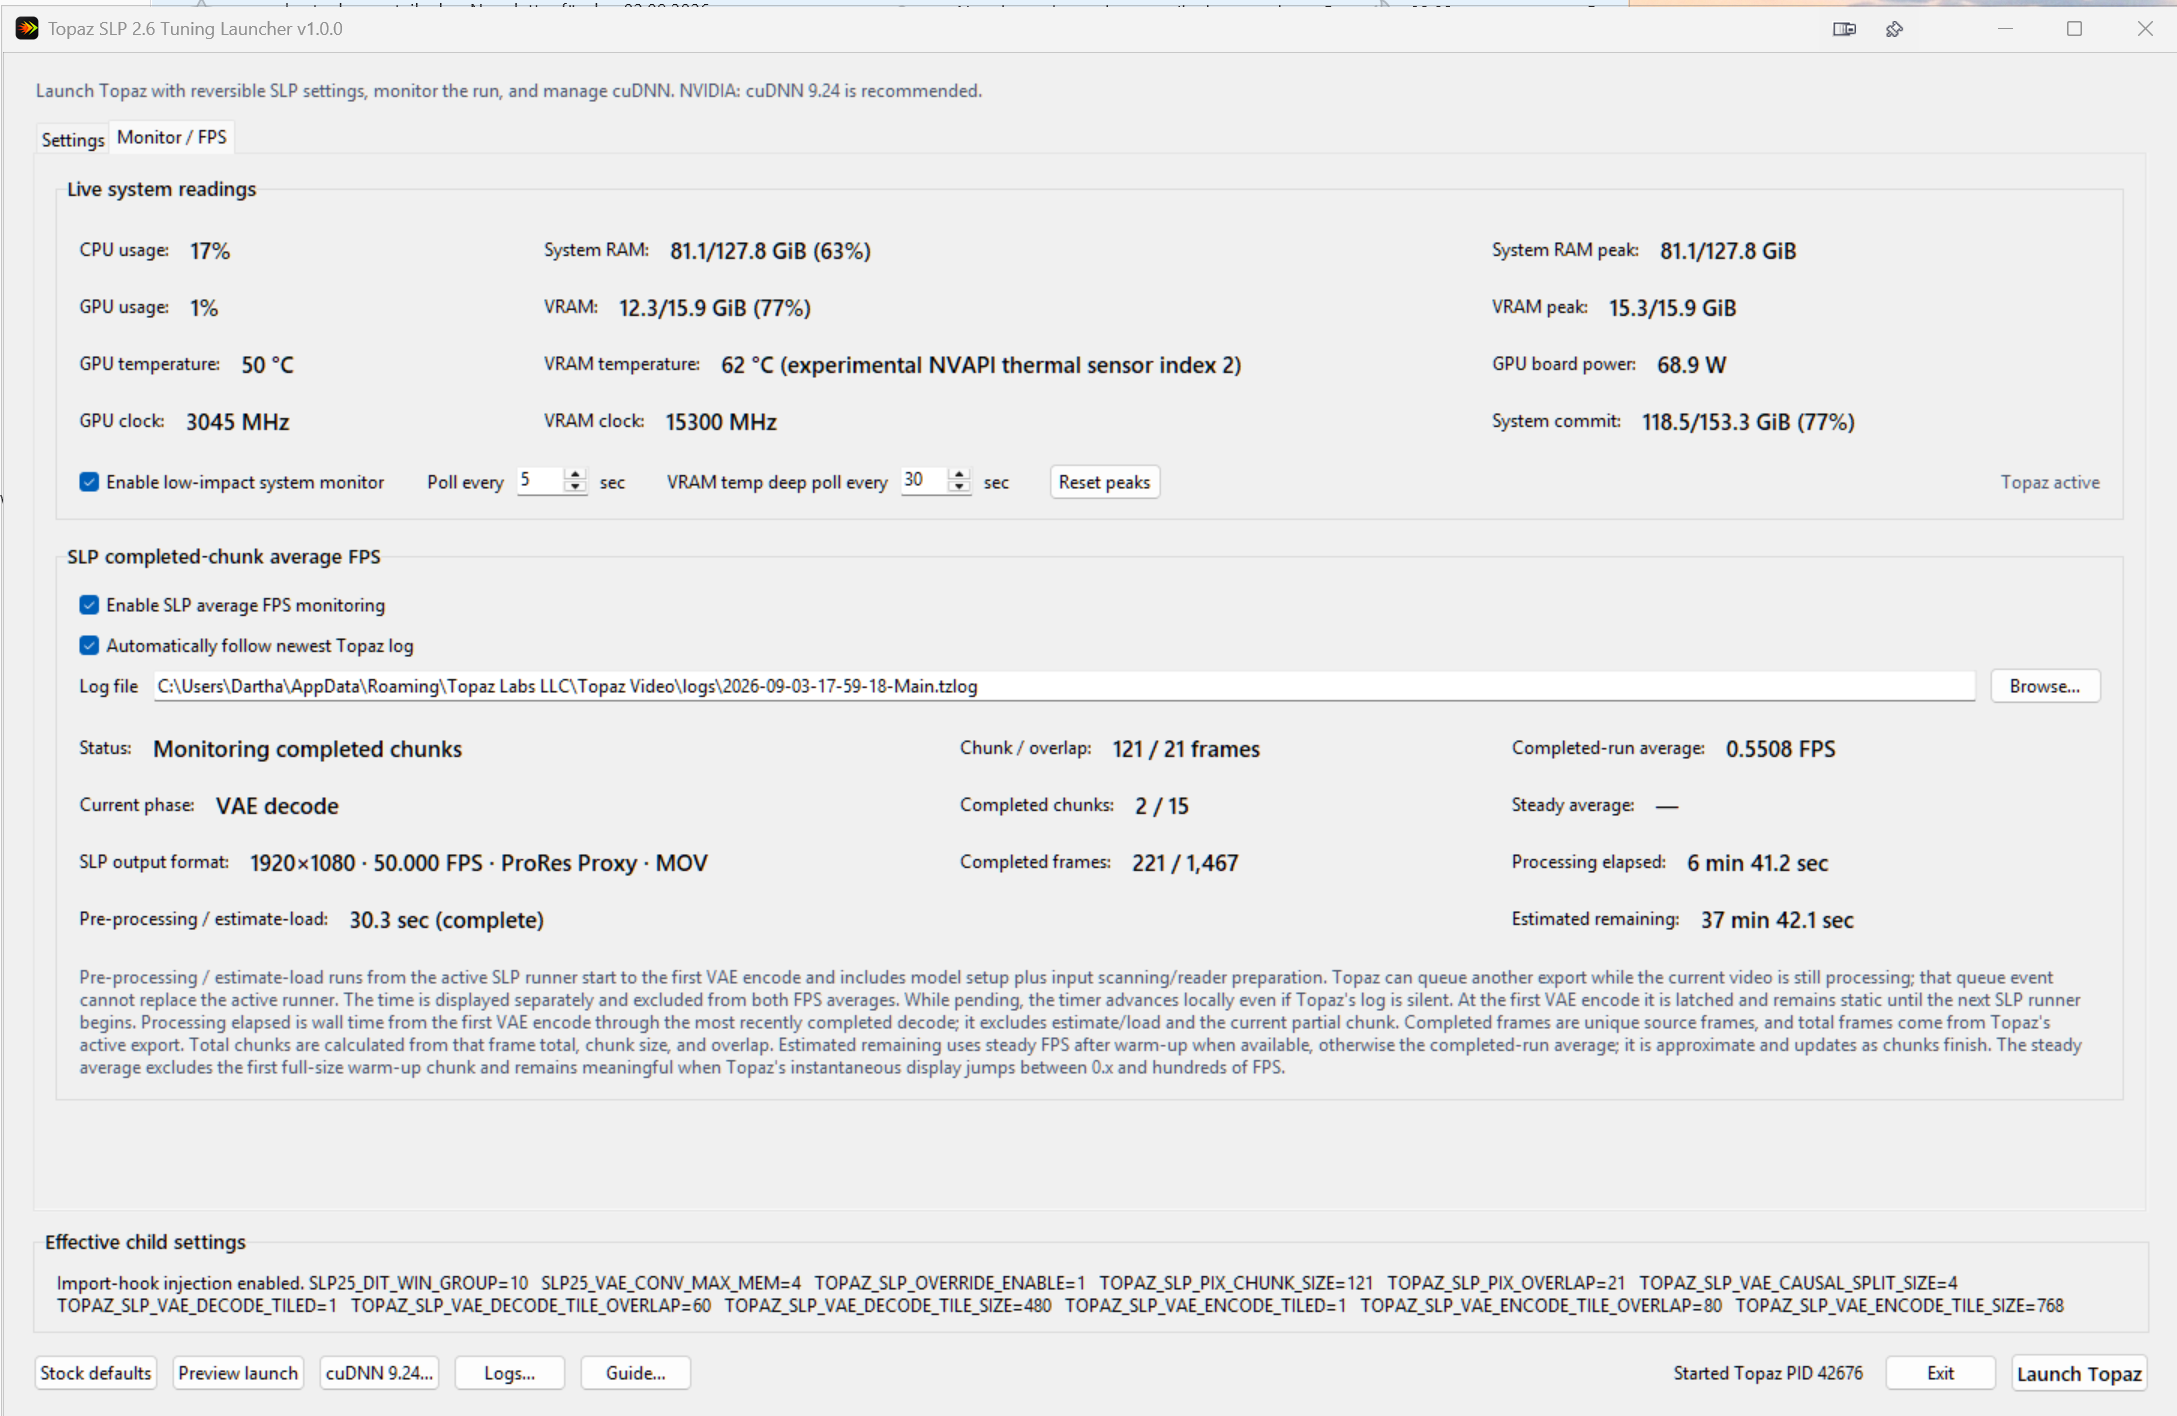
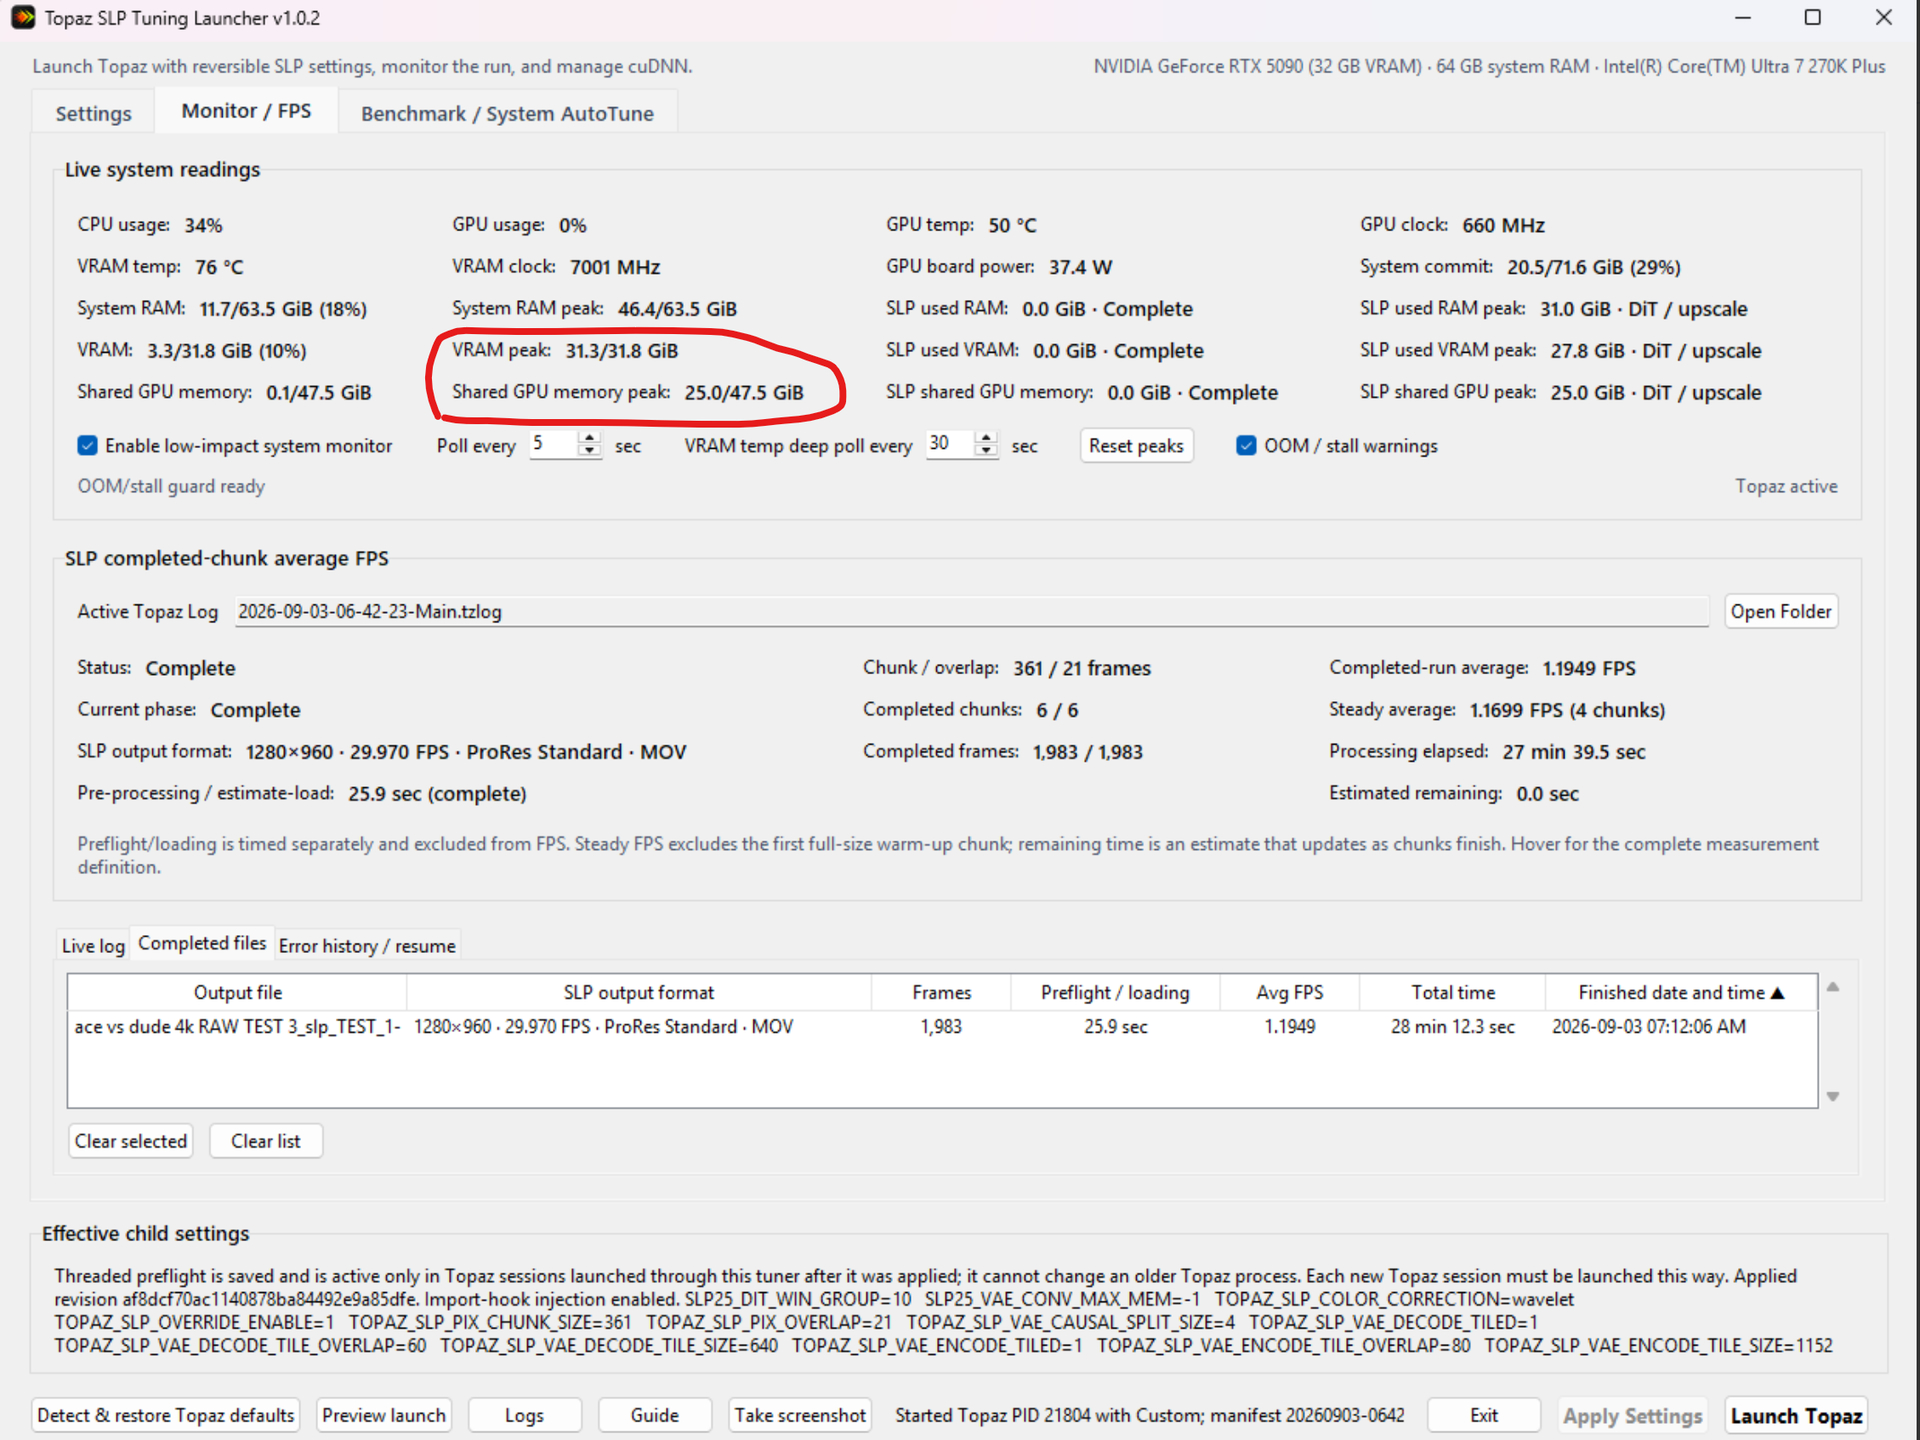
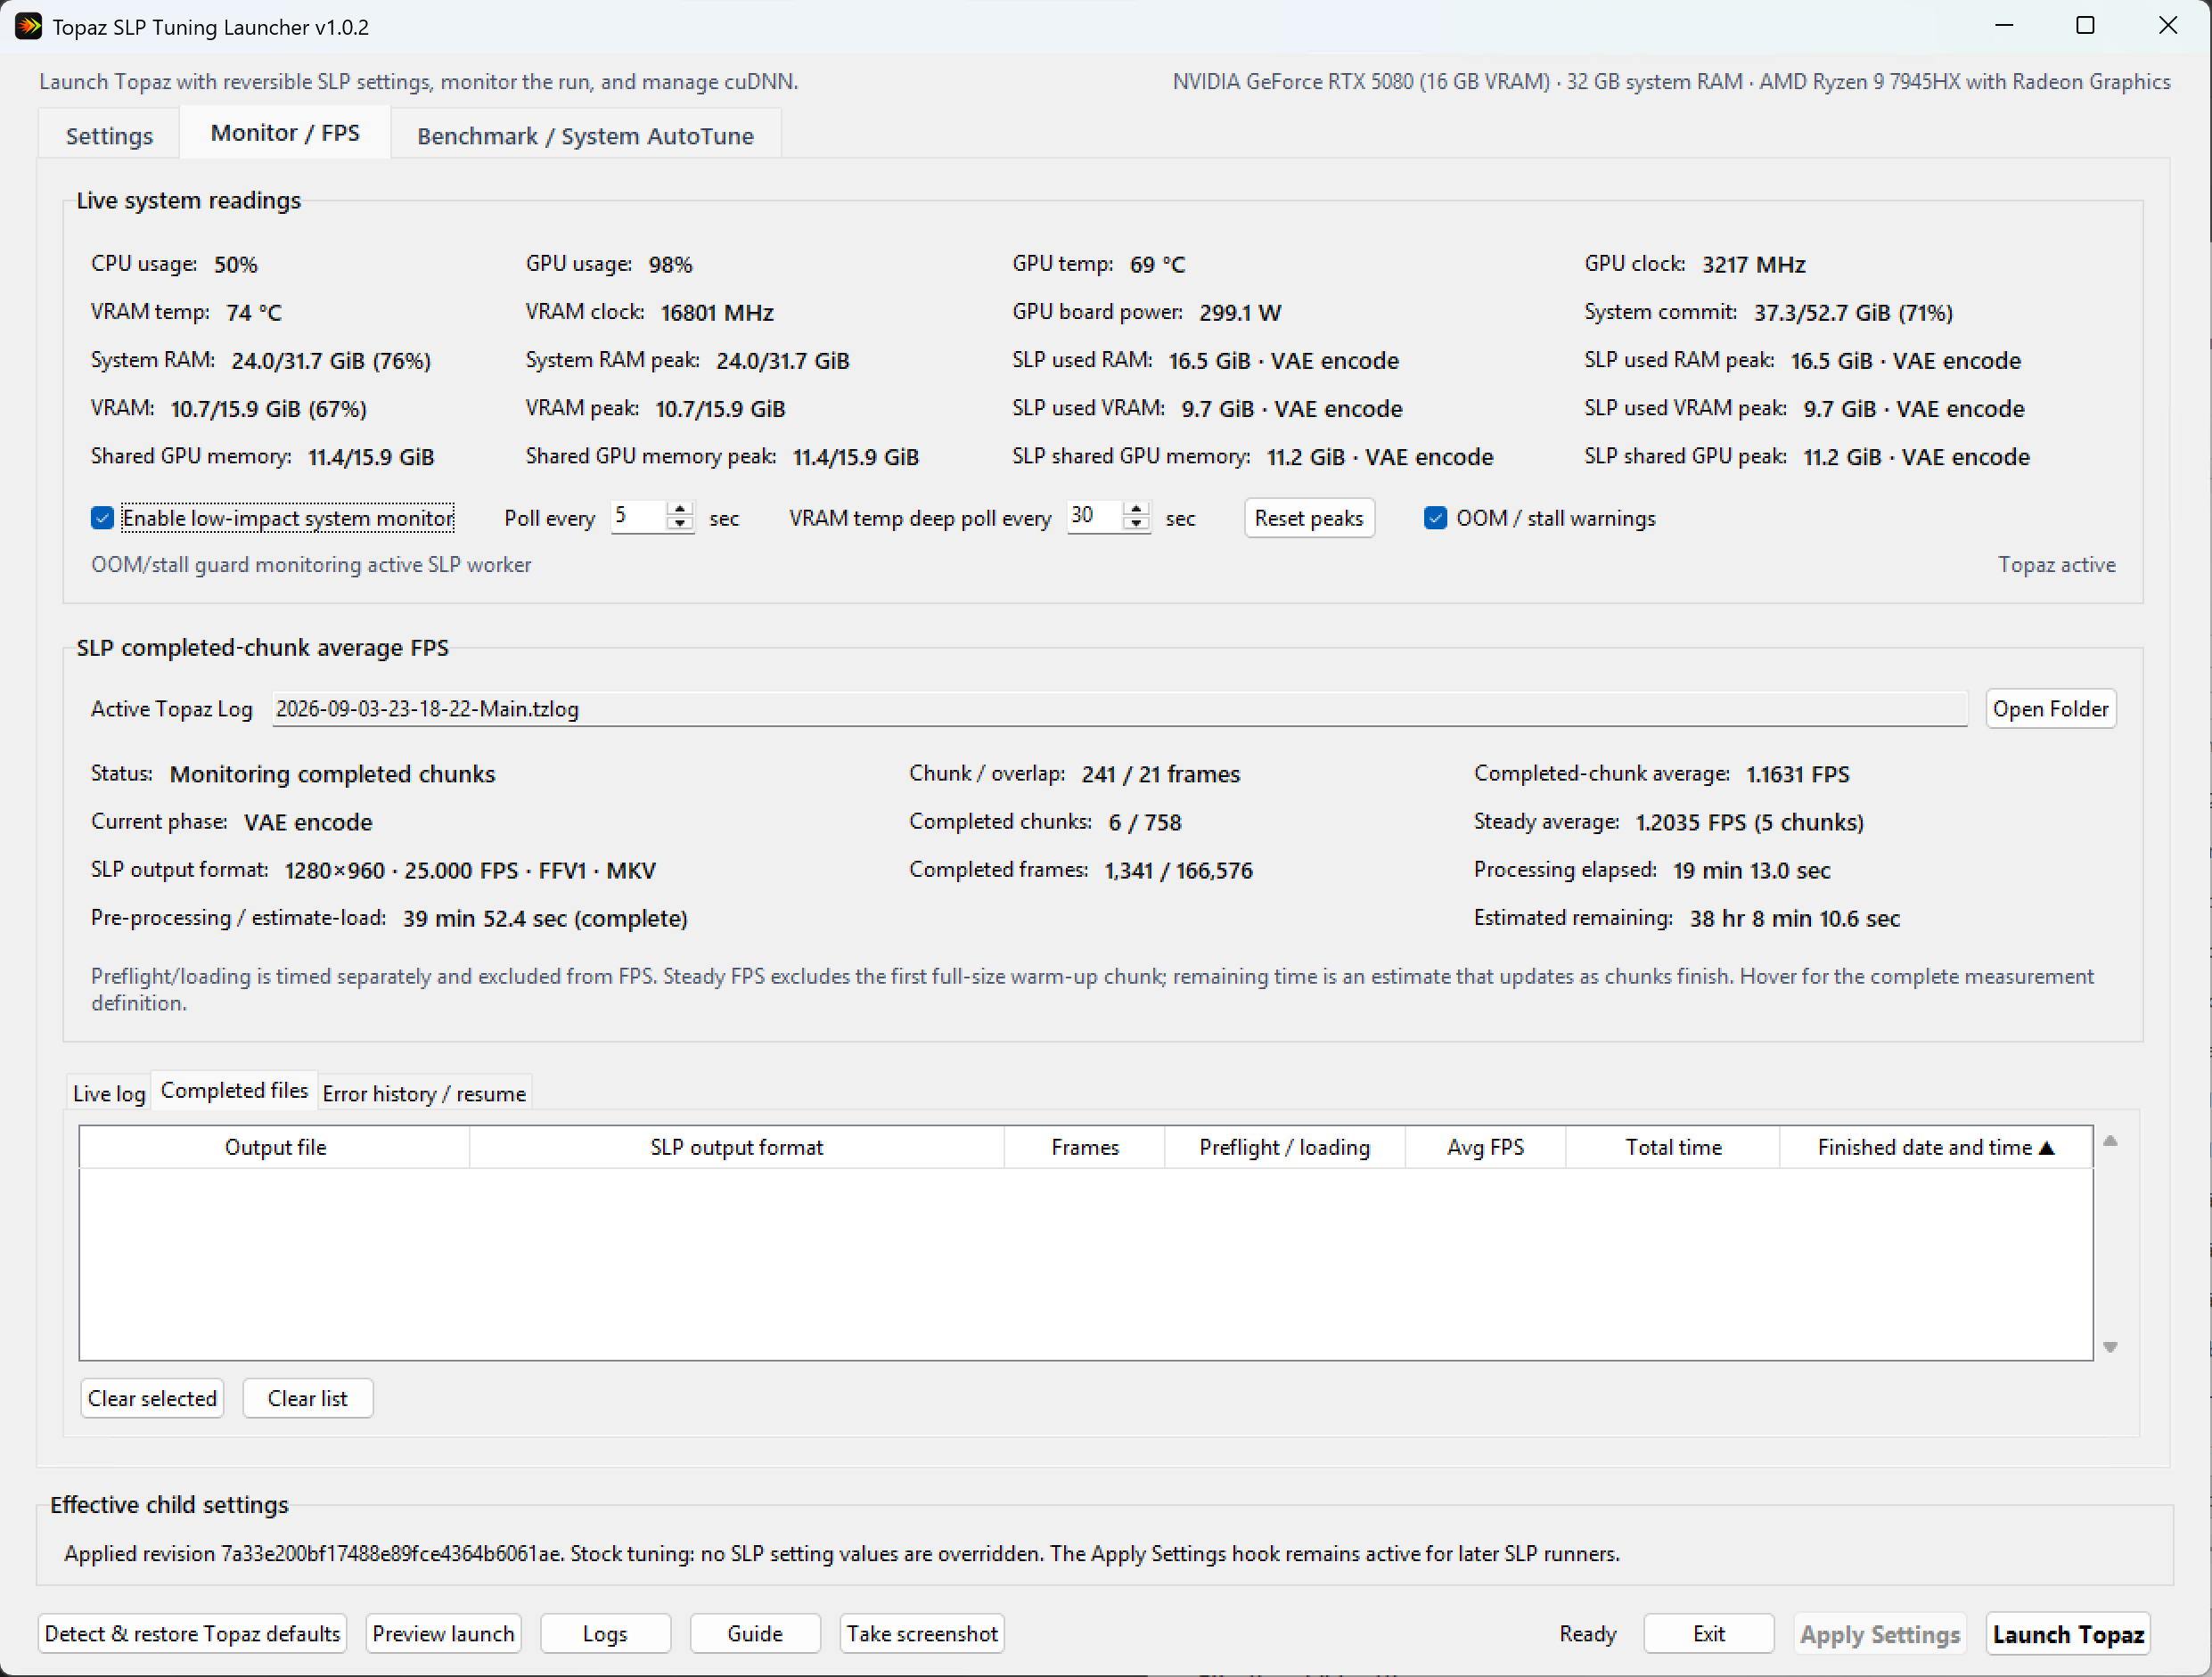
- Adds process-attributed SLP used RAM, SLP used VRAM, and SLP shared GPU memory current/peak readings with the phase at which each peak occurred, alongside whole-system capacity and peak readings.
- Rising SLP dedicated VRAM near capacity together with sustained shared-GPU growth and rising RAM/commit is a useful visual signal of spill or thrashing. Shared GPU memory alone is not proof and never triggers an alert by itself.
- Adds sustained RAM, commit, VRAM, likely-spill, and no-progress warnings. The launcher never terminates anything automatically. If the exact worker PID can be verified as
neuroserver.exe, the user may explicitly terminate only that process tree; Topaz Video itself is never killed. - Reconciles log state with the live process list so canceled or missing runners no longer leave a stale VAE-decode phase or warning behind.
- Makes long-chunk tracking resilient to repeated intermediate
RUNNINGrecords and long log gaps, so the active counter and FPS history do not reset without a genuine later runner start. - Adds persistent Completed files, including SLP output format, and separate Error history / resume evidence. Recovery is an honest frame-0 retry under captured settings; unsafe pixel-changing mid-file continuation is not exposed.
- Adds a redacted, rotating diagnostic Live log and bounded searchable/exportable on-screen history.
Settings and preflight
- Adds Detect & restore Topaz defaults. Unknown native values are never guessed; a successful default restore disables faster threaded preflight.
- Makes Apply Settings visibly active for every pending launch change, including the threaded-preflight checkbox. Ordinary SLP values apply to later SLP runners in the existing launched Topaz session. Threaded preflight is chosen when Topaz starts, so apply it, fully close Topaz, and use Launch Topaz here.
- Keeps the opt-in threaded SLP 2.6 frame-count hook process-local and reversible. It adds decoder threading to the same exact
ffprobe -count_framesoperation, falls back to native behavior, and does not alter Topaz, FFmpeg, Windows, or source media. - Adds Take screenshot, which maximizes the launcher, waits for stable window geometry, then copies the complete launcher to the clipboard. Open the relevant tab and paste it into a support or results reply with Ctrl+V; without the settings/monitor/results evidence, a report cannot be meaningfully diagnosed and offers little help to the community.
cuDNN 9.24 and lower-memory NVIDIA cards
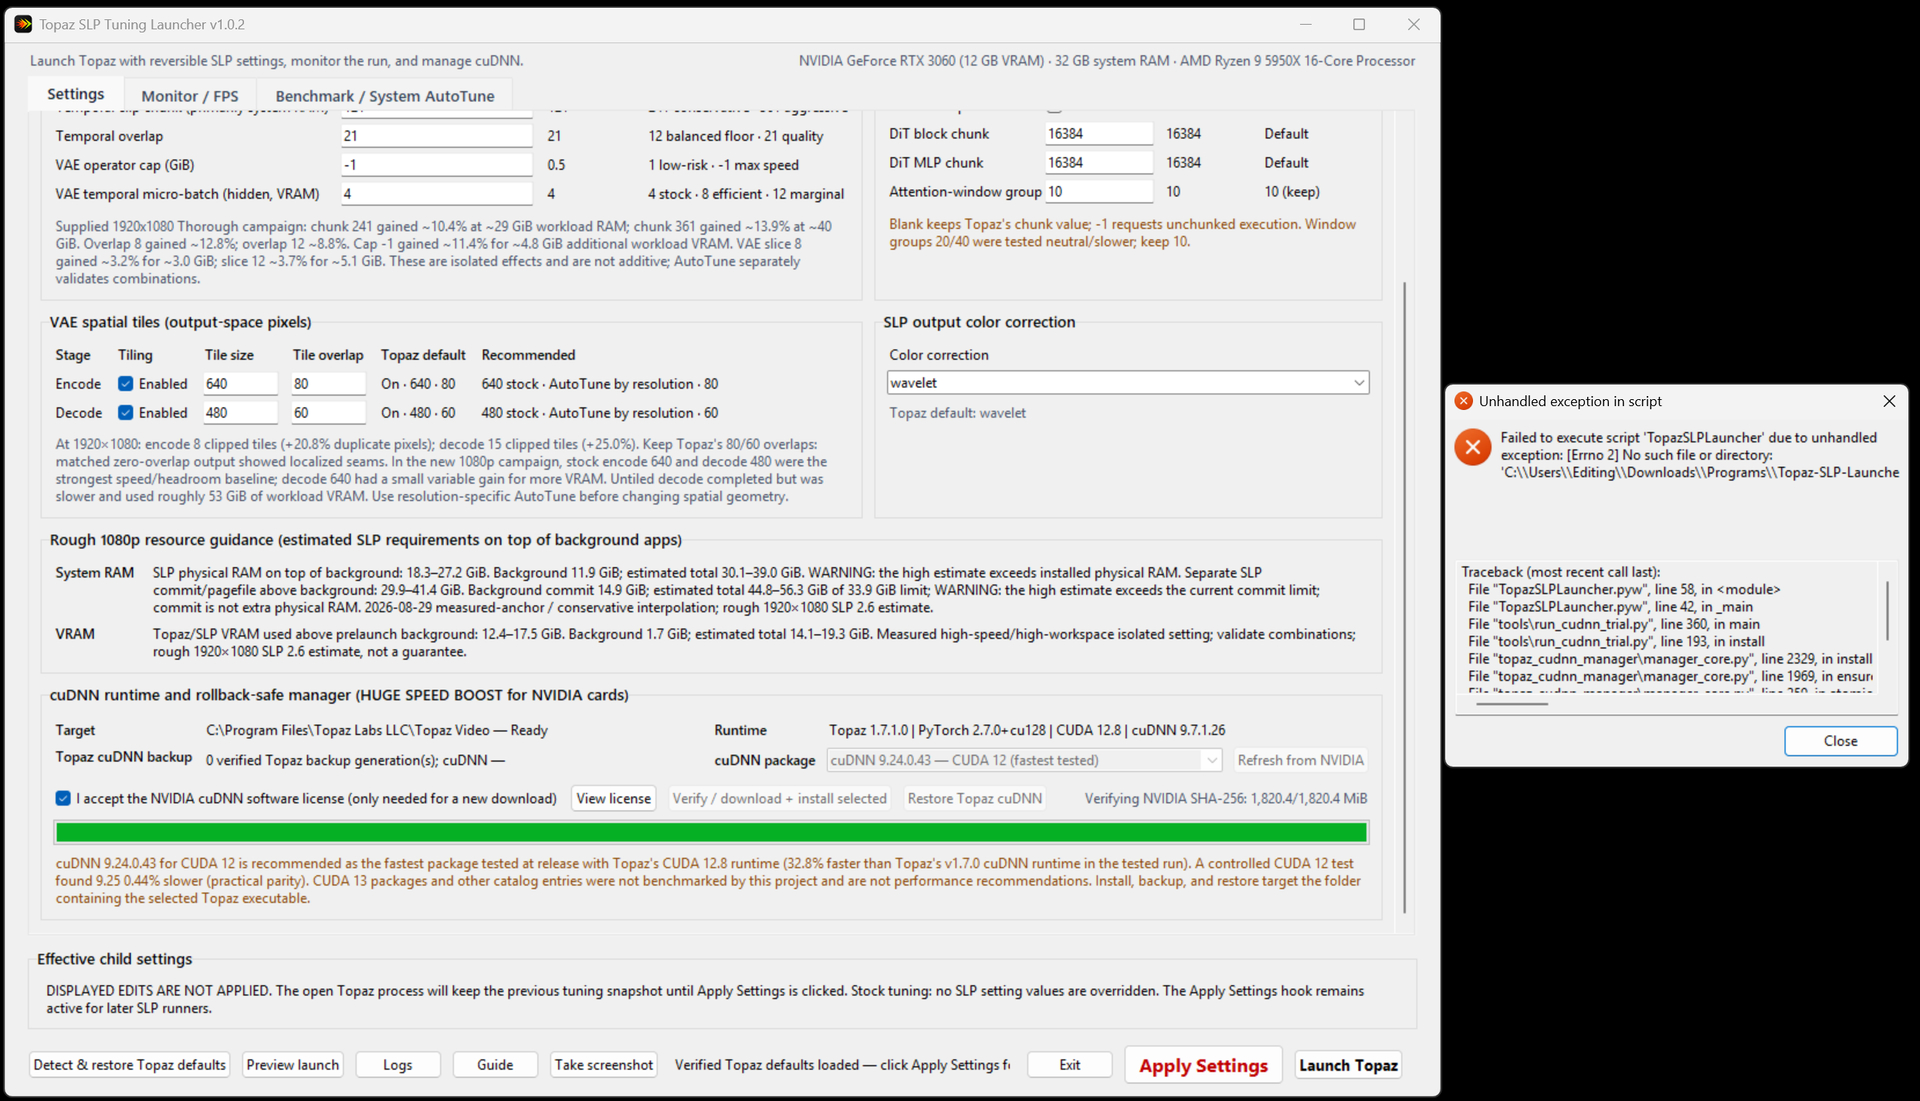
cuDNN 9.24.0.43 for CUDA 12 remains the fastest package tested by this project with Topaz’s CUDA 12.8 runtime. Compatible 12 GB and 16 GB NVIDIA cards should theoretically be able to benefit from that runtime even when SLP tuning values remain stock, because the cuDNN comparison does not require selecting larger chunks or tiles. This is not a promise for hardware I do not own. Please do not ask me whether your hardware configuration will benefit from this app or ask me to predict its exact gain. Run AutoTune at your desired SLP output resolution and share the complete results so others with the same hardware can learn from them.
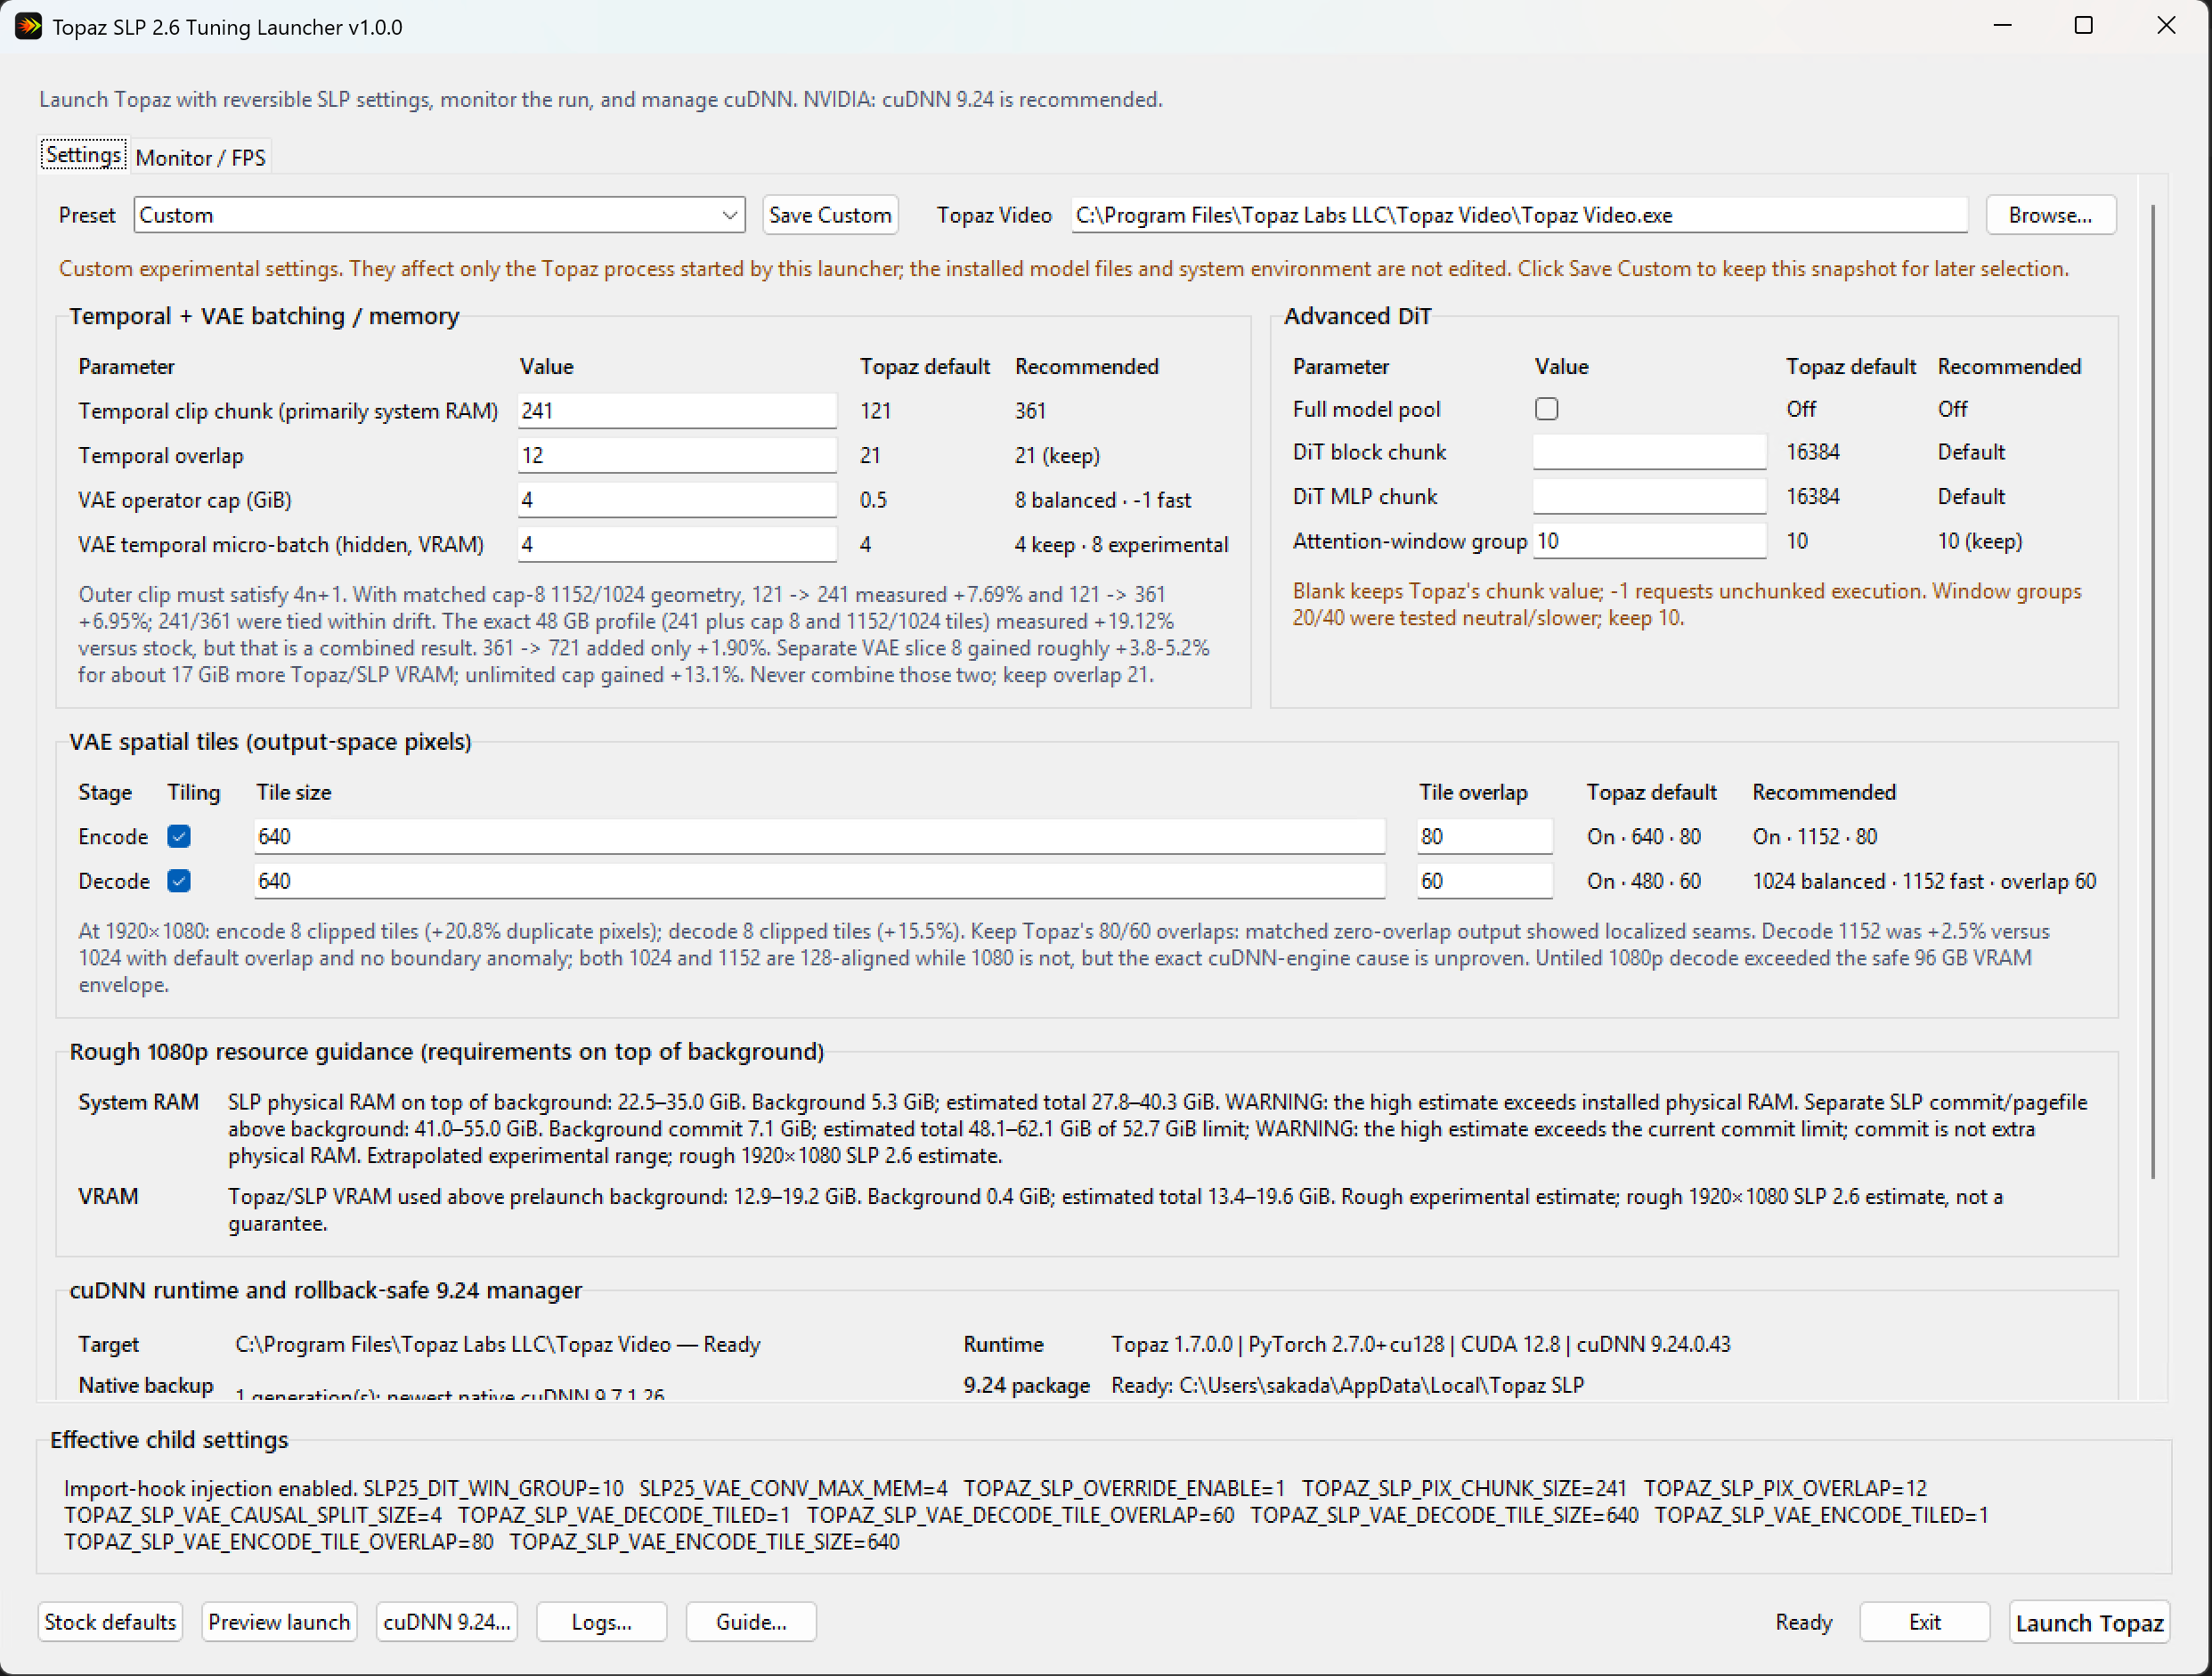
Settings and cuDNN management

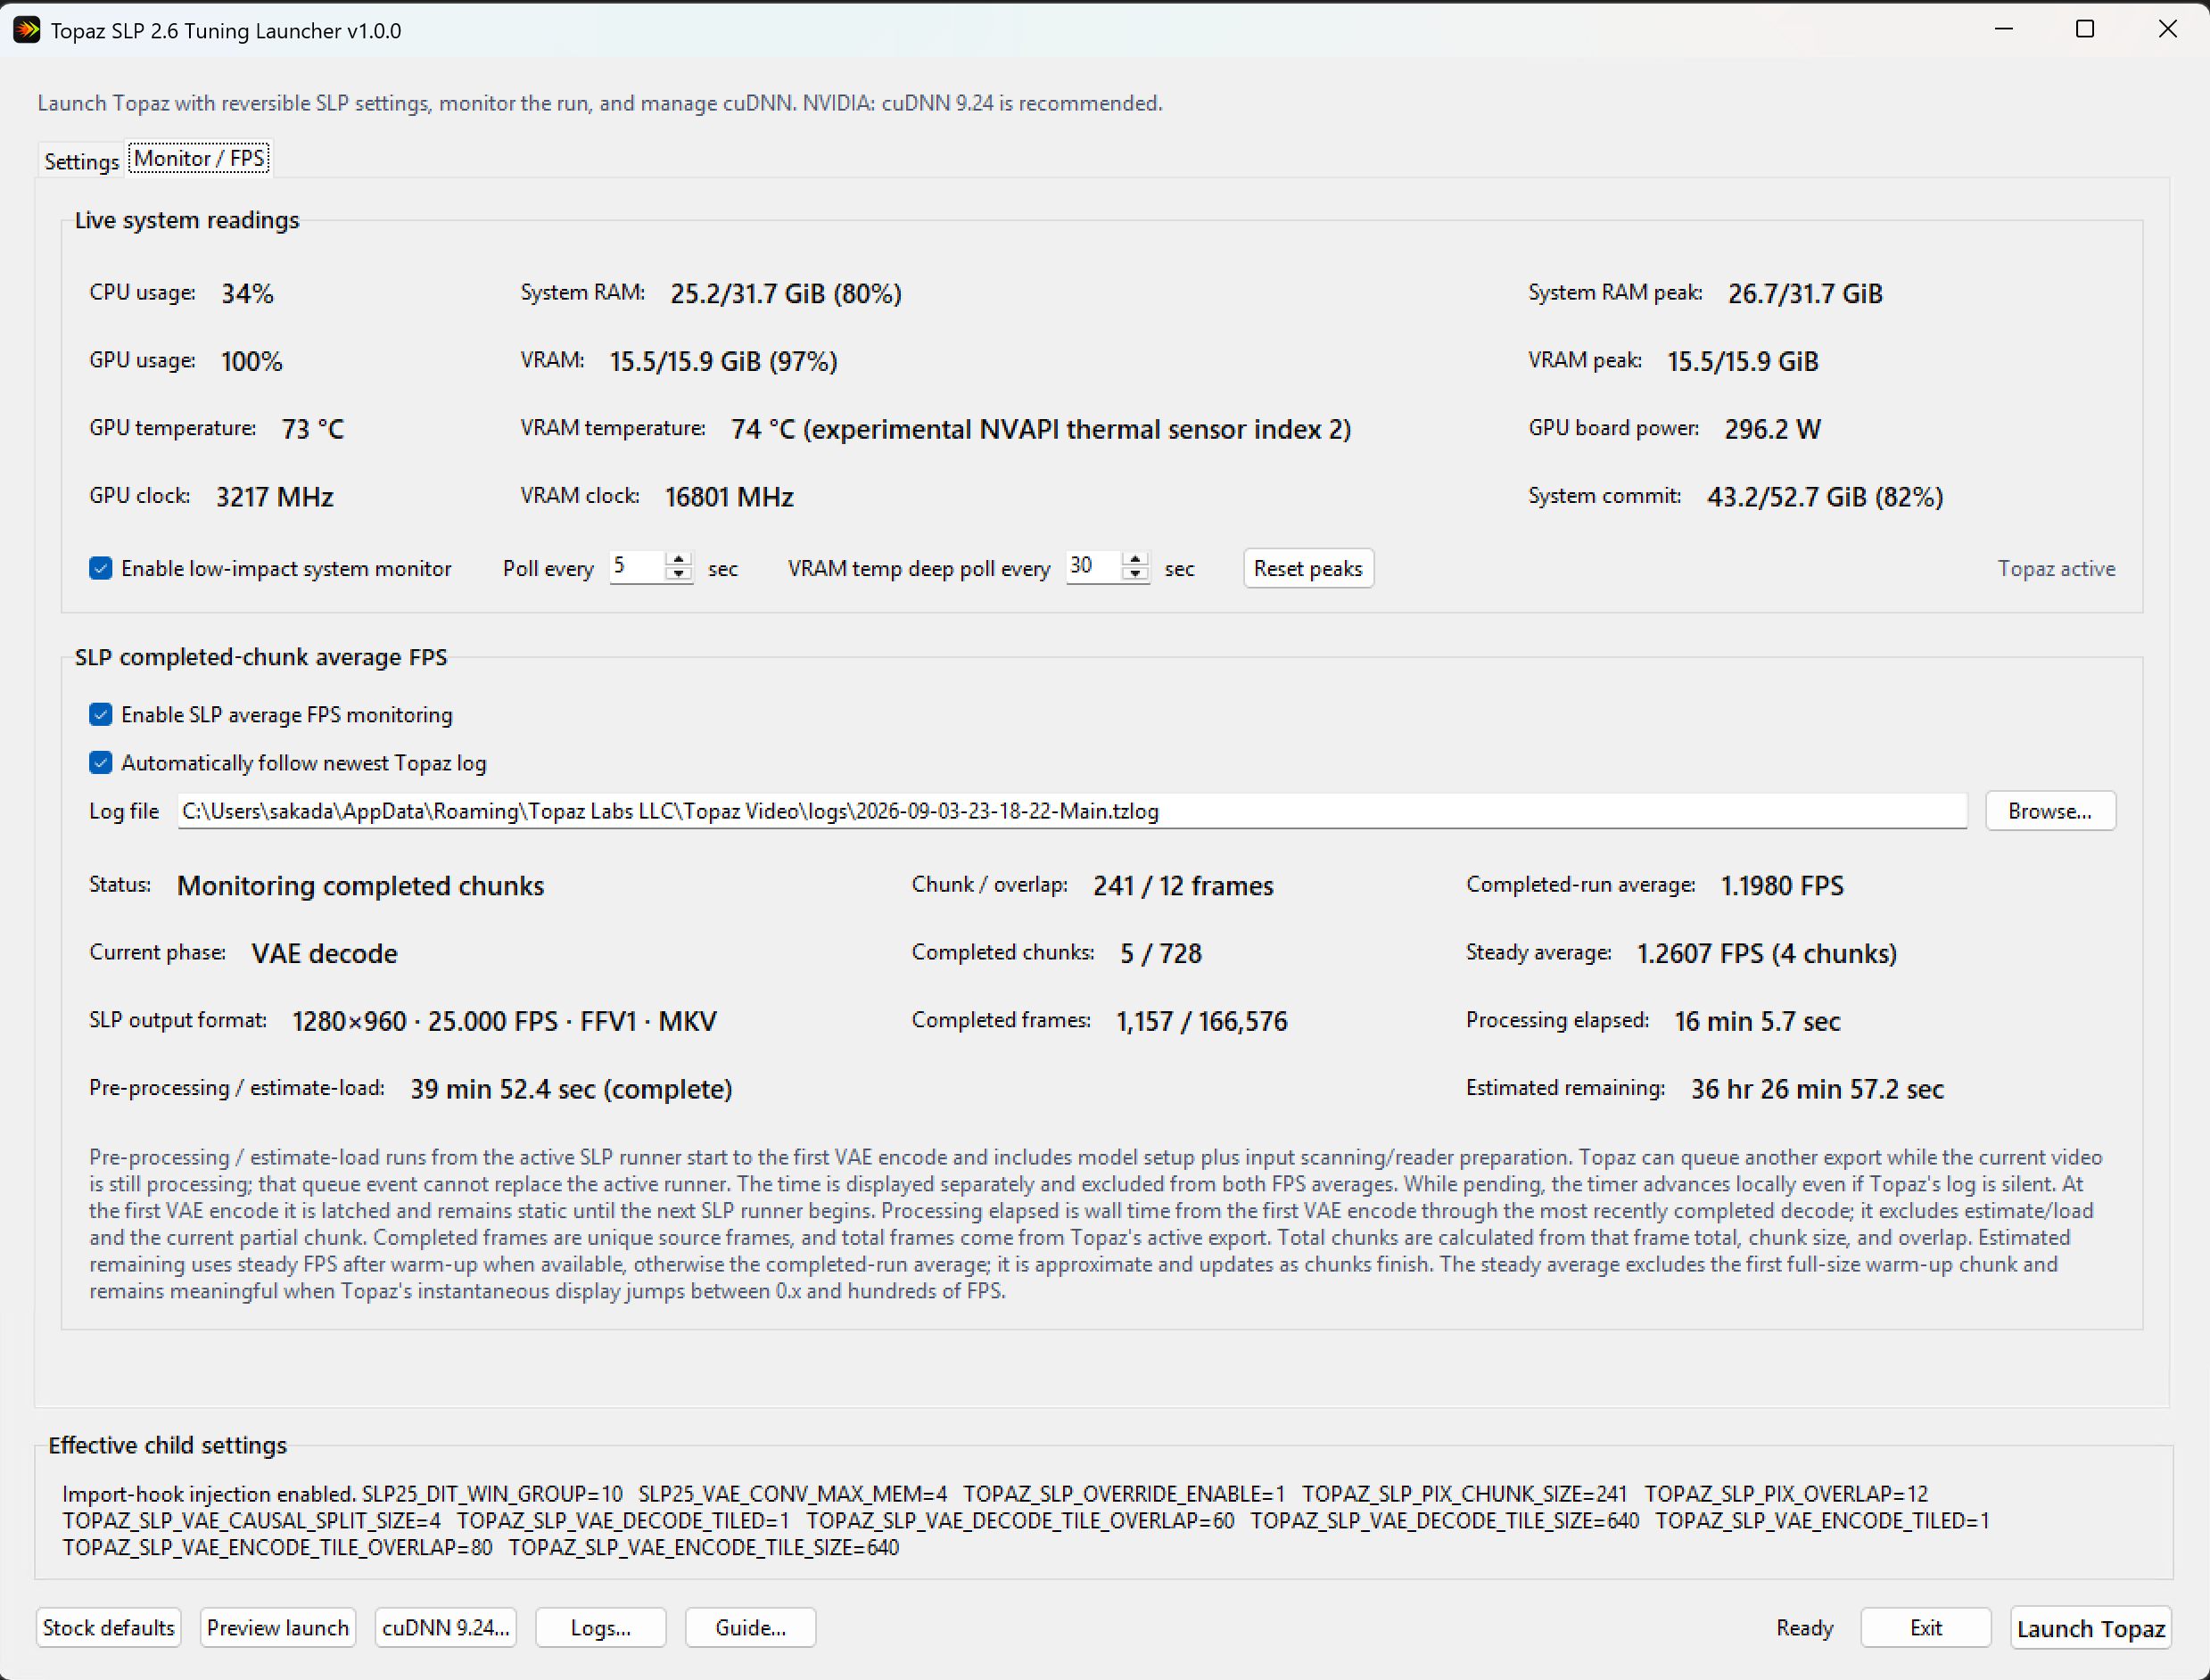
Monitor / FPS and completed-file history

Benchmark / System AutoTune plan

Benchmark results and efficiency

RAM + VRAM starting guide