Well… here is what I just found. If you put the mask on the layer BEFORE you send it to Mask AI, it comes back as an editable mask. It is exactly what it use to do. I think that what Mask AI SHOULD be doing is duplicate the layer, add a mask than go to the plugin. If this doesn’t get fixed in an update, I will simply create an action to do just that!
Yep. That created a mask, but then you lose the transparency.
I personally would like to have both - hence the approach I was using.
It still would be good to suggest to Topaz that they build that mask generating function into the program (as an added product feature that everyone would get and not have to figure out).
At minimum they should add it to the Tutorial for MAI. But then that’s still klugey. The elegant approach is to make the program gen a transparency and layer mask on a single output layer back into the host s/w.
I was going to suggest a Ps action option earlier, but then aborted that reply for a few reasons:
It would take just as much effort to find & run the action (beyond the initial recording of it) as it would to just hit the mask icon below the layers stack to add a blank layer mask
Not everyone can (or wants to) create an action (even if it might save a few seconds)
It makes a feature (generating a transparency & mask via a plugin) that a lot/most of Mask AI’s users will need to work with a less convenient, less integrated & potentially a less attractive competitive solution for image masking to users who want a more straightforward approach
You can do the action approach. But with my beta tester hat on I’m trying to think what a majority of users could benefit from features-wise.
As another quick interim solution,
Open image in PS, duplicate layer
Take into MAI, (I do a quick manual TriMap, compute manually) I also then compute manually via Contrast mode (subtle but there is a difference)
Apply
Additional tip for anybody who doesn’t know - to emphasise the faint wispy hairs in Linda’s example above (and the faint areas near the edge of her shoulders) just paint over the area with a white brush in Overlay blend mode - in that blend mode a white brush can’t paint over pure black (and vice versa for a black brush). One hell of a time saver for filling in near edges.
The problem with putting the mask on the transparent layer after it is returned is that the masked pixels are gone. The solution is to create the mask on the layer before you send it to MAI. When it returns, the pixels are there under the mask and you can bring any back that MAI might have removed. An update that I would like to see is a simple 2 step process - 1) duplicate the layer and 2) put a mask on it, then send it to MAI.
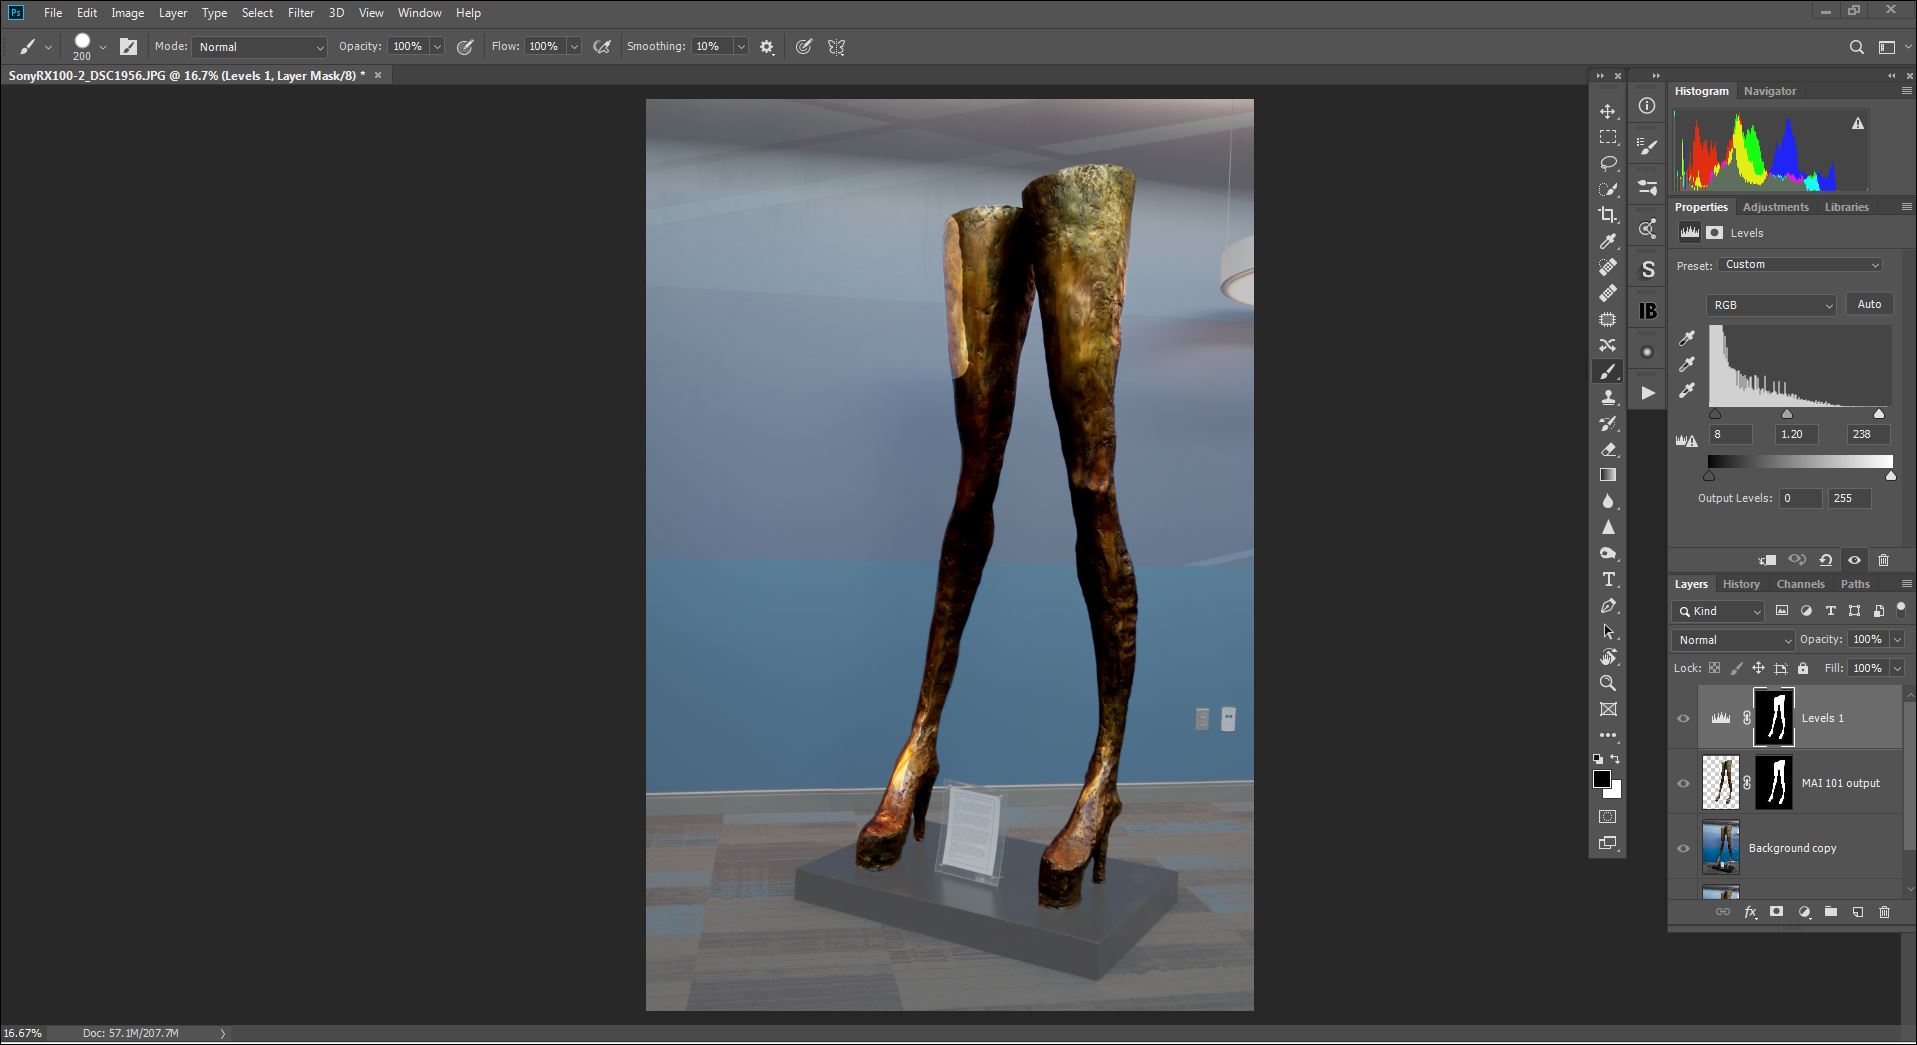
Okay, I’m feeling really really dense. I was able to move my mask to a Levels layer and make levels adjustments to the selected part of the image (not to the mask itself - hmm I’ll have to ask Linda about that… the mask goes away when I try to use Levels).
But when I did what you suggested and painted along the edges of this pic (it’s not hair but it’s a sculpture that ended up with needing to restore some edge quality) it just painted white over my mask (with layer set to Overlay blend mode). I think I tried the painting on the mask itself and then on the image (in case I was misunderstanding where to paint)… Pls help. Keep it simple… “See Dick. See Jane. Paint Jane paint. White on mask.” etc.
Oh, I wonder if it’s b/c of what Jay is saying above… that I’m not working with the right kind of mask. I’ll try it again using the duplicated layer, open mask then create mask approach.
Firstly you just select the mask and then hit Cntl+L to bring up the levels dialogue box which then works directly on the mask. You can’t really add an adjustment layer to the mask a la non destructive working, but equally you can’t do any damage to your image.
Secondly, yes you paint on the mask itself. A white brush can’t paint over pure black, but it can paint over dark grey. Can you show us a screenprint of the mask? Alt+click on the mask to make it fit the image size.
Ah right, that’s not the best sort of example for getting the benefit of the overlay blend mode, as it has clearly defined edges which are best suited to just painstakingly doing it the hard way. Compare that to Linda’s example where there’s a bit of patchiness on the white near the edge - that’s where it really helps, and on the faint hair surrounded by black outside the main white area
Okay. After I go work out I’ll try it with some grasses or something nature-y (bird?) I’d be more likely to shoot, since I never make portraits. When I - rarely - photo people it’s usually street photography and/or photojournalistic types of shots. And they’re usually on busy backgrounds given that type of photog…
Follow pmeach instructions. You are actually applying the levels command directly to the the mask using Ctrl L (if you are nervous about that, duplicate the layer with the mask first). You are also painting directly on the mask using Paul’s tip about painting with the brush in overlay mode. I’ll look to see if I can find a youtube video for you.
Thanks for finding/posting that! I’ll definitely check it out and try what you guys suggested on some nature/animal photos! I appreciate the tips and y’all taking the time to hunt down good tutorials also.