Hello everyone,
We have a prototype available for testing. This prototype is the new A/B comparison. The main goal of this early prototype is to test the previewing workflow.
This version is in a developmental state, meaning the prototype is very buggy. You can expect a lot of functionality to not work as well as frequent crashes. Export does not work well on the frontend, but you can still expect decent results on the filesystem.
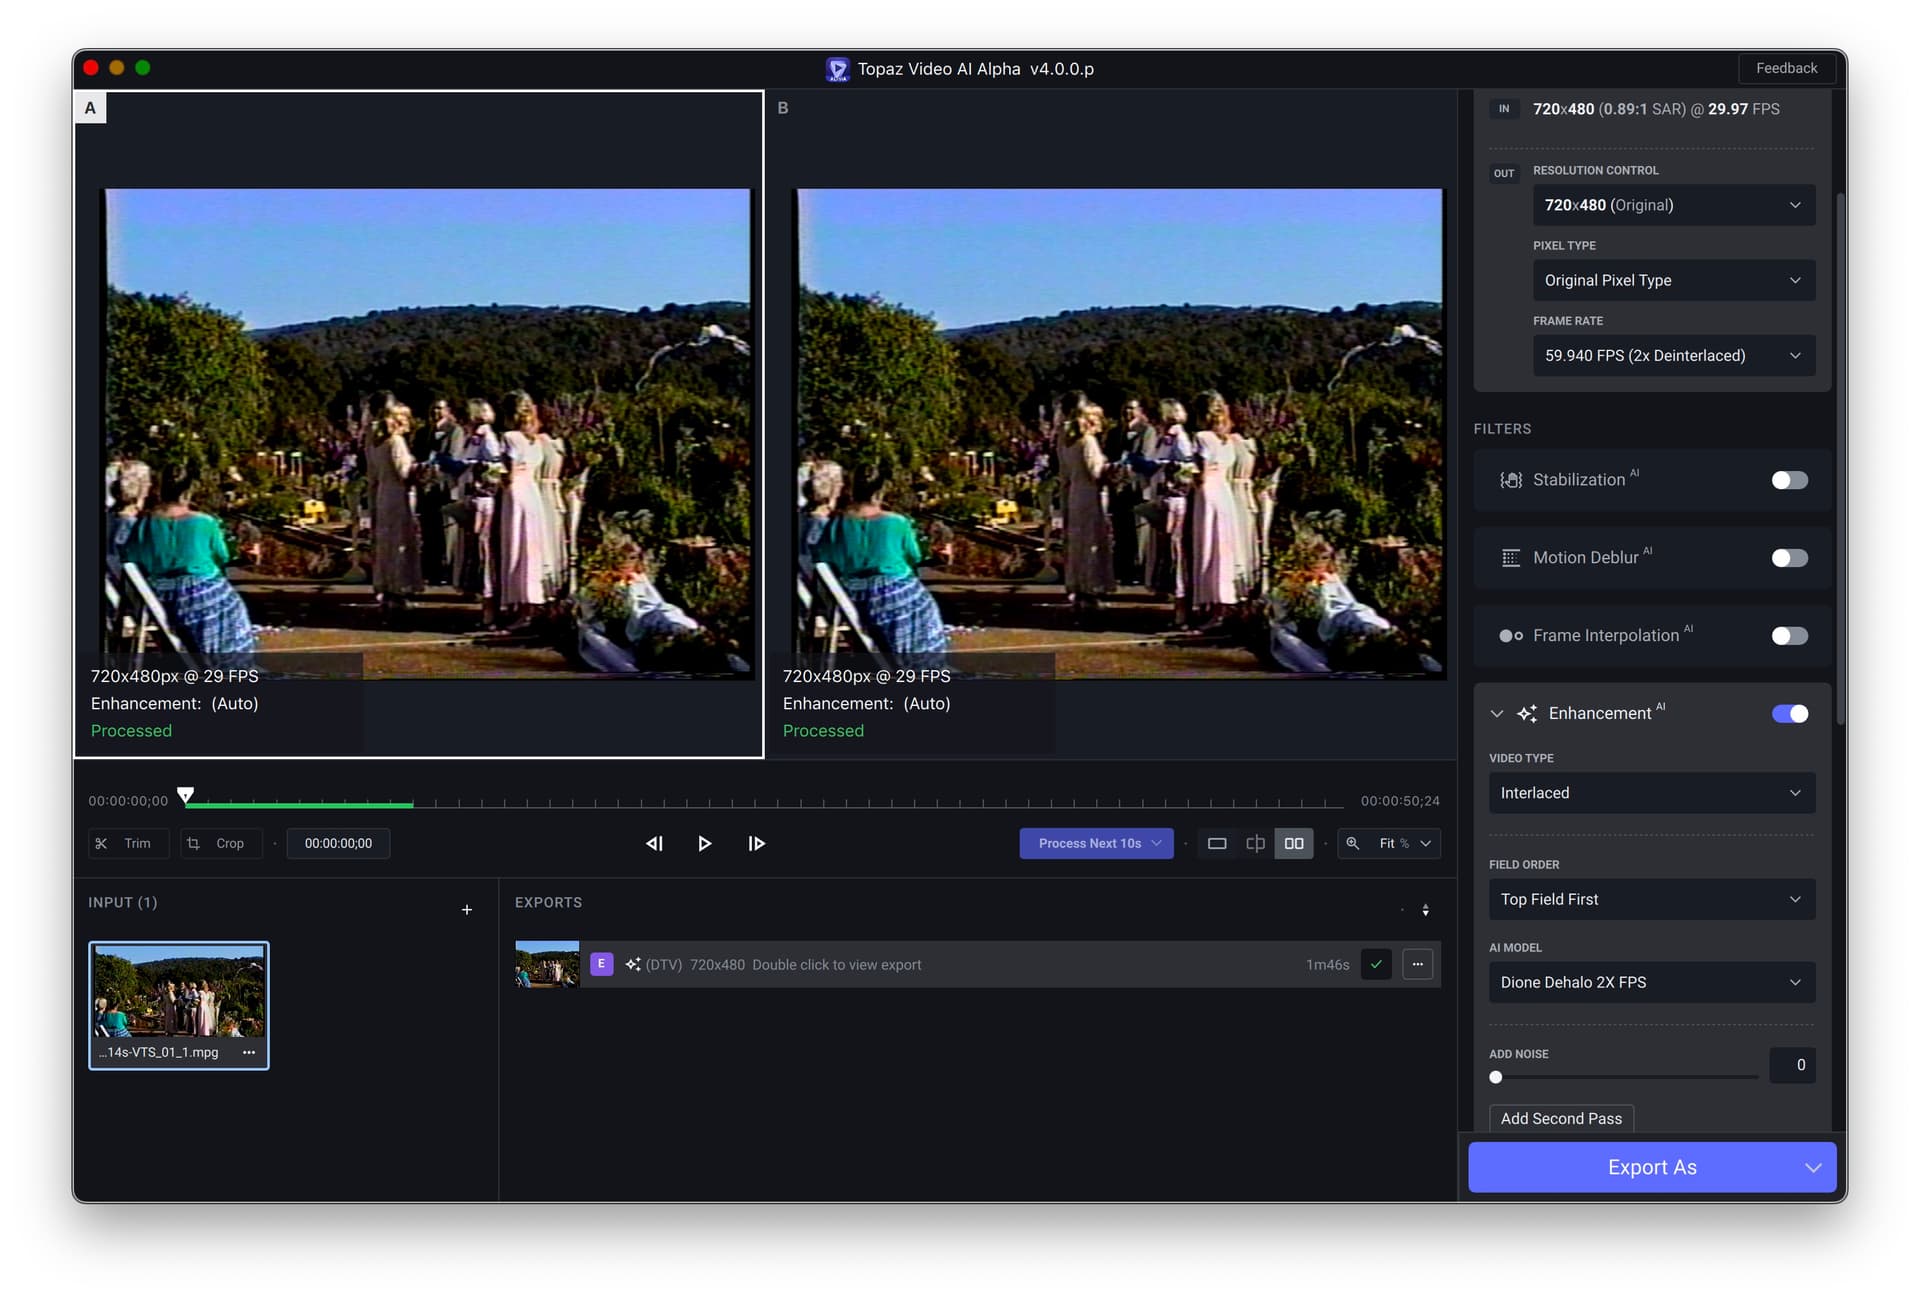
The prototype overhauls how you typically interact with Topaz Video AI. Instead of the typical input, output view that you are used to, now, you will have two views that models can be applied to. With these views you can build and compare different combinations of models to find out which model configuration works best for your original input.
4.0.0.p
Information about the prototype
The main goal of the change is to allow you to make the best decision about what model configurations to use. To accomplish this, we think it’s best for the user to be able to apply different models and see the results side by side.
For example, you can apply Proteus to your A view and Artemis to the B view to see which one has the result you prefer. At any time, you can revert to the original input to compare with the original. This is different from before where you must apply one model configuration at a time and always be comparing to the original.
Details about how to use
The first difference is you must select which view to focus. If you click the left view, A will be highlighted. If you select the right view, B will be highlighted.
When you have a view highlighted, the models/filters you add to the view will be specific for that view. So if you want to see how “Recover Original Detail” works you could give view A & B Enhancement, then give them different “Recover Original Detail” values.
When you have made the changes to the filters you want to see, you can click “Process Next …” to see these two different combinations of filters applied to the input.
When you do this, a progress bar will be applied to the timeline. This is the area of the video where you chose to see the filters be applied. You can watch this section to see how the input has changed. At any time, you may right click a view and click “Reset to Original.”
When you have a combination of filters that you really like (lets assume it’s the filters applied in view A) you may click the A view and click export.
We think this is the best way to be able to find the best mix of models to get the best results possible. Let us know what you think about the new previewing workflow established with this prototype.