The PNG file from PAI is large because it is in 48-bits color (16-bit per channel).
PNG compression is lossless, for most images the compression only reduce file size slightly. PAI didn’t include PNG compression level from the beginning, because high compression level is slow and not very helpful.
If you want significantly smaller PNG file size, you should ask developer to allow export PNG in 24-bits color (8-bit per channel.)
255MB 48-bit-PNG will never compress to 74MB, unless you reduce the bit count and converted to 24-bit-PNG.
Ah yes the bit level thats for sure it. I honestly never realized images had bit levels like video. The next question however is, is PAI outputting images in 48bit even if they arent’t originally? That would be a waste and driving file sizes up.
When I process a Sony ARW file running as stand alone and save the result as a tiff, Windows thinks the resulting file is sRGB. I get weird colours when I load it into Affinity Photo (using ProPhoto) on a wide gamut monitor.
DNG and jpeg files are also coming up as sRGB in Windows.
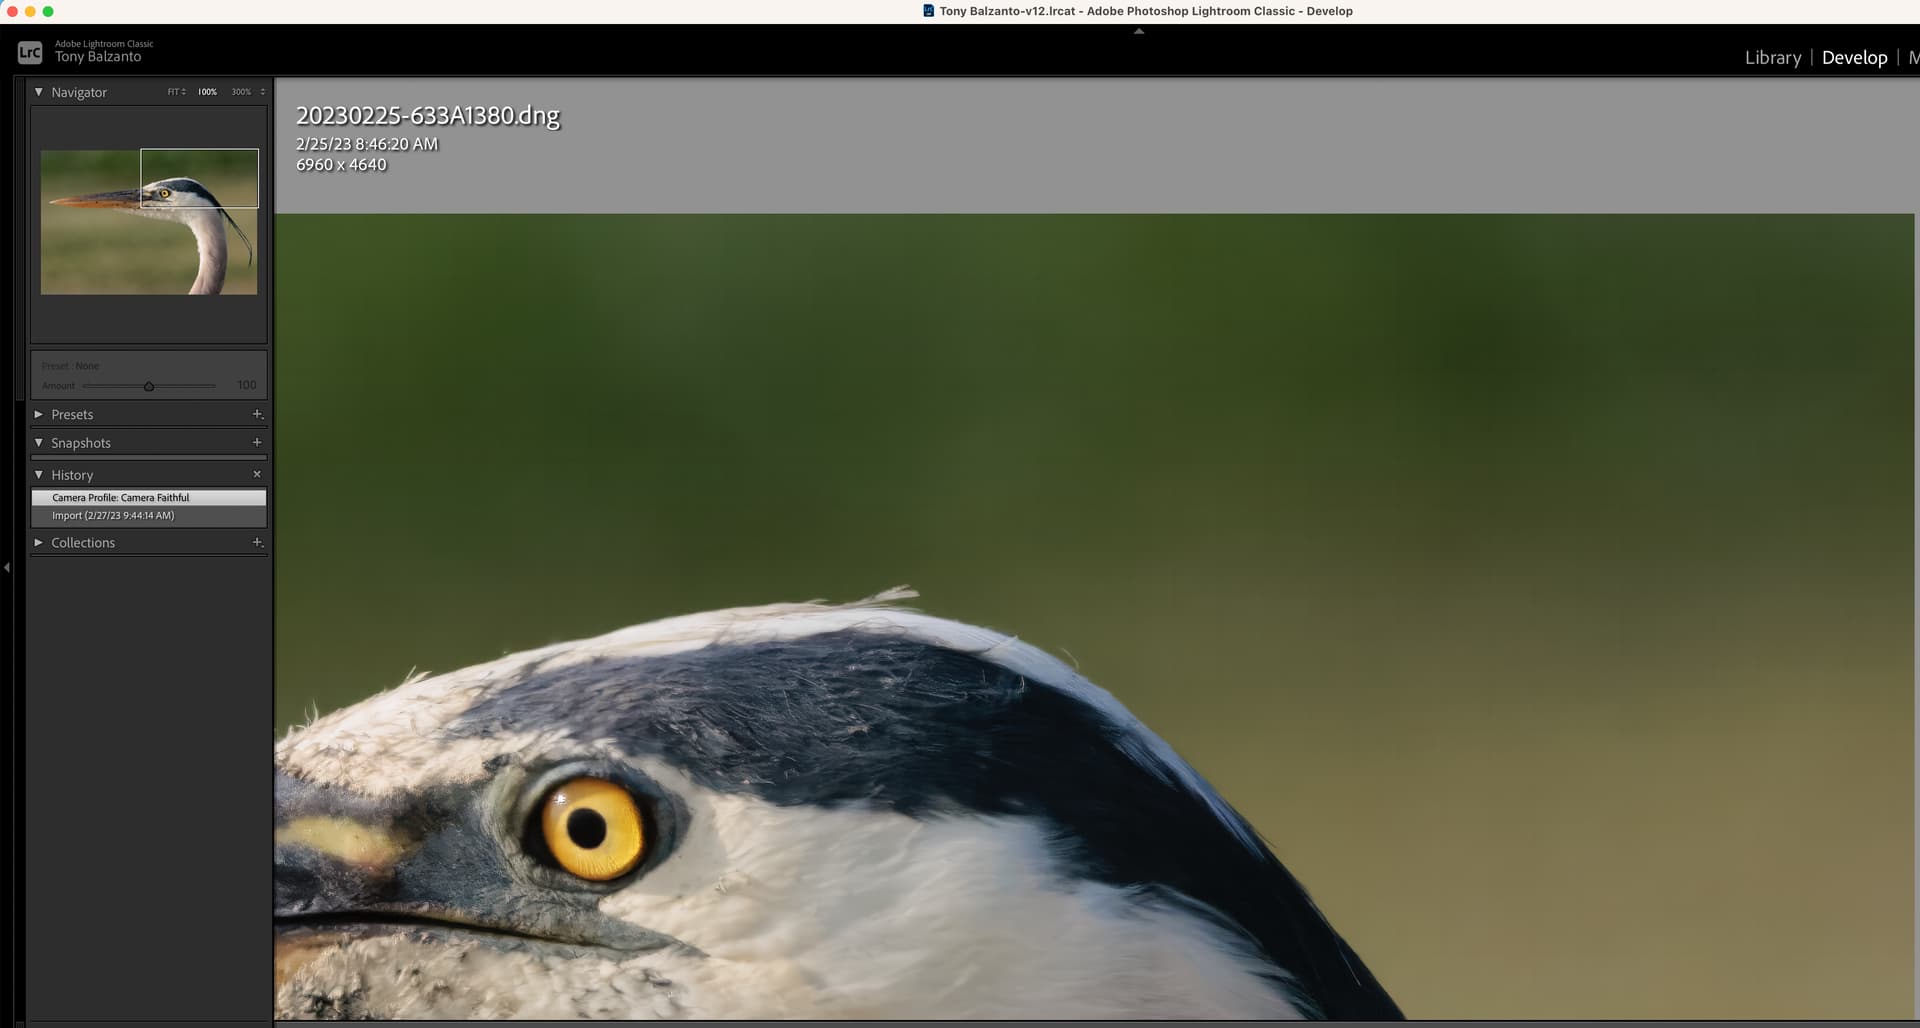
I have had a problem today where Topaz Photo ai has not kept the lightroom edits. I used the masking brush and the results looked great until I saved the photo back to Lightroom.
Topaz was showing 4 updates were available so I installed them and it didn’t make any difference. I’m running Ventura 13.2.1
I like to round trip with Lightroom. I prefer LR’s multiple sliders to have more control over the appearance of the grain. In my opinion grain is a final step and PAI isn’t a full fledged editor, so isn’t at a space in most editing to apply grain.
Version 1.1.6 gave great results on face sharpening. All subsequent upgrades were fuzzy but this appears to have been fixed with issue 1.2.3, than you. Brilliant results on faces.
Hands are a real problem though. Webbed fingers, fingers turned into clawlike structures and acid-burn looking hands whenever veins or wrinkles are present, fingers sometimes fused together and babies feet turned to solid club-like lumps. Needs some work to get feet and hands to same standard as faces.
Yes, that’s cool, I personally like to comp real scanned film grain, but nevertheless, I think it would still be useful to have the option there for cases in which you need a one-stop solution.
Also, further on, would it be unrealistic to expect AI-powered grain, with more control that would do a better job than Lightroom?
It’s not a bug, there is no option to change the upscale settings. You can always raise a request as an Idea under the thread in Topaz Photo AI category on this forum.
I noticed that changing the type of preview (from single to anything else) immediately crashes the app.
I’ll upload the logs to dropbox.
Though, the path to the image has non-latin characters, could that be it? I’ll test.
Image opens (drag&drop), and PAI processes it successfully without a hitch though.
Edit: It crashed with the image in “normal” folder, too.
After processing a couple images with Photo AI version 1.2.3, I noticed a checkerboard, like a wire fence, throughout the background. I believe when processing each of these, I was using enhance resolution and upscaling 1.5-2x. Both images were processed from Lightroom from the Plug In Extras menu to process the raw (CR3) file.
Steps to reproduce issue:
From Lightroom Classic, File → Plug In Extras → Edit in Photo AI
Process with NR, Sharpening and Enhance Resolution
Hello - people after processing in AI 1.2.3 and previous versions have slight yellow tinge complexion.
Running a HP Envy x360 2 in 1 laptop 15.
Processor AMD Ryzen 5 5625U with Radeon Graphics 2.30 GHz
64-bit operating system
Windows 11 Home
How can this be resolved? I do mostly portraits - so right now this is useless to me.
I bought Topaz Photo Ai 2 weeks ago. I installed it on my PC (Win 10, CPU Intel (R) Core i7-8700 CPU, 3.2 Ghz) 24G0 RAM, , GPU Intel (R) UHD 630 graphics
MONITOR 1920X1080. So in principle, following the min requirements for Topaz Photo AI, I have everything I need for the program to work properly.
I tested with JPEG, RAW, different file sizes and duration and if the 1st phase of recognition is OK (autopilot). After, at the level of the image quality, it runs without any evolution, even after 1 hour (on same picture), whether with the remove noise, sharpen, … I get no results, no change.
When you view your images that take on a yellowish hue, are they in the same color space as your original image? (sRGB - sRGB, Adobe RGB (1998) - Adobe RGB (1998), etc.).
Also, are you changing file extension types at all? (from .tif - .jpg, .dng - .jpg, etc.).
Do you activate Face Recovery or Image Resolution Enhancement or Gigapixel upscaling or any features in PAI 1.2.3 besides denoise, sharpen?
Open a new image in TopazLabs before the saving process of the previous one is over.
Result:
The new added picture appears in the window with the saving process. The program shows that it has saved only one picture (the first picture) but in the folder there are two pictures - the first that you saved and the second that you added at step 3.