Topaz Photo AI v1.0.6

Howdy!

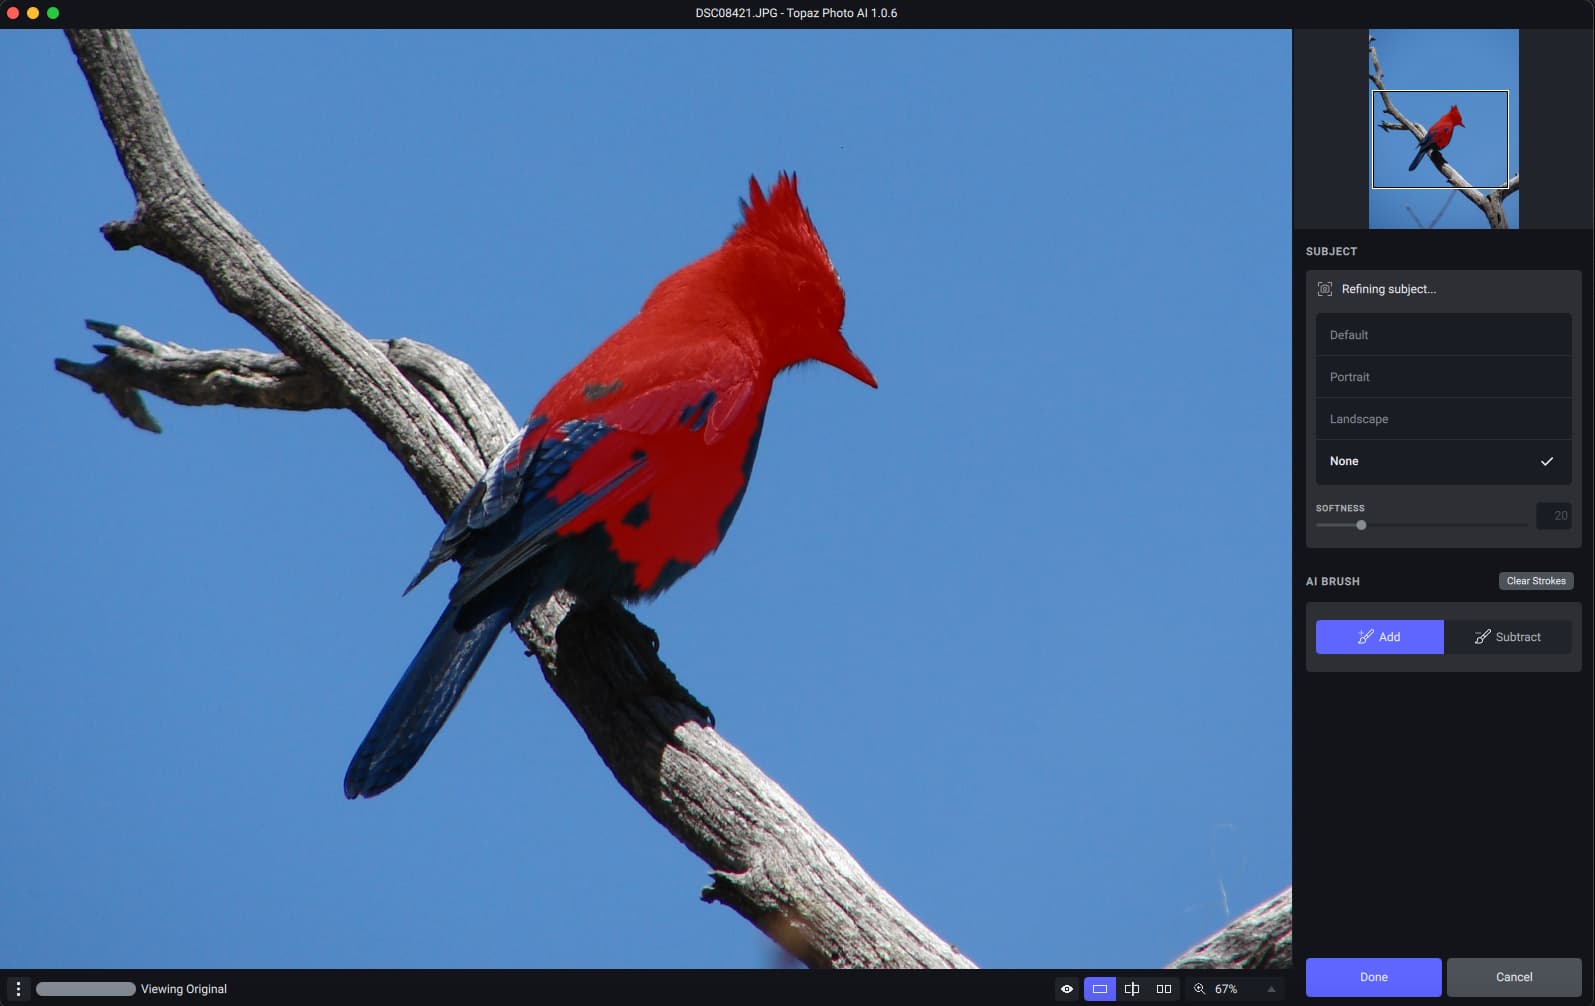
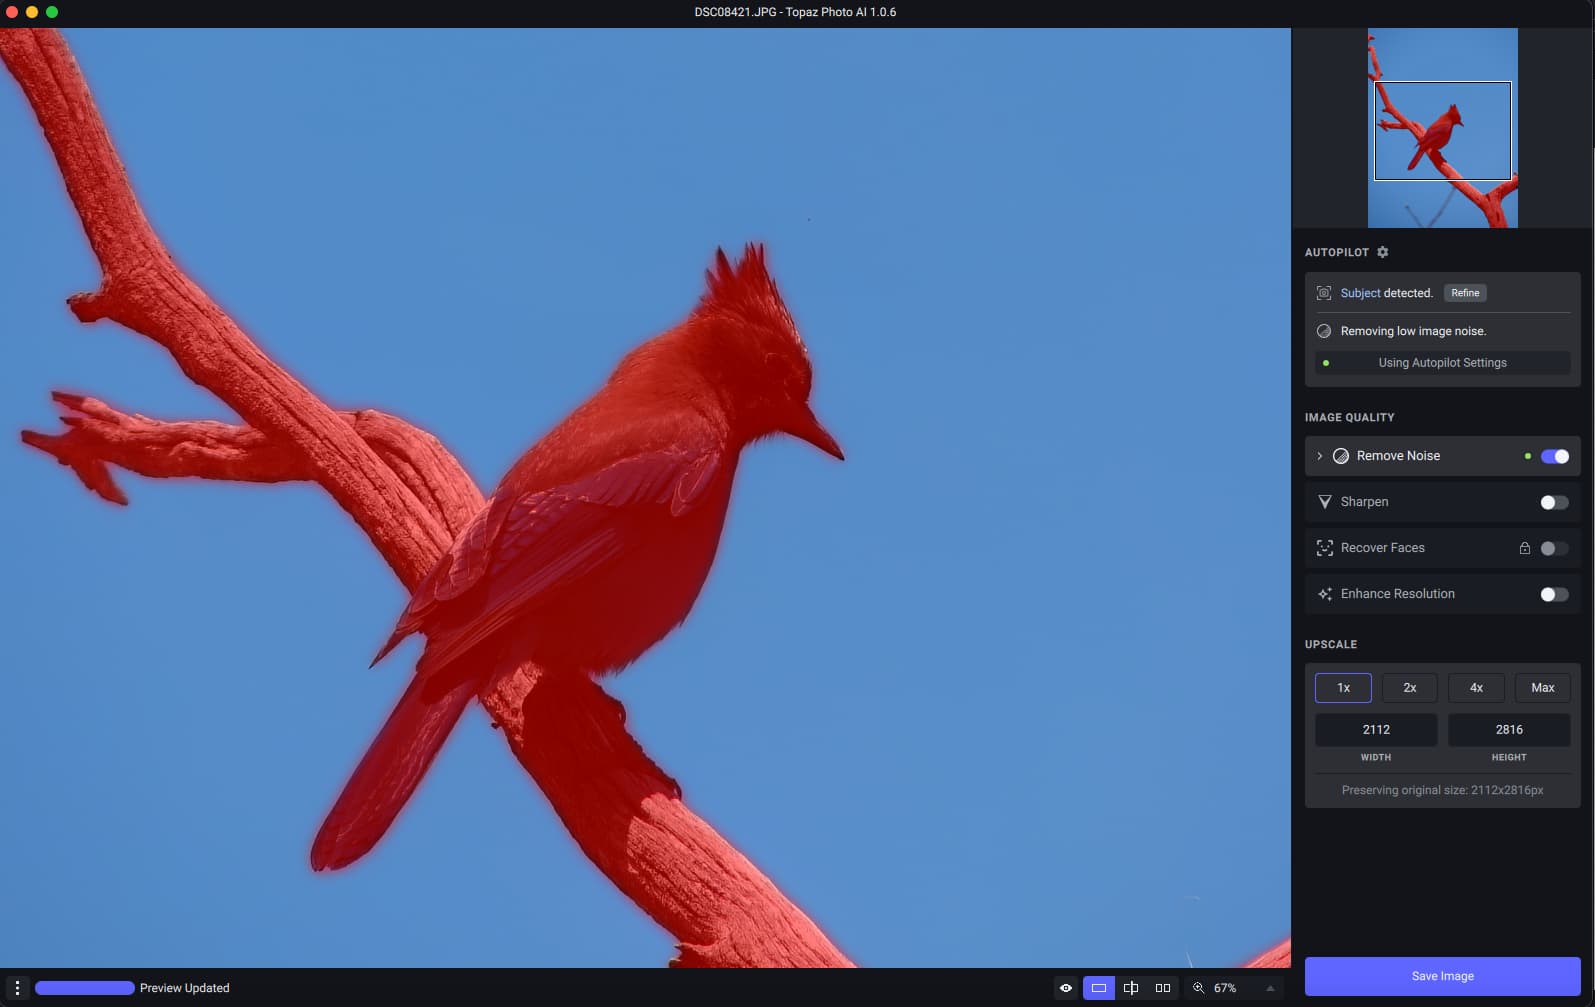
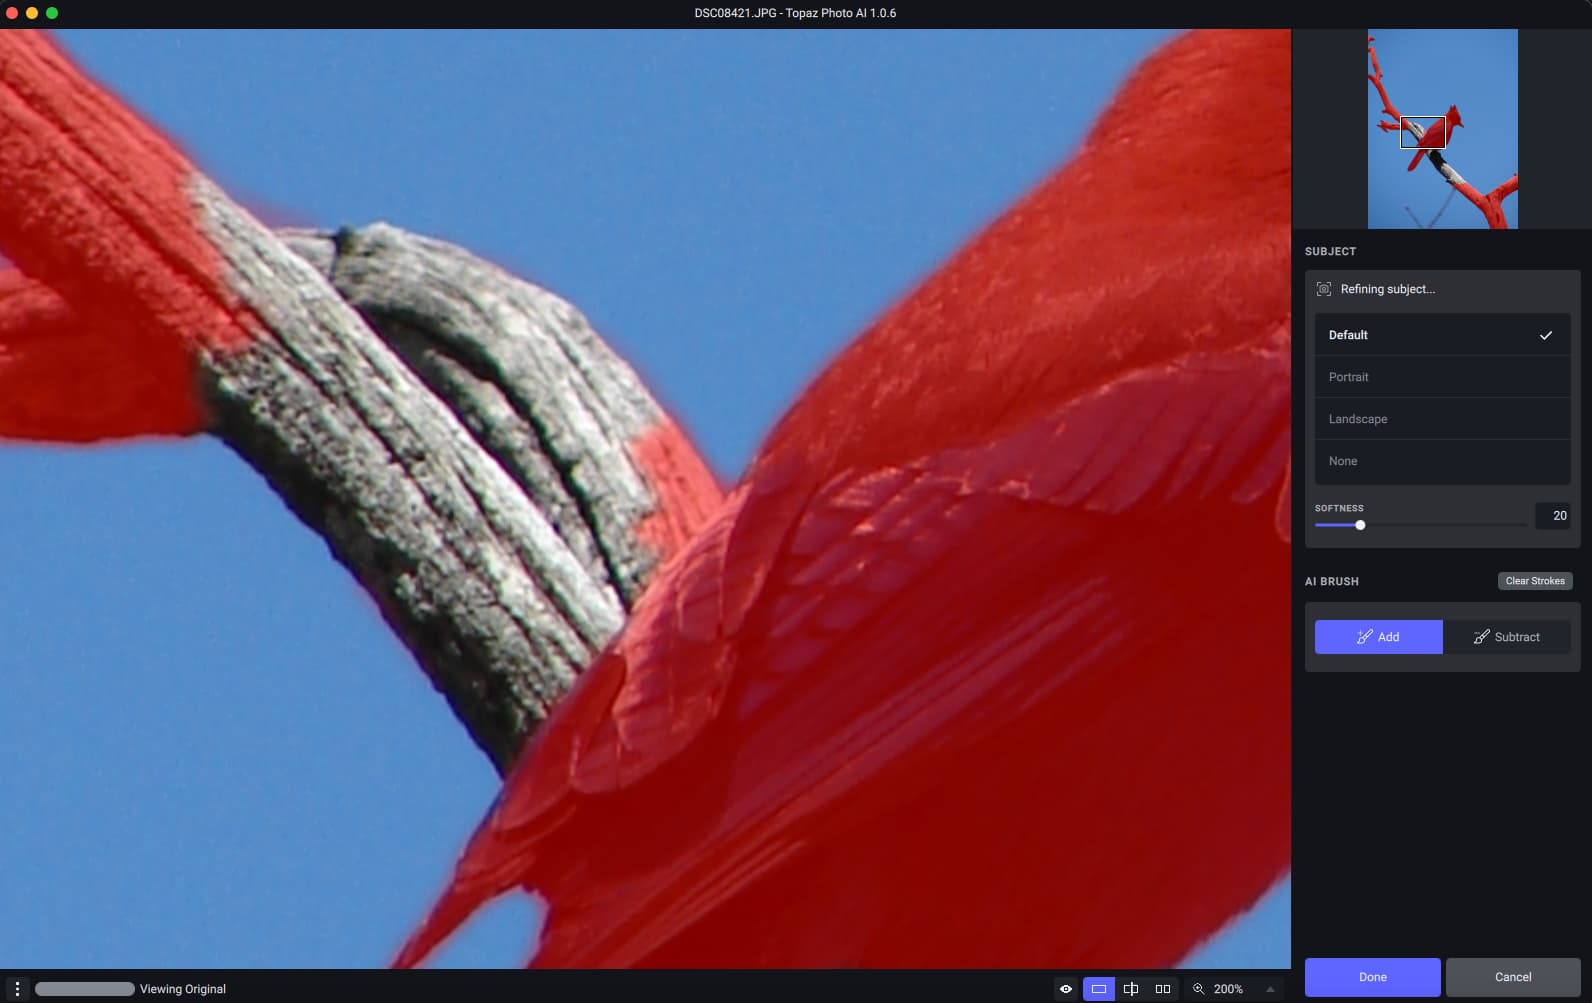
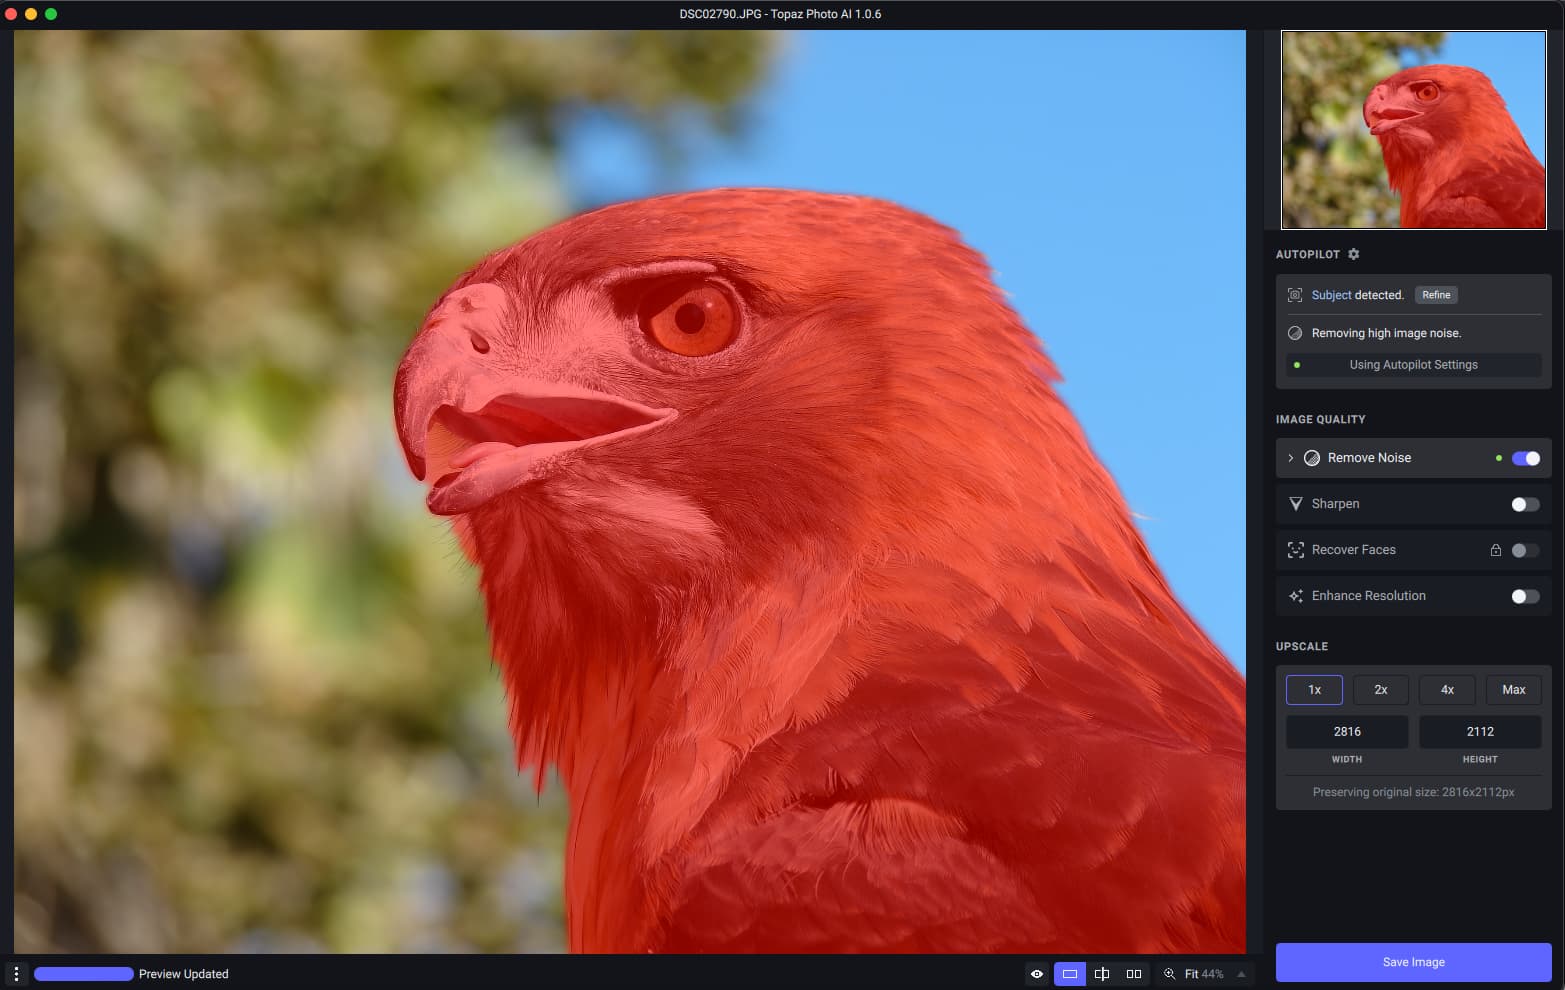
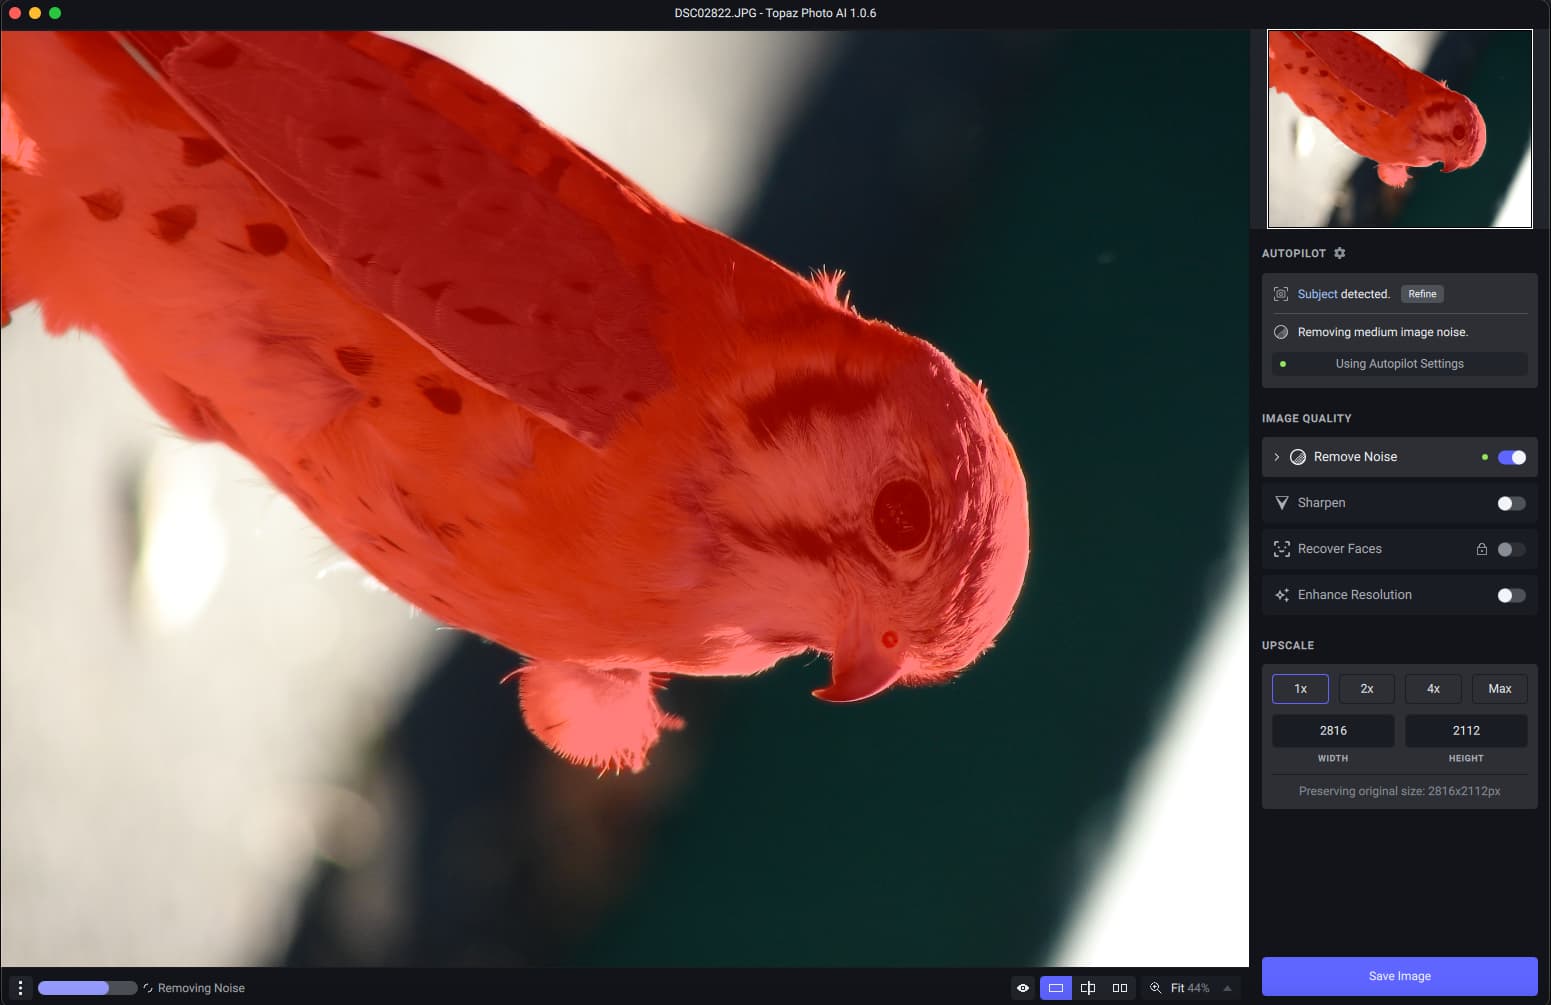
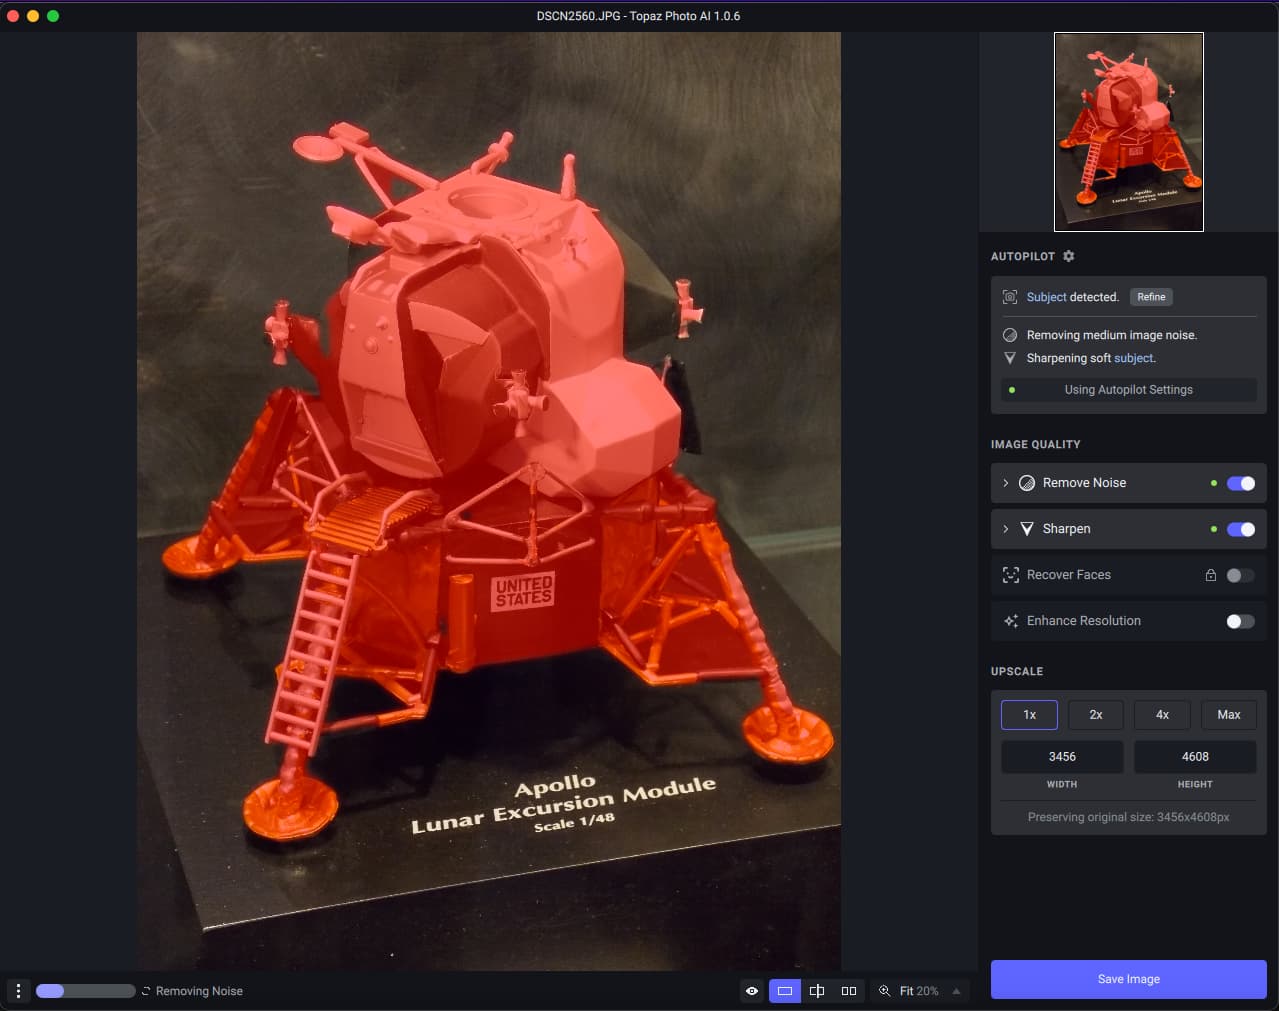
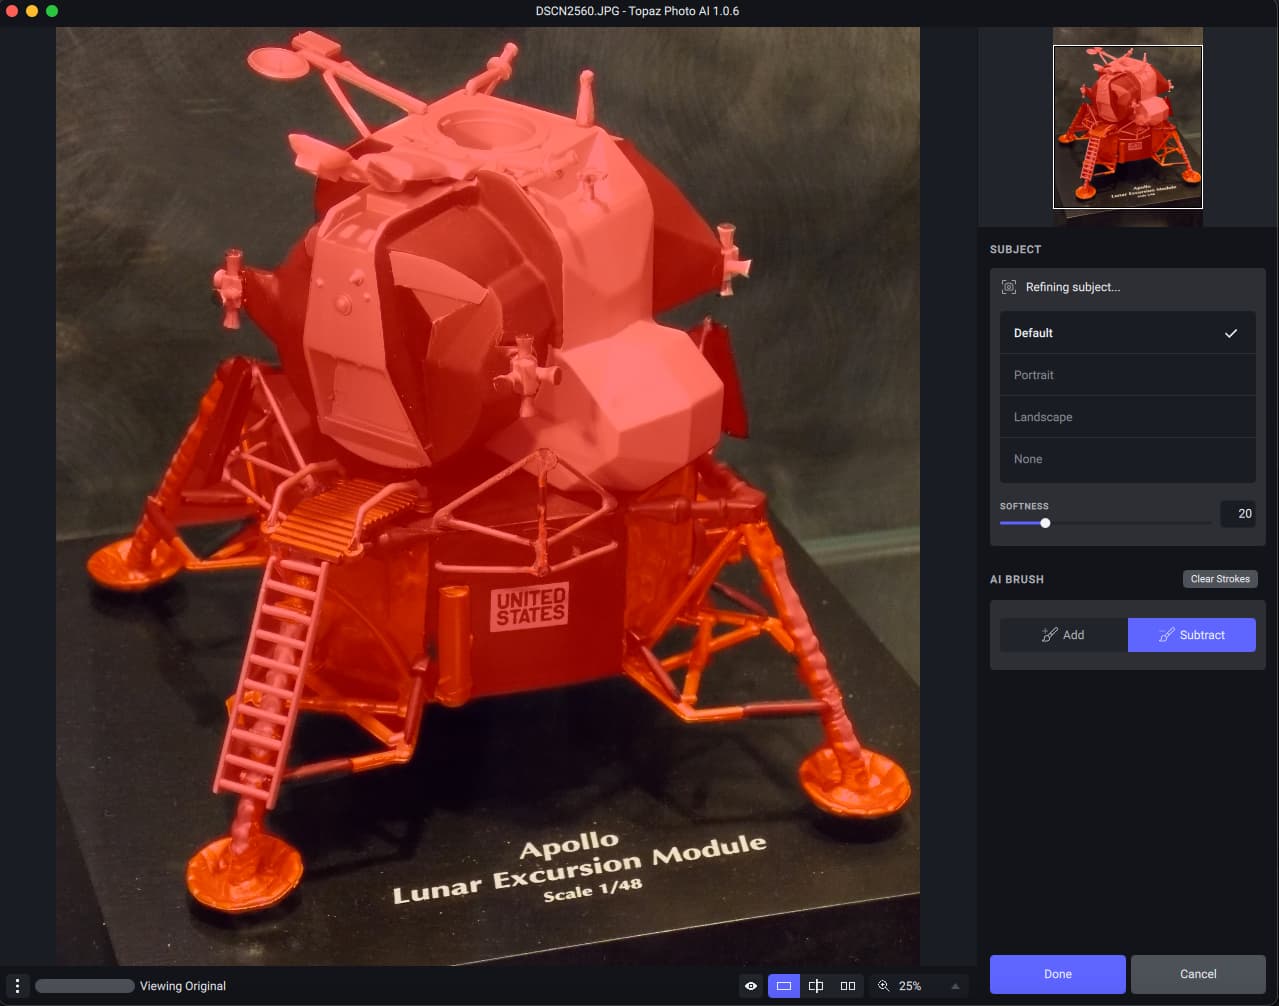
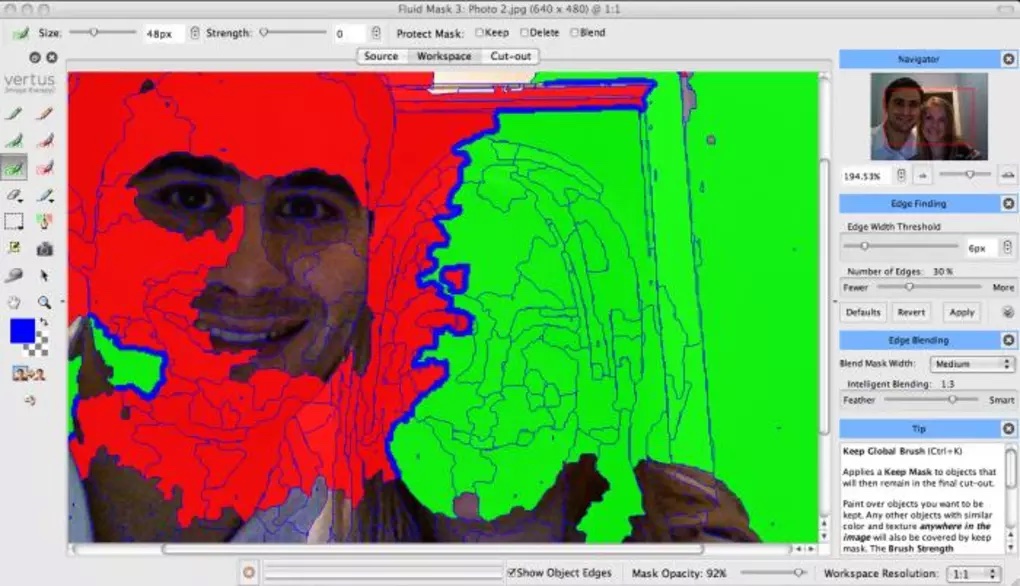
This week we have an update that continues improving memory usage and performance improvements and bug fixes, general quality of life stuff like that… Oh yeah, also AI Brush, a feature we’ve been working on for a while that will allow you to refine your subject mask with much more precision! We think this is much better than the “dumb” brushing in the older IQ apps, even with their edge detection modes. It still has a lot to improve upon though, and you should expect to see further updates to it - please give us any feedback you have over your experience using AI Brush to help make it the best it can be!


If you own DeNoise, Sharpen, and Gigapixel with up-to-date licenses then you already have access to Topaz Photo AI!

Please give us any feedback or report issues with this release. We’ll be updating TPAI regularly to address those pieces of feedback and issue reports. If there’s a specific image you’d like us to see, you can send it us at this dropbox link.


v1.0.6
Released October 20, 2022
Mac: Download
Windows: Download

Changes since 1.0.5:

  • Implemented AI Brush, a feature for more finely editing the subject selection
  • Further reduced memory usage, particularly when batch processing
  • Various performance optimizations
  • Default zoom is now “Zoom to fit” on small images
  • Updated exiftool, adding support for several new cameras and metadata tags
  • Updated lensfun, adding support for several new cameras and lenses
  • Fixed some special characters, like #, causing issues with loaded images
  • Fixed crash when saving some RAW images
  • Fixed Mac being prevented from falling asleep whenever the app is open. Now it’s only prevented while processing images
  • Fixed issues with Subject Only and subject masks sometimes not applying correctly
  • Fixed images that are 1024x1024 or 2048x2048 becoming washed out after running face detection
  • Fixed the subject detection setting in AP preferences visually resetting to “Default” after re-opening the application
  • Fixed subject refinement and face selection modes not closing when dragging an image into the application
  • Fixed the app sometimes crashing while closing, particularly when used as an external editor
  • Fixed image settings tooltip showing Sharpen settings incorrectly
  • Fixed Sharpen sliders showing suggested values at 1 when Sharpen is not suggested

We still have a lot more planned! Here’s some of the things we are actively working on improving:

  • AI Brush
13 Likes

Alright here we go! macOS Monterey, Intel iMac. Installation was smooth.

For my first couple of test images (a car, then a bird), PAI cannot find a subject (edit: See below).

Trying to use the brush to select the subject is painful! Lots of adding and subtracting as I go:

Oops, too much! No easy way to back out (and clearing strokes stopped working):

Where is the brush size selector? It’s like a tiny toothpick. We need more subject refinement categories (no birds, etc.).

In case I missed something I will keep trying…

I reset preferences to default, and the subject was now auto-selected. AND the branch the subject sat upon…

I cannot seem to do surgical refinement along the subject edge (either too much or too little is selected):

I was wondering if a very soft brush would enable me to erase large unwanted areas (the branch) quickly. So I zoomed out all the way, cranked up the softness, then this!

Crashed Thread: 0 Dispatch queue: com.apple.main-thread

Exception Type: EXC_BAD_ACCESS (SIGSEGV)
Exception Codes: KERN_INVALID_ADDRESS at 0x00007fd2fa55af7e
Exception Codes: 0x0000000000000001, 0x00007fd2fa55af7e
Exception Note: EXC_CORPSE_NOTIFY

Termination Reason: Namespace SIGNAL, Code 11 Segmentation fault: 11
Terminating Process: exc handler [71406]

VM Region Info: 0x7fd2fa55af7e is not in any region. Bytes after previous region: 11890559 Bytes before following region: 4226
REGION TYPE START - END [ VSIZE] PRT/MAX SHRMOD REGION DETAIL
MALLOC_LARGE 7fd2f77fc000-7fd2f9a04000 [ 34.0M] rw-/rwx SM=PRV
—> GAP OF 0xb58000 BYTES
MALLOC_LARGE 7fd2fa55c000-7fd2fb0b4000 [ 11.3M] rw-/rwx SM=PRV

Kernel Triage:
VM - Fault hit memory shortage

Thread 0 Crashed:: Dispatch queue: com.apple.main-thread

Tried another bird…

Subject selected nicely:

I need to remove some selected area in his mouth. The crosshairs are not aligned with the actual brush:

Screen Shot 2022-10-20 at 5.25.07 PM

I think I am missing having “dumb brushing”… Maybe offer us a choice until this is working properly. Feels very alpha.

Subject auto-detected again, but no way to rotate image. That is super-basic and needs to be present. Then I experimented with Adding to the mask – crashed immediately.

Relaunched with same image and repeated, could not crash but also could not Add/Subtract at all. And the cursor is WAY off from where the mask is being editied.

The auto-selection here was mostly good:

Then I Subtracted little areas and Added others. This gives me a bit of hope… :wink:

This new Topaz approach reminds me of the old Fluid Mask plug-in:

4 Likes

Hi Anthony,

Installed 1.0.6 over 1.0.5 - Win 11 Pro (desktop) PC. Processor = Auto (AMD RX 6800 XT. Intel i9 12th gen). 64GB RAM. No glitches during install or launch of STANDALONE.

Tested Sony ARW raw image of classic car. Previously unprocessed.

B/c your Changelog emphasis was new Masking Brush feature (I wasn’t experiencing crashes b4 so nothing for me to tell wrt that), I’ll focus on my experiences with the Masking Brush. But, I will note signif. ongoing “issues” I’ve been experiencing with PAI that started in 1.0.4 and continue to this 1.0.6 rel. below the Masking Brush observations.

Current/Initial Masking Brush - Positives:
1- There is the beginning of a masking brush. That is cool!
2- I have my PAI set up to show No Subject b/c of the past unpredictability of the Subject detection. With it off, I was able to click on Detect and open the panel to start using/accessing the Masking Brush okay. [At some pt perhaps a Brush symbol or something to indicate a manual brushing func. is hidden out of view might be useful]
3- I’m able to paint (very roughly - it lays down in patches and isn’t respectful of edges is what I mean by “rough”) with it in the area I want to mask.
4- After I paint a Mask on with the Masking Brush, I’m able to go back up to Subject (in the Settings Panel under A.P.) and see the mask appear on my image when I hover over the word Subject. So it is recognizing what I’ve painted as a Subject Mask.
5- After having clicked “Done” after my initial mask paint in, I’m able to hit “Refine” and go back to add to the mask then hit done again and see the revised mask on Subject hover.

Those are all positives to me as the initial steps into a Custom Masking facility in PAI. I definitely felt I had more control than the fully A.P. sensing and/or most recent Refine options. BTW, I assume that where the mask is is where the Settings are being applied (ie, the moral equiv. of the White/show mask in Ps) - is that right? That said, I’d like to see the feature richness evolve …

Needed Features to Build on Current/Initial Masking Brush Functionality:
1- Need Brush Sizing options (to make larger & smaller)
2- Need Brush Hardness/Softness control & accurate Edge Detection
3- Need Mask Density (a strength control of sorts relative to whatever settings are being applied where the mask is painted in)
4- Need Mask Brush Erase or other means to Refine a Brush selection. I couldn’t figure out a way to take away some of what I’d painted…
5- Need a Mask Overlay Opacity control (to be able to see what’s under the mask more easily on a user-controlled level.
6- Need (certainly some ppl prefer it, but lower on the priorities to me) a Mask Overlay color choice (color picker).

Ongoing issues - unrelated to Masking Brush:
1- Still getting significant pixel hops/shifts
2- Still experiencing issue of a previously closed image (from File menu) re-opening when a new image is opened.

3 Likes

Did you figure out a way to subtract from a manually-brushed in mask? I may have missed something… I solely painted. Didn’t use A.P. masking. When I went over edges of my desired test mask area I couldn’t figure out a way to do the equiv. of changing my mask color brush from wht to black… I feel kinda dopey about it.

This looks like a totally new approach to masking: by adding in or subtracting blocks of pixels. Zooming in seems to make the refinement more precise. I like what I see so far.

2 Likes

Thanks for the early feedback on AI Brush! I mirror y’all’s sentiments wrt wanting brush sizes and overlay opacity/color (and I have a whole list of other improvements planned as well, like undo/redo). I just wanted to pop in and say that for anyone finding it a hassle to switch between add and subtract mode, you can right click and drag to perform the inverse action.

3 Likes

If you get it right, it could be a game changer! I found on the one quick test I did, that I could add or subtract by clicking and that this got more precise as I zoomed in further. Is there a standard keyboard shortcut for switching between add and subtract?
If it all comes out well in the wash, it might then be a good time to resuscitate Topaz Mask AI using the new technology.

That would be great!

In Ps it’s the “X” key that swaps b/wn the white & black colors to add to the show or hide (respectively) masking elements.

It would be swell (how’s that for contemporary vocab.) for PAI to mirror that shortcut syntax.

Especially for those of us who use PAI primarily as a Ps plugin! For those who don’t use PAI as a plugin, they wouldn’t have to unlearn or use a competing shortcut to what they’re familiar with. The X would just be a convenient shortcut key… :slightly_smiling_face: Plus, it’s sorta visually a cross-b/wn symbol/letter.

Hi guys, I am capturing multiple frames with my drone, processing then stitching the frames into a 360° panorama. As the panoramas exceed 1 Gigapixel, no Topaz product is able to refine the final stitched image, therefore I have to rely on enhancing the individual frames then stitching them.


Unfortunately, Photo AI introduces severe vignetting in every frame, which means that the photos look like a patchwork collage when stitched as there is no smooth transition at the overlapping edges.
I’m attaching before/after detail from one frame.

I don’t see a way to make use of this product, due to the severe limitations.
Best regards, and I hope that you can make this work for Gigapixel images
Barney

Hi Barney,

I’m interested in your process!

How many images do you typically stitch to create a pano?

How do you stitch the panos? Is there a program you use?

Hi Fotomaker, glad to show you! We all learn by sharing. :grin:
This is the frame arrangement. I haven’t included the upper sky. You can see the dark banding caused by the PhotoAI vignette.


You can see an aerial panorama here, stitched from DNG frames captured with my DJI Mini3 Pro drone.
The absolute BEST program for stitching is PTGUI Pro. It reads the Yaw, Pitch & Roll metadata embedded in each frame by the drone and aligns the frames accordingly. The result is a much better quality panorama than the self-stitched one you can get directly from the drone.

See the panorama here: Camberwell Town Hall | Hidden Melbourne
This is what the frame layout looks like in PTGUI. Actual panorama is 36000x18000px (648Mpx).

With my larger drone I can capture and create 3Gpx panoramas.
Best regards, Barney

1 Like

That’s really cool! The resulting panos are impressive. I had no idea you could get self-stitched panos from a drone.

Part of the question behind my questions was whether you could make the stitch (to eliminate the vignetting - I don’t do drone work, but make panos in Ps for landscape shots), then chop that stitched image into smaller chunks to run through PAI to denoise, sharpen, enlarge.

I appreciate you taking the time to explain & show examples. I’m someone who likes to learn new things! BTW, I just got a notice from Rocky Nook that the 2nd ed. of Colin Smith’s drone book is just out. Apparently, his 1st ed. got great reviews - part about drones & drone tech and part coffee table book. Take care. Regards.

Interesting question Fotomaker!

This is a 3Gpx view of Melbourne from the south, zoomed in. Switch the markers and the map on and off.


Link: https://www.hiddenmelbourne.com.au/aerialviews/melbourne-high-school/
3Gpx panorama 6.94GB (77970x38985px)
You can see the individual frames here

Each frame is 6008x4000px

It is possible to tile this after stitching, say break it up into tile sizes that Topaz can handle, then join them up again. The problem that I see is that Topaz will vignette the edges of each tile, then when I join them again it will look like a whole lot of postage stamps stuck on a page and not a seamless 360x180° sphere.
regds, Barney

1 Like

Fotomaker, the self-stitched photos from the drone are rubbish!
Low resolution, low dynamic range, badly stitched.
The little drone pea-brain can’t do a proper job.

1 Like

Can we have an option to set default zoom? The only thing useful to me is 100% as I’m only interested if the output is going to look good on my screen. Auto-fit is just a bad choice IMO, because a really small image will often look bad but at a normal size looks fine.

Good dog, Topaz. Refinement brush at last. Seems ok but only just tried with a pic I had to hand. I will be testing out after this week ends shoot.

I appreciate your listening

Norman

2 Likes

Comparison of processing
Header
Hogwarts Express on Glenfinnan Viaduct
Four images with crops of the train to show colour and processing


Topaz AI_6 using auto pilot from CR2 RAW file, lens correction on

ACR process then plugin AI noise with lowlight profile, lens correction on

Same ACR process into NoiseAI plugin using the clear profile. On my Screen this is a better noise profile and note the 3 and 4 carriages blur like on Photo AI . This is a 20mm lens with a DOF from 2m to infinity !

Lastly Canon DPP exported to PS and AI Sharpen filter use with only noise correction .

Will post again when I have had more chance to play , but on first view great idea the selection brush , however the auto is much better these days , and the brush as it is … not good !

Glad to see the start of subject brush implementation. However, if I resize the image view then try to use the brush the application crashes. I have tried this with a number of different file types with the same result. Has anybody else experienced this?

In my opinion this should not have been a release as a product but is still in Beta. Furthermore, many of the bugs reported should have been found in internal testing rather than users having the frustration of encountering them.
Topaz, you are damaging your reputation by this premature release. This product has great potential, but you need to do much more thorough internal testing before releasing to users.

The newly implemented masking brush with Auto Select (aka AI) is not the optimum solution. The AI doesn’t differentiate between subject and background when they are similarly colored. It would be much better implemented as a true brush (with an adjustable brush size).

1 Like