One of my only complaints about the latest AI / Creative models is the ridiculous amount of sharpening happening, something that once done beforehand like this, we can never overcome in post editing. Sharpening is something even apple learned with their latest camera modes: Tone in it down! We can add sharpening later, but can never remove if done for us ahead of time.
When this software first came out, there were more controls I recall to sharpening, detail, texture, and this has all basically been removed. What we get now just looks kinda awful on many images that yes, resolution and details has been increased but the hard edges just ruin it all.
I hope at some point we can have more control on this aspect of it.
actually just saw this after I deleted stuff. I will find another example. Here is the other small issue, the color shift as you increase the creativity level. This is more noticeable on things like landscape images where the colors go from a nice blue, to a sickly green which you can partially see happening here if the image loads (not loading for me at the moment). The colors go from a warmish skin tone (or warm grey background) to a greenish hue as the levels increase making composition very difficult to now have to also color match
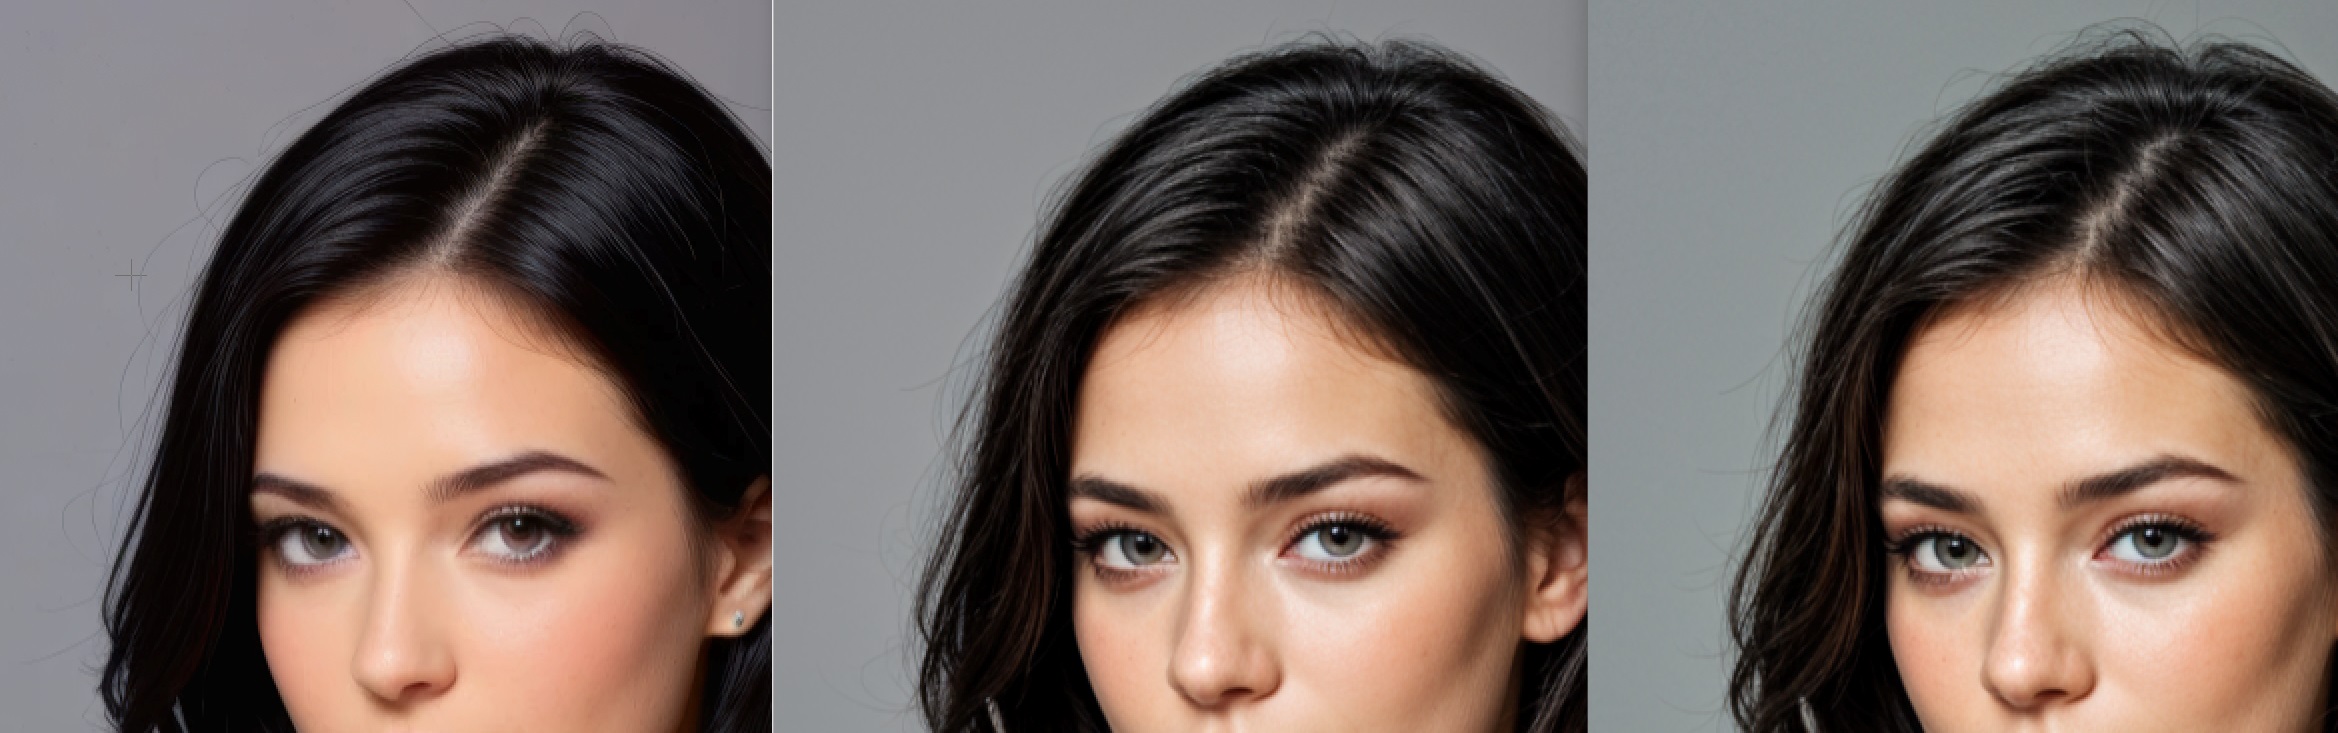
These are not perfect examples and it’s more obvious on people but I think give a decent glimpse of what becomes problematic and ugly. Looks like camera over-sharpening effect a bit
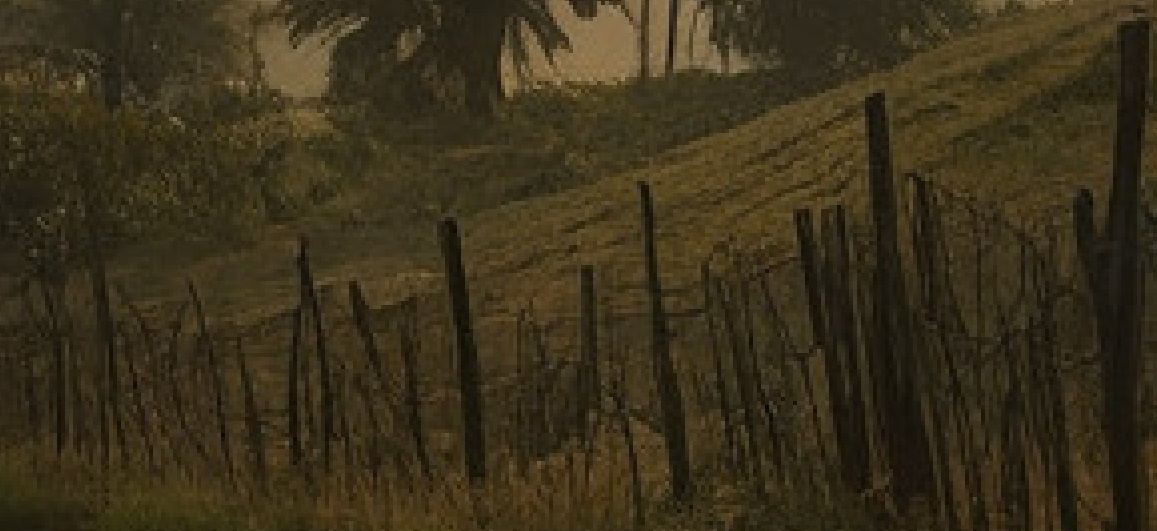
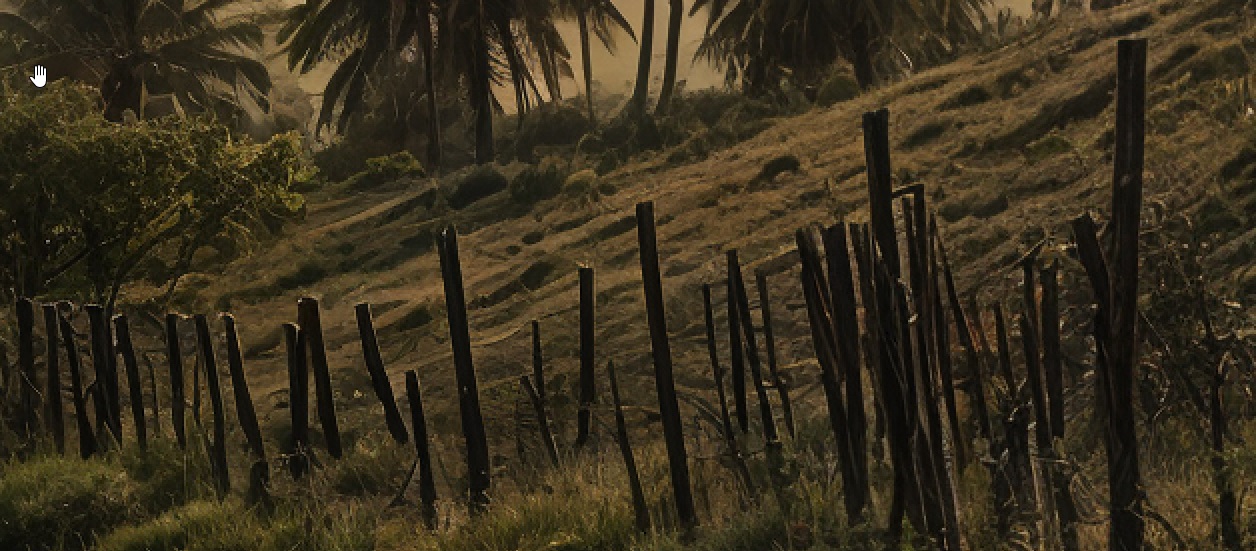
This is zoomed in to again I apologize for not having that perfect example just now. There is the obvious attempt to sharpen up (not just add resolution or detail) that’s very distracting. if you notice the fence posts goes from a subtle effect in original to a glaring hard edge almost white in the upscaled
A good example and while i AM zoomed in, you can see the dramatic over-sharpening taking place which is nearly impossible get rid of once generated like this. Let US do the sharpening in post (or have an option to tone it back). Right side is original, Left is the upscaled 2x version at lowest creativity level (beyond the lowest, anything NOT a person looks pretty awful typically).
When zoomed to 100% it comes across as white outline around objects and really detracts from any benefit the upscale AI did. This really needs a slider to shut it off or just don’t do it at all. Let the user do later if they want.
May I ask was the original image imported directly into the Standalone version of Gigapixel or via a host application such as Lightroom, Photoshop or a similar Image Editor and is the original a RAW or JPEG image.
Because, looking at the original image zoomed in you can definitely see the halow around the buildings which is a common occurrence when a subject with sharp edges is sharpened against a plain background.
Basically, some kind of preprocessing has already been applied to the image
This can happen with a previously sharpened JPEG, from a host application like Lightroom which applies a small amount of sharpening automatically or by adding contrast via the Clarity Slider within Lightroom or similar.
Gigapixel has only enhanced what was already within the image and this can be easily rectified within Photoshop or similar applications using Blend Modes or your preferred method.
It sounds like a good feature request would be to implement the option to preserve color and preserve faces from Bloom into Topaz Gigapixel for use with the generative models like Redefine & Recover.
Preserve color and tone would be awesome. I would like to add details but NOT affect the overall color and dark/light of parts of the images. Right now another big side effect is images can take on a very ugly HDR quality to them with higher detail levels. Basically anything above (in giga) “Low” the “Feeling” of the image, colors, tone, etc starts to get lost. There is more detail yes, but at the expensive of changing the image into a totally different look. A dark and Moody image of warm colors, turns into a flattened, sharpened, and greenish looking hues and in many cases, is not usable as the output, or if it is, has to be re-color adjusted, and try to put back in the original tone/dark light of the image that was removed.
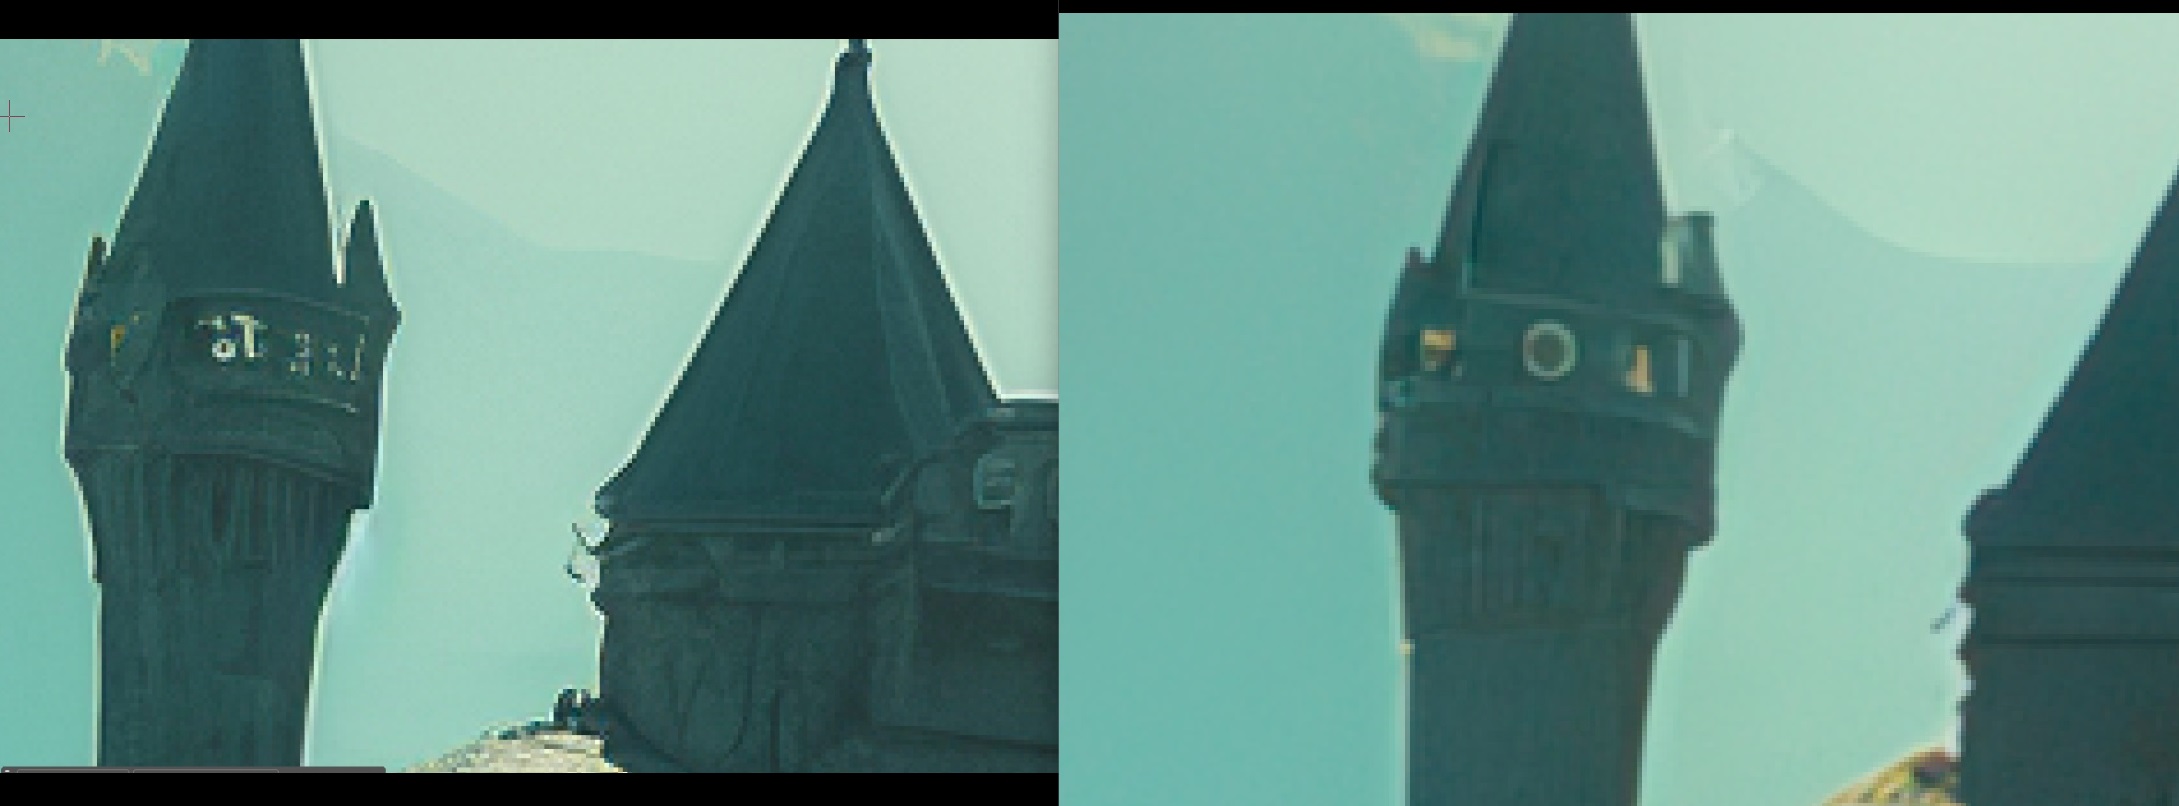
This was original output from a flux render (That’s obviouslly a small zoomed in section and yes there is a faint? lightness to image on right around the tower edges.. but yet the standard “upscale” does just fine with it and outputs and nice clean edge.
yet AI upscale does not and adds that sharpening effect on the left. Which gets worse the higher you upscape or the higher the “model” version. There’s simply no way to avoid it on the AI stuff.
Solution? Upscale with both AI and non-ai and Paint out in photoshop, but .. like my “Rock” example in comment I just posted.. . somewhat tedious to have to do both or multiple renders of the same image or different parts/cropped and merge back in together.
I appreciate what you’re saying and like yourself I would normally clean up in Photoshop by creating two instances of my image and paint the Sharpening in or use my Halo Removal Action
I tried to send, you my Photoshop Halo Removal Action but, I’m afraid this service doesn’t allow for that so, here are the steps and tobe honest it’s so easy you probably won’t need an Action
Halo Removal:
Open Photoshop with image then press Control plus the J key to duplicate the image
Navigate to the Select Menu and choose Sky from the drop-down list. The Sky will be automatically selected for you
Next press Shift plus, Control plus the I key to Invert the Selection then, press the Delete key to delete everything but the sky then, press Control plus the D key to deselect the Selection.
Navigate to the Filter Menu then, Blur and choose Gaussian Blur from the list.
The Gaussian Blur pop-up will open now within the Radius Box either type the number Two in the box or if you prefer move the Slider until it reaches the number Two then press OK
That’s all there is to it my friend
Tip 1: This, method won’t entirely remove the Halo first time only reduce the Halo by half to remove the Halo completely simply Duplicate the Layer again.
You can either create an Action form the Steps above or Message me your email and I’ll gladly send you My Action
Tip 2: Although this method uses a Sky Selection it doesn’t only work with sky’s the selection doesn’t know the difference between a sky or a blank background it only assumes anything blank is sky.