Education | Dark Images In Photo AI

I received a mailout…

Unfortunately, my experience doesn’t come anywhere near “one click”

I took the instruction to “Import a challenging shot” to see what Photo AI’s autopilot would come up with.

Here is the untouched RAW opened in a competing RAW editor…

And here is the result of using that editor…

Finally, here is the result of Photo AI’s “a few clicks”…

I’m sorry but I am not impressed.

Nonetheless, I shall continue to use Photo AI for print sharpening and resizing my TIFF exports from my other editor - two things it does do exceedingly well.

2 Likes

Hi Joanna.

Just a couple of observations, clearly your unedited original RAW Image is extremely underexposed.

I’m uncertain so I would hazard a guss, that after the initial Analyzing the Image Autopilot, selected Sharpen & RAW Denoise only for this image.

In addition, I see you have added both Adjust Lighting & Balance Colour which Autopilot, would neither Add or Recommend either of these two Enhancements for RAW Images, they have to be added by the user from the Add Enhancement list.

Because, when Adjust Lighting or Balance Colour are used with RAW images, the output is automatically converted and Exported as a TIF Format File instead of DNG.

Basically, Autopilot only applies Denoise & Sharpening automatically and gives you Some Suggestions of what to do Next…

Topaz Photo AI isn’t an Image Editor yes, it has a few basic editting features Cropping and the Remove option for instance, but it’s prime usage is for Enhanceing Images the First Step of cleaning the image if you like, before you can apply further Adjustments with an Image Editor yourself.

Having said that, the Autopilot example Topaz, emailed you is achievable with just One Click let’s take another look

Here’s a closer look

You can clearly see from the image above this isn’t a high quality RAW Image it’s a Small Low-Resolution JPEG with a lot of compression artifacts which can be Eradicated with the Autopilot Enhancement Suggestions Denoise, Sharpening and Upscaling

The next part of the example basically says, Photo AI Analyses your Image for Quality Issues and Automatically Recommends the Best Enhancements in One Click

In other words, you Click Once to add each Suggestion it wasn’t implied One Click does it all because, it then goes on to say Then, Tweak any Setting to Achieve the Perfect Photo for you.

“Achievable with just One Click”
One Click Denoise, One Click Sharpening and One Click Upscaling

Follow The Steps

  1. Launch Photo AI

  2. Import a Challenging Photograph and try for yourself for example, Fast Action, (Motion Blur) High ISO (Denoising) or LOW- Resolution (Upscaling)

  3. Use Autopilot for Suggestions (The Image is Automatically Analyzed Autopilot reads and makes Suggestions based on that information)

  4. Fine-Tune with Manual Control for Optimal Results (Tweak and Adjust the settings until you’re happy with the Results)

Here’s the Results

So not an Overstated Claim in Advertising?

2 Likes

Hi @AND-E

In actual fact, the image is perfectly exposed to give the result that I got out of DxO PhotoLab

I normally use PhotoLab as my first step as its NR is rated very highly and I have not been able to get better results with Topaz.

I have been using Topaz for print sizing and sharpening for years and will continue to use it for those purposes but, in the light of the advertising mail, I thought I would see if Photo AI lived up to its “one click” promise.

Maybe, with carefully selected images, this can be achieved but the advert clearly invited me to choose a “challenging” image. So I did. And, no matter how many tweaks and twiddles I did, there was no way I can improve on, or get anywhere near, the kind of results that I can get with this “difficult” DxO PhotoLab.

My feeling is that I could never rely on Photo AI as a full workflow tool. It simply doesn’t have the finesse and sophistication I require.

My main reason for posting was to point out that, under the UK Trade Description Act, this could be regarded as misleading and open Topaz up to a legal challenge for misrepresentation.

I think that his kind of fallacious claim is only going to increase in this age of AI where everything can be fixed by “just” doing this or “just” doing that.

Hello,

As Andy was saying above, you can’t compare your image with the image used in the example. Our email is about the Upscale function in Photo AI to recover details in small low resolution images. This is not what’s needed for your image at all.

Our tools won’t work well with under exposed images like that because you need more flexibility to adjust the lighting before enhancing the details. One workflow that would work great for your RAW image would be this:

  1. Send the RAW image to Photo AI. Remove the RAW noise.
  2. Export as DNG.
  3. Finish the lighting and color adjustments in the software of your choice.
  4. You can finally send the photo a second time as a TIFF to Photo AI if you need to use the Sharpen enhancement (Optional)
2 Likes

Thank you Alexandre, as always excellent advice.

2 Likes

Thank you for your detailed reply however, as Alexandre, was saying you can’t compare your original underexposed RAW Image with the Photo AI sample image neither can you compare Photo AI with a comprehensive Image Editor such as DXO PhotoLab or any other similar Applications.

Fundamentally, Topaz Photo AI is Designed for Photographers, to help solve many issues with Photo Quality Problems like Denoise Noise Reduction, Sharpen Sharpening Details and Upscaling anything from Low-Resolution images from the Web to High-Resolution Images for Printing which is better than anything else available.

may I digress for a moment, Joanna. have you considered Gigapixel’s Gigaprint App for your Printing output.

With Gigaprint, you can first determine the best upscaling model and settings in the Edit mode, and then switch to the Gigaprint mode to select your size and send the upscaled image directly to the brilliant WhiteWall Printing Company for creating amazing prints.

I’ve been a WhiteWall client for many years infact here’s a YouTube video review for you

Hope this was helpful

The original Topaz email was an Autopilot Tutorial for working with Challenging Images.

You said

After the initial Analyzing, Autopilot based on that information determined, your image needed Noise Reduction and Enhanced Detail

So, Autopilot automatically applied the correct Denoise and Sharpening Models with the right Strength Amount for both.

Hence, Autopilot Successfully Completed the Challenge for you

Therefore, not Misleading and currently nothing to do with the UK Trading Standards Authority and the UK Trade Description Act of 1968

So, I repeat not an Overstated Claim in Advertising?

2 Likes

That’s what you read into the text, but that is not directly what the text says.

What is does say is…

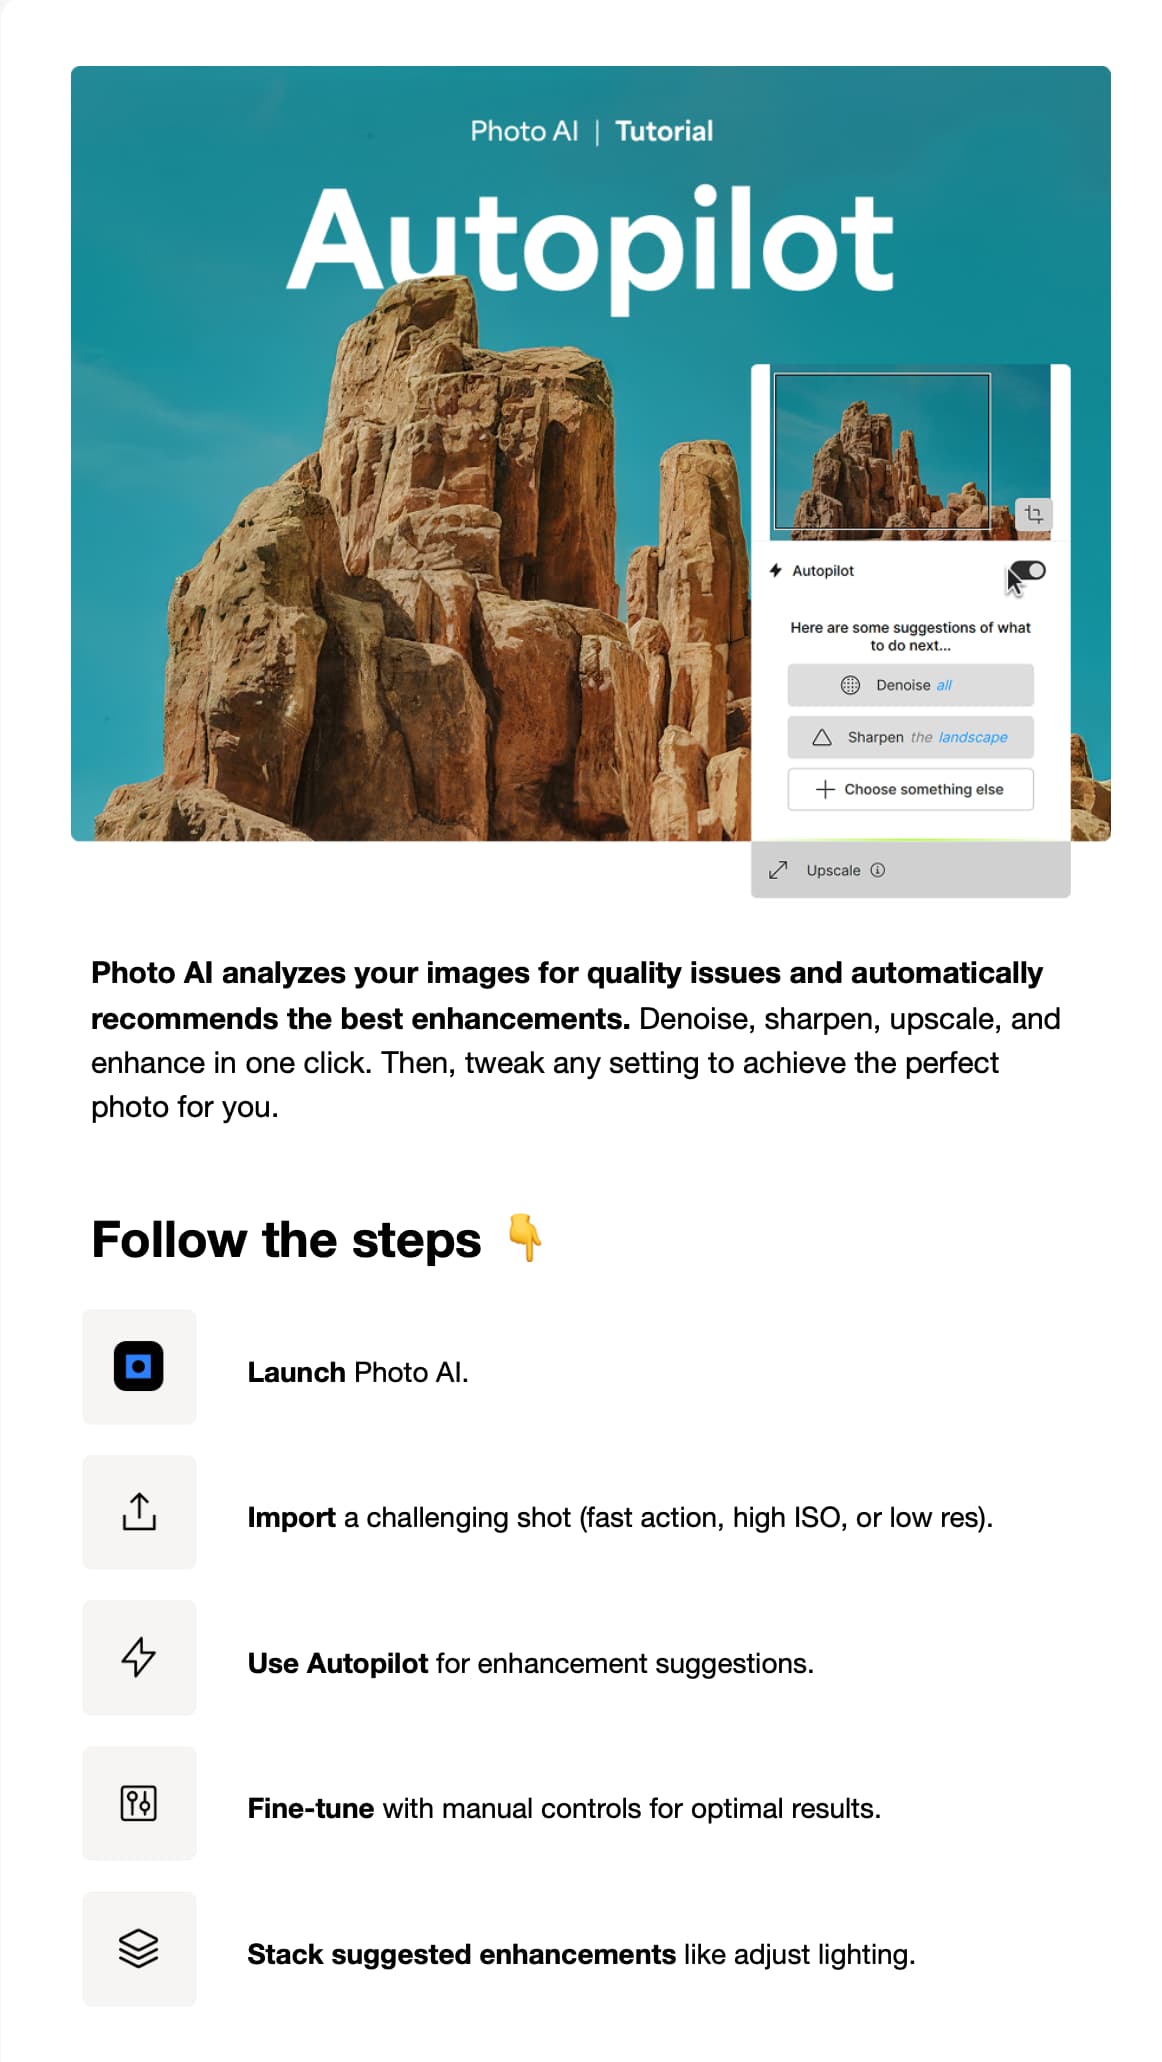
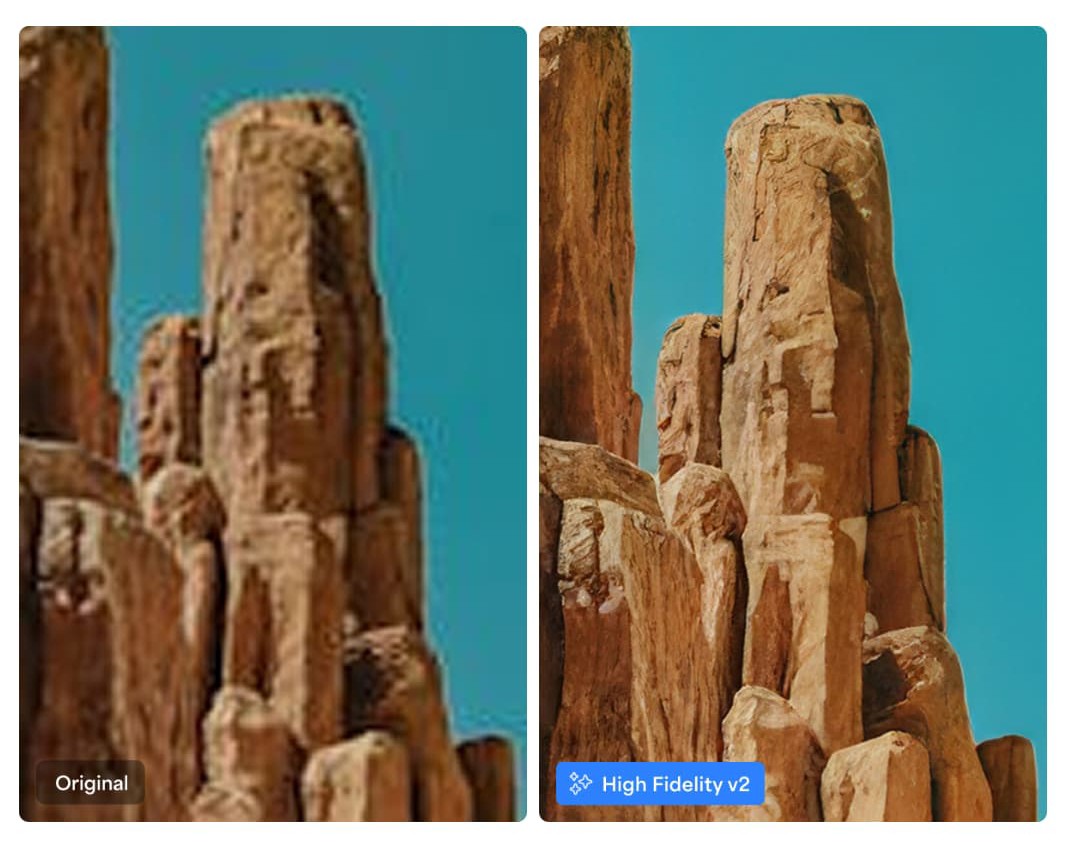
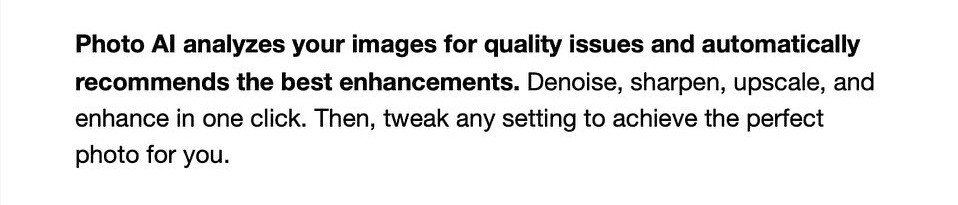
Photo AI analyzes your images for quality issues and automatically recommends the best enhancements. Denoise, sharpen, upscale, and enhance in one click. Then, tweak any setting to achieve the perfect photo for you.

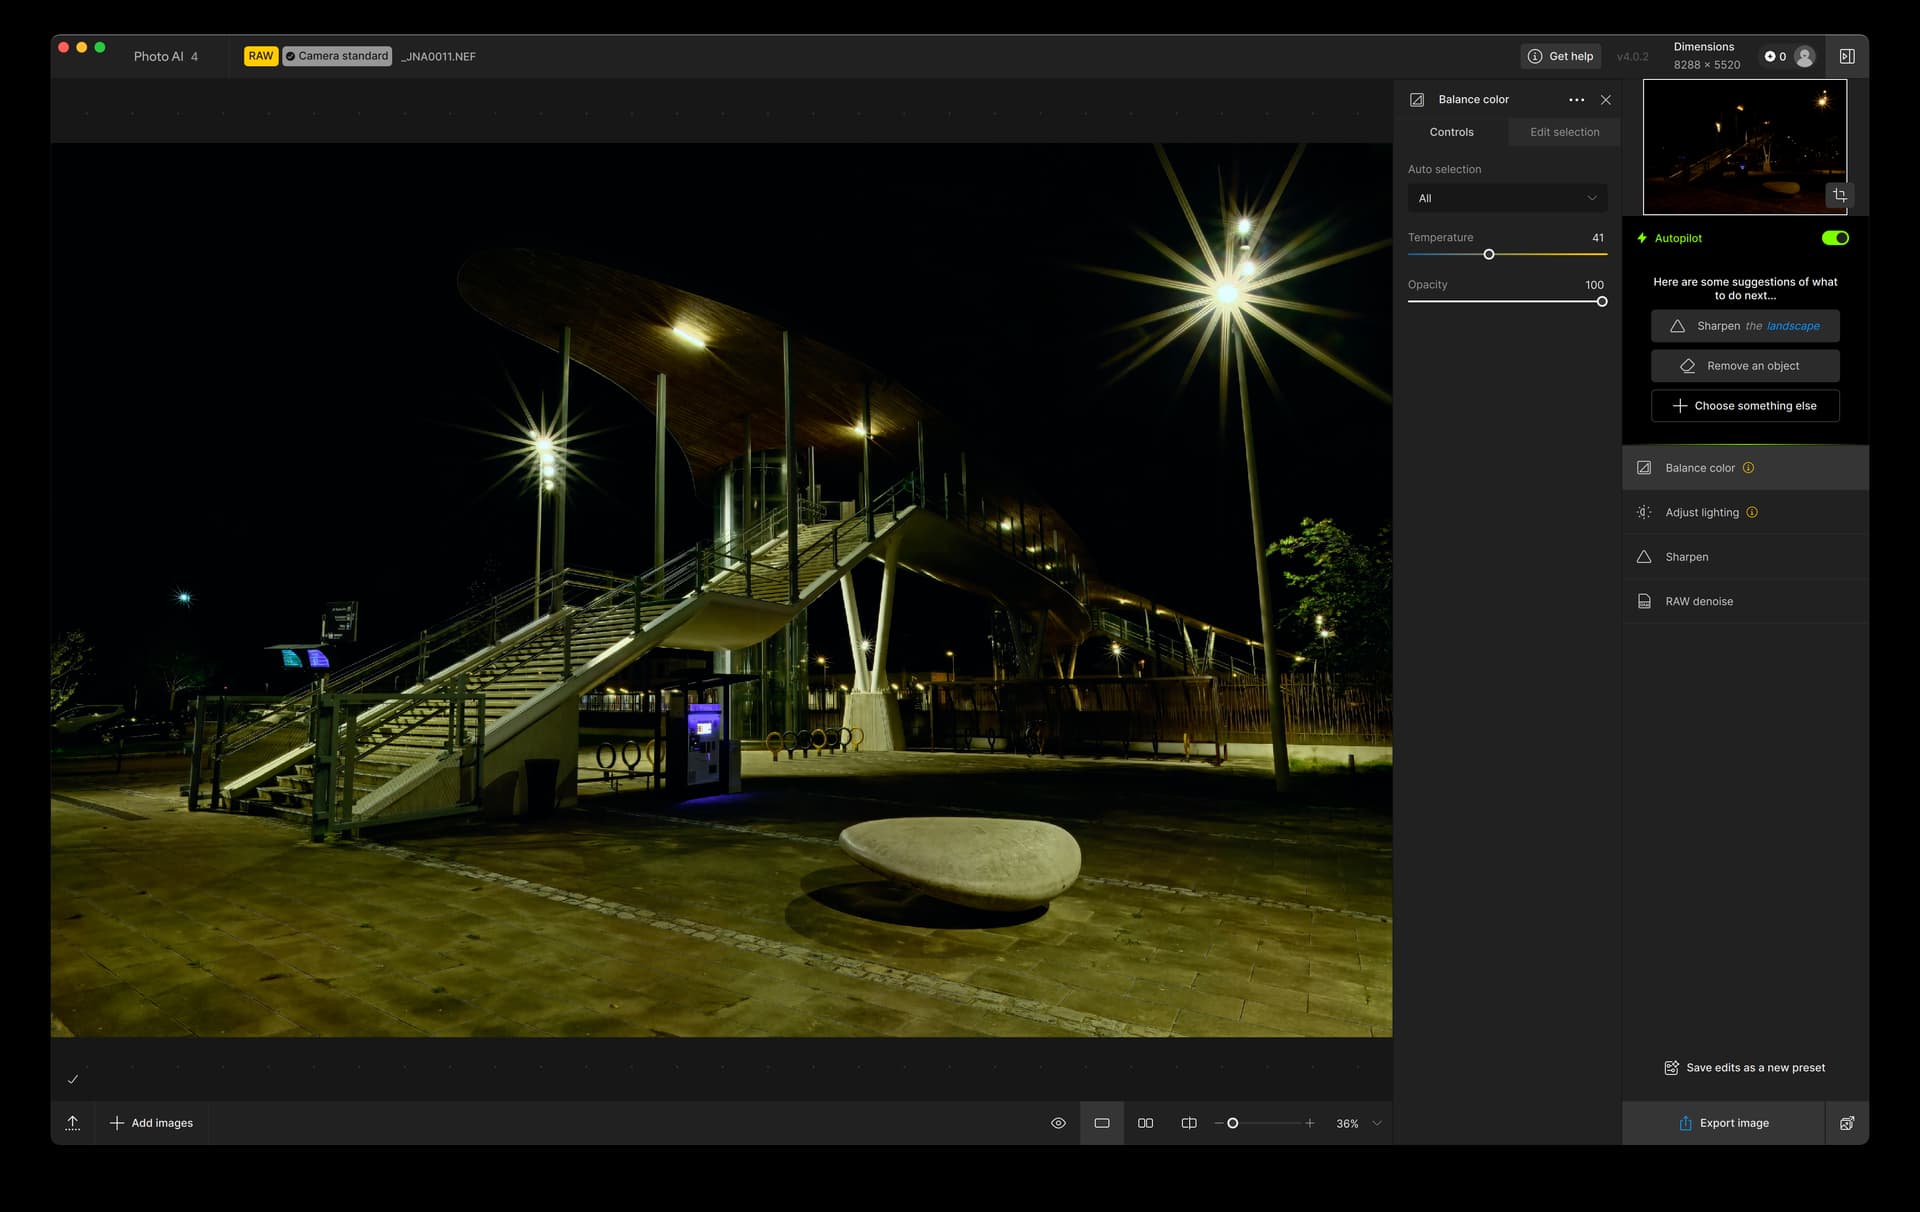
It may well have done “denoise, sharpen, upscale and enhance” in one click but its only suggestions were “remove an object” and “preserve text”.

The part of the text that most concerned me was…

Then, tweak any setting to achieve the perfect photo for you.

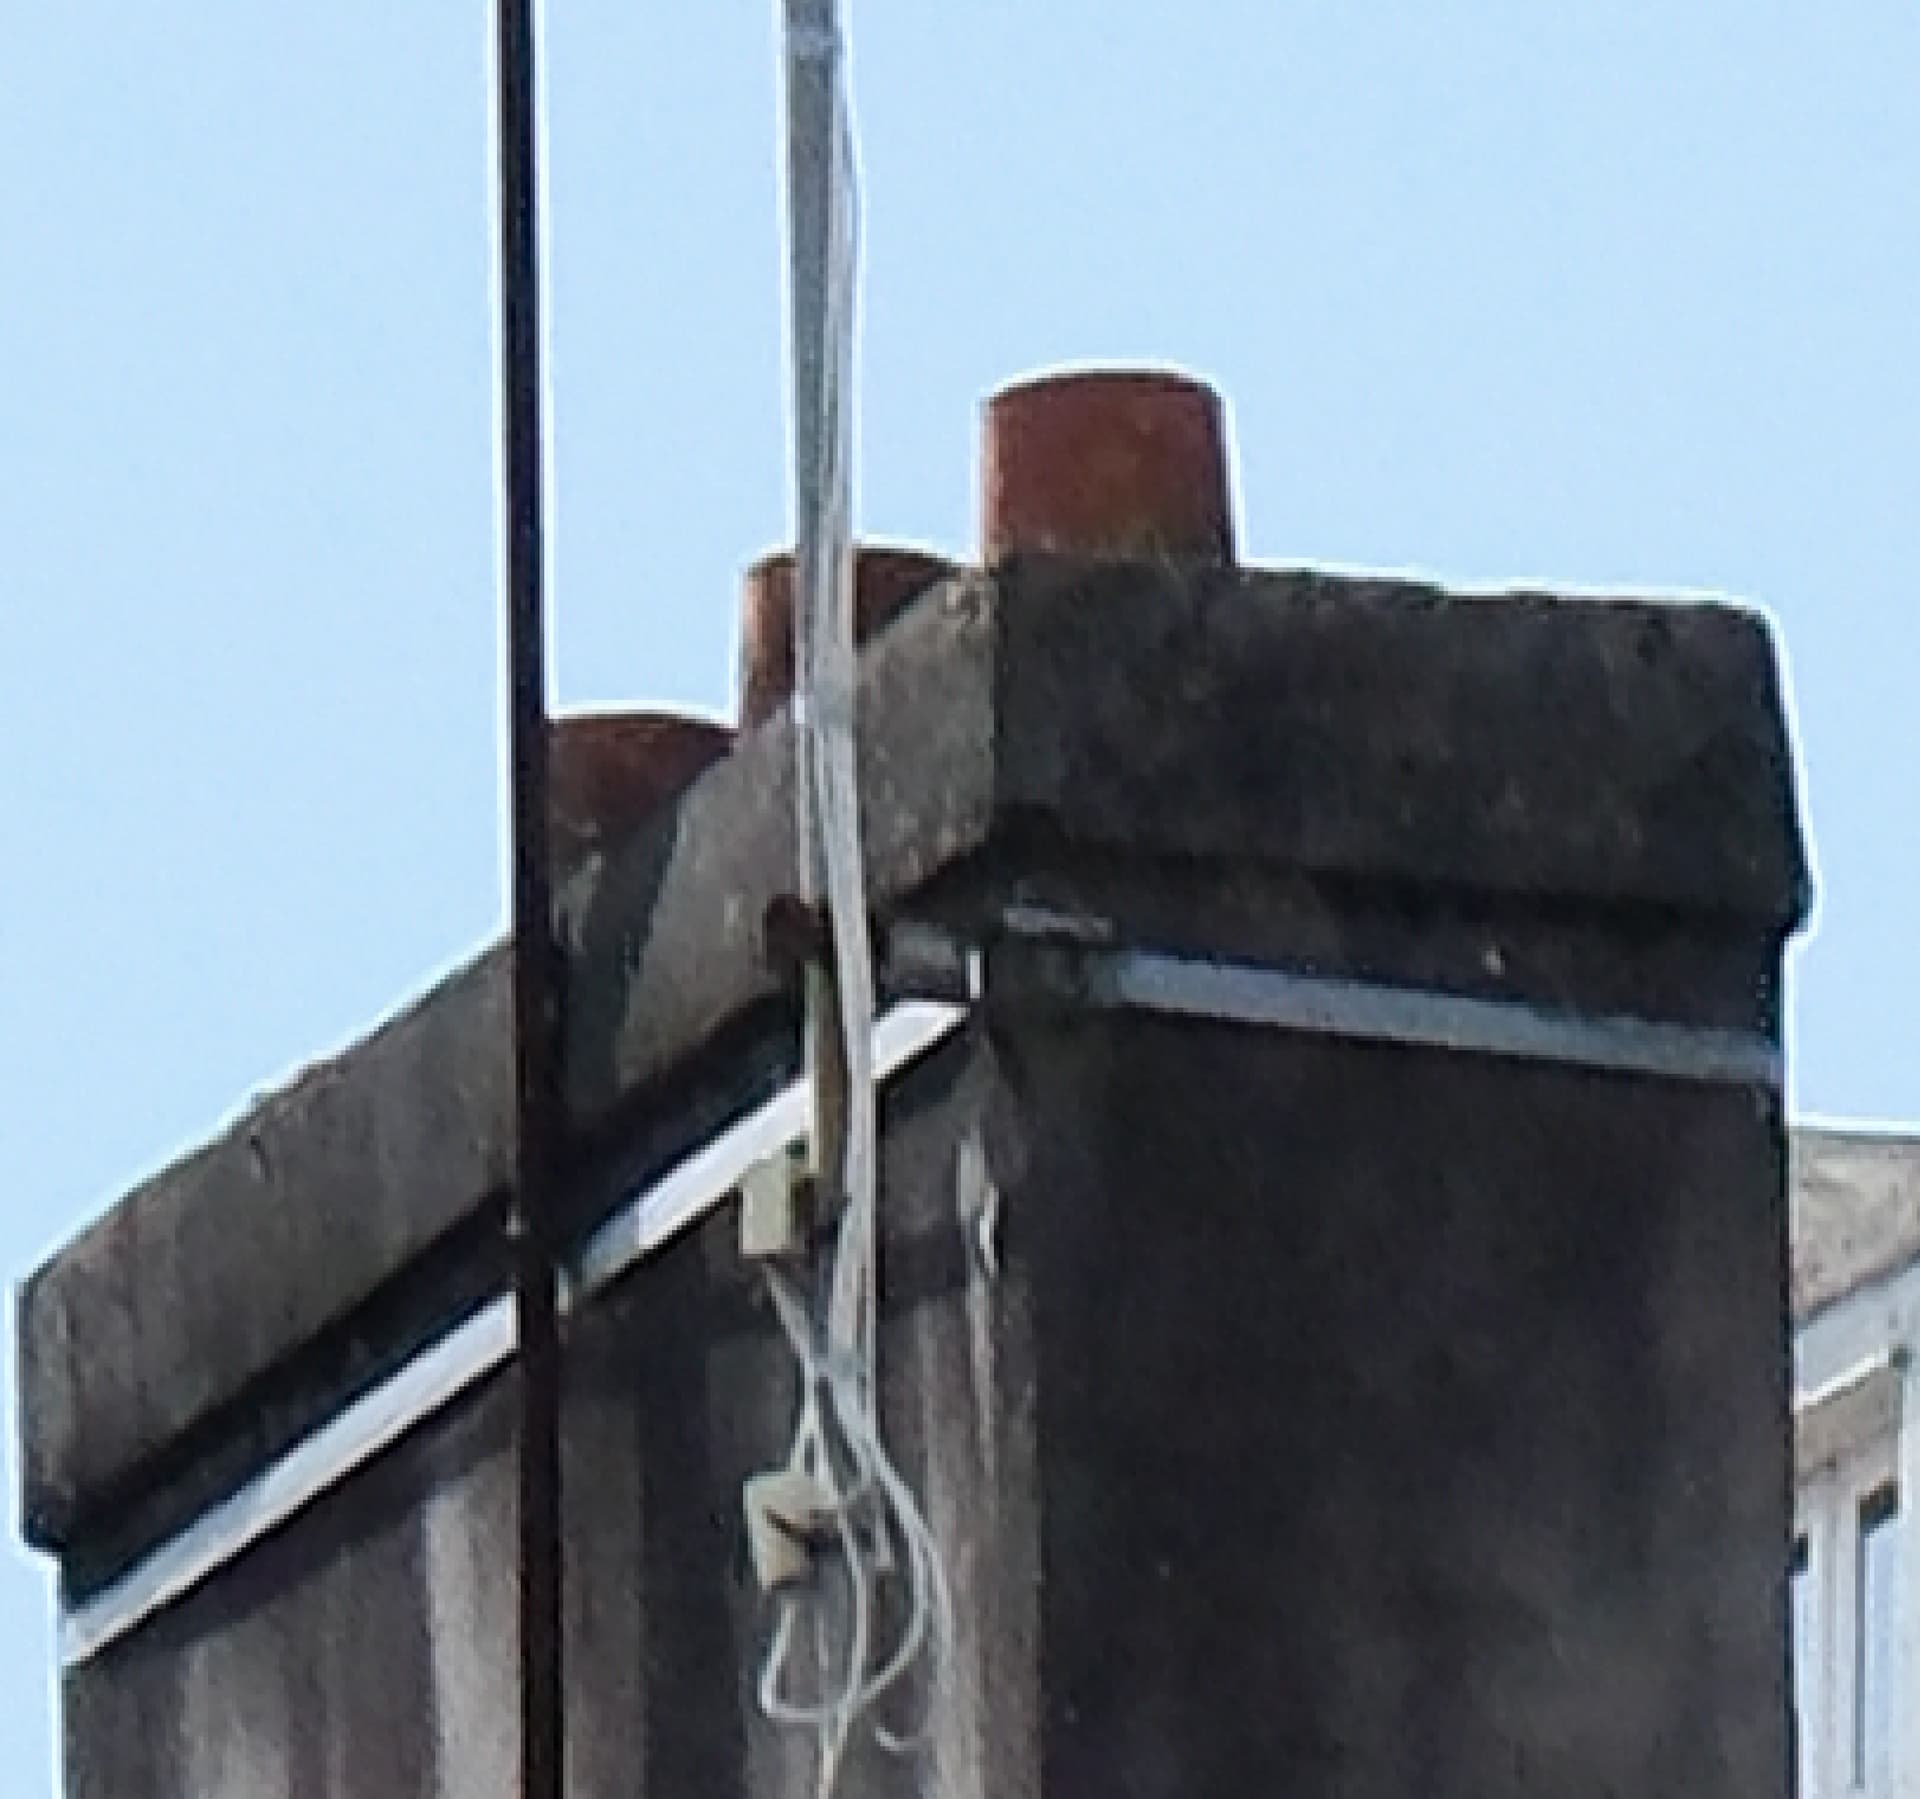
So, I did “tweak any setting” but, no matter what I did, I could never “achieve the perfect photo for you”

If I follow the instruction …

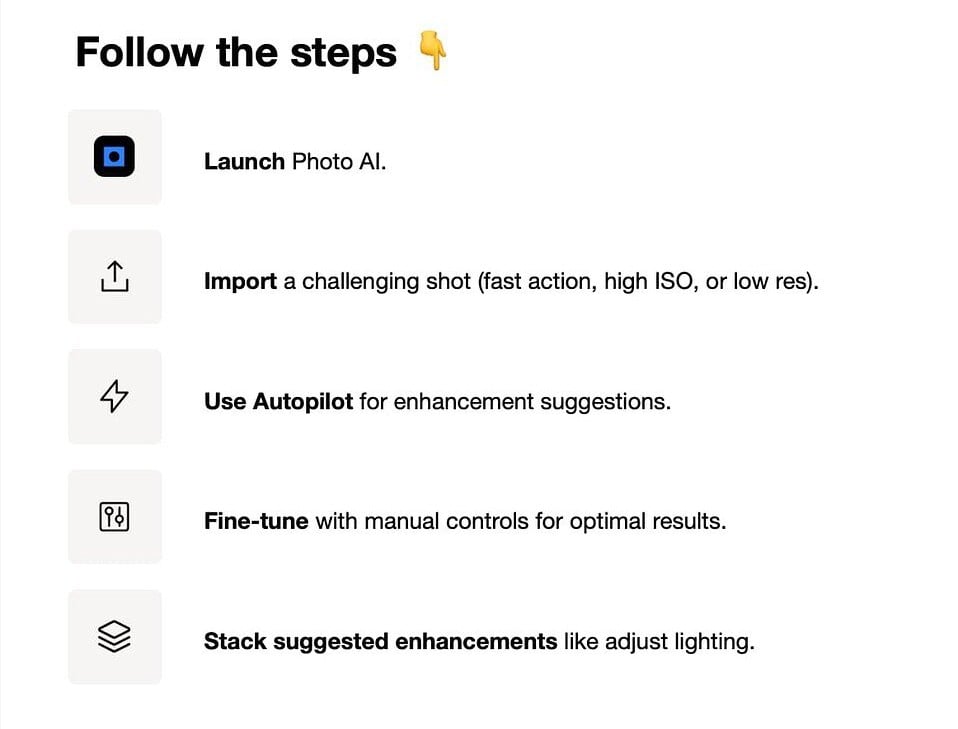
Fine-tune with manual controls for optimal results

What it does not say is anything about any limitations as to the corrections that are feasible and that is the phrase that I feel “exceeds the truth”.

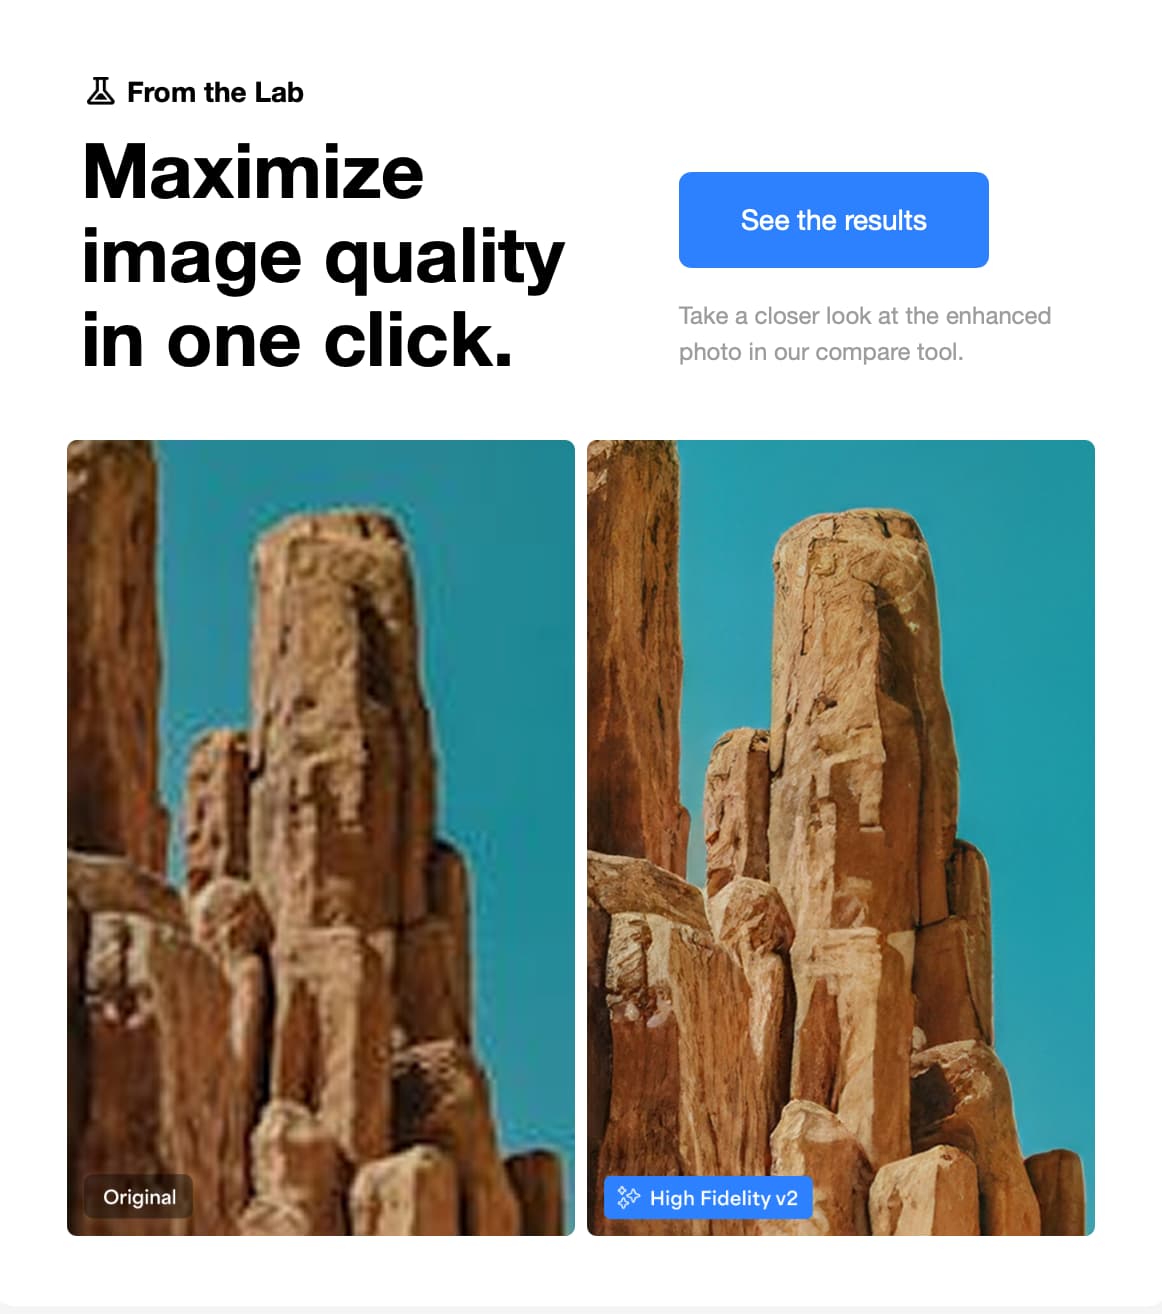
But that is not what the mailout actually says. The headline is " Maximize image quality in one click. It doesn’t say that you have to have a near perfect image to start with.

Your suggested workflow might work, if I weren’t already using DxO PhotoLab because, from my testing, its noise reduction is better. It also involves making an intermediate DNG copy, which is not necessary in my workflow, which is…

  1. Process RAW image in PhotoLab
  2. Export as TIFF
  3. Open TIFF in Photo AI, resize and optimise sharpening

Works great every time! There is nothing wrong with Photo AI. I love it and have just printed an exhibition using it. The only point I was trying to make was that the mailshot could have been better worded as it can give a wrong impression.

My answer is yes. In fact, I have been using it for many years for making wall sized prints from scanned large format (4"x5") negatives. but, when Photo AI came along, I saw it was the ideal solution to being able to enlarge, sharpen and otherwise enhance previously inadequate images in one app.

As to your recommendation of being able to send to Whitewall, that would be fine if they used a Lambda printer to create silver halide prints on baryta paper, but they don’t, but Picto in Paris do and I am well pleased with their results and I have been using them since moving to France from the UK 9 years ago. I used to use Harman for the same process before that.

Actually, far from convincing me to use Whitewall, the video convinced me to stay with Picto as I have never had to send for and assess test prints. In my experience, Picto just get it right first time and they certainly don’t do any extra processing unless you specifically ask for it.

While it’s true that we aren’t mentioning limitations, we are also not saying that it will fix any photos. The example in the email is actually a bad quality photo to start with, so I think it’s a good one. It’s not like we took a photo that was already of good resolution.

I sent your feedback to the marketing team regardless :slight_smile:

Thank you,

3 Likes

Now that is definitely marketing speak :grinning_face_with_smiling_eyes:

Anyway, apart from that, be assured that I recommend Photo AI when I do teaching sessions as, although PhotoLab might be the best for noise reduction, for the size of prints that we make regularly, we couldn’t get the final resized print quality without Photo AI.

An interesting remark I have had from some other photographers is that they get the impression that we took the picture on a large format film camera, whereas we actually used the Nikon D850. Such is the clarity of detail. Keep up the good work.

Finally, how about working on a tool that magically removes halos from compressed jpegs?

Movement blur sharpening can get part way there but it’s not as perfect as I would like.

This is great to hear that you like the quality of your prints after they are enhanced in Photo AI.

For the halo removal tool, can you post this in the idea section?

The development team is looking at the most popular ideas to improve our apps.

Thanks

2 Likes