Education | Color Profiles in LrC vs In-Camera

Hi guys,

I’ve been having really weird color shift issues with Topaz lately, to a point I can hardly use it with my regular workflow.

I’m using Lightroom classic V14.0.1 and Topaz Photo AI 3.3.1 (recently updated, the bug was there before though). OS is Windows 10.

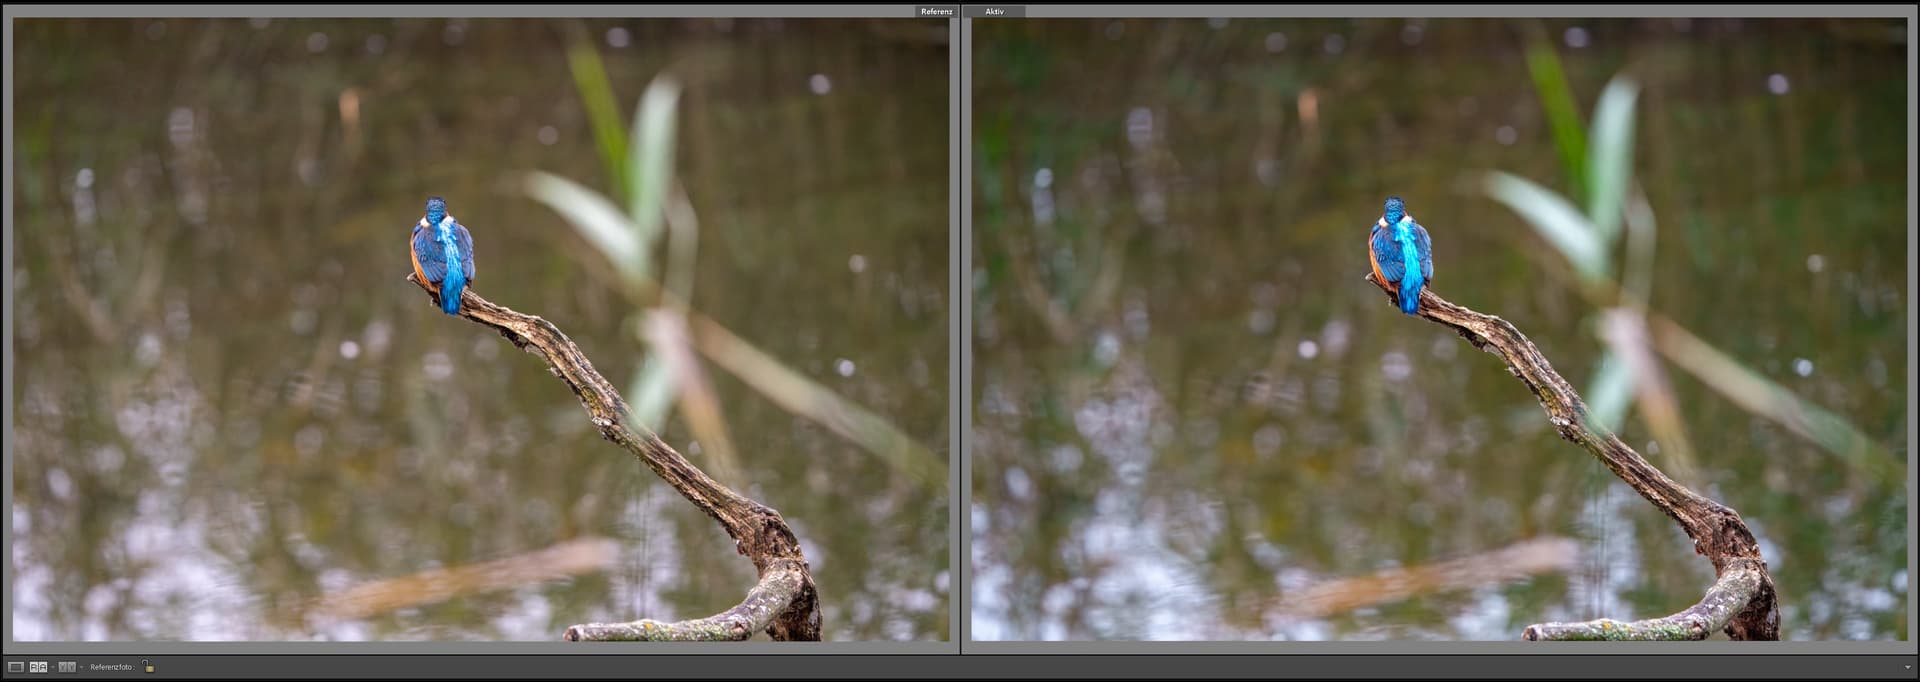
On the left you can see the RAW before using Topaz. On the right I’ve used Topaz (RAW Denoise and Sharpen).


All settings are just the same, also the picture looks fine in the preview in Topaz. It just comes out like this after exporting back to LR.

I tried to look for a solution myself and found a thread where somebody recommended to not go via “File - Plugin - Process with Topaz” but “Photo - Edit in Topaz”. This way, the picture comes out fine:

but since it works with TIFF format, I can’t use RAW denoise and the normal denoise doesn’t give a comparable result. Also, I can’t edit several photos at once. So this definitely isn’t a permanent solution.

If I don’t use Lightroom but load the photos directly into Topaz, the issue is the same - so it doesn’t seem to be a LR issue, but Topaz related:


(left RAW, right imported into LR after editing directly into Topaz)

I’ve tried uninstalling and reinstalling Topaz, LR and even the Creative Cloud, which didn’t have any effect at all.

I’ve found that several other people had the same issue, especially with the Alpha 7R V, which I also use. The only other solution I found was in this thread where the camera profile was “Camera ST” after the reimport into LR - but in my case, it’s the same (Adobe Color) as in the original photo.

So far, nothing helps and I can only use the “workaround” of exporting the TIF, which, as I explained, isn’t an acceptable solution at all.

Please help me, thanks

edit: I’ve tried experimenting with the bug a bit more and if I use the LR plugin, but don’t use the Auto setting for denoise and sharpening, but change them just a slight bit, the issue is still there, but much less:

How does it look if you manually set white balance for each image? That helps with some of my images in Capture 1, but I’m sufficiently clueless in LR that I can’t figure out how to work on two images at once in (non quick) develop mode.

Unfortunately, that didn’t help. I can only get a little bit closer to the original, but it still looks different. It seems that it’s not just the white balance that gets “shifted”, but a change in individual colors.

I do see differences in before/after rgb histograms. I imagine a bit of it is due to differences in demosaicing between LR, C1, and TPAI/LibRaw. Increasingly, I’m using TPAI at the end, rather than the beginning, of my workflow, especially for images with a dark/bright sections.

Unfortunately, for my workflow that isn’t an option. I only use LR (and Topaz) and no other software. If I do all the edits in LR first so that I’m satisfied with the picture and use Topaz then, I still only have the two options I stated first - either, I use the “photo - edit” method and edit the TIF, but that way, I still don’t have the RAW denoise but the normal one, which doen’t give as good results. Or, It use the “Plugin - Edit in Topaz” method, and get a picture with the shown color shift, so I basically would have to do the complete editing process again.

It doesn’t really make a difference if I edit the picture before or after using Topaz - since it’s not only the white balance but something about the individual colors, it seems I would need to edit the settings (saturation, tone, brightness or anything) for each color individually to have any chance to make the Topaz result look “normal” again.

Would you mind sending in some more information to get a better understanding of the problem you are having with this particular type of image? Please send the following information:

  1. The original image file.
  2. The processed image.
  3. A screenshot or description of the settings panel so I can see what adjustments were turned on.

You can securely submit your image(s) to my Dropbox using the link below.

Dropbox File Request

Please be sure to send me a note to let me know you sent something.

This topic was automatically closed after 60 days. New replies are no longer allowed.

Make sure when posting Before/After that we also see the Develop screenshot, with Basic panel shown. I suspect a custom Adobe color profile (such as Adobe Color) is applied on import in the before, and that is being compared to a in-camera profile that Photo AI will put when handling the RAW file (from metadata).

You can set LrC to use the in-camera color profile in Edit > Preferences > Preset > Global RAW default to Camera Settings.

You can also, in the Develop tab, copy edits you made on the before and paste onto the Photo AI DNG!