That really did make a difference! Thx for the example.
You’re welcome 
Some new photos from February 12th with the Kangaroos.
Here with an Australian pelican
Are the kangaroos (according to the photos) so tame that they let themselves be petted? Amazing. And unbelievable, what a great zoo it is. Very nice image enhancement. 
Well, let’s just say they’re used to the keepers and visitors. There’s no barrier between the visitor walkway and the rest of the kangaroo enclosure, so they can freely wander along it. And that day, it was the first time I’d ever seen one let itself be petted. Apparently, their fur is very soft.
Yes  .
As I’ve often said, this zoo is one of the largest in Europe. But soon it will be the largest in the world. They recently opened a new greenhouse covering more than 4 hectares (40,000 m²).
- Dimensions: 206 meters (length) x 192 meters (width) x 24 meters (height).
- Structure: An immense glass cathedral made up of prefabricated modules.
- Contents: It houses 230 animal species and an exceptional botanical collection.
This tropical greenhouse is part of the 10th world created in the park. And I think this won’t be the last one.
Thanks 
Thank you! That helps to see the flat (and makes a great pic too).
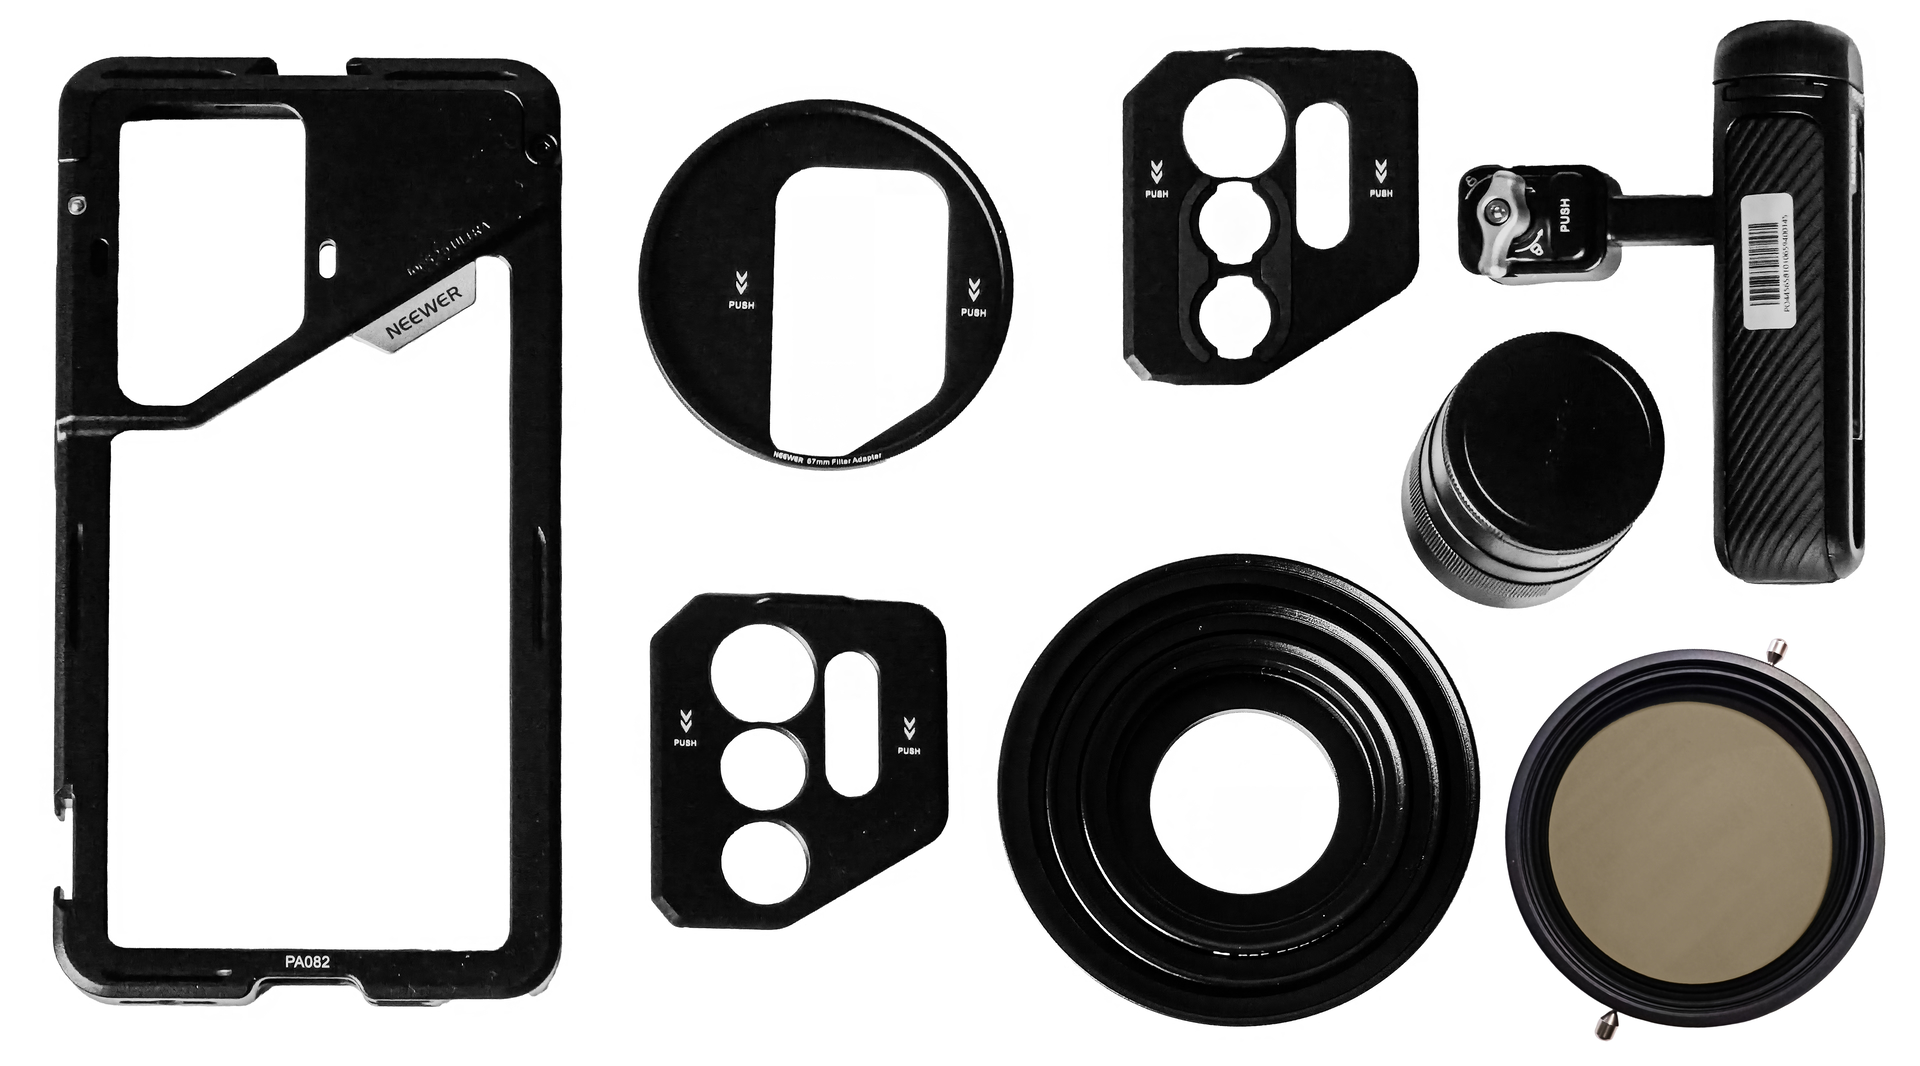
I wondered if you just had a clamp for the exterior lenses.
That’s a lot of gear. Do you bring it all when you go shoot? Definitely need a bag for that.
No, I don’t use a clamp. The lenses screw onto the mount, which then attaches to the smartphone cage. There are also lenses with clamps, but I don’t need them.
To be honest, for example, for the lens mount, I only use one—the one with the thread. The other is for lenses with a “T” mount. For the moment, I only have one telephoto lens, so I don’t need a bag. I put the VND filter and the filter adapter set I use to pixel the 67mm VND on my 43mm telephoto lens in my jacket pockets. And the handle is still attached to the cage when I take the photos.
Some new photos from February 12th in the southern aviary of Pairi Daiza
Perhaps my favorite. Yes, there’s a slight misalignment, but I re-edited the final photo and generated content underneath because the tail was slightly cropped in the original.
It’s incredible how even a very bad original can be improved – especially 2 Parakeets. A lot of work, I suppose. 

Thanks . And yes I spend a lot of time on a photo to achieve this level of quality.
So, I’m looking for the best possible prompts to use in Gemini Nano Banana Pro to complete the process in one go. The credits are quite expensive. On the Gemini website I use, it’s Lovart.
Lovart : Le Premier Agent de Design IA au Monde | Plateforme de Design Graphique Automatisé
And a 4K generation with Nano Banana Pro costs 18 credits. I only get 30 per day. That’s very little. Four or five months ago, I was getting 100 per day. They’ve reduced the amount. It’s too bad.
Here are my latest photos from February 12th with the African penguins.
For this one, the improvement is subtle because it was already very good to begin with.
Portrait of an African penguin. - Imgsli
I used Gemini Nano Banana Pro 4K to deblur the penguin for this one.
Full-size portrait of an African penguin. - Imgsli
I’m intrigued by the Imgsli you post and ability to share Before/After split view images.
Do you upload before & after pics to a website & it then gives you a shareable link that is in the split view format?
Gemini Nano Banana is for me very often the first rescue attempt. And often successful – I would like to know why it is so efficient covering such a large area of different objects? Billions of trainig examples?
BTW, is there existing an animal/bird that doesn’t have a representative in the Pairi Daiza park? It must be pretty expensive to maintain a zoo like this with so many different inhabitants. As I looked at their website, the entrance fee starts at a pretty high amount. But it’s certainly worth it.
I upload my images to the site, add a title, and below each image, I either leave the default name (the name of the uploaded photo) or, as I do here, I add “before/after”. For the link, I retrieve the URL from the top.
Here is the site on its main page.
When you create a new album, you are on this page.
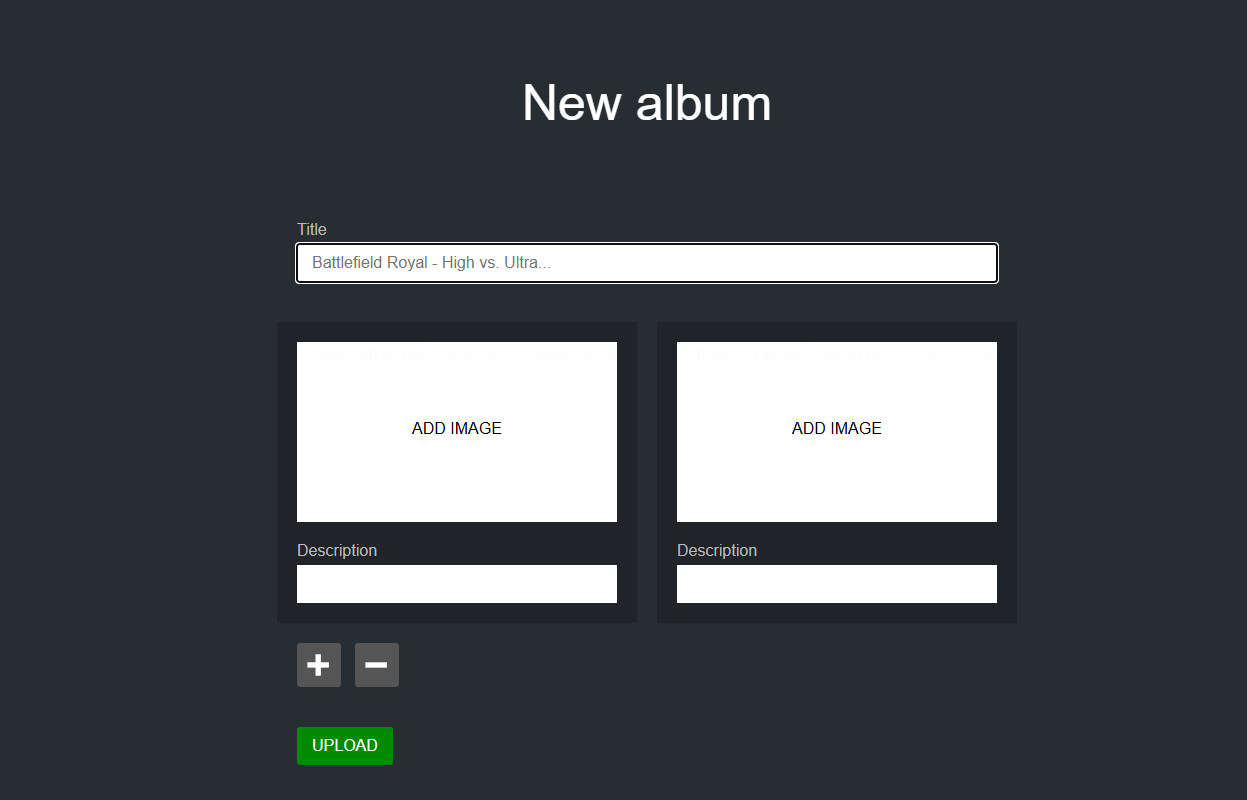
The downside is that when you import photos with very high resolution, the loading page tends to crash once or twice before it works. But sometimes it works on the first try.
It’s hard to say. You really need to know all the birds and animals that exist to compare them to any species that might be missing from the park.
Yes, the price is quite high, but with an annual pass, you recoup your investment after 5-6 visits. It’s worth it  .
Yeah. But there are quite a few staff and keepers to maintain the park and the animals, which can live longer than in their natural habitats.
In fact, the park is now so big that it’s impossible to see everything in one day. Hence the convenience of season passes. There are also hotels within the park to get as close as possible to the animals, but they are really very expensive. Especially the newly built ones in the new Edenya greenhouse. Almost €1000 a night! Personally, I think the hotels are mainly for those who come from very, very far away and want to see as much as possible. I live 30-40 minutes from the park, so it’s easy for me to get there by car. .
Thank you.
I’m going to check that out. It may help with the Ps educational things I produce.
Photo from February 14th with a Siberian tiger. Still at Pairi Daiza Park. For now, I’ve just run a pass through Gemini Nano Banana Pro 4K. But even then, the quality is noticeably improved. I’ll improve it even more later.
The prompt used for enhancement is:
“Significantly enhances every detail of this photo. The image should be sharper and free of blur. Shows the texture of the tiger’s fur. Restores the sparkle to its eyes. Recreated the micro-details of the tiger’s tongue. Maintains the tiger’s pose. Nikon D7200 DSLR quality.”.
And here is the final result
I took the opportunity to further improve the colorimetry.
The original is the version without the Gemini processing. So it’s straight from my smartphone with just some retouching in Lightroom Classic.
