Welcome to the forum.
It would have been helpful had you included details of your hardware, graphics card, operating system, graphics driver version, Denoise version and its preference settings, along with source image type, source color profile (if any) and your save settings. That would have given your post more meaning. It would also have helped if you stated whether the issues occur when you are using Denoise AI free standing, or as a plugin from a particular host editor.
For example, to clarify my reply, I’m using Denoise AI 3.2.0 on Windows 10 Pro version 21H1 Build 19043.1110. Hardware is Intel i7-10700, 32GB RAM, Graphics GTX 1660 OC 6GB, with 471.11 driver, and for the following Denoise AI is being used freestanding…
In terms of whether color profiles are being lost - I don’t know what you are basing this on.
The situation re the terms “color profiles” and “color spaces” (which are not technically the same, but are often interchangeably used) can be confusing, and made somewhat more so by conflicting views as to whether the EXIF standard for color space allows for just sRGB =1 with everything else as uncalibrated = 65535), or whether Adobe (1988) =2 is also allowed.
Anyhow, RAW images have no actual color profile, though the EXIF metadata may show a camera color space setting (which would apply to ex camera JPGs), so when using Denoise AI freestanding with a RAW source image, if you specify "preserve source profile"and save as a JPG, then there is no ICC color profile to preserve, so Denoise AI embeds the widest ICC color profile it can (ProPhoto) in the saved JPG. That will affect how that JPG is subsequently viewed if the view software supports color management.
Note that in this situation Denoise AI also sets the EXIF colorspace to uncalibrated.
If I use instead a source TIFF file which has an embedded Adobe RGB (1988) Color profile (with EXIF color space “uncalibrated”) as the source file, and save to JPG with the same “preserve source profile”, then the saved JPG correctly has an embedded Adobe RGB (1998) ICC color profile, and its Exif Color Space=2 (shows as Adobe RGB).
If I use the same TIFF file as the source file and save to a TIFF, then the saved file has an Adobe RGB (1998) color profile embedded (though it might be reported in some software as “Adobe98”). It has an EXIF color space=65535 (shows as “Uncalibrated”).
Perhaps to add to the confusion, it seems that some applications cannot read the EXIF metadata written into TIFF files by others, giving the appearance that it has been stripped, when that may not be the case. My reference when in doubt is ExifTool. And Exiftool has no difficulty reading the EXIF metadata written into TIFF file save from Denoise AI in freestanding mode.
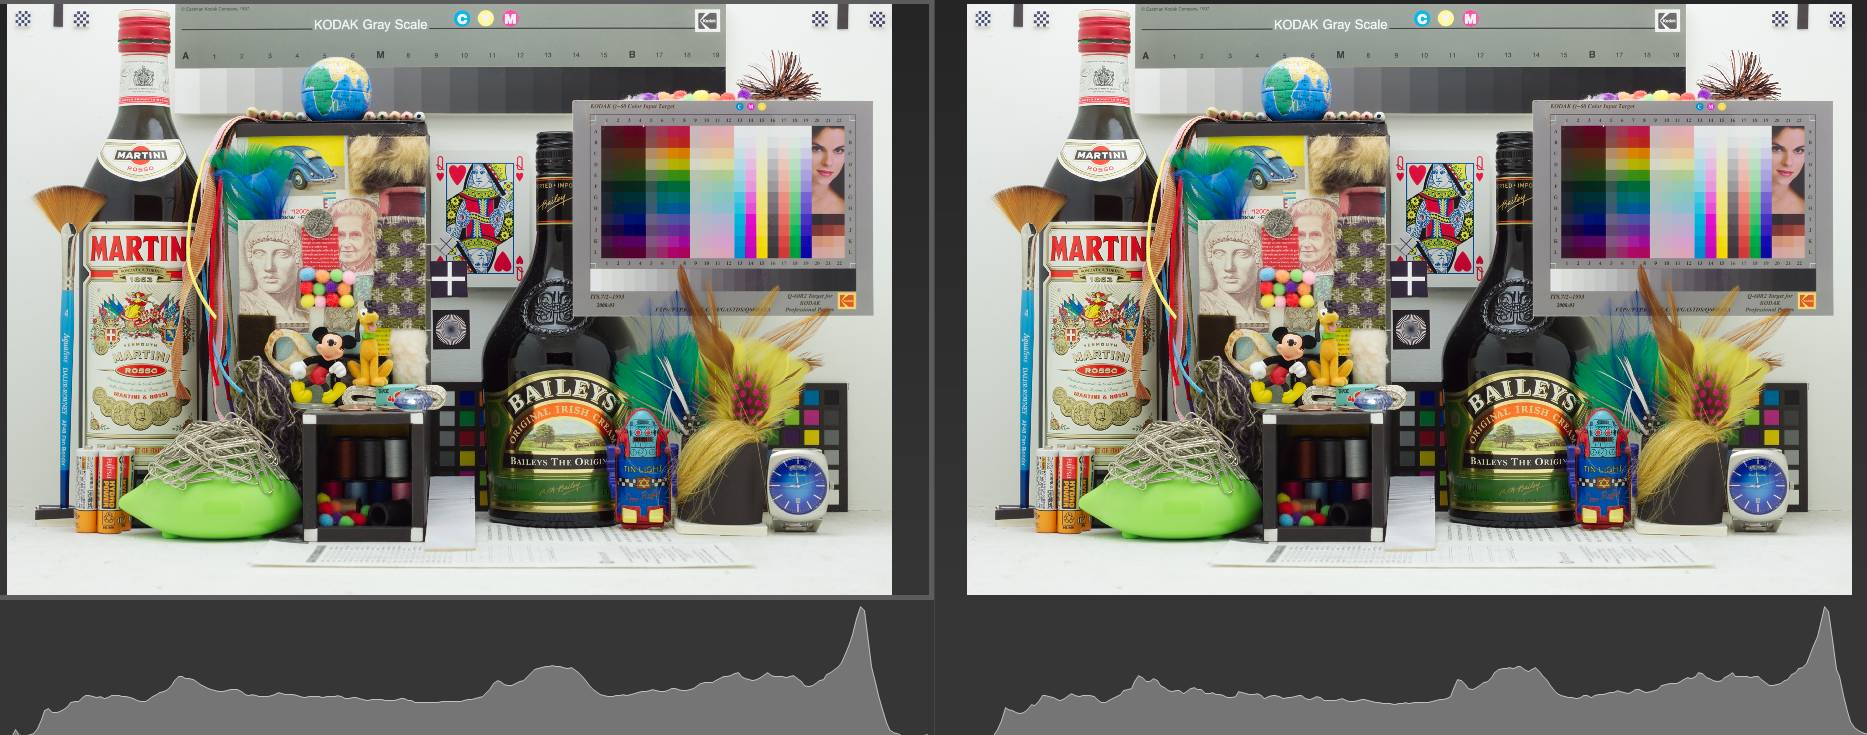
Finally, the screenshot below shows a source TIFF image and the saved TIFF Image from Denoise AI. I don’t have a problem with the colors in the saved file, however I’ll leave it to others to make their own judgement.
For the sake of completeness, the original image was a RAW file from a Sony SLT-A77V camera. It was developed into a TIFF in Affinity Photo, with default settings other than disabling noise reduction and setting the Color Profile to Adobe RGB (1998). That TIFF image was then processed in Denoise AI (freestanding mode) using the Standard Model, RN=22, ES=1, ROD=0, CNR=10 and saved to TIFF, LZW compressed. using “preserve source profile”